|
The meeting section is set up to allow company staff to create a meeting and specify
the meeting date, meeting time, location, and the agenda. Staff can write out an
outline of what will be discussed in the meeting, add the employee’s they would like
to attend and send an email notification to those employee$s so they can view the
meetings agenda and meeting notes prior to attending the meeting.
Meetings can be created before the meeting or Staff can have a attendee can take notes
during the meeting. Staff will sign that they attended and participated in the meeting
on the Safety Net smart phone application and the meetings minutes and all attendees
signatures will be sent and saved on Safety Nets server when the meeting is submitted.
Meetings can written up and employees invited to meeting through the R & T Electric Pro web application. For information about the meeting
through the web application click here.
Once a Meeting is submitted:
- 1. An Email can be sent to the employee to review the meetings. (For more information
about email alerts check the email alerts section of the manual).
- 2. Safety Net Statistics are updated for the number of meetings completed for companies and employees.
|
|
|
1.Add Meeting |
Steps
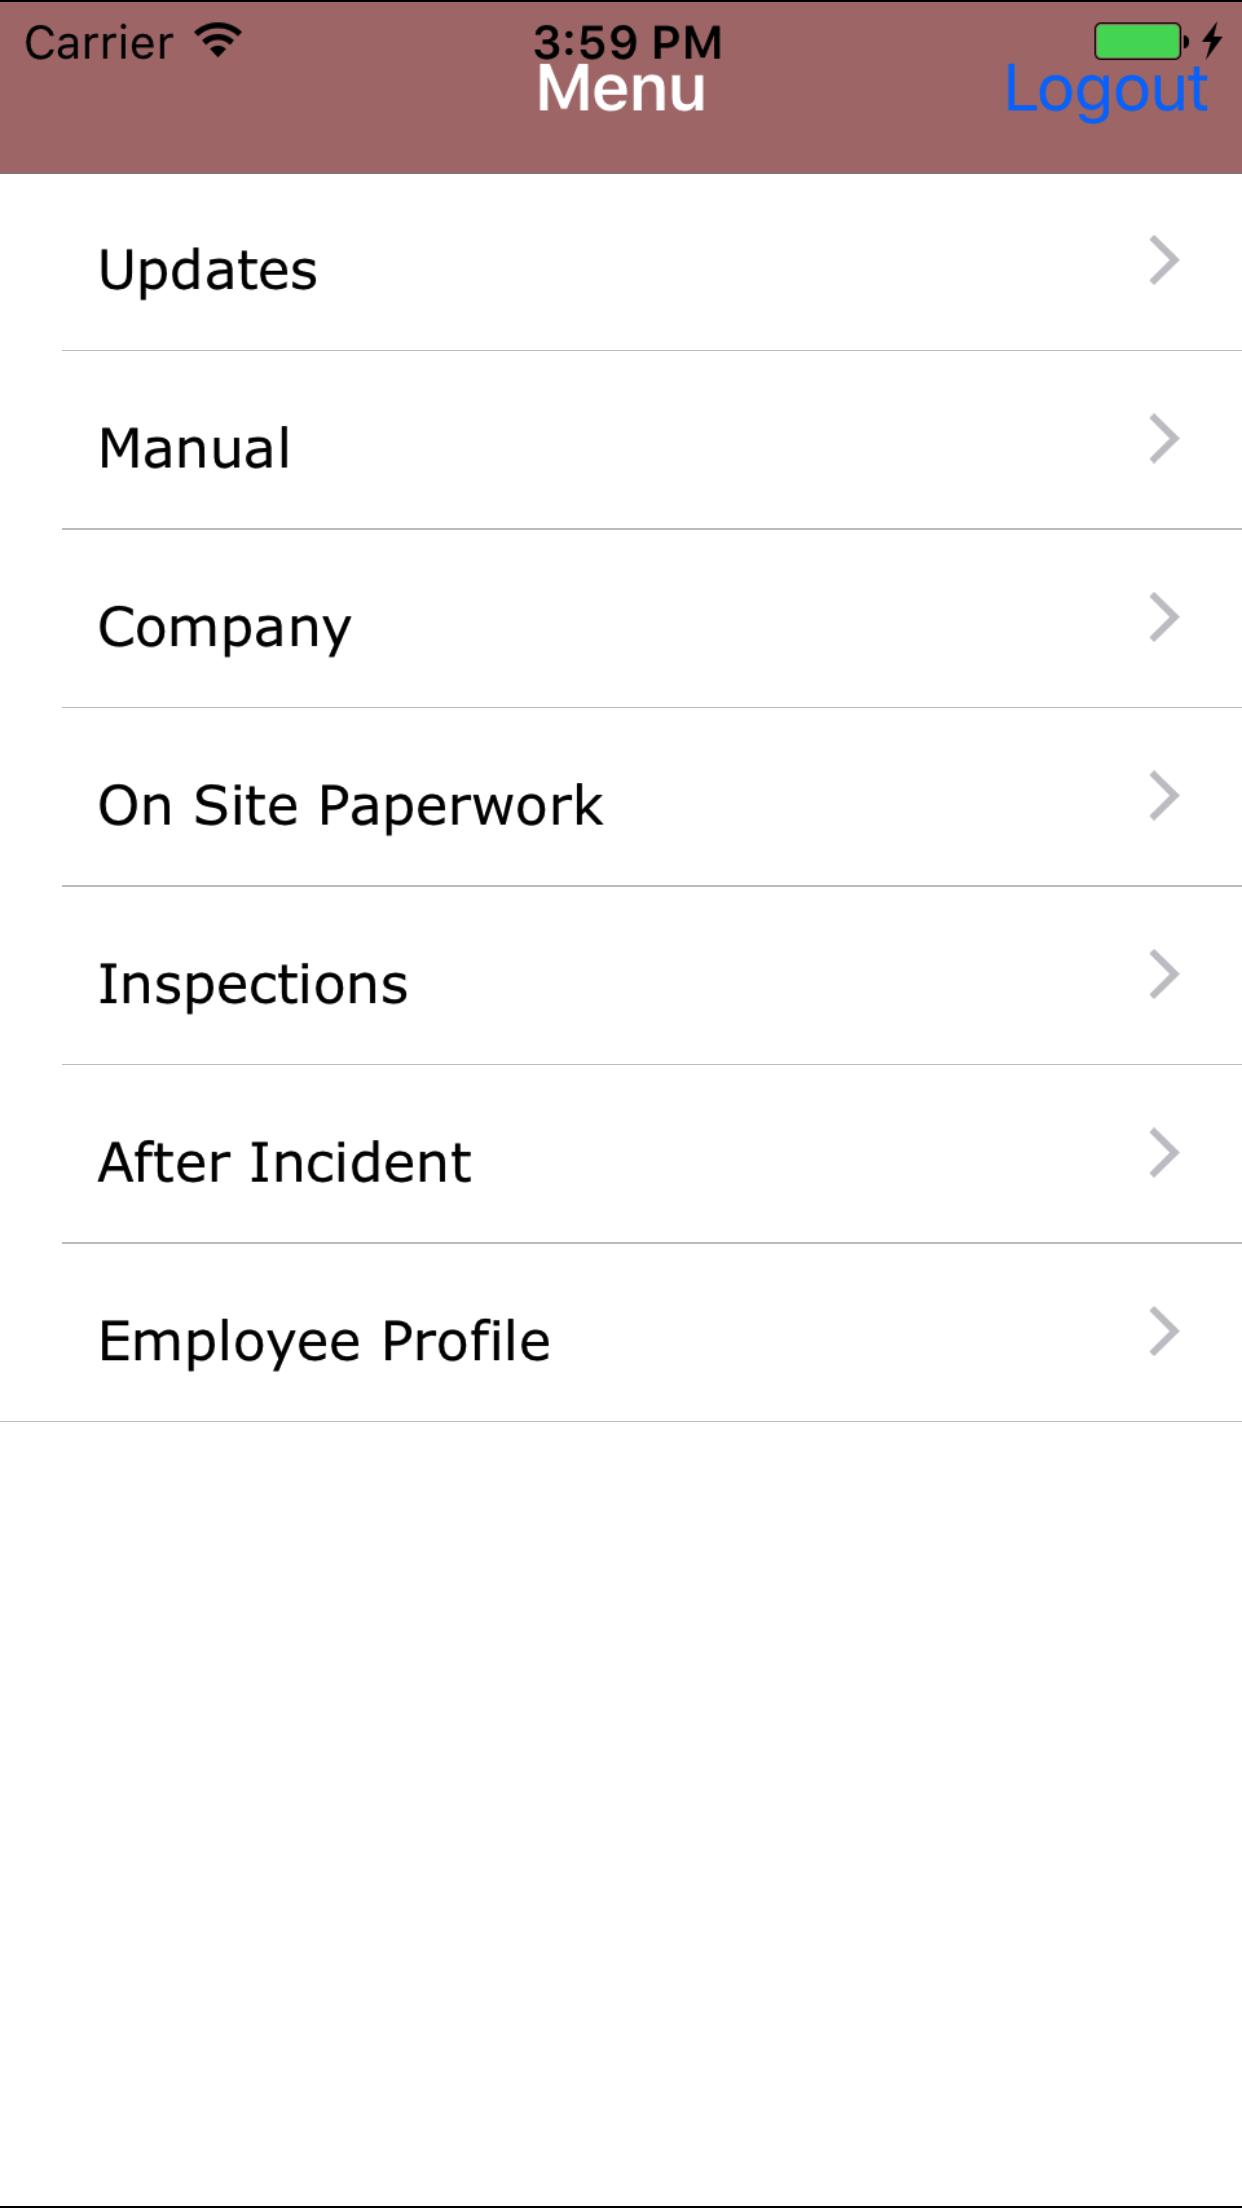
- From the Main Menu screen, tap the Company button.
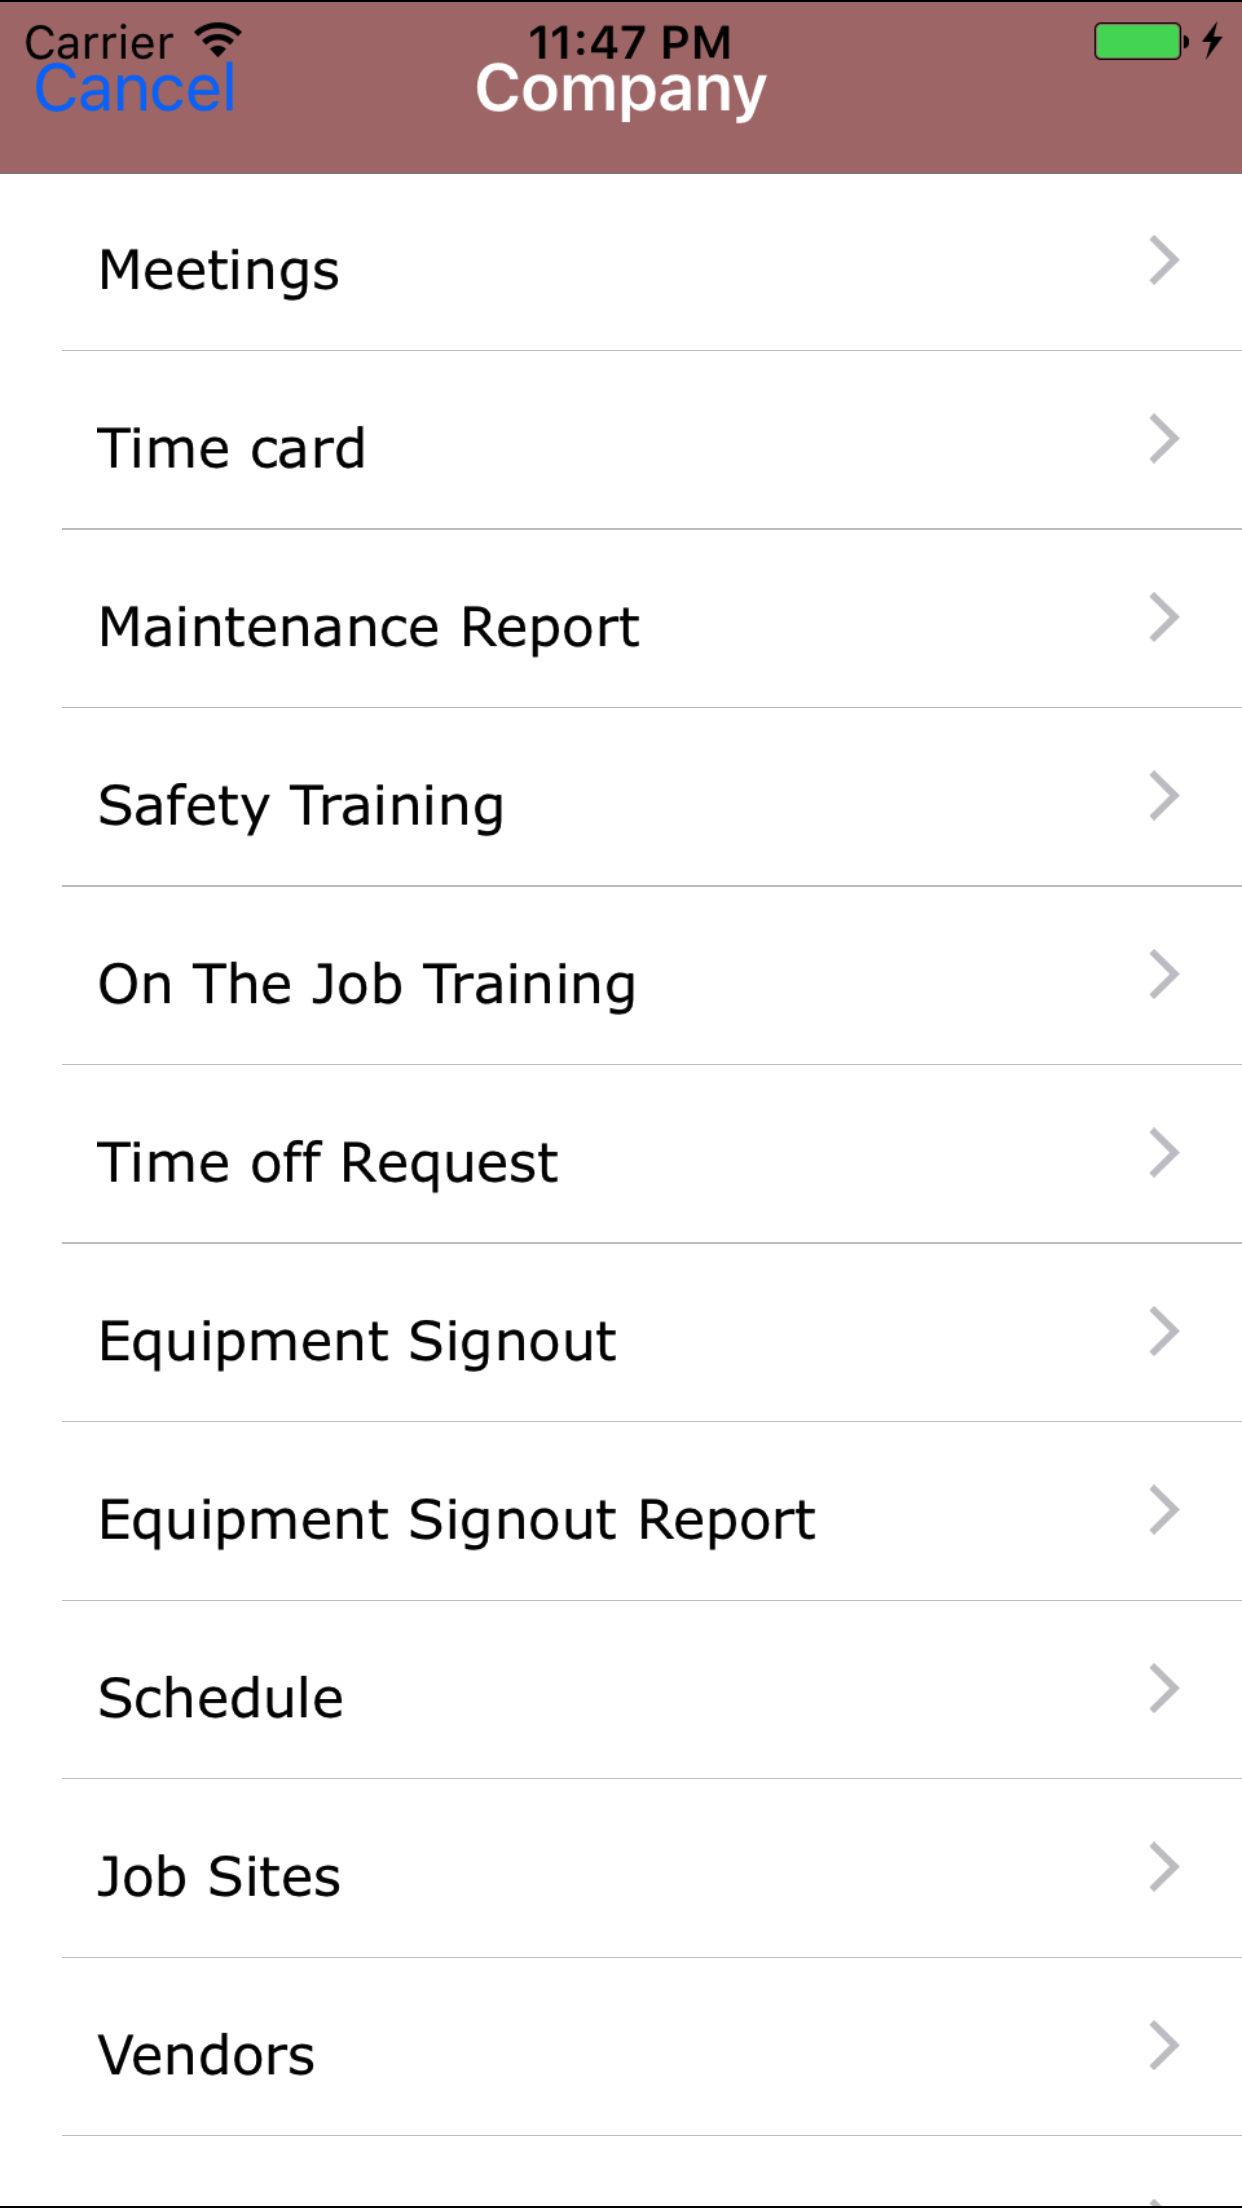
- Then tap on the Meeting button to open the Meeting section.
- The meeting section loads with a explanation of the section. Then tap on the
Next button in the top right corner to open the Add Meeting screen on the first tab.
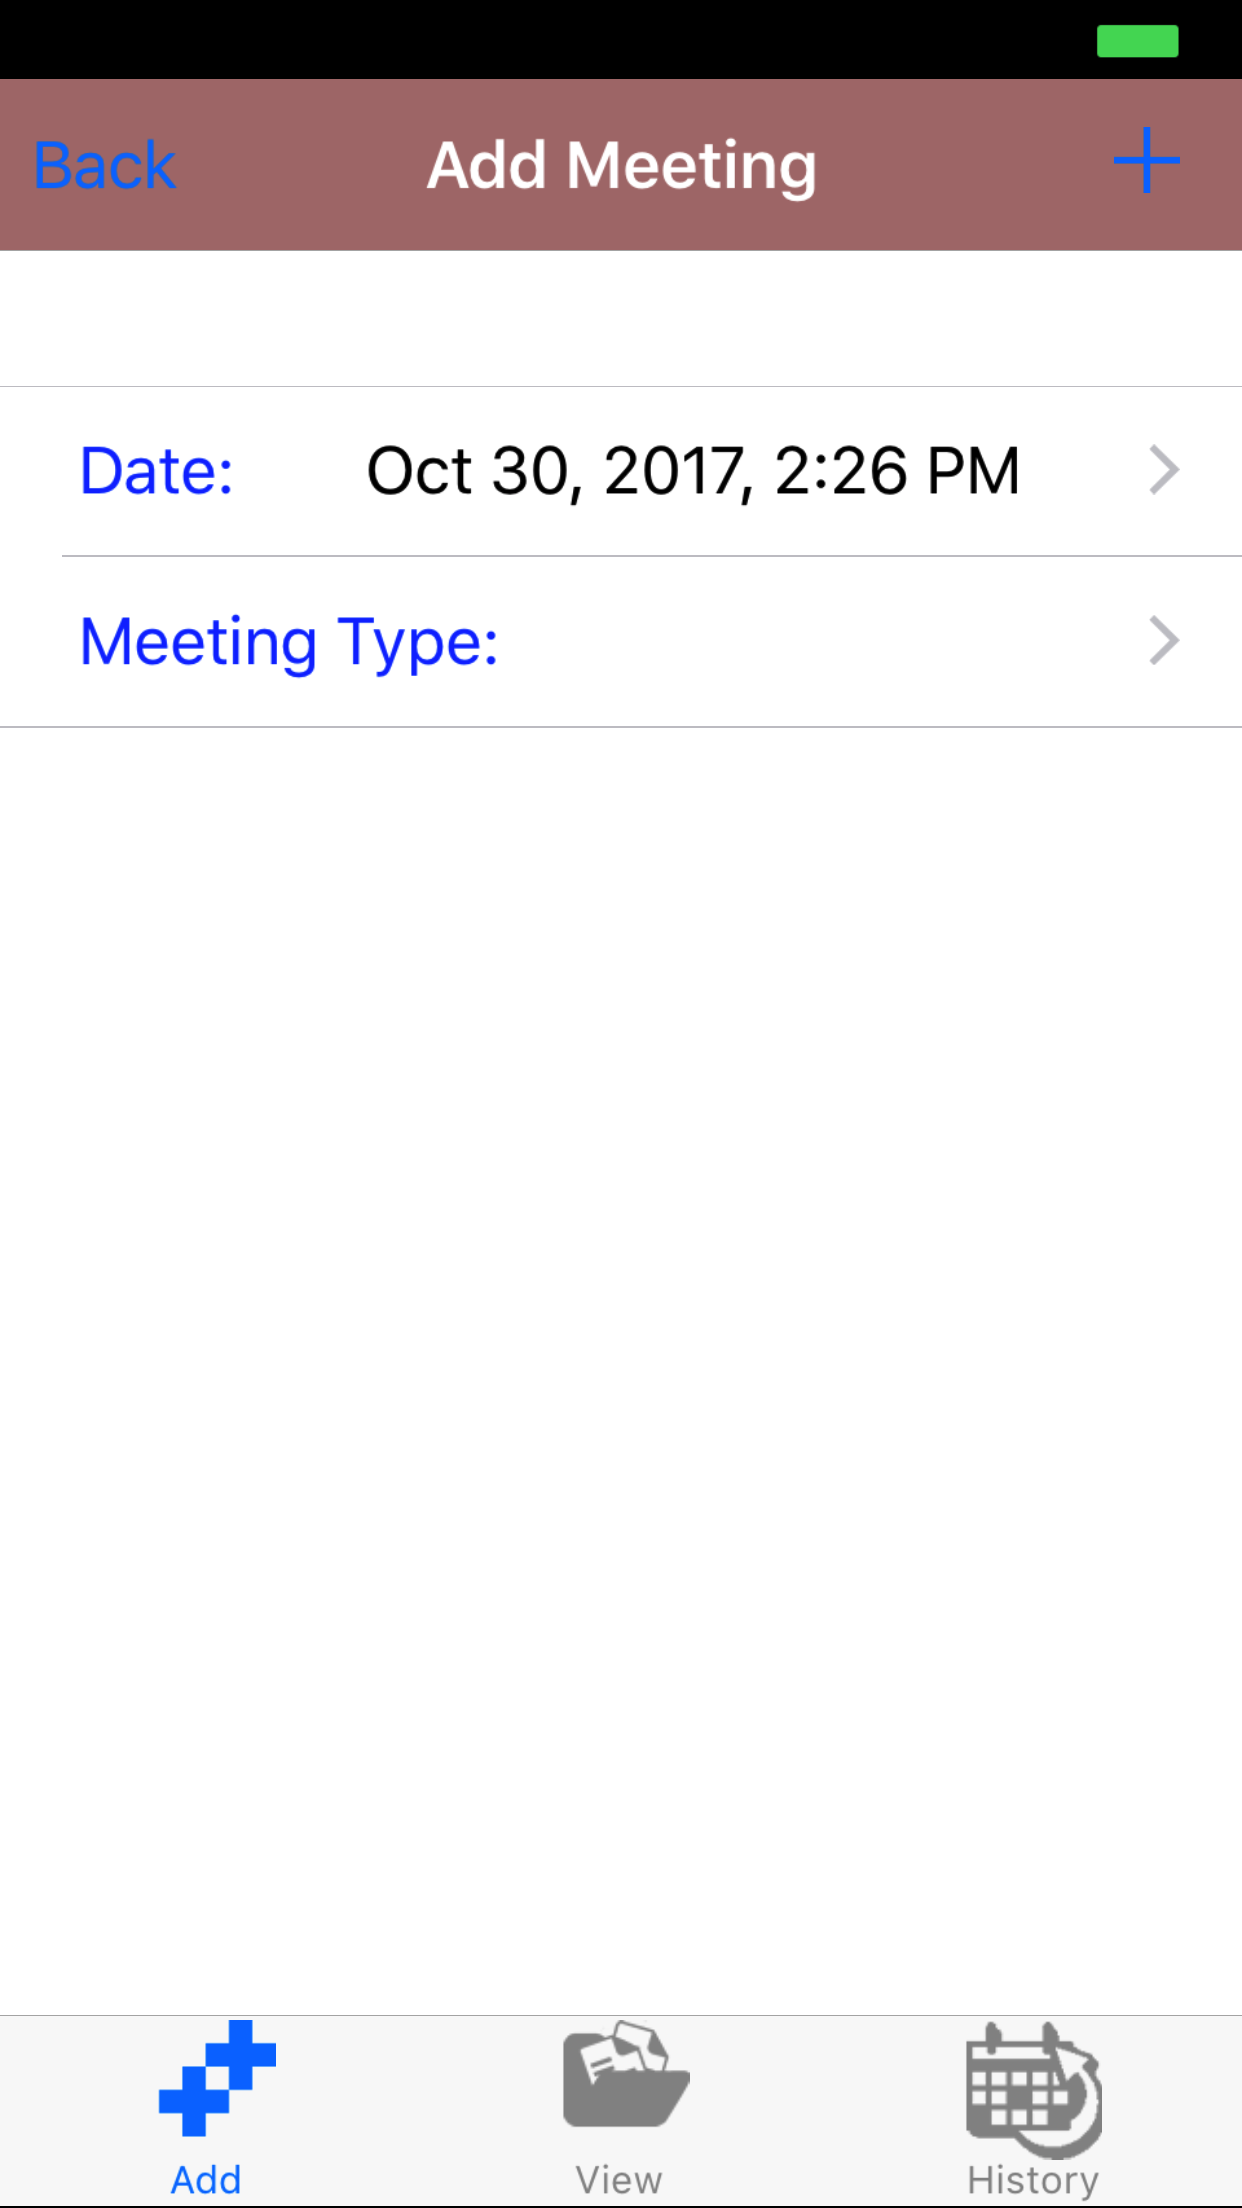
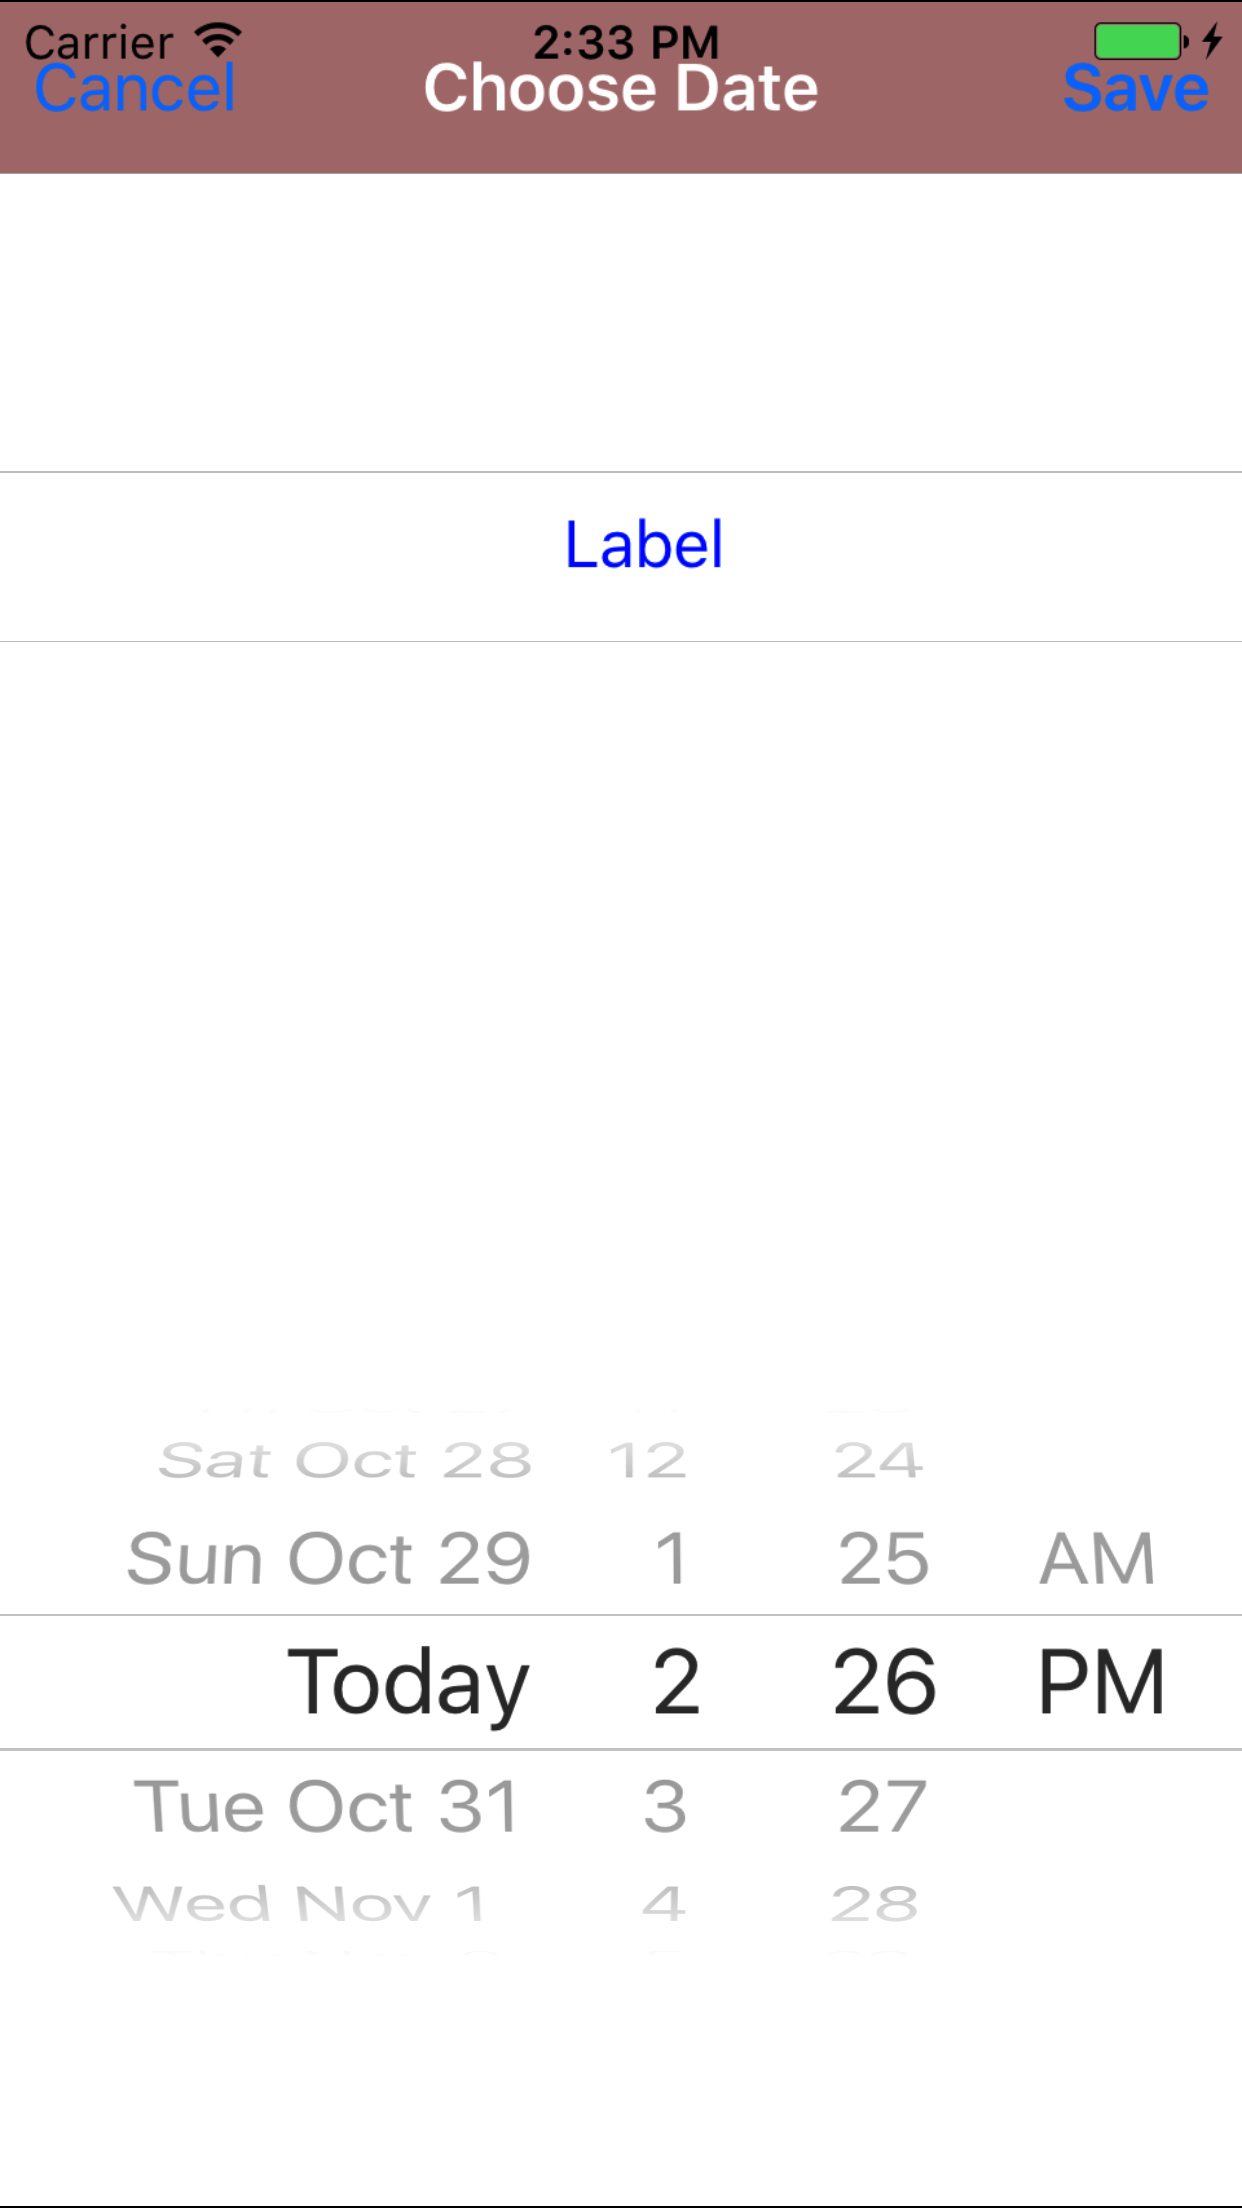
- Date: The date field allow field staff to choose the date and time the meeting occurs.
- Tap the Date field to open the Choose Date Time screen.
- Scroll the date wheel on the far left of the screen until the desired date is highlighted.
- Return to the Add Hazard Assessment screen by either tapping Save in the top right corner to select the highlighted date or tapping Cancel in the top left corner to leave the Date: field unchanged.
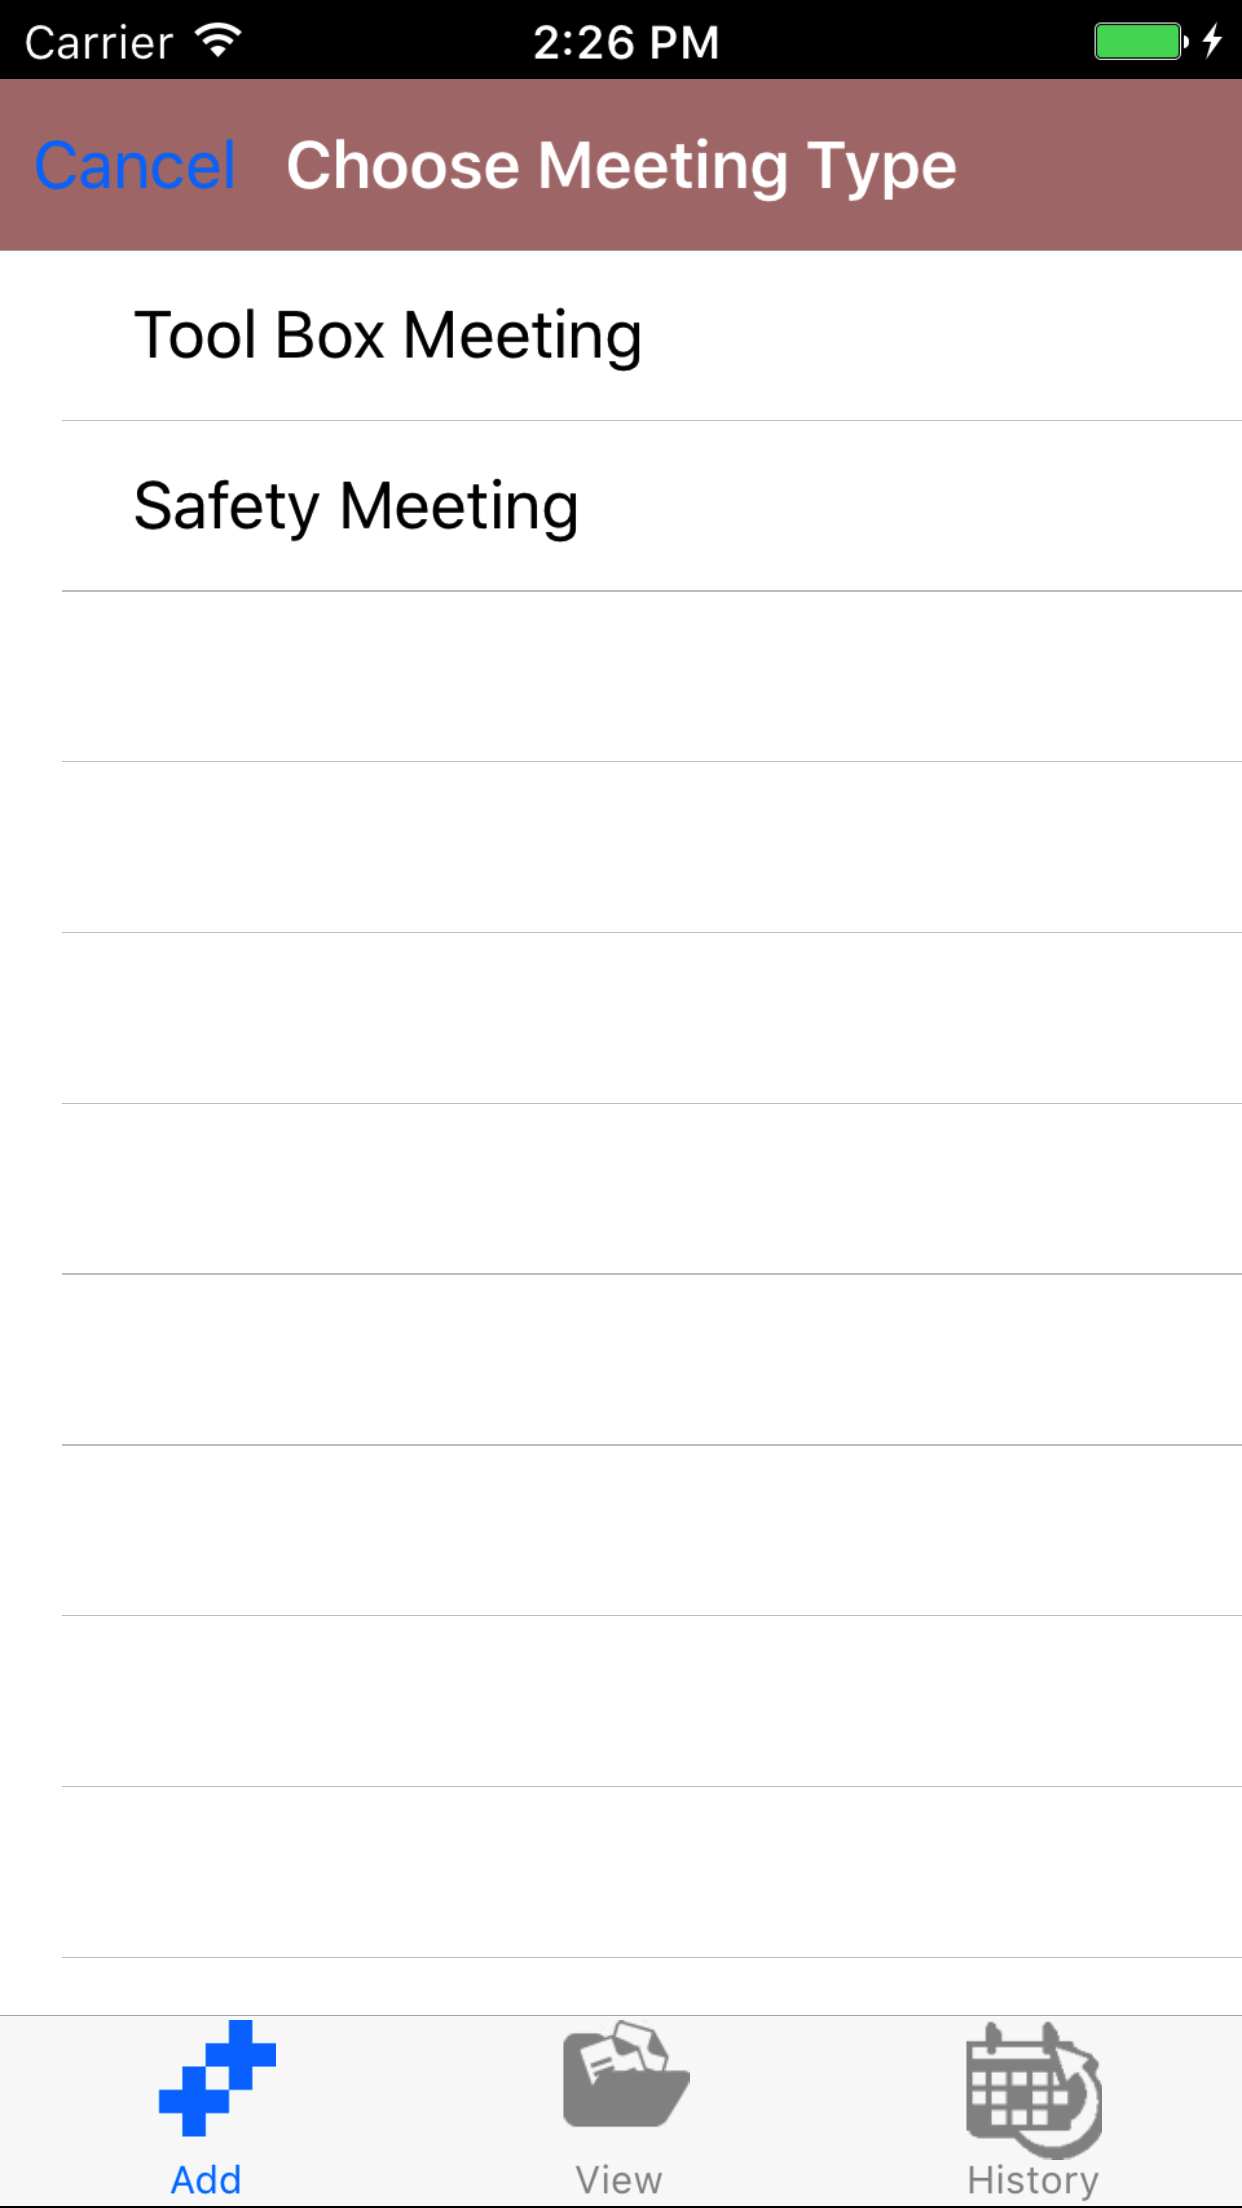
- Meeting Type: The Meeting Type field refers type of meeting type that is occurring. Meetings types can be divided
between safety meeting where company safety topics can be covered or tool box meeting where company business can topics could be covered.
- Tap the Meeting Type field to open the Choose Meeting Type screen.
- Scroll the list of meeting types until the desired meeting type is displayed on the screen.
- Tap the desired meeting type to select it or tap Back in the top left corner to leave the meeting type field unchanged and return to the Add Meeting screen.
- Return to the Add Meeting screen by either tapping Save in the top right corner to select the highlighted meeting type or tapping Cancel in the top left corner to leave the Meeting Type field unchanged.
- Tap the + icon in the top right corner to add the Meeting.
- A pop-up message that reads Meeting Added indicates that the Meeting is ready for details, employee, and paragraphs information to be entered.
|
|
| Step 1 |
|
|
| Step 2 |
|
|
|
|
2.Look Up Open Meeting |
|
Once a meeting has been created, it can be accessed on the View Meeting tab. From this tab field staff can:
- Edit the meeting details
- Add/Edit meeting notes
- Add/Edit attendees
- Closing out meeting
Once in the Meeting section
Steps
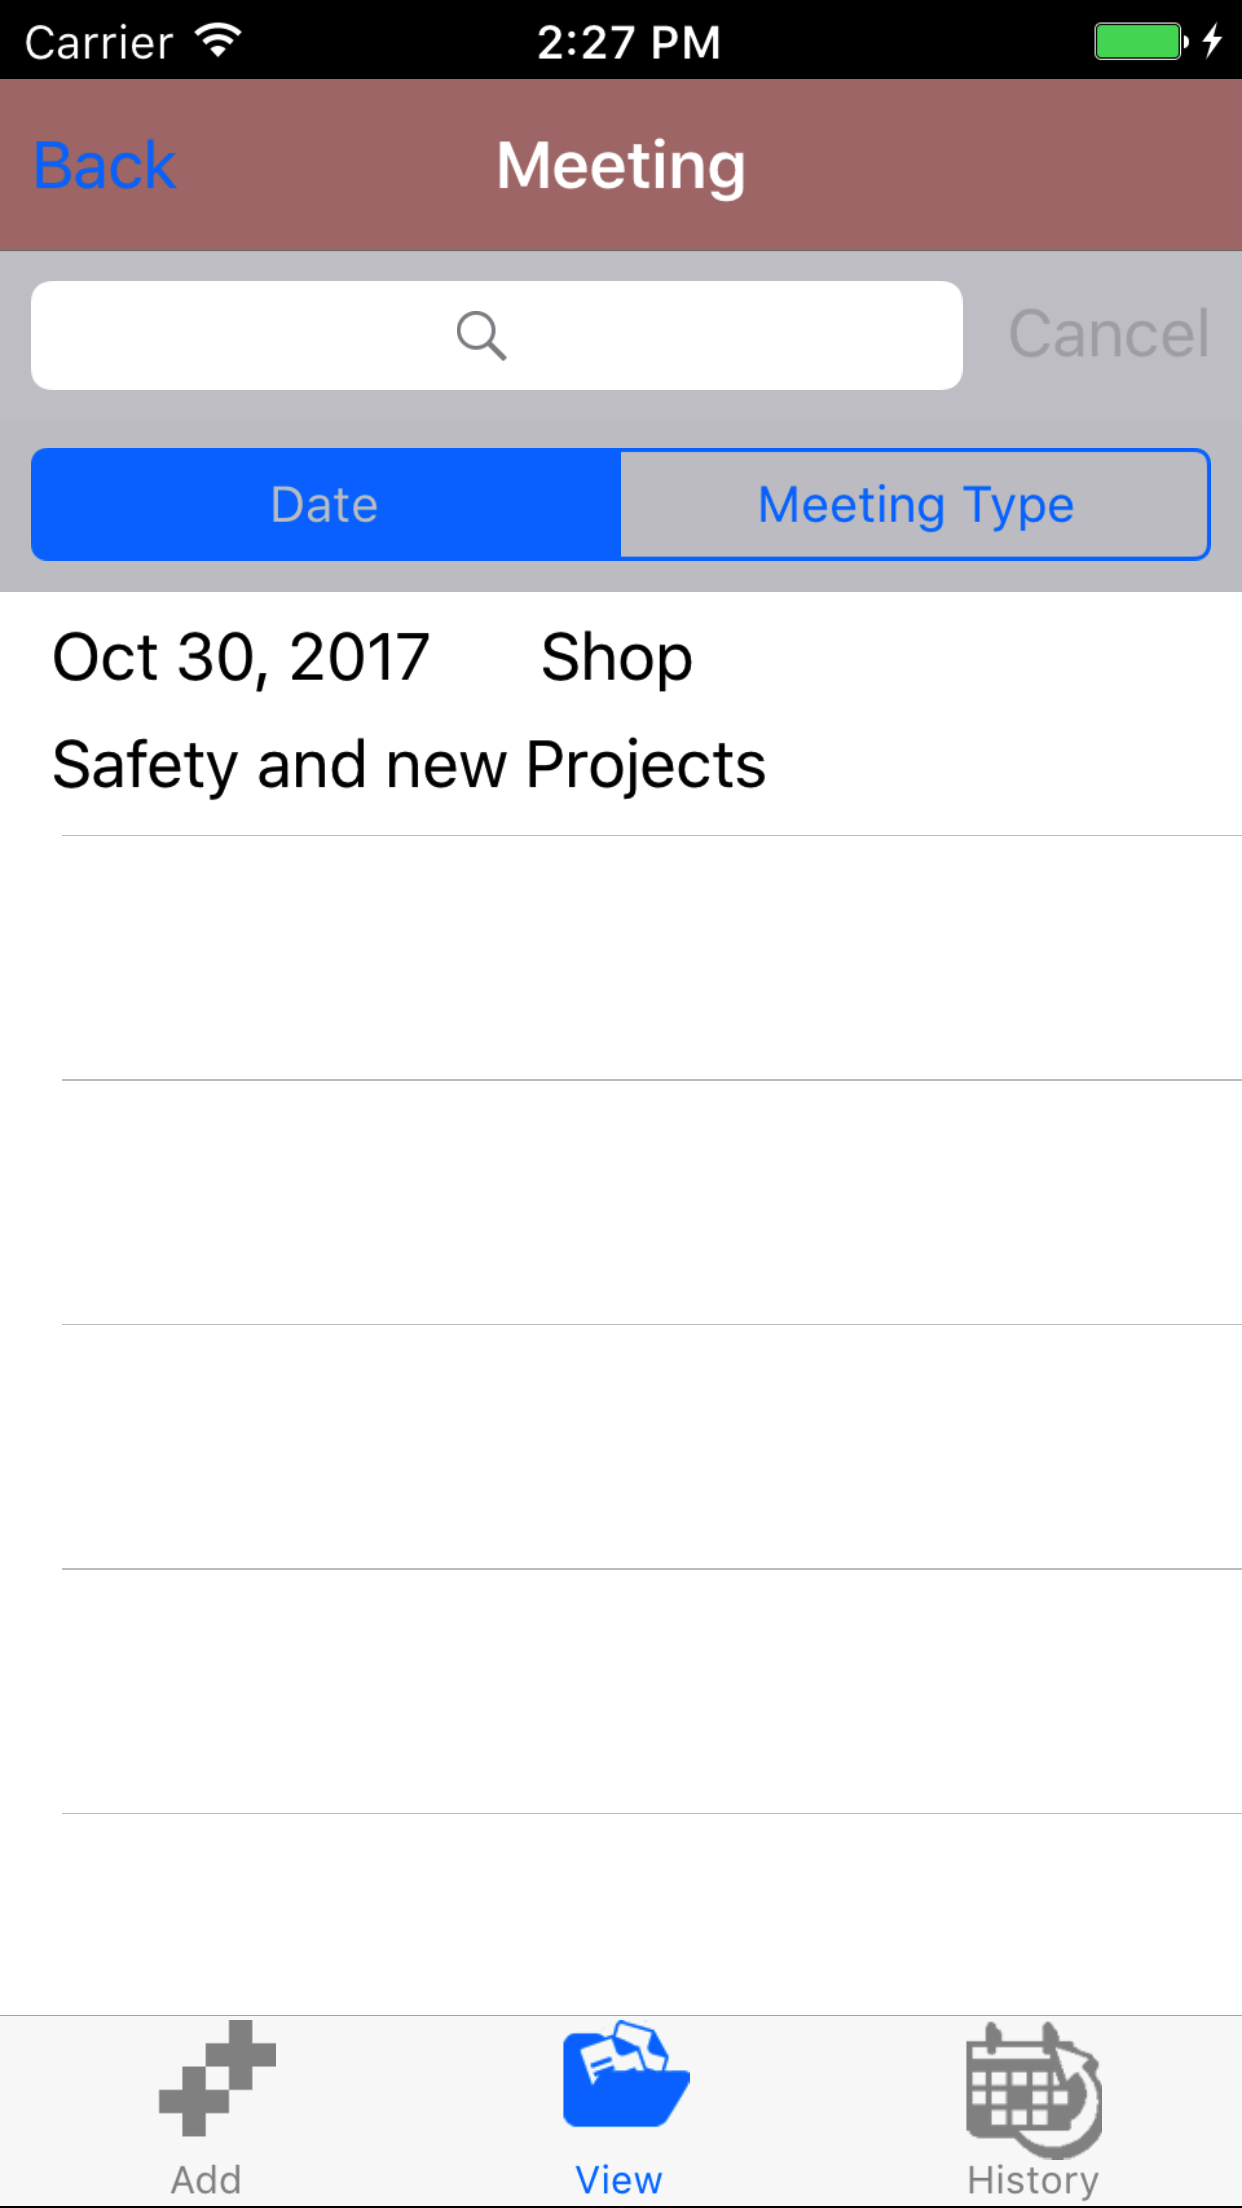
- Tap the second tab on the menu, the Meeting view.
To Search Meetings: Pull down on the list view, the search is defaulted to search by date enter the date in following
format YYYY-MM-DD. The other option for the Meeting search by meeting type. Enter your search
criteria and click the Search button.
- Scroll the list of Meetings until the desired Meeting is displayed on the screen. The meetings information is displayed:
the date in red on the top line on the left side, the meeting type in black on the top line on the
right side, the meeting location in blue, and the meeting overview in black on the bottom line.
- Tap on the Meeting you would like to view. This loads the meeting details.
|
|
| Steps 1-3 |
|
|
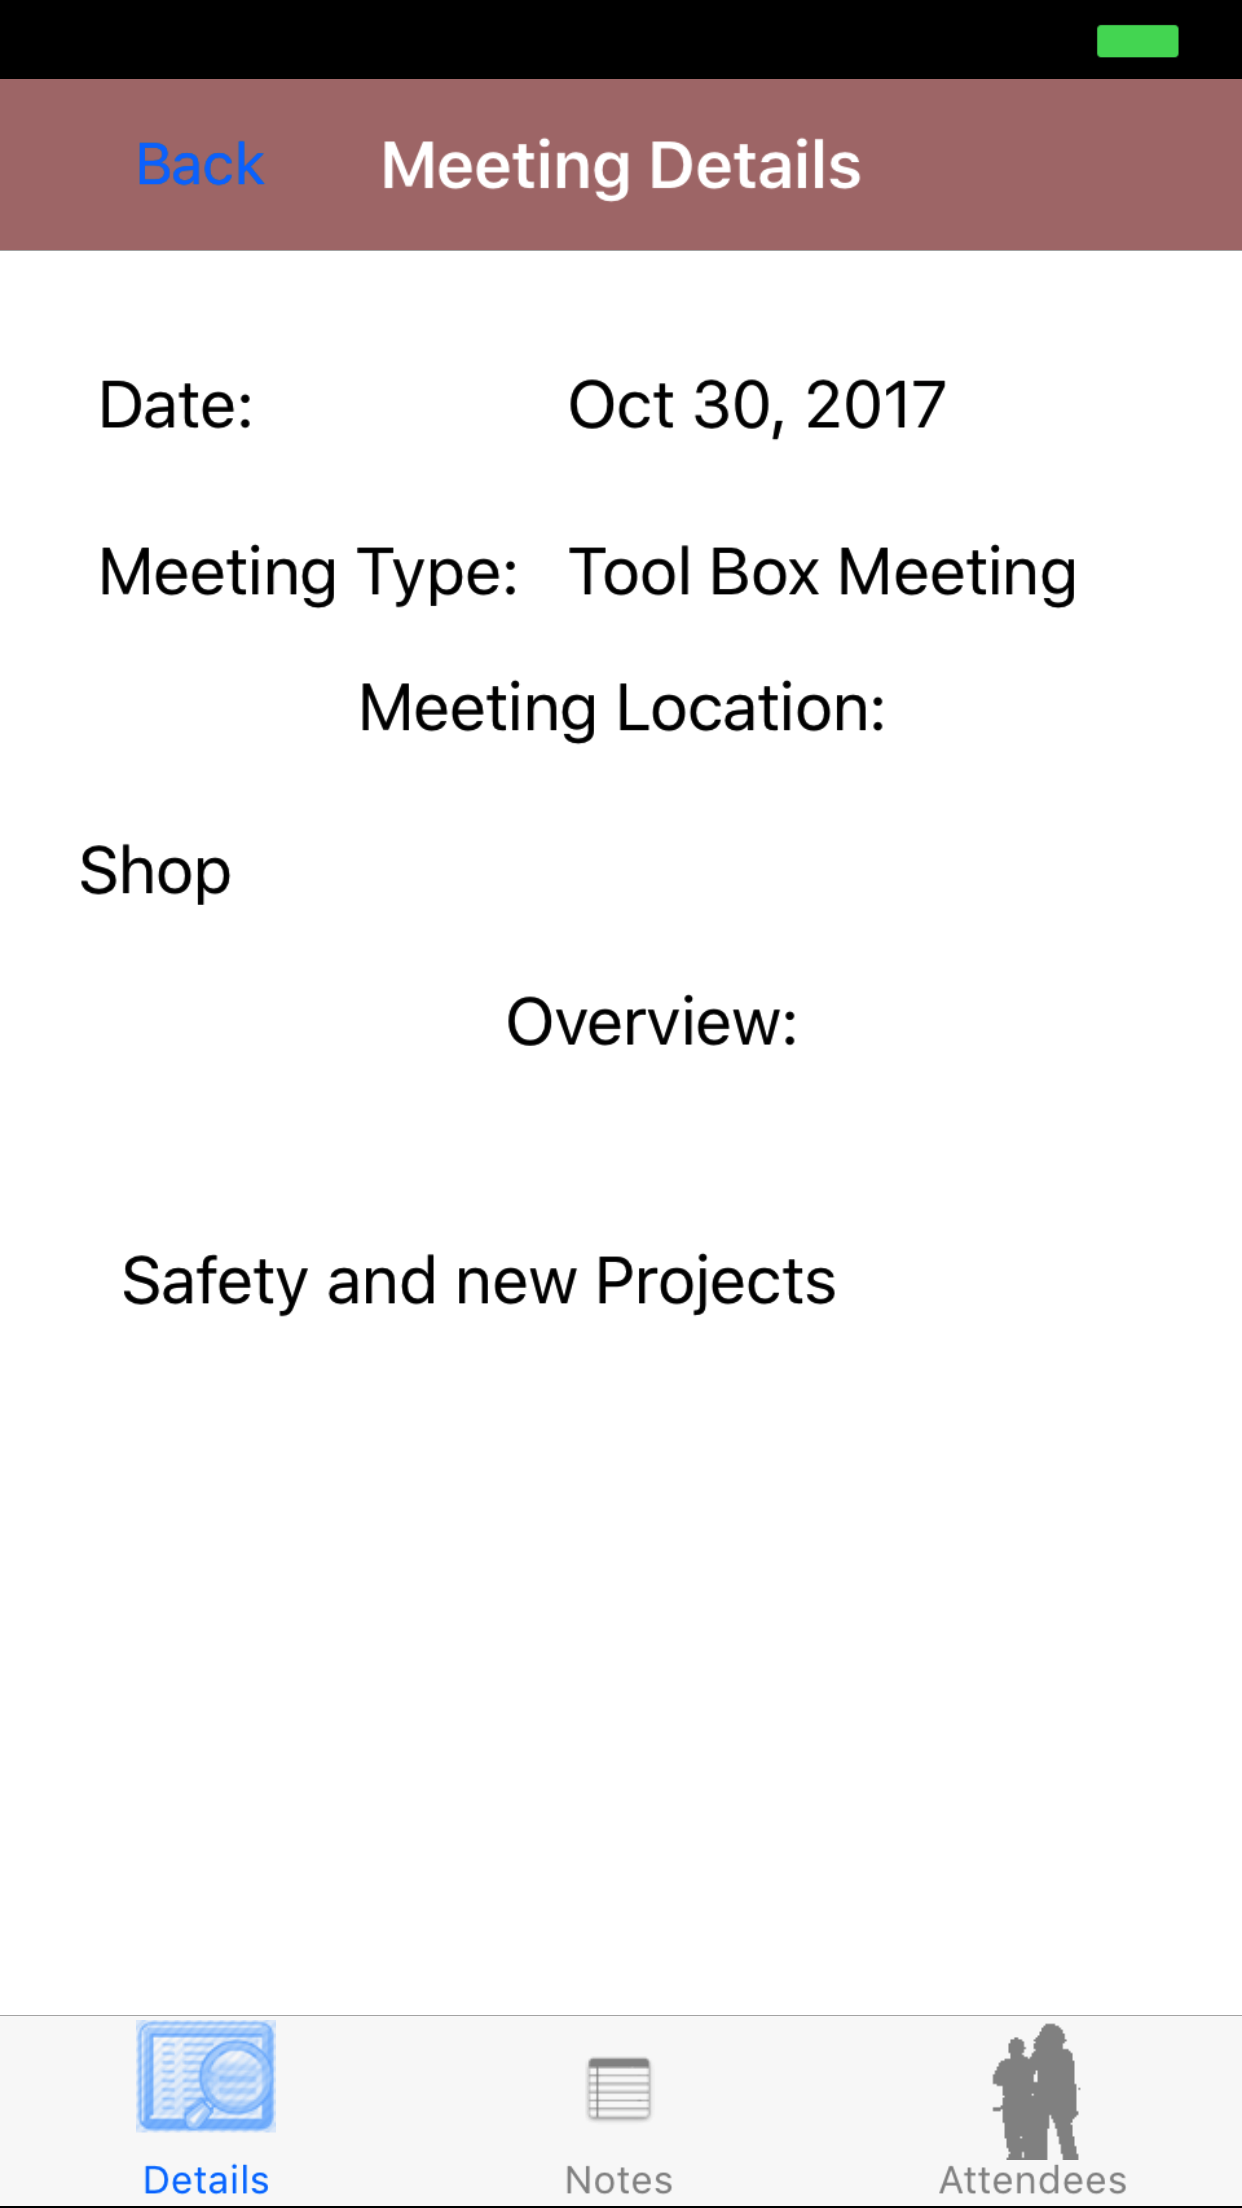
3.Edit Meeting Details |
|
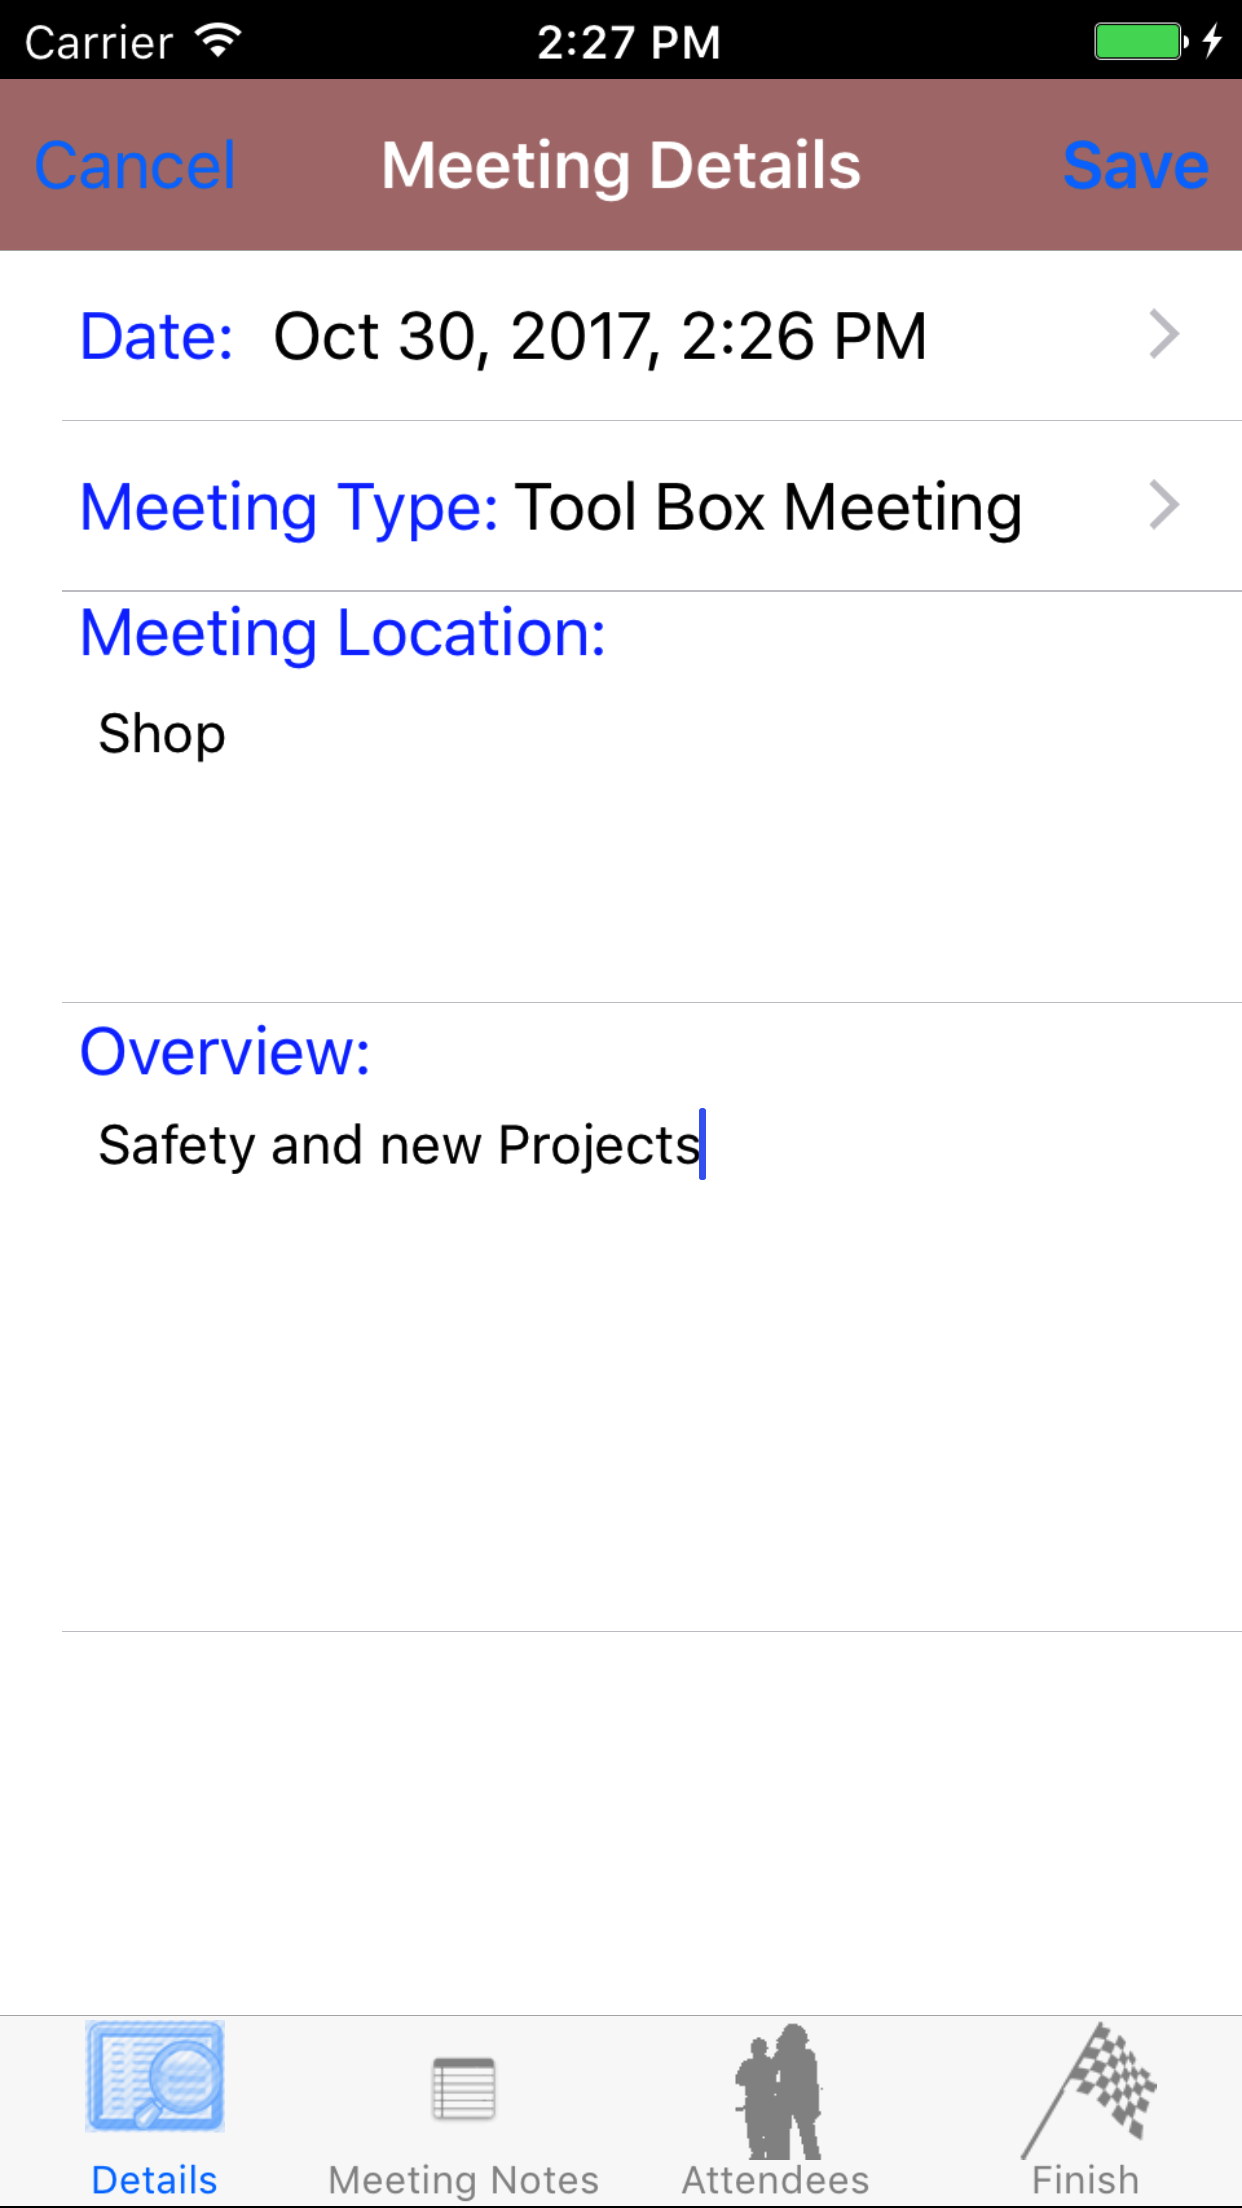
The first step in completing a Meeting is entering the details of the meeting itself - date, meeting type,
meeting type,and overview.
Once on the Meeting you would like to Edit
Steps
- Date: The date field allow field staff to choose the date and time the meeting occurs.
- Tap the Date field to open the Choose Date Time screen.
- Scroll the date wheel on the far left of the screen until the desired date is highlighted.
- Return to the Add Hazard Assessment screen by either tapping Save in the top right corner to select the highlighted date or tapping Cancel in the top left corner to leave the Date: field unchanged.
- Meeting Type: The Meeting Type field refers type of meeting type that is occurring. Meetings types can be divided
between safety meeting where company safety topics can be covered or tool box meeting where company business can topics could be covered.
- Tap the Meeting Type field to open the Choose Meeting Type screen.
- Scroll the list of meeting types until the desired meeting type is displayed on the screen.
- Tap the desired meeting type to select it or tap Back in the top left corner to leave the meeting type field unchanged and return to the Add Meeting screen.
- Return to the Add Meeting screen by either tapping Save in the top right corner to select the highlighted meeting type or tapping Cancel in the top left corner to leave the Meeting Type field unchanged.
- Meeting Location:: The meeting location field allows field staff to enter the location where the meeting is to take place. The character limit of this field is 100.
- Overview: The overview field allows field staff to enter a overview off what is going to be discussed in the meeting. The character limit of this field is 250.
- Tap Save in the top right corner to save any changes to the Meeting Details.
|
|
| Step 1 |
|
|
| Step 2 |
|
|
|
|
| Step 3 |
|
|
|
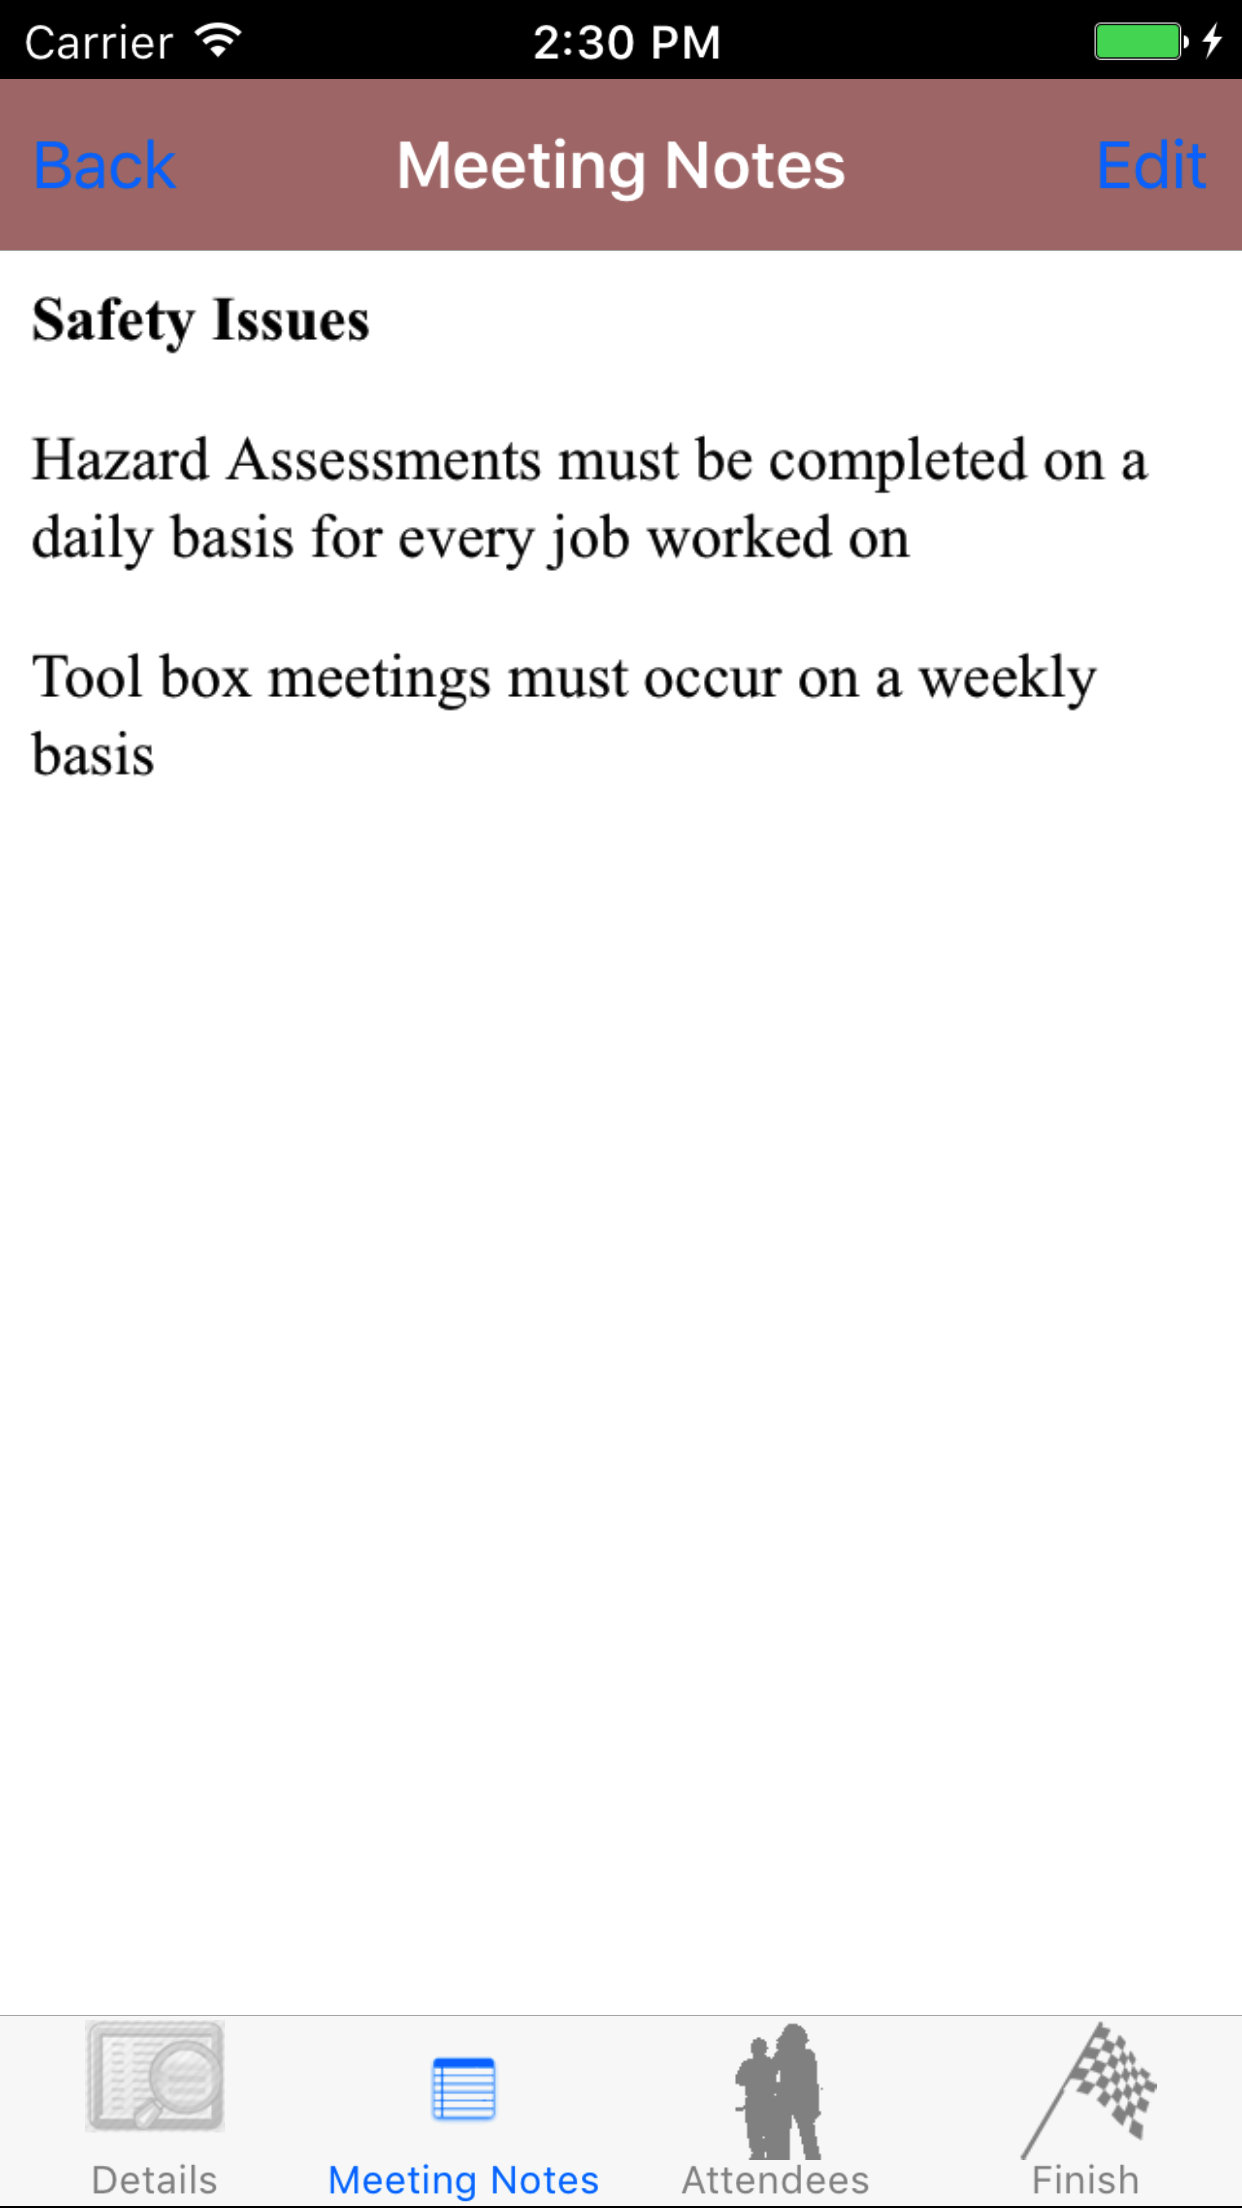
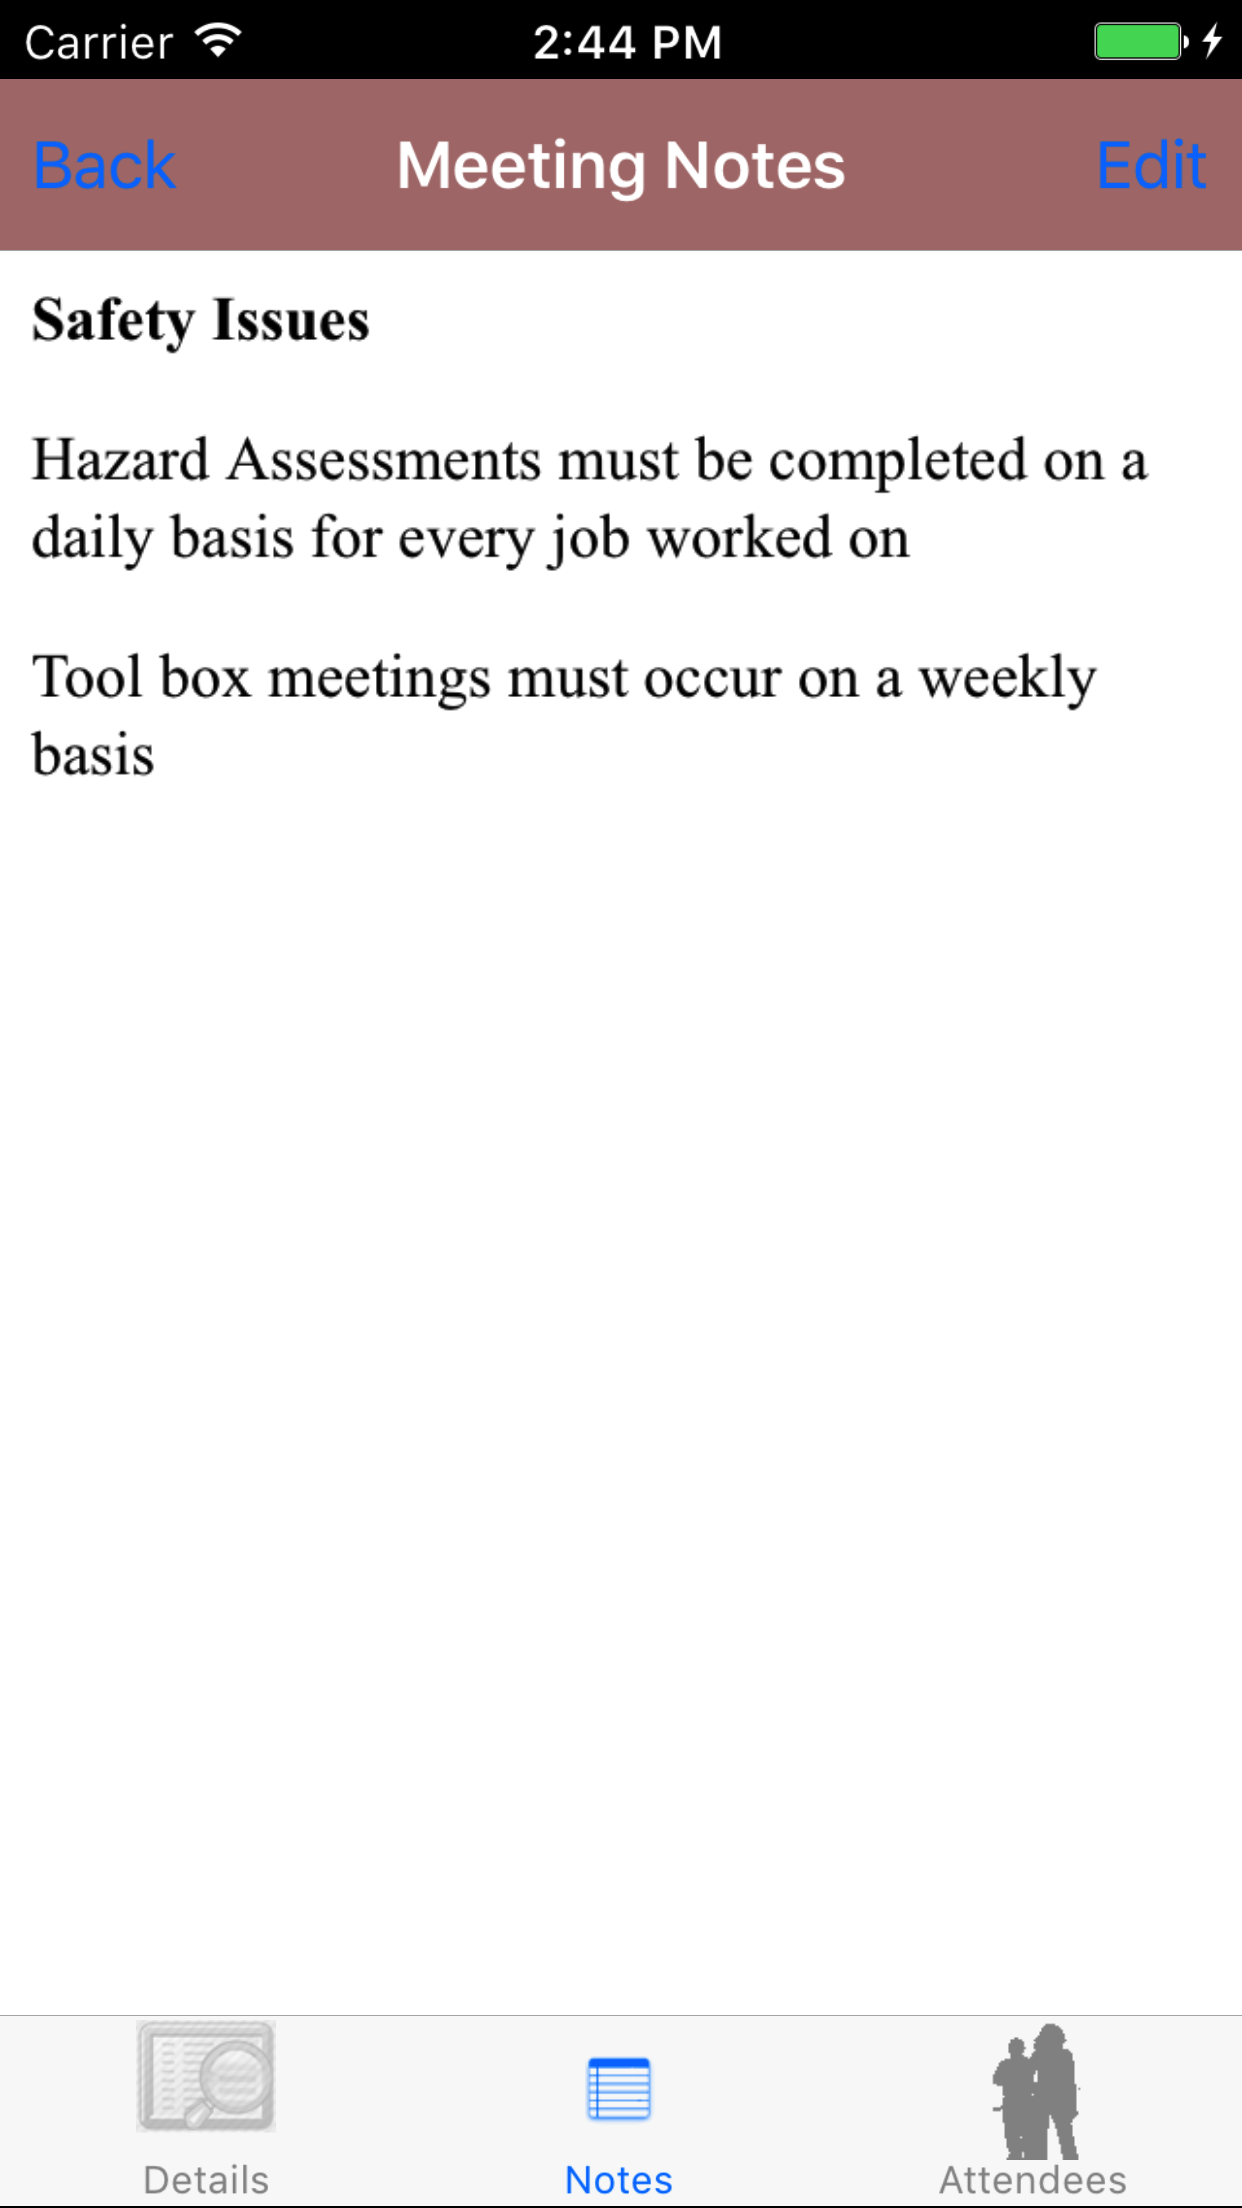
4.View Meeting Notes |
|
Once a meeting on the meeting you want to view.
Steps
- Tap on the second tab on the menu, Meeting Notes
- This opens the notes for the meeting view in a nice easily readable version. If no notes
have been added for meeting yet the view will be blank.
For information about adding new paragraphs click here for information
about editing paragraphs click here.
|
|
| Steps 1-2 |
|
|
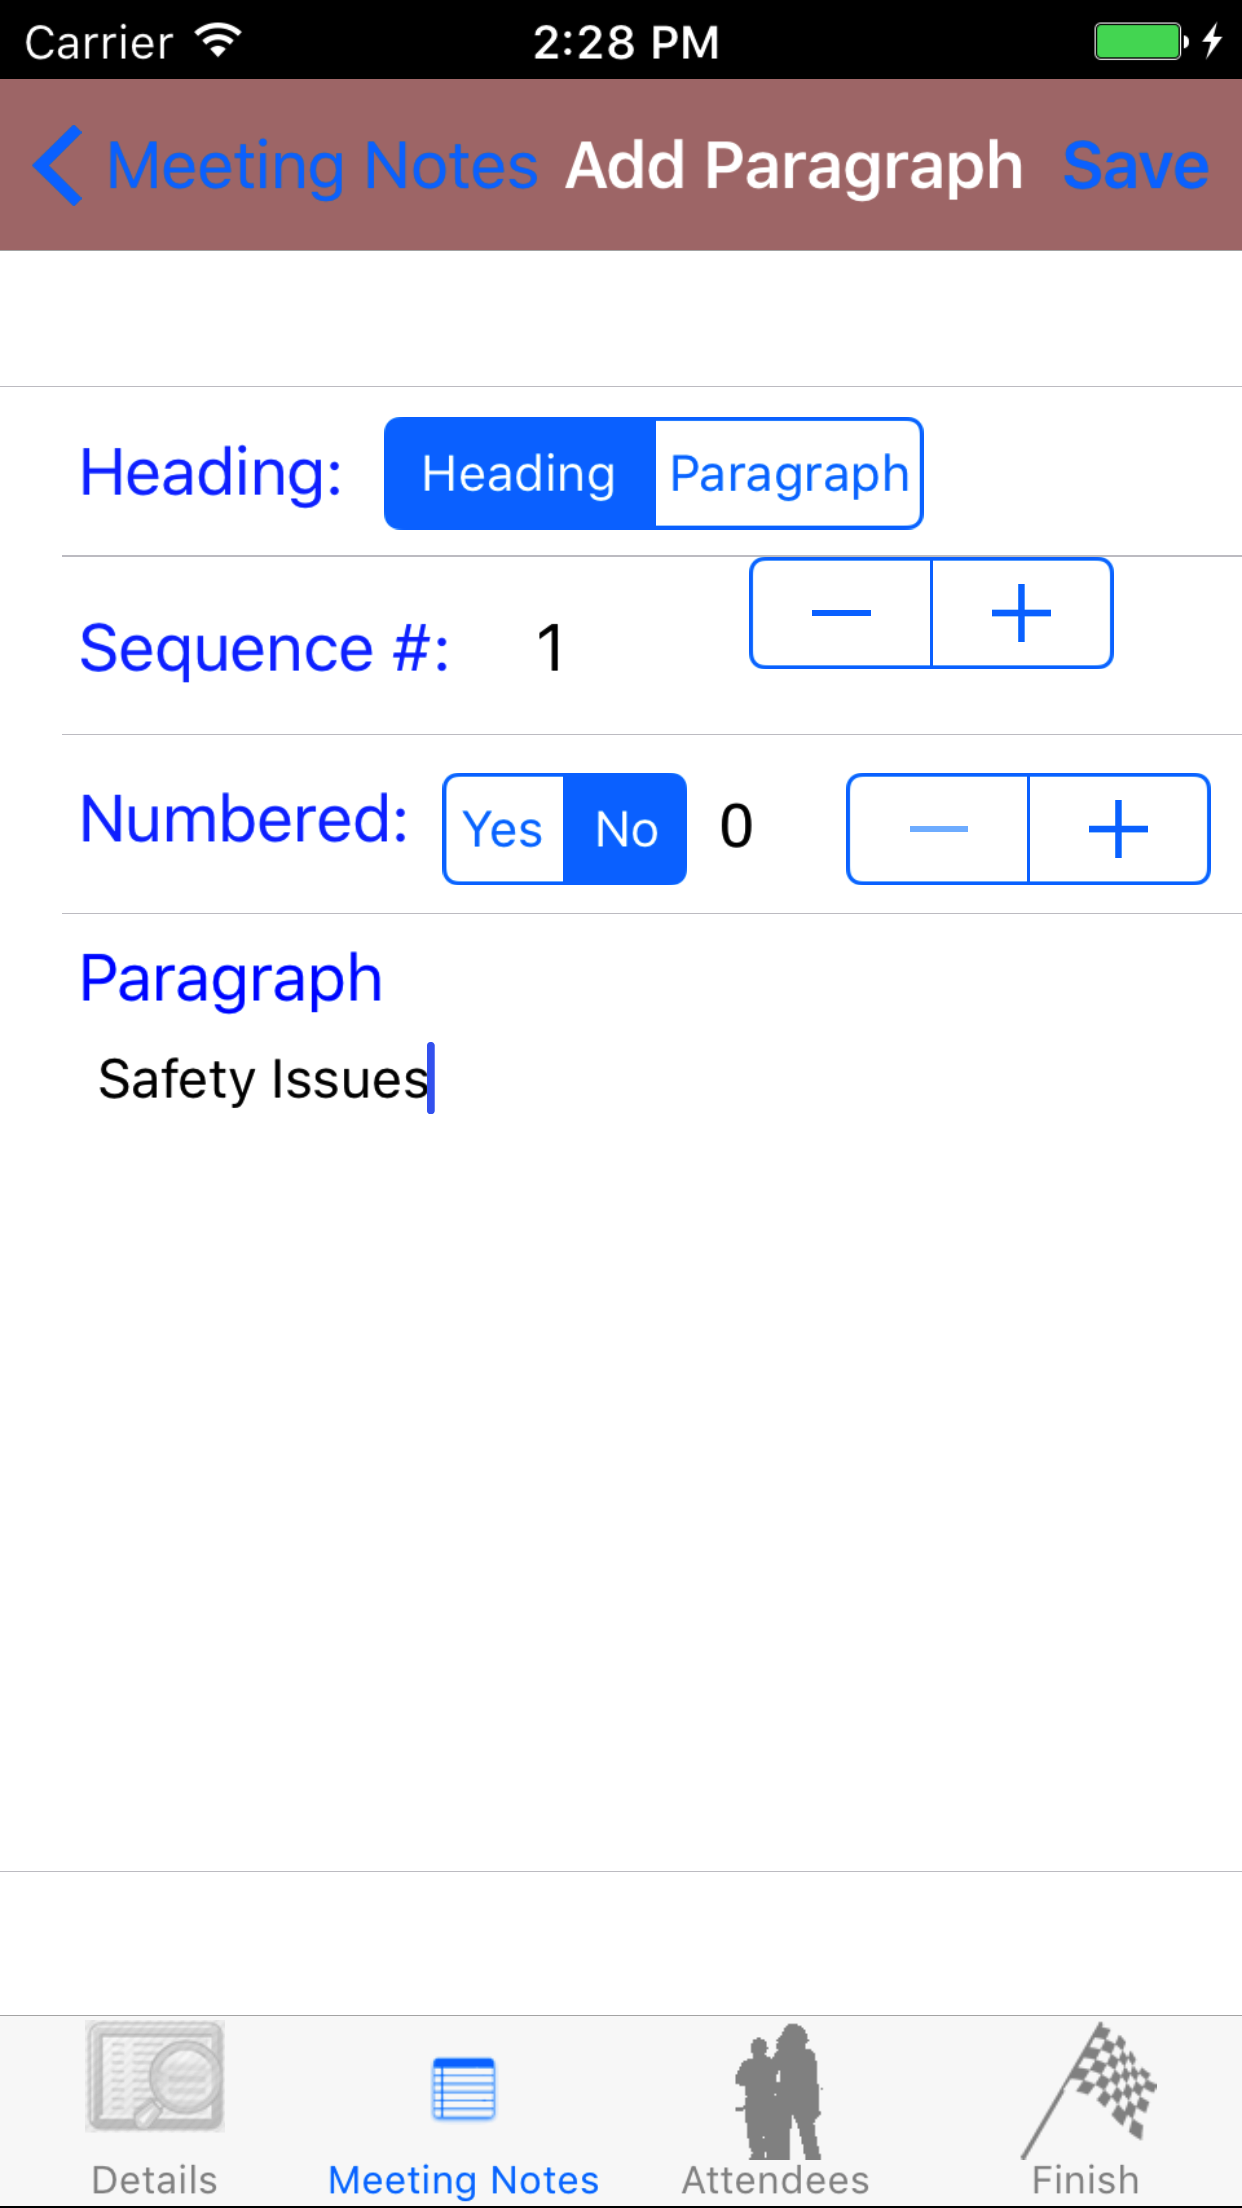
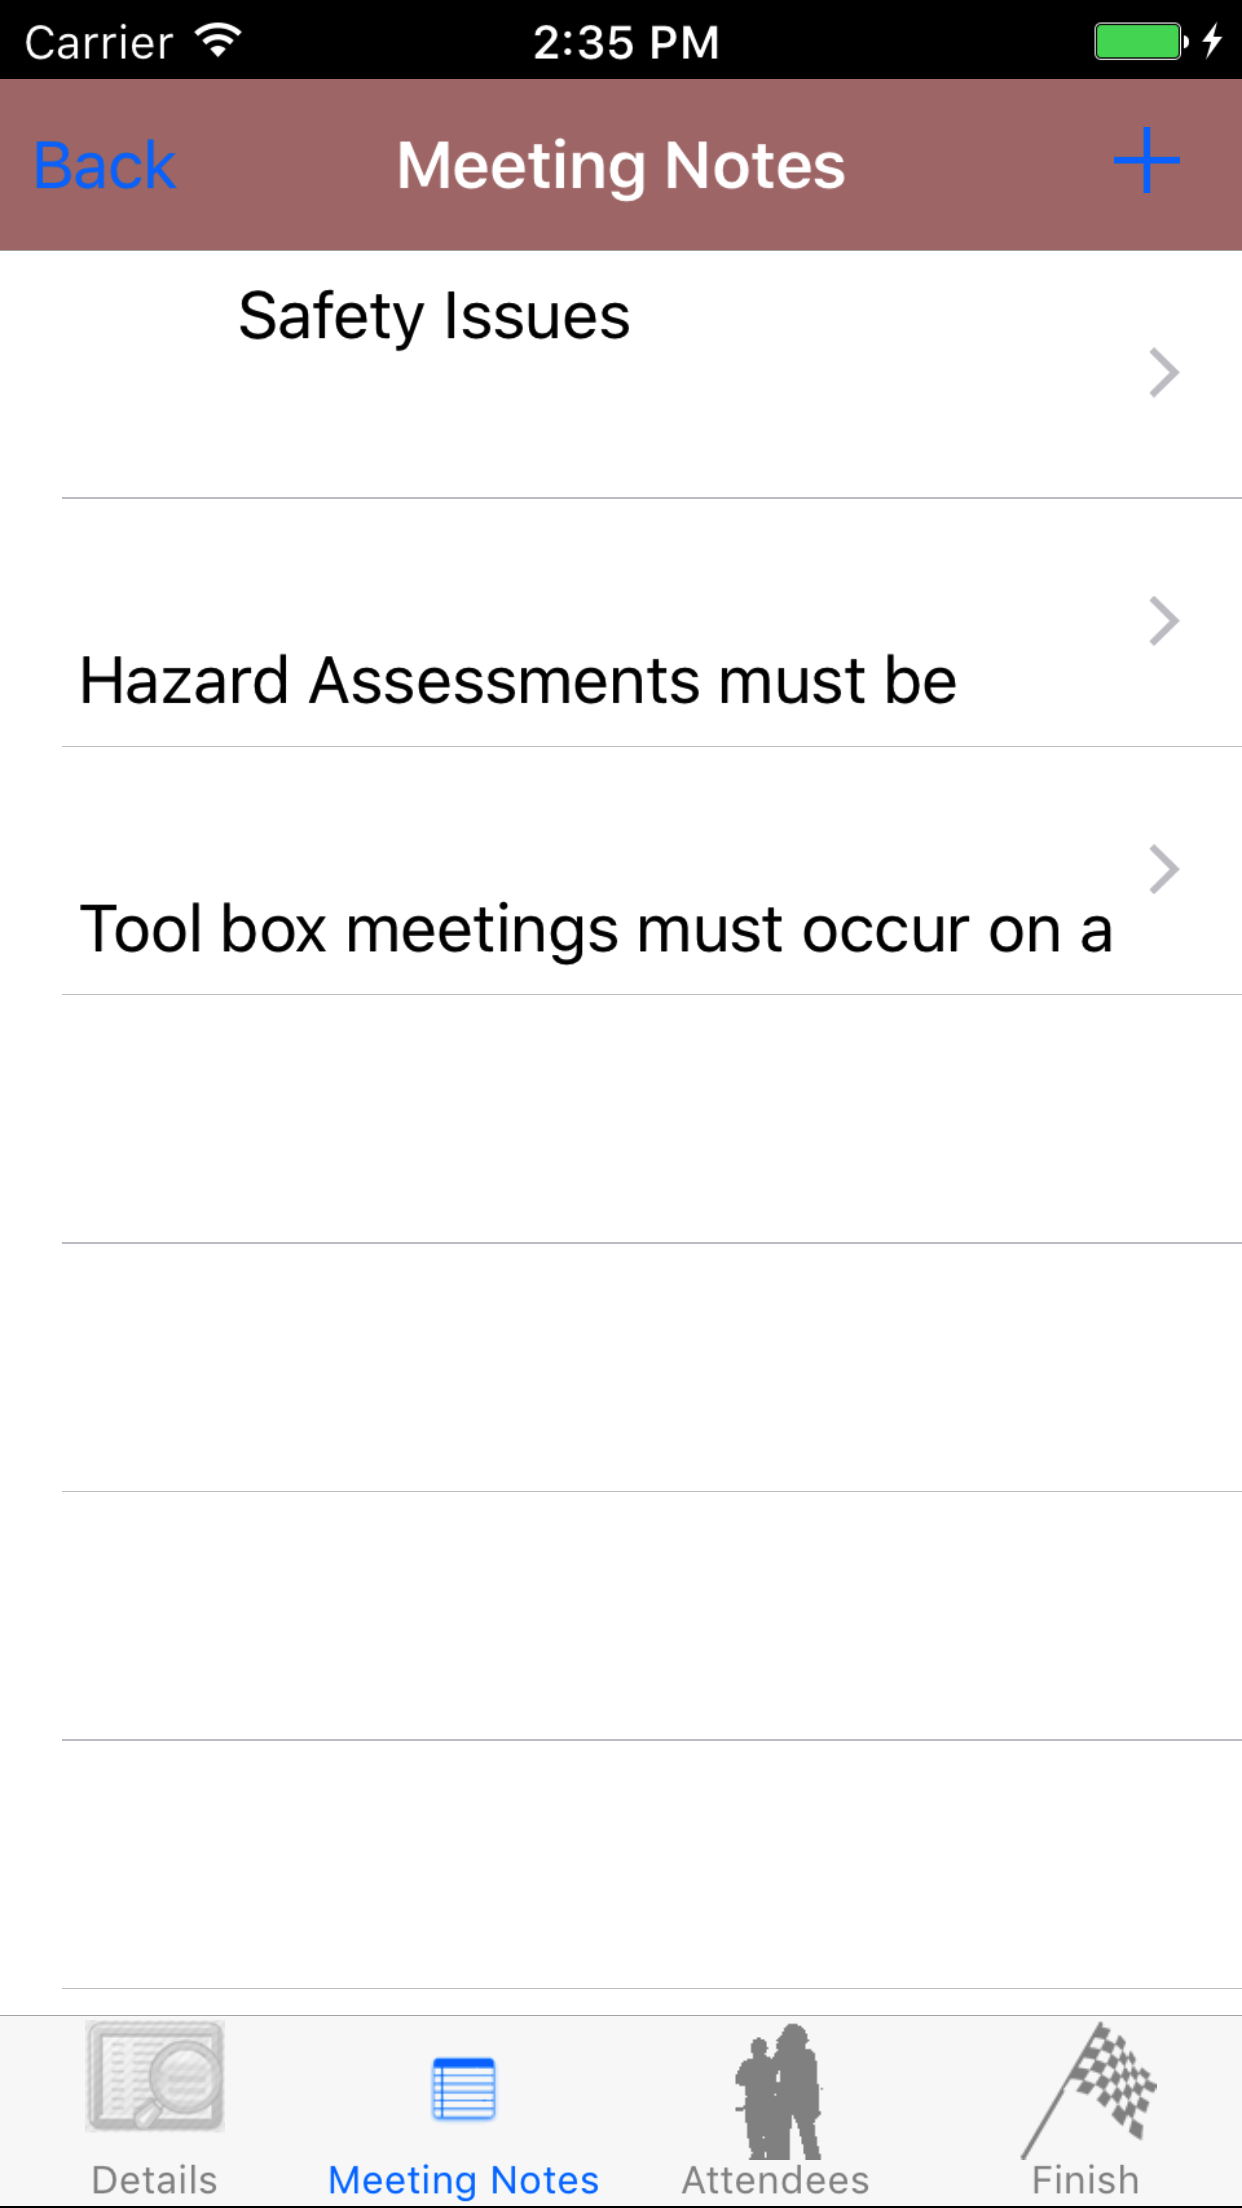
5.Add Paragraph |
|
Add Paragraphs to a meeting is crucial to accurately preparing notes about what will be talked about or is talked about during a meeting. R & T Electric Pro
allows meeting note paragraphs to be numbered or non numbered and either bolded for headings or basic text for paragraphs.
Once on the Meeting Notes view of Meeting you would like to Edit
Steps
- Tap the Edit button on the top right hand corner of the screen to open the meeting notes detail screen. This lists headings in blue and paragraphs in black. If a paragraph is to be numbered the number will appear
on the left hand top corner of each paragraph cell. The order of the the paragraphs number appears in the top right hand corner of each paragraph cell.
- Tap the + icon in the top right corner to open the Add Paragraph screen.
- Heading: The heading segment controller allows field staff to select either Heading (for the text to appear in bold text) or Paragraph (for the text to appear in regular text).
- Sequence #: The Sequence # field allows field staff to order the paragraphs of a safety meeting in any order they see fit.
- Tap + to increase the sequence number of the paragraph or - to decrease the sequence number of the paragraph on the Stepper
- Numbered: The Numbered segment controller allows field staff to make paragraphs either Numbered if Yes is chosen or Non Numbered if No is chosen.
- Numbered Value: The Numbered Value field allows field staff to give the paragraph a number value, if the Numbered segment controller is set to Yes.
- Tap + to increase the numbered value of the paragraph or - to decrease the numbered value of the paragraph on the Stepper
- Paragraph: The Paragraph field allows field staff to enter a single paragraph of a safety meetings documentation or minutes. The character limit of this field is 500.
- Tap Save in the top right corner of the screen to add a new paragraph to the Meeting.
|
|
|
|
6.Look Up Paragraph |
|
Once on the Meeting Notes view of Meeting you would like to Edit
Steps
- Tap the Edit button on the top right hand corner of the screen to open the meeting notes detail screen. This lists headings in blue and paragraphs in black. If a paragraph is to be numbered the number will appear
on the left hand top corner of each paragraph cell. The order of the the paragraphs number appears in the top right hand corner of each paragraph cell.
- Scroll the list of paragraphs until the desired paragraph is displayed on the screen.
- Tap the desired paragraph to select and open the Edit Paragraph screen.
|
|
|
| Step 1 |
|
|
| Step 2-3 |
|
|
|
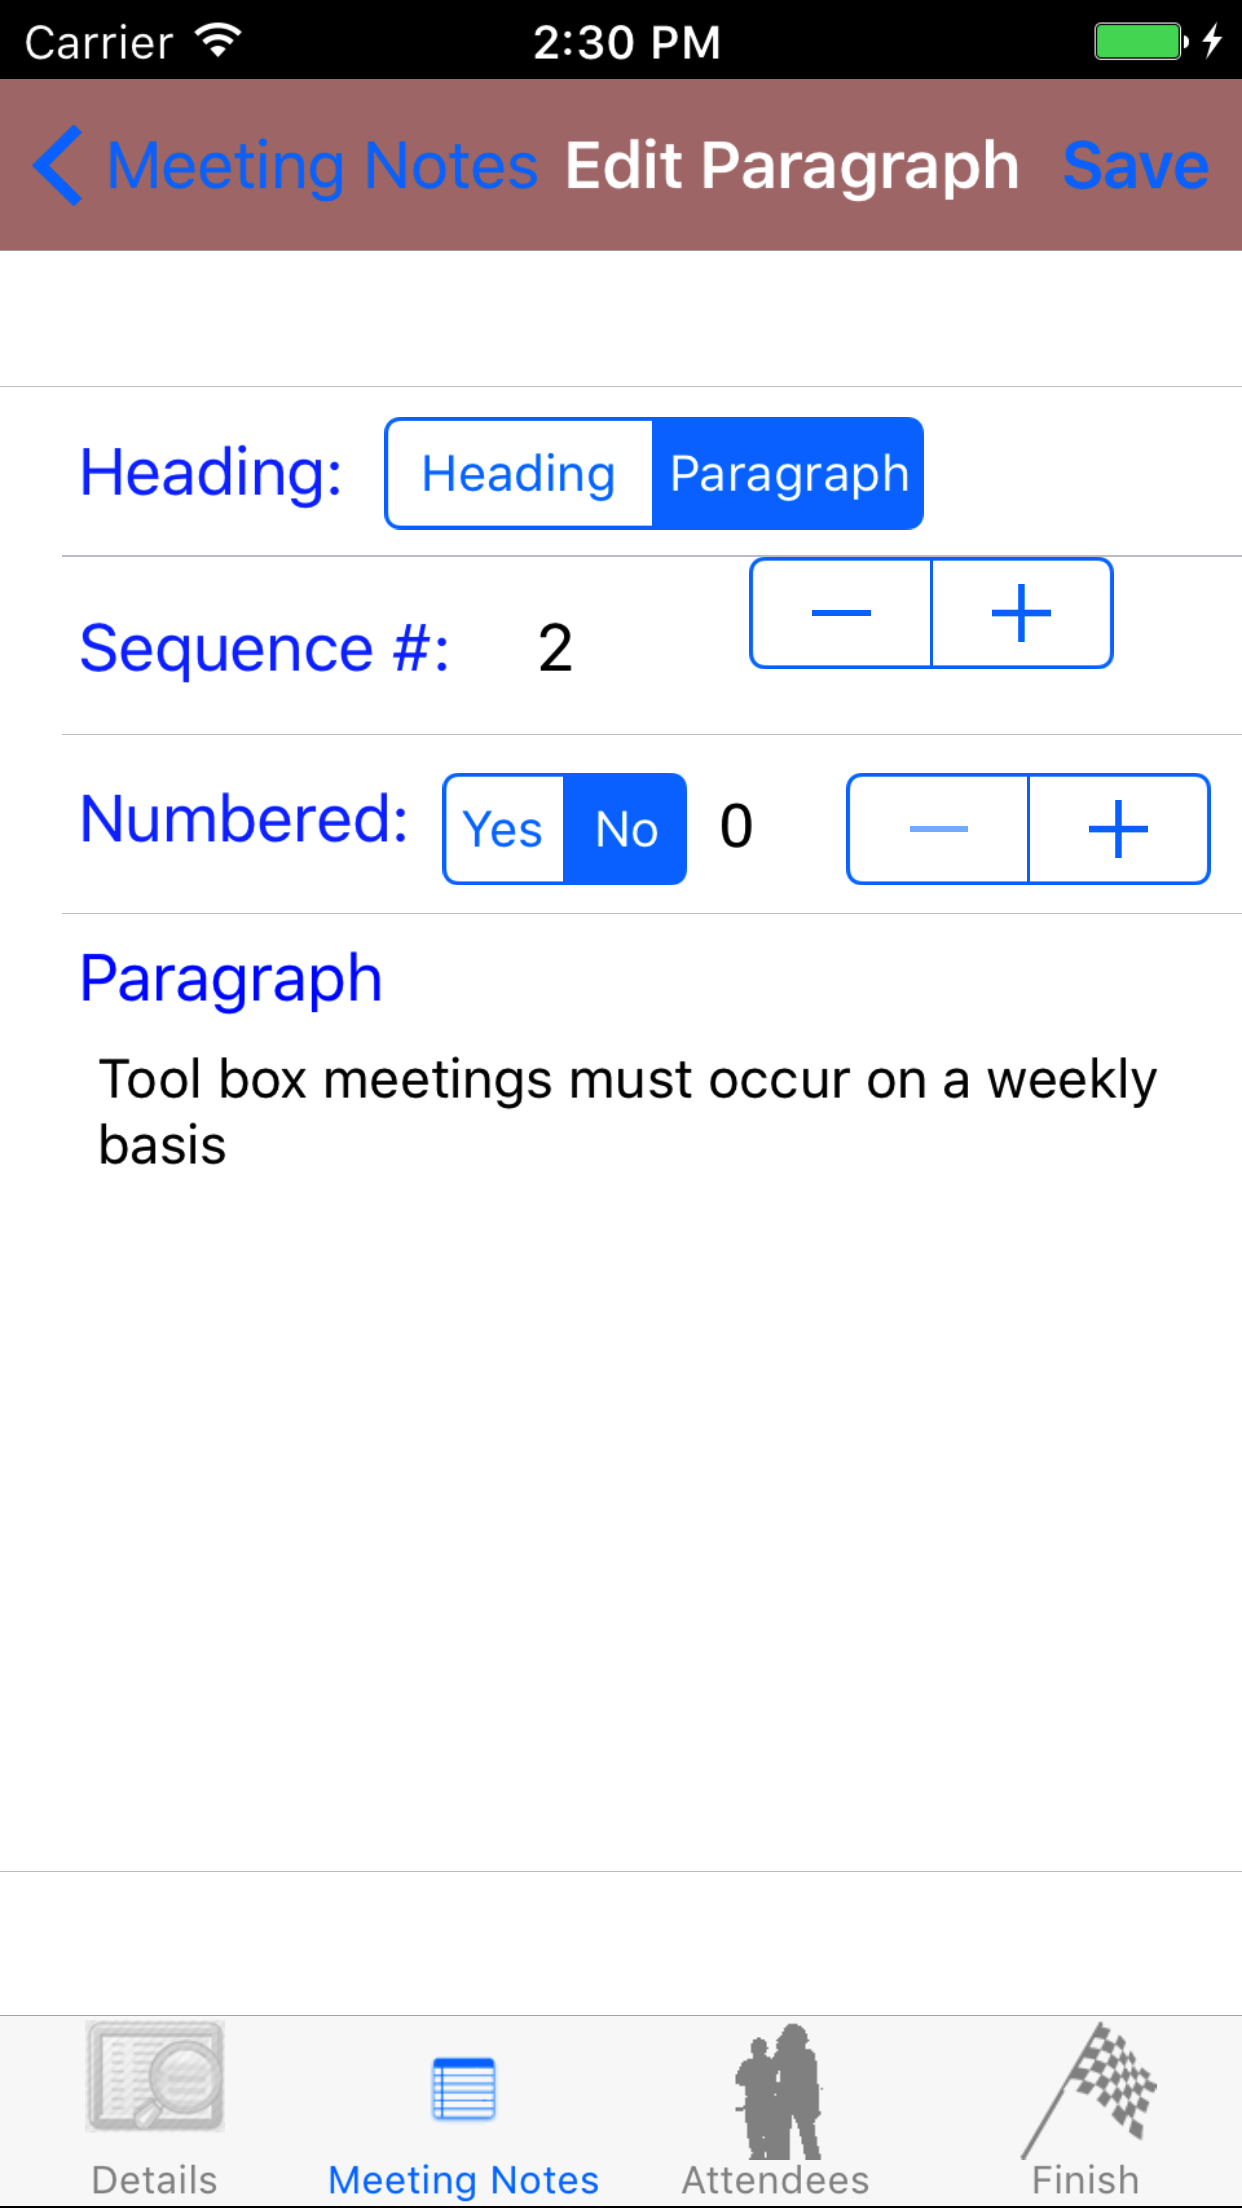
7.Edit Paragraph |
|
Once on the Edit Meeting Notes view of Meeting Paragraph you would like to Edit
Steps
- Heading: The heading segment controller allows field staff to select either Heading (for the text to appear in bold text) or Paragraph (for the text to appear in regular text).
- Sequence #: The Sequence # field allows field staff to order the paragraphs of a safety meeting in any order they see fit.
- Tap + to increase the sequence number of the paragraph or - to decrease the sequence number of the paragraph on the Stepper
- Numbered: The Numbered segment controller allows field staff to make paragraphs either Numbered if Yes is chosen or Non Numbered if No is chosen.
- Numbered Value: The Numbered Value field allows field staff to give the paragraph a number value, if the Numbered segment controller is set to Yes.
- Tap + to increase the numbered value of the paragraph or - to decrease the numbered value of the paragraph on the Stepper
- Paragraph: The Paragraph field allows field staff to enter a single paragraph of a safety meetings documentation or minutes. The character limit of this field is 500.
- Tap Save in the top right corner of the screen to edit a paragraph in the Meeting.
|
|
| Steps 1-6 |
|
|
|
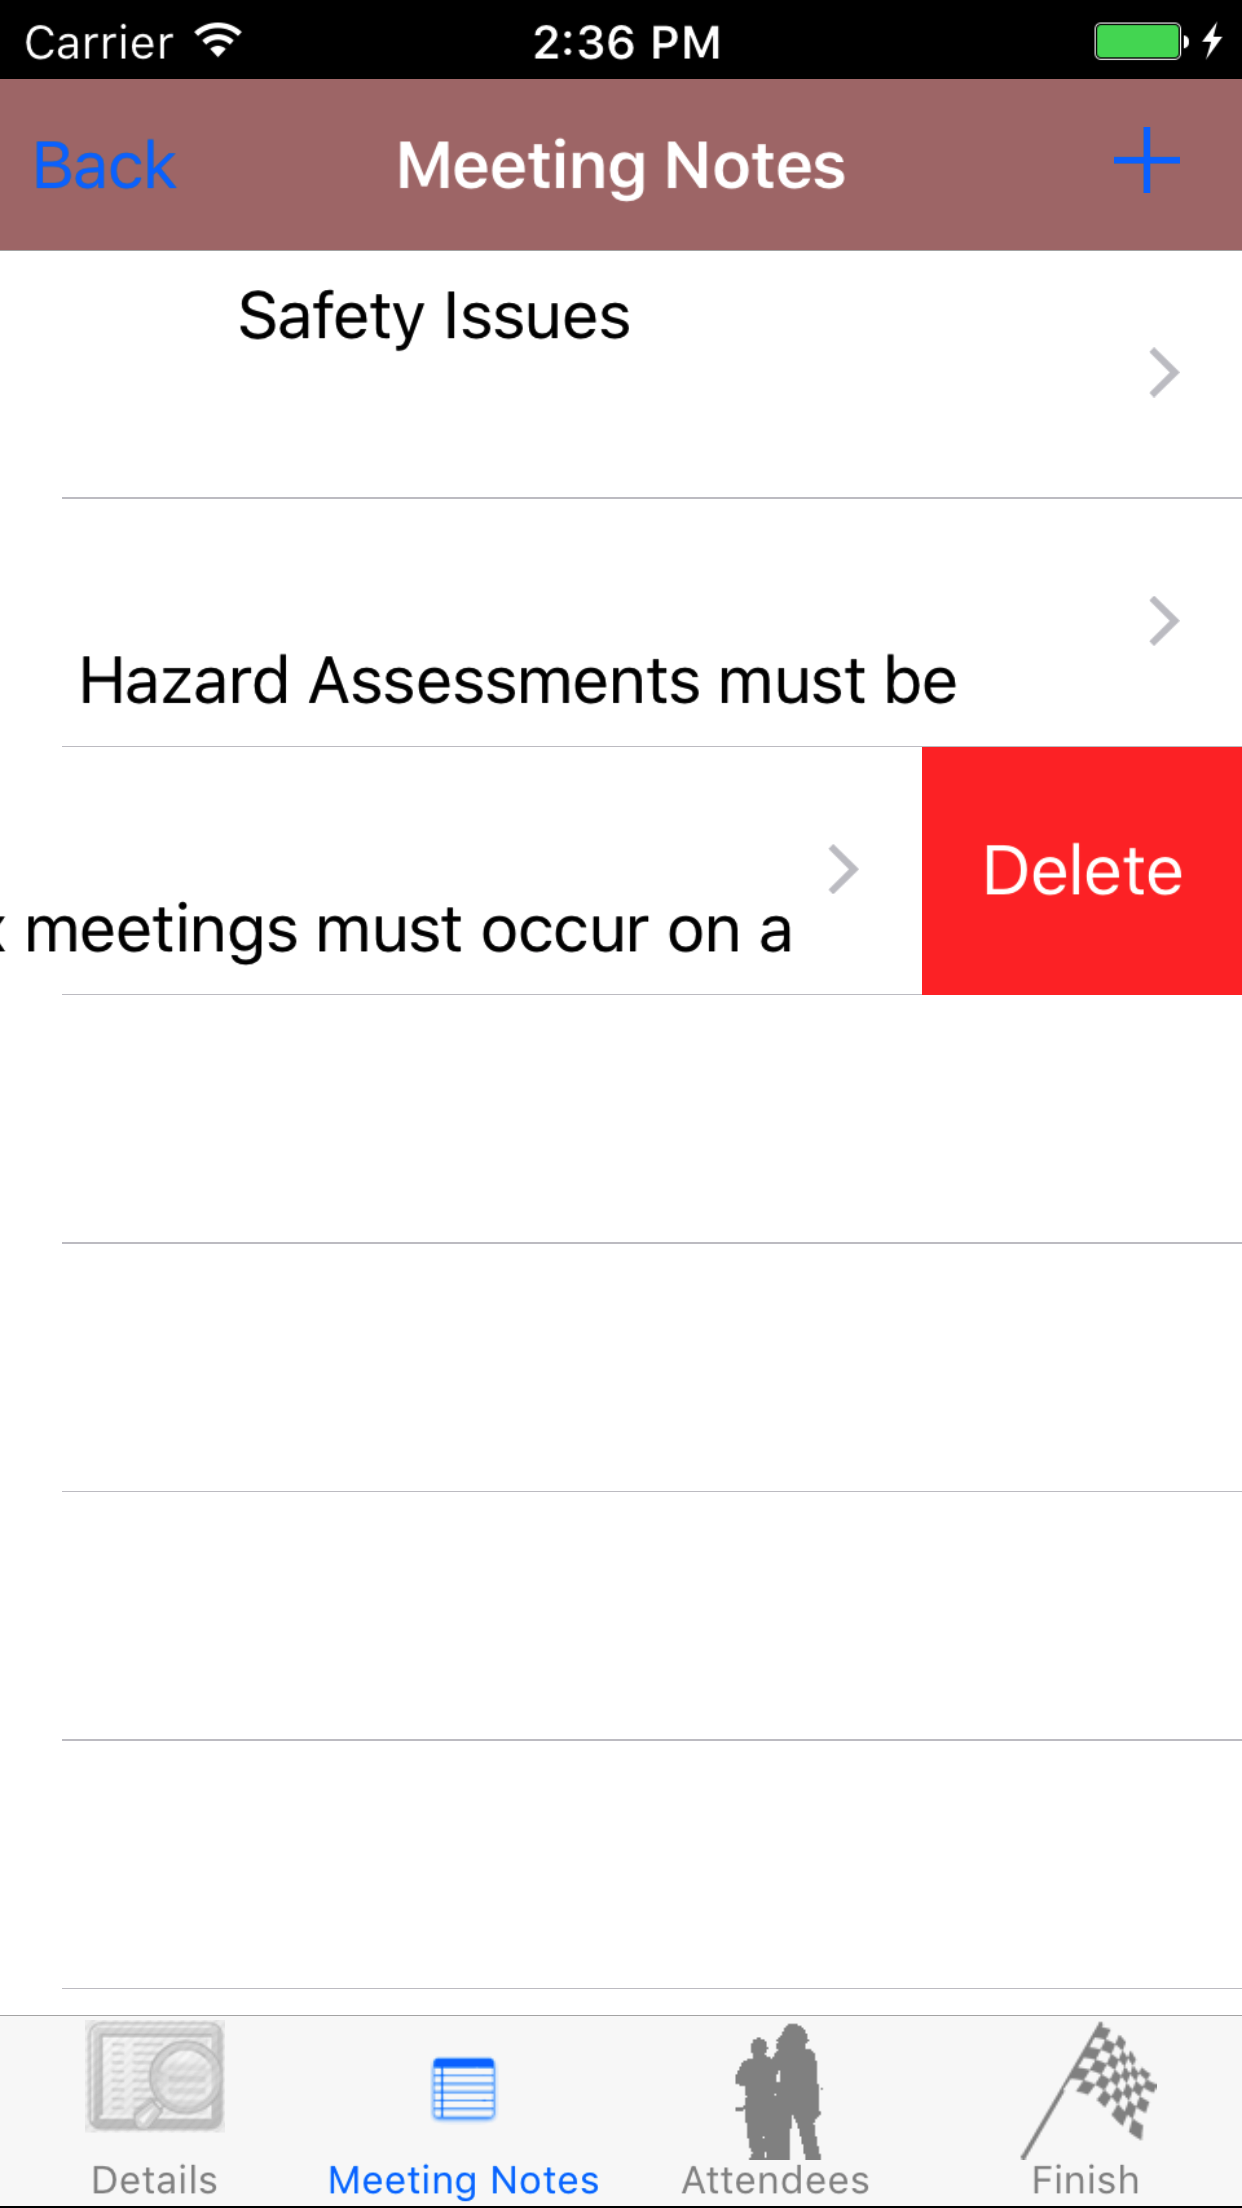
8.Delete Paragraph |
|
Once on the Meeting Notes view of Meeting you would like to Edit
Steps
- Tap the Edit button on the top right hand corner of the screen to open the meeting notes detail screen. This lists headings in blue and paragraphs in black. If a paragraph is to be numbered the number will appear
on the left hand top corner of each paragraph cell. The order of the the paragraphs number appears in the top right hand corner of each paragraph cell.
- Scroll the list of paragraphs until the desired paragraph is displayed on the screen.
- Swipe from the right edge to the left to bring up the delete button for the paragraph.
- Tap the Delete button. The paragraph will be deleted from the meeting.
|
|
|
| Steps 1 |
|
|
| Steps 2-4 |
|
|
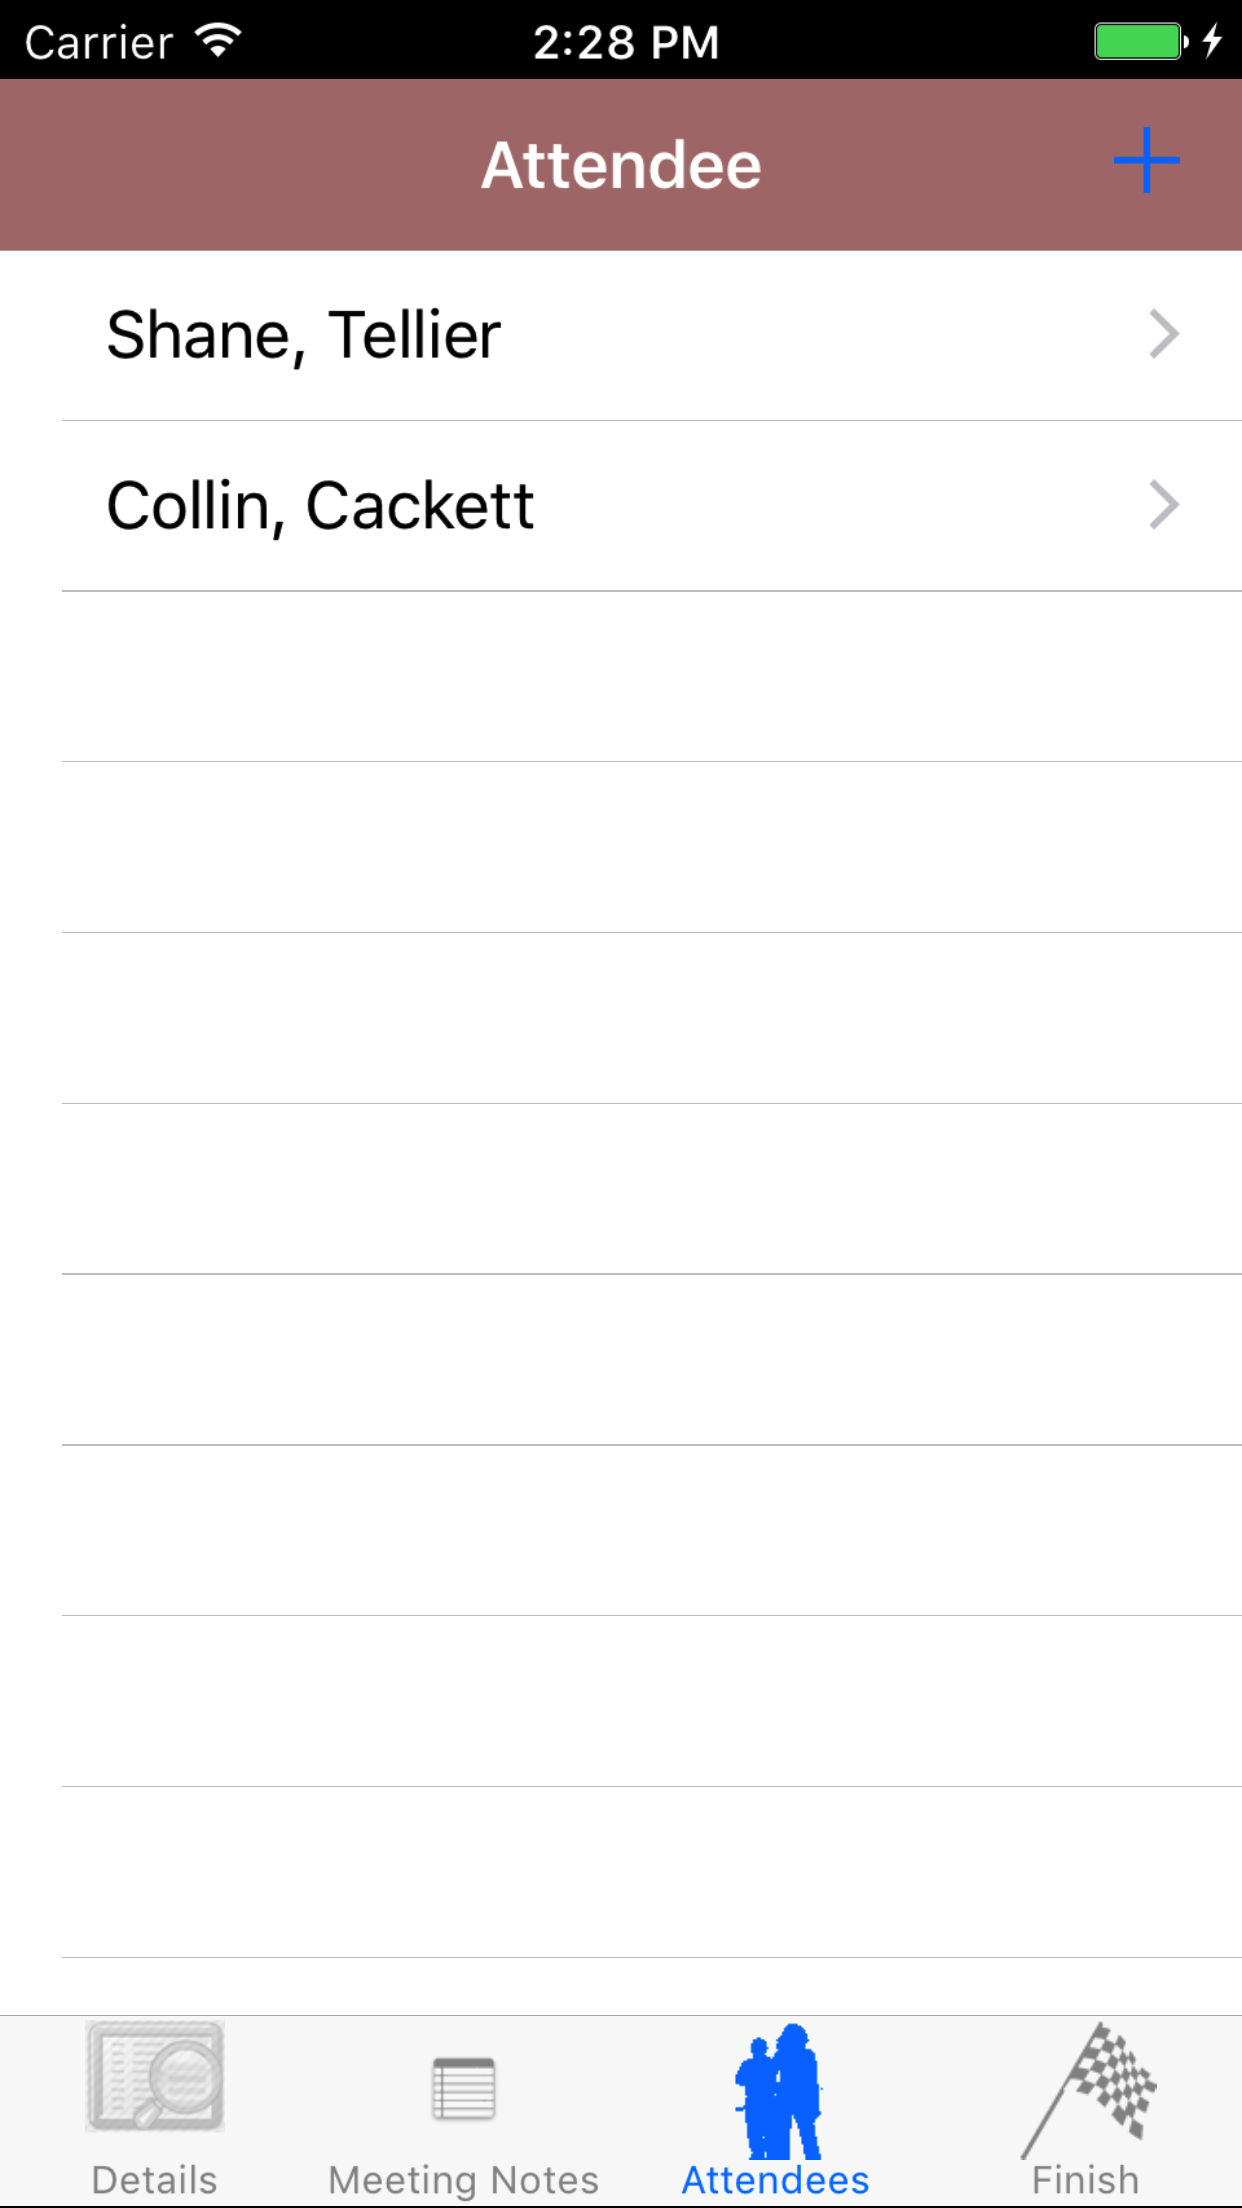
9.Add Employee to Meeting |
|
Adding employees to the Meeting is crucial to reporting accurately. In order to have an accurate picture of the meeting, adding employees to
the meeting needed.Here are the steps on how to do it:
Once on the Meeting you would like to Edit
Steps
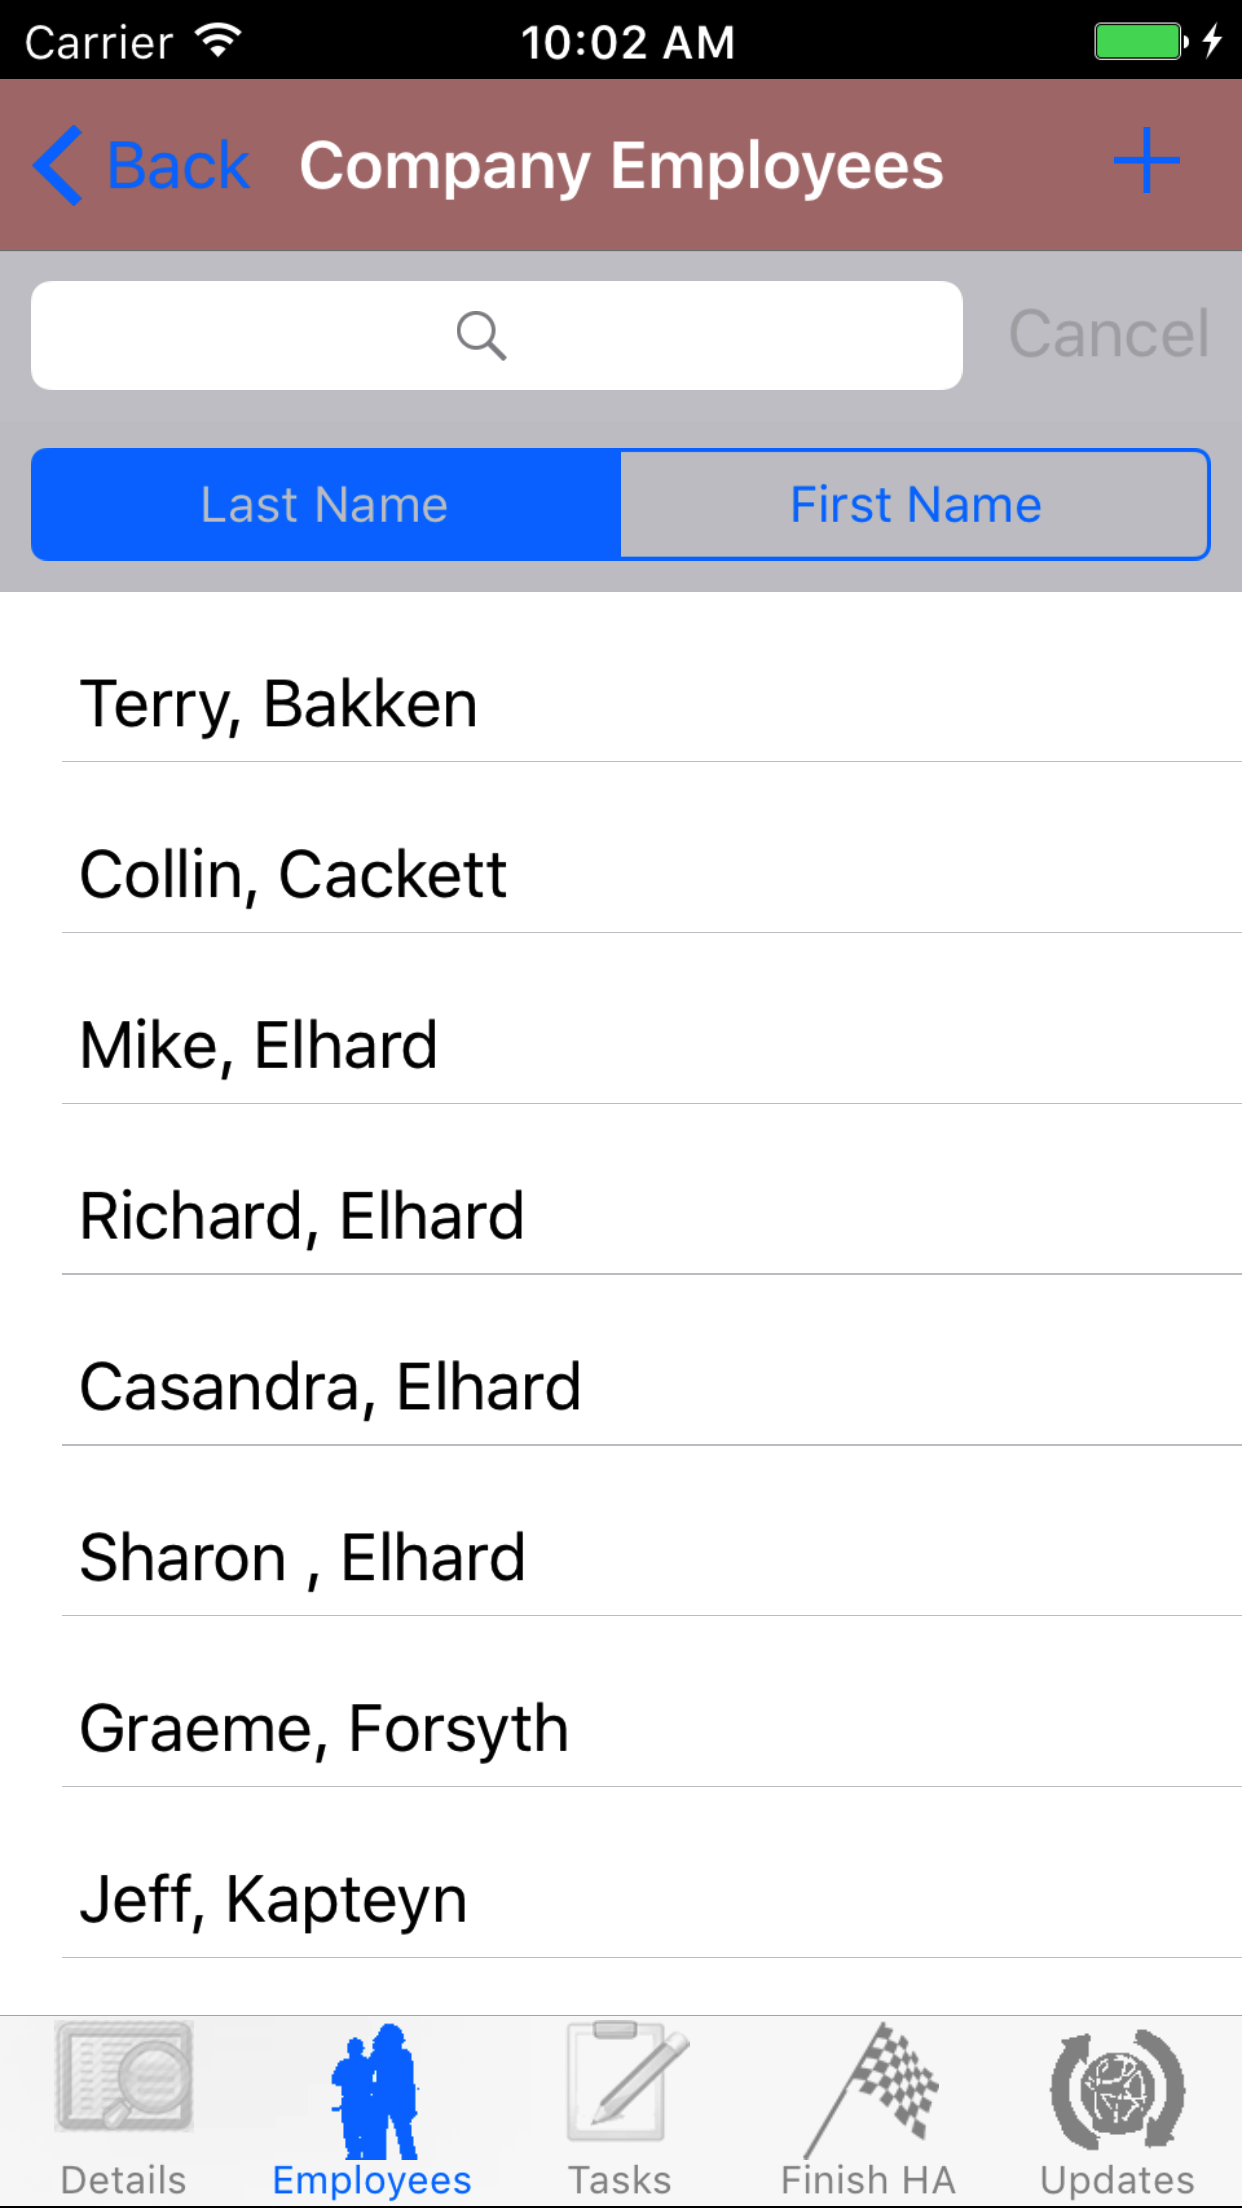
- Tap the Attendees icon the third tab from the left on the bottom of the screen to open the Attendees screen. This screen loads with the employees currently included in the meeting.
- Tap the + icon in the top right corner to open the Employees list or tap Employees in the top left corner to return to the Employees screen.
Employees are listed in descending order of last name.
To Search Employees: Pull down on the list view, the search is defaulted to search by last name.
The other option for the Employee search is by first name. Enter your search
criteria and click the Search button.
- Scroll the list of employees until the desired employee is displayed on the screen.
- Tap on the employees name and they will be added to the meeting
A pop-up message that reads Employee Added indicates that the employee is now listed on the Meeting Employees screen.
|
|
| Step 1 |
|
|
| Step 2 |
|
|
|
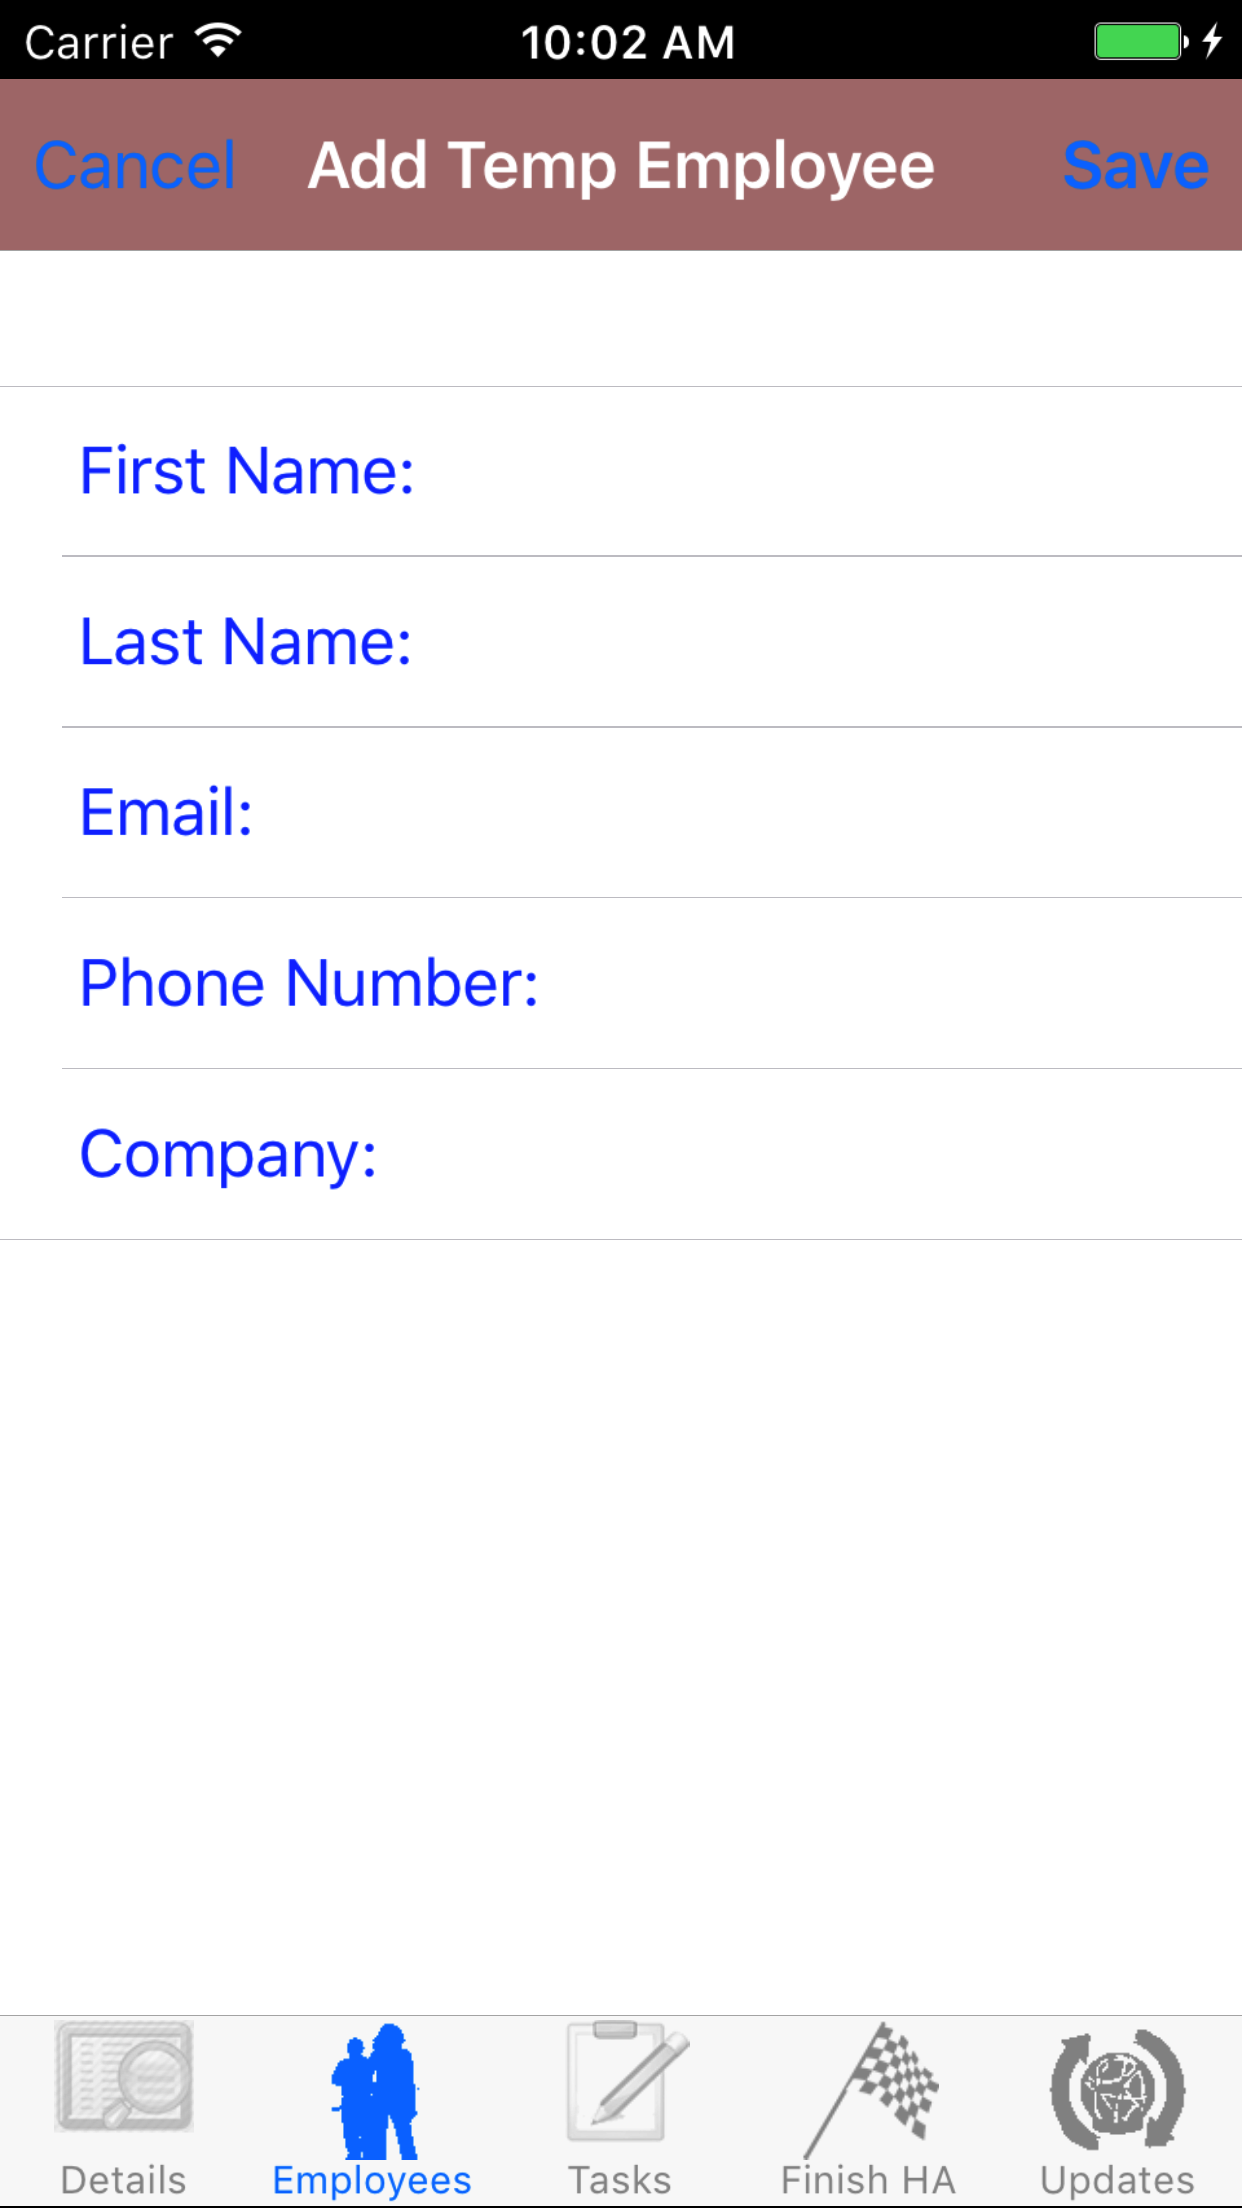
10.Add Outside Employee to Meeting |
|
Adding employees to the Meeting is crucial to reporting accurately. In order to have an accurate picture of the meeting, adding employees to
the meeting needed. Sometime a client or a supplier or a vendor or even a sub contractor will attend a meeting to track that this person has attended your meeting.
Here are the steps on how to do it:
Once on the Meeting you would like to Edit
Steps
- Tap the Attendees icon the third tab from the left on the bottom of the screen to open the Attendees screen. This screen loads with the employees currently included in the meeting.
- Tap the + icon in the top right corner to open the Employees list or tap Employees in the top left corner to return to the Employees screen.
- If the desired employee is not in the list,Tap the + icon in the top right corner of the screen.
- First Name: The First Name field should indicate the legal given name of the employee. The character limit of this field is 25.
- Last Name: The Last Name field should indicate the legal surname of the employee. The character limit of this field is 25.
- Email: The Email field should indicate the best (i.e., most often used for business purposes) e-mail address for the employee. The character limit of this field is 25.
- Phone Number: The Phone Number field should indicate the best (i.e., most often used for business purposes) telephone number (land line or cellular) for the employee. The character limit of this field is 13.
- Company: The Company field should indicate the name of the company for which the employee works. The character limit of this field is 75.
- Tap Save in the top right corner of the screen to add the outside employee to the Meeting.
|
|
|
| Step 1 |
|
|
|
| Steps 2-3 |
|
|
| Steps 4-9 |
|
|
|
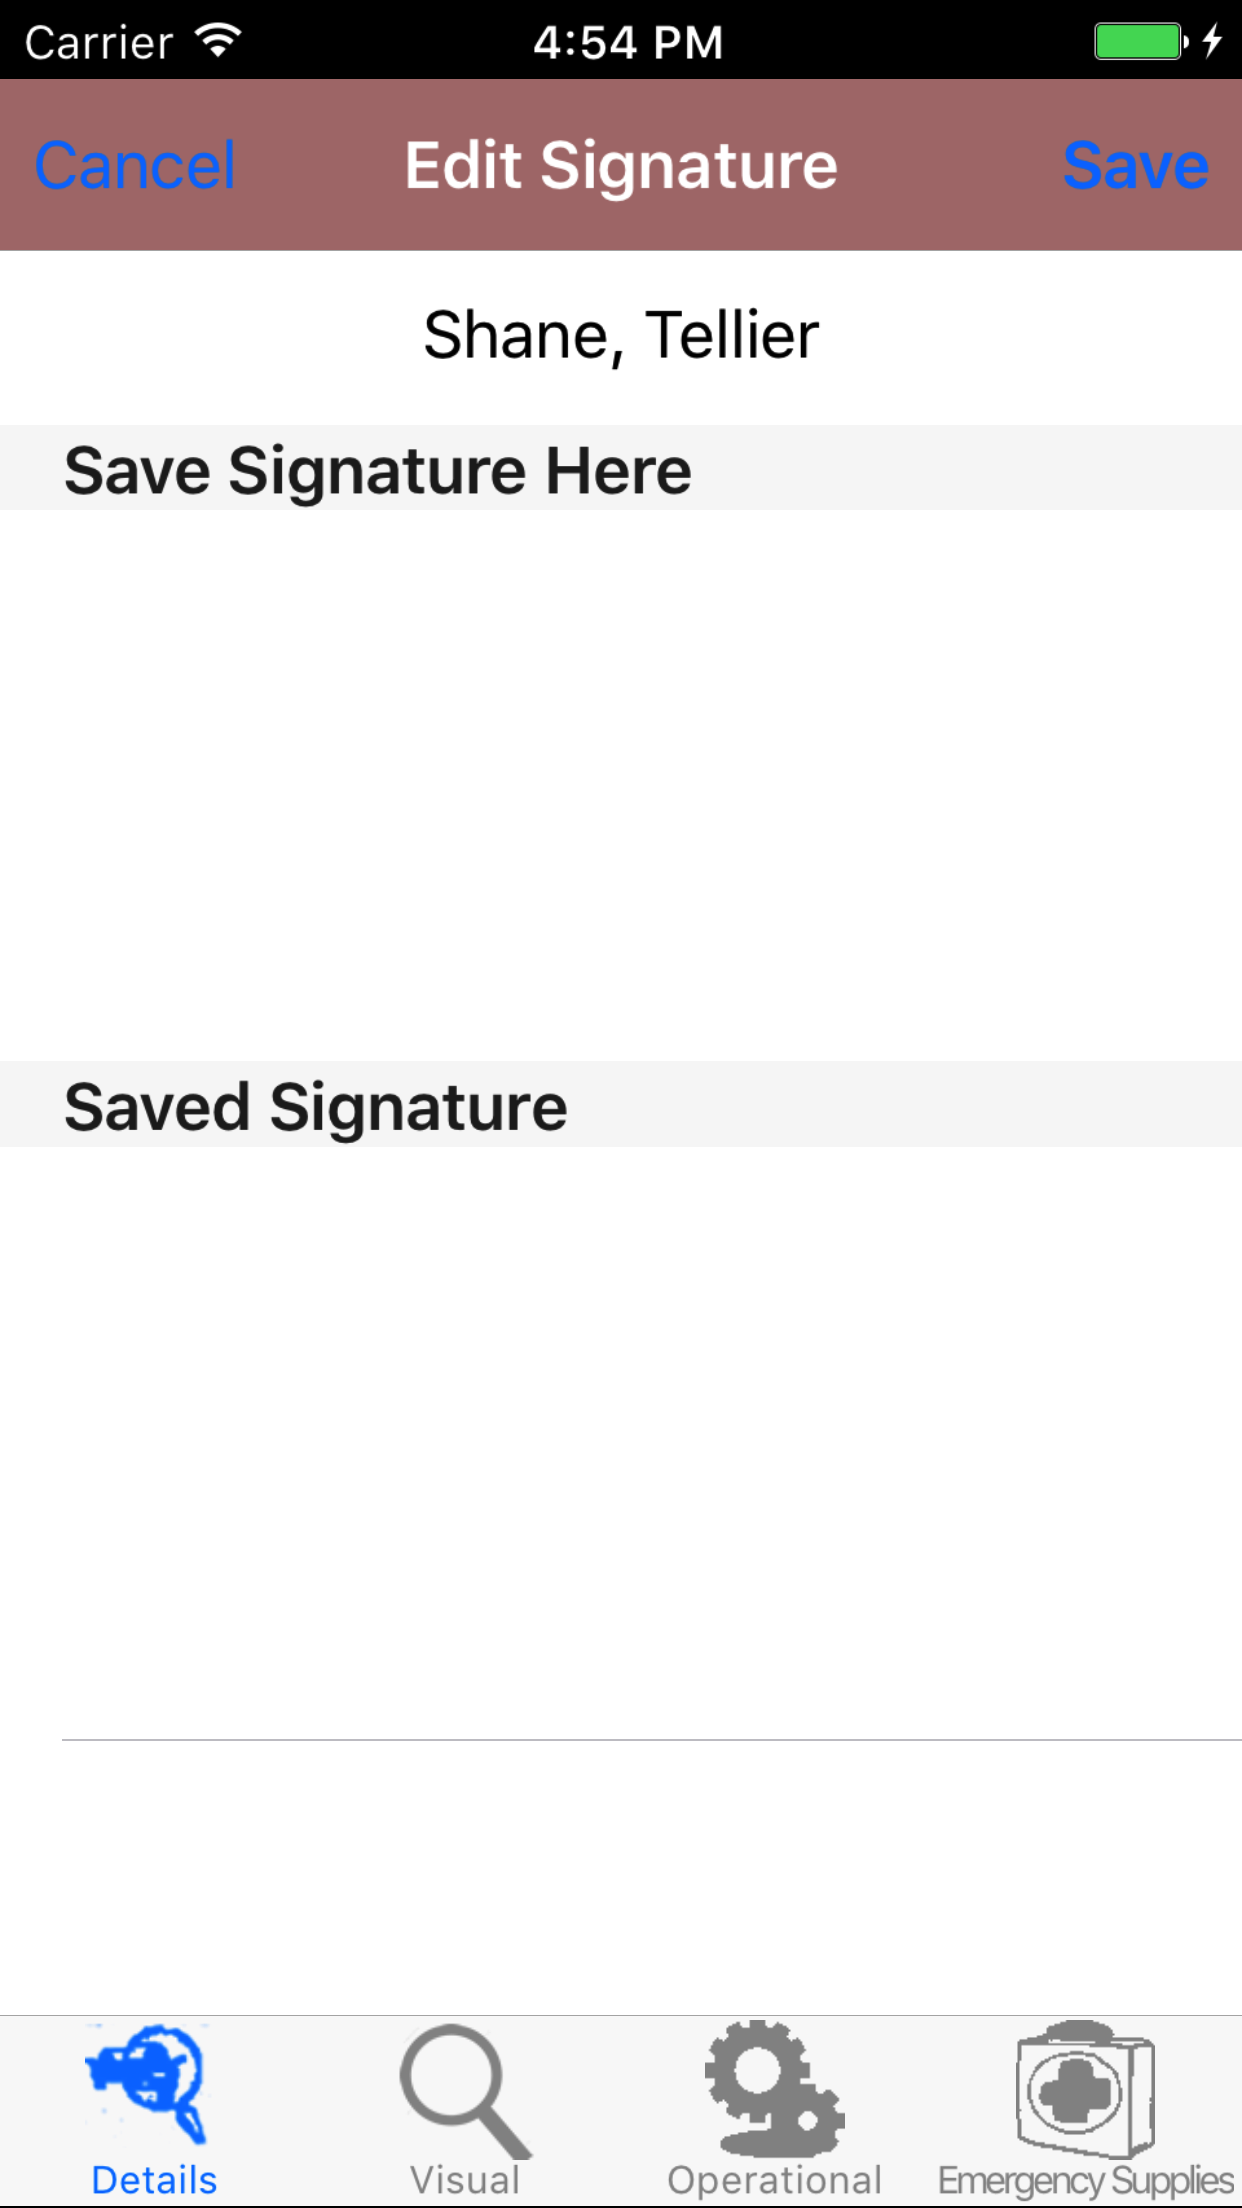
11.Add Employee Signature |
|
Each employee added to the Meeting must provide an electronic signature to indicate that they have been made aware of all tasks and hazards and will comply with all safe work procedures and plans for elimination.
Once on the Meeting you would like to Edit
Steps
- Tap the Attendee icon at the bottom of the screen to open the Attendees screen.
- Scroll the list of employees until the desired employee is displayed on the screen.
- Tap the desired employee to select them and open the Edit Attendee Signature screen
- Have the selected employee sign in the white space beneath the Save New Signature Here label.
- Tap Save in the top right corner of the screen to update the Saved Signature field.
The saved signature will appear below the signature entry screen.
|
|
|
| Steps 1-2 |
|
|
| Steps 3-4 |
|
|
|
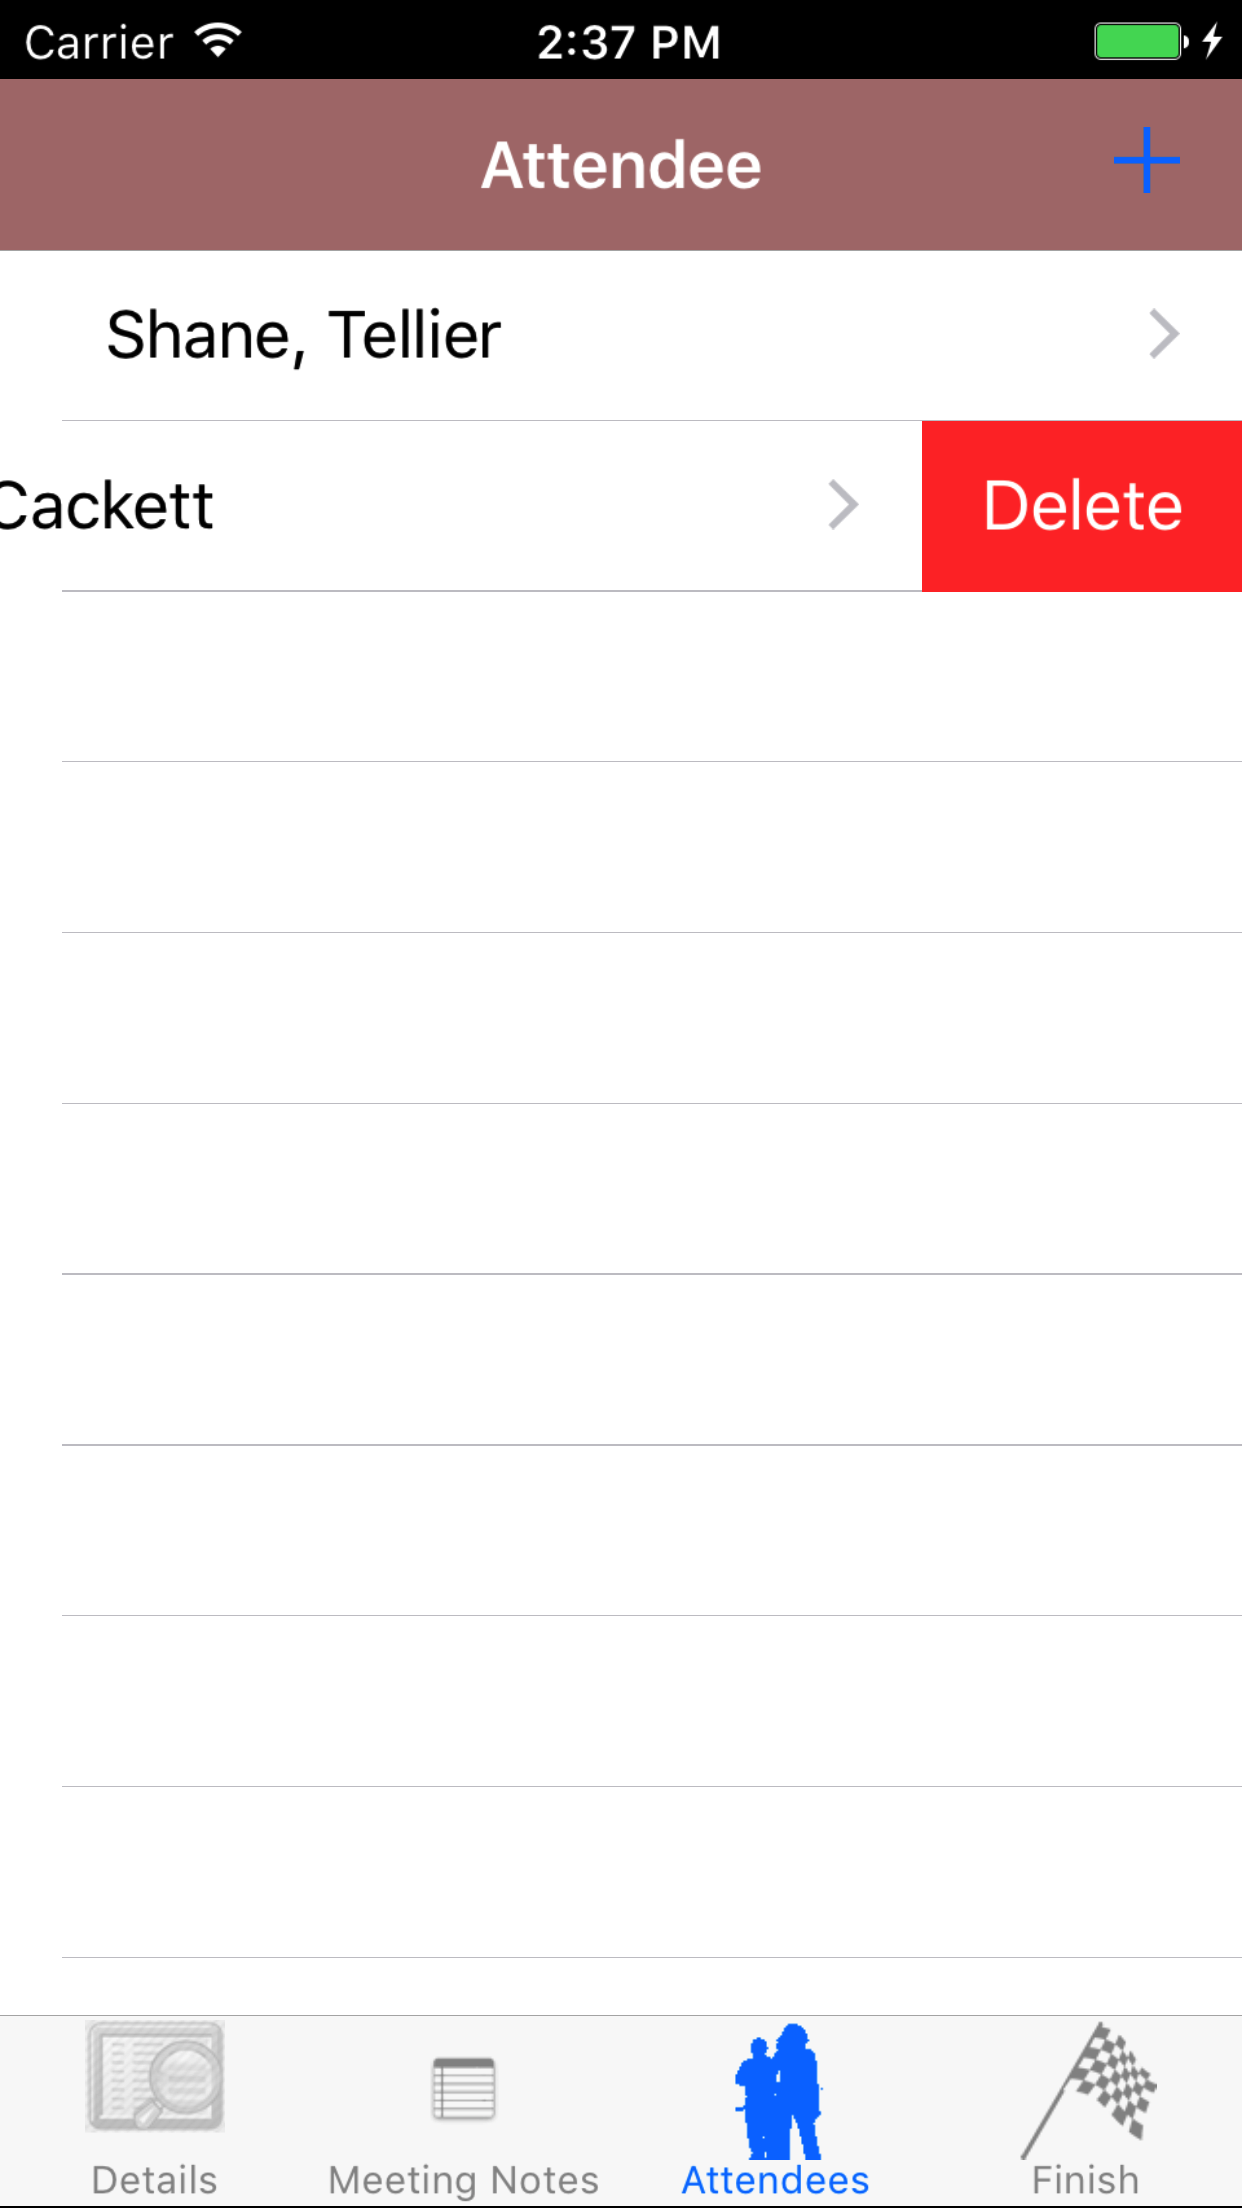
12.Delete Attendee from Meeting |
|
Once on the Meeting you would like to Edit
Steps
- Tap the Attendees icon the third tab from the left on the bottom of the screen to open the Attendees screen. This screen loads with the employees currently included in the meeting.
- Scroll the list of attendees until the desired attendees is displayed on the screen.
- Swipe from the right edge to the left to bring up the delete button for the attendee.
- Tap the Delete button. The attendee will be deleted from the meeting.
|
|
|
| Steps 1-2 |
|
|
| Steps 1-2 |
|
|
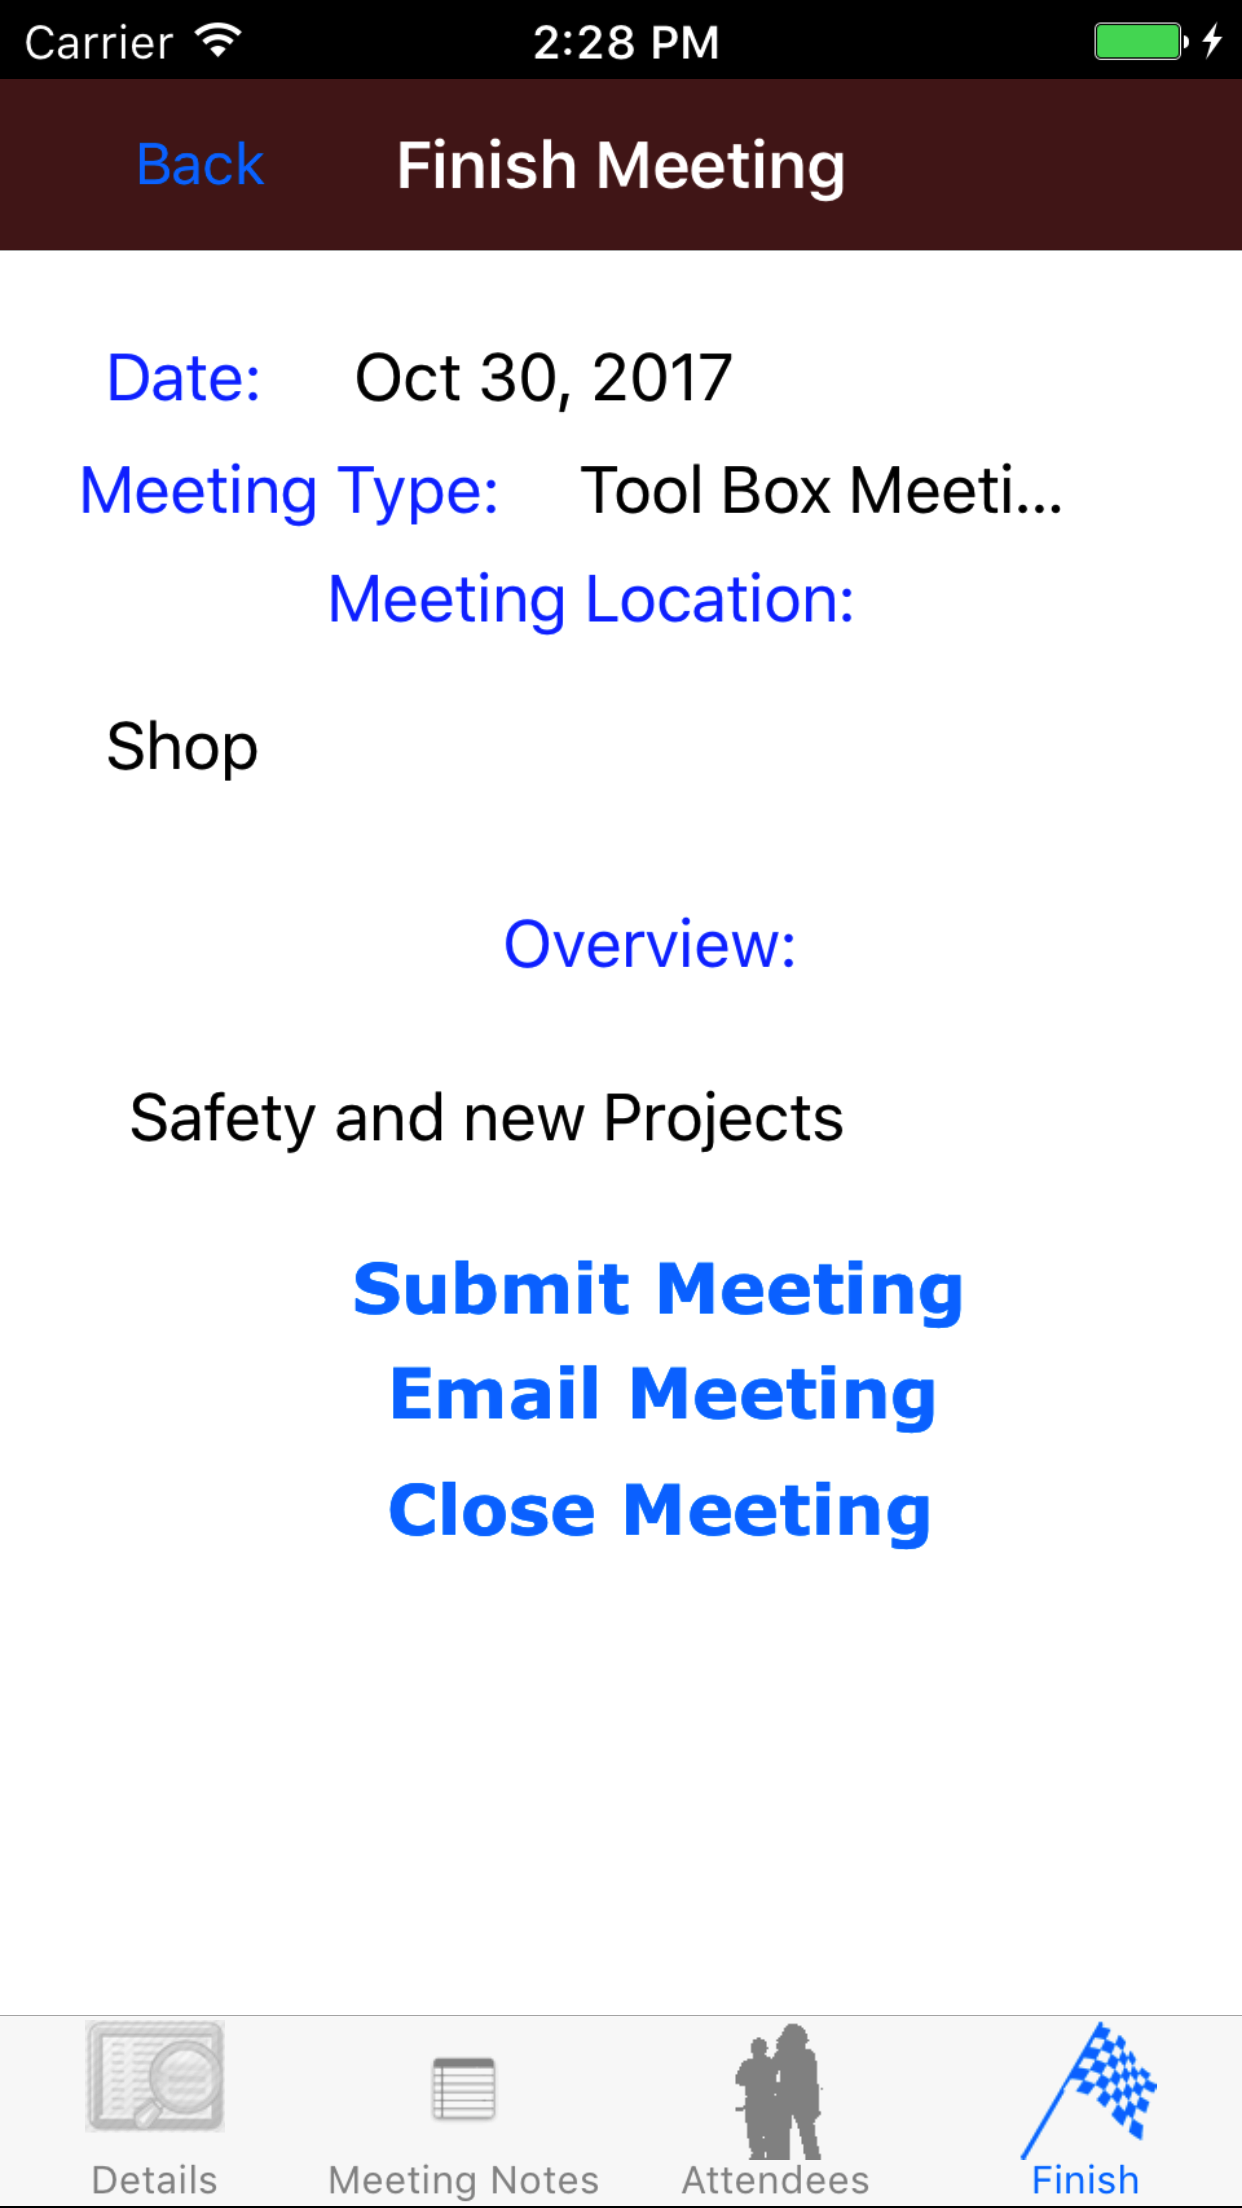
13.Submit Meeting |
|
Submitting a meeting can be done, so that all meeting attendees can download the meeting notes themselves. This could be done
to make following along with the meeting easier. Once the meeting has been submitted field staff can update their App to get the latest
safety meetings to be added to the system. For more information about Updating Meeting click here.
Once on the Meeting you would like to Edit
Steps
- Tap the Finish icon the fourth tab from the left on the bottom of the screen to open the Finish Details screen.
This screen loads with the meeting details.
- Meeting Date
- Meeting Type
- Meeting Location
- Meeting Overview
- Tap the Submit Meeting button.
|
|
| Steps 1-2 |
|
|
14.Email Meeting |
|
Email a meeting can be done, so that all meeting attendees know that they have been invited to a meeting. R & T Electric Pro thinks providing meeting
attendee$s with a copy of the meeting notes before they attend gives attendees a better chance at participating whole heartedly in a meetings
discussions if they new what is going to be discussed a head of time. Field staff emailed will receive a email with a link to the entire meeting. Field
Staff can then download the meeting to their iPhone App using the update meeting function. For more information about Updating Meeting click here.
Once on the Meeting you would like to Edit
Steps
- Tap the Finish icon the fourth tab from the left on the bottom of the screen to open the Finish Details screen.
This screen loads with the meeting details.
- Meeting Date
- Meeting Type
- Meeting Location
- Meeting Overview
- Tap the Email Meeting button. R & T Electric Pro will send all meeting attendees an email with a link to a view of the meeting.
|
|
|
| Steps 1-2 |
|
|
15.Close Out Meeting |
|
Once a meeting has been conducted, the notes for the meeting updated, and all attendee$s sign off on being at the meeting. Its important
that all the information is submitted and the meeting is closed out in R & T Electric Pro.
Once on the Meeting you would like to Edit
Steps
- Tap the Finish icon the fourth tab from the left on the bottom of the screen to open the Finish Details screen.
This screen loads with the meeting details.
- Meeting Date
- Meeting Type
- Meeting Location
- Meeting Overview
- Tap the Close Out Meeting button. All information on the Meeting will be sent to the Web Application and the meeting
will be moved to the History section of the Meeting section of the iPhone App.
|
|
|
| Steps 1-2 |
|
|
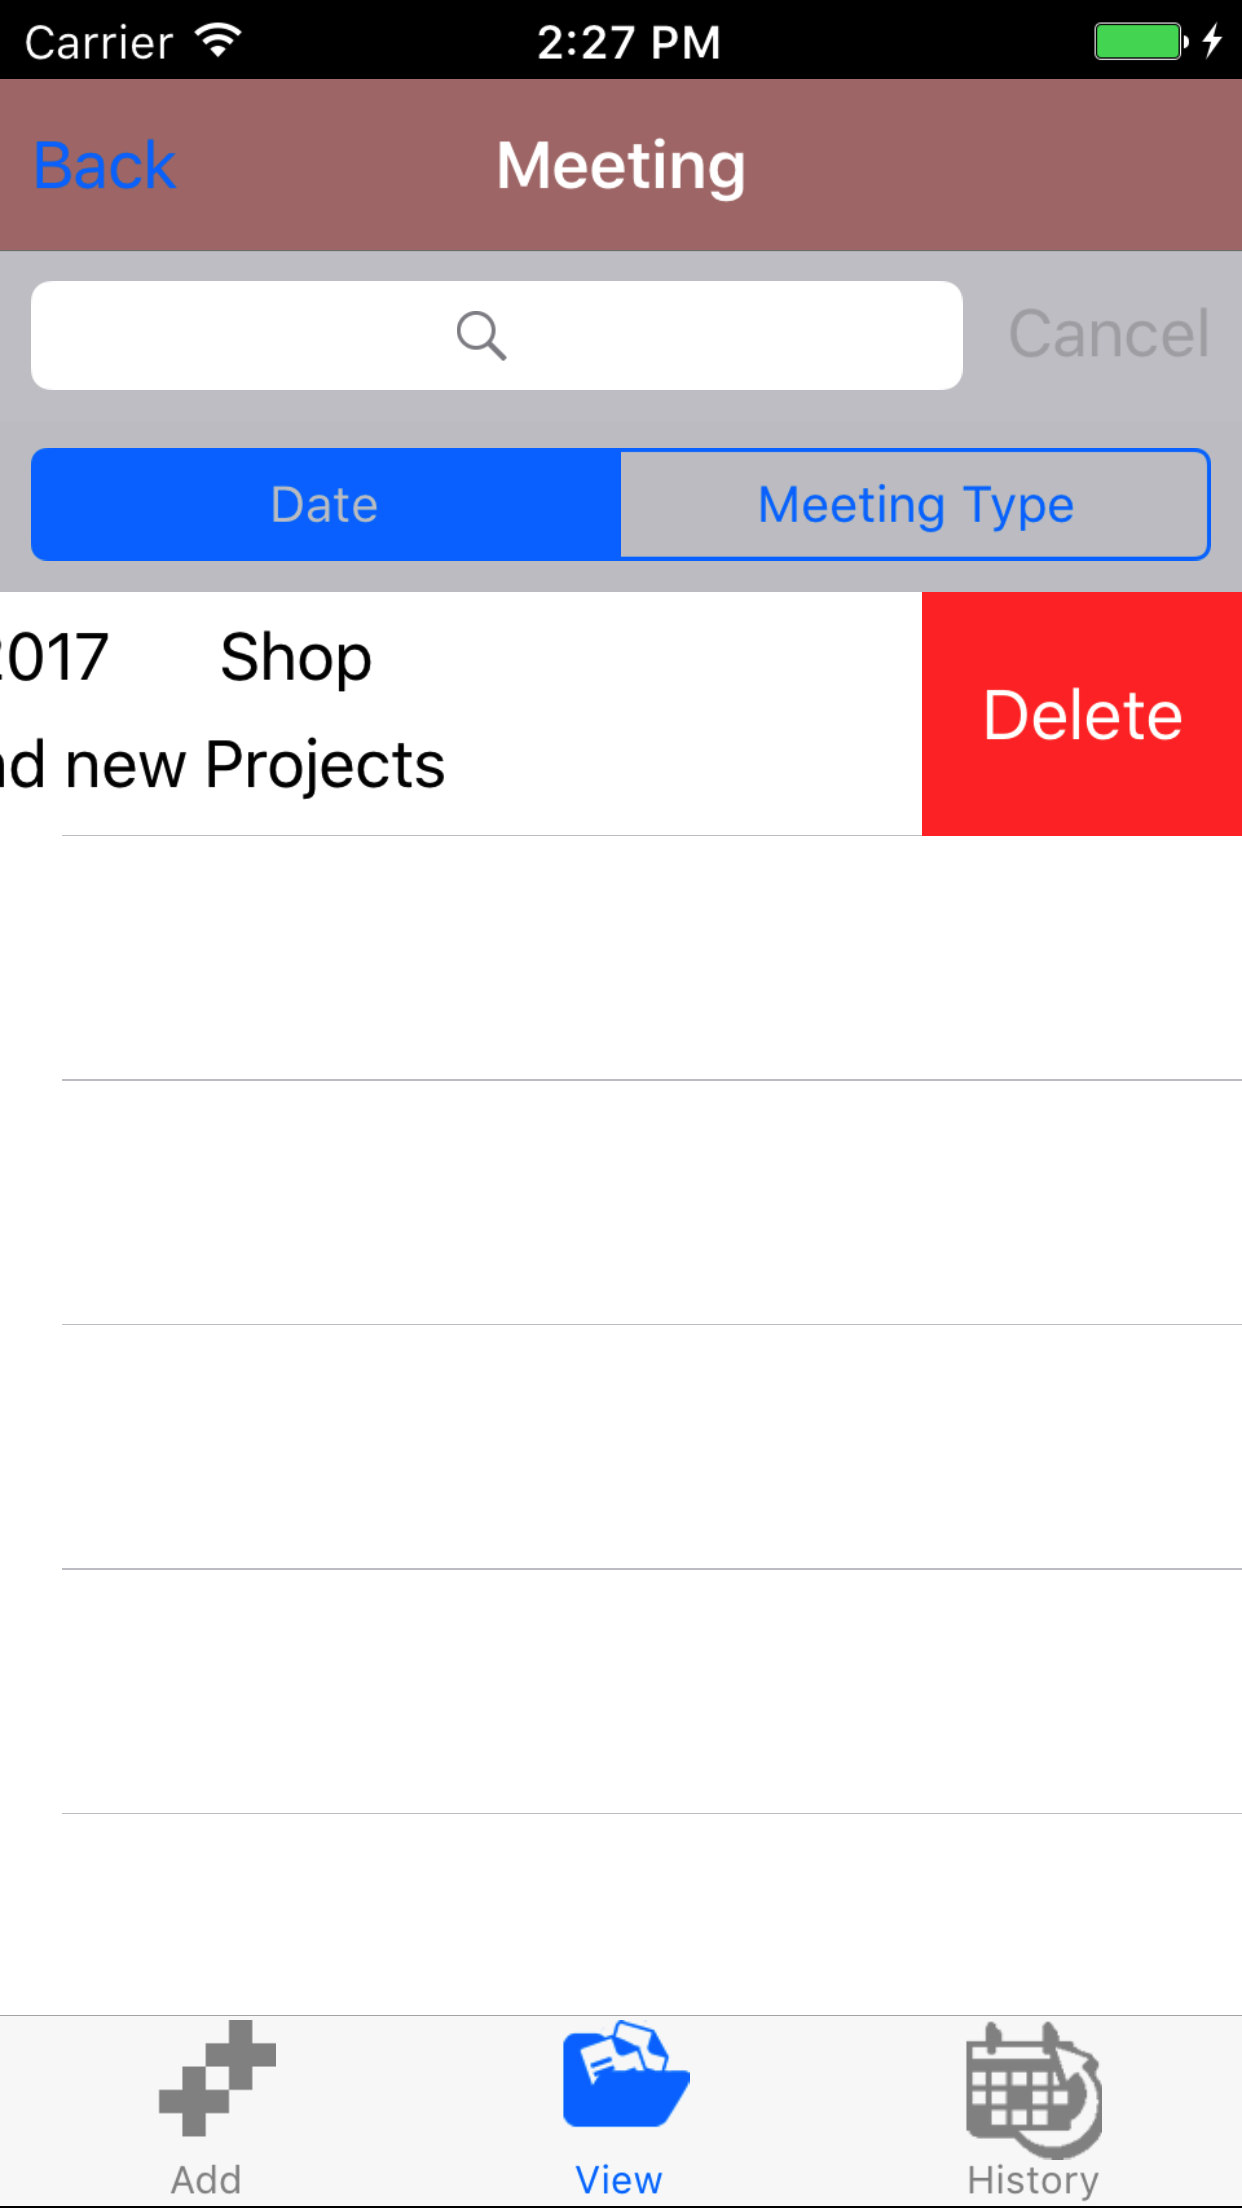
16.Delete Meeting |
|
Once in the Meeting section
Steps
- Tap the second tab on the menu, the Meeting view.
To Search Meetings: Pull down on the list view, the search is defaulted to search by date enter the date in following
format YYYY-MM-DD. The other option for the Meeting search by meeting type. Enter your search
criteria and click the Search button.
- Scroll the list of Meetings until the desired Meeting is displayed on the screen. The meetings information is displayed:
the date in red on the top line on the left side, the meeting type in black on the top line on the
right side, the meeting location in blue, and the meeting overview in black on the bottom line.
- Swipe from the right edge to the left to bring up the delete button for the meeting.
- Tap the Delete button. The meeting will be deleted from the IPhone Application.
|
|
|
| Steps 1-2 |
|
|
| Steps 1-2 |
|
|
17.View Closed Meeting |
|
After Meetings have been closed out, they will be available to look at through the History view on the iPhone Application.
Once on the Meeting section
Steps
- Tap the third tab on the menu, the History tab of the main menu view. This loads with a list of the closed out Meetings
listing the the date of the meeting, meeting type, overview in black.
To Search Meetings: Pull down on the list view, the search is defaulted to search by date enter the date in following
format YYYY-MM-DD. The other option for the Meeting search by meeting type. Enter your search
criteria and click the Search button.
- Scroll the list of Meetings until the desired Meeting is displayed on the screen.
- Tap on the Meeting you would like to view. This loads the first tab, the meeting details tab of the History view.
It loads the following details including:
- Date
- Meeting Type
- Meeting Location
- Meeting Overview
At the bottom of the screen is the Re Open Meeting button. If this button is pressed. The meeting will be re opened and editable again.
- Tap the second tab, the Notes tab of the History view. This loads with the formatted copy of the meeting notes.
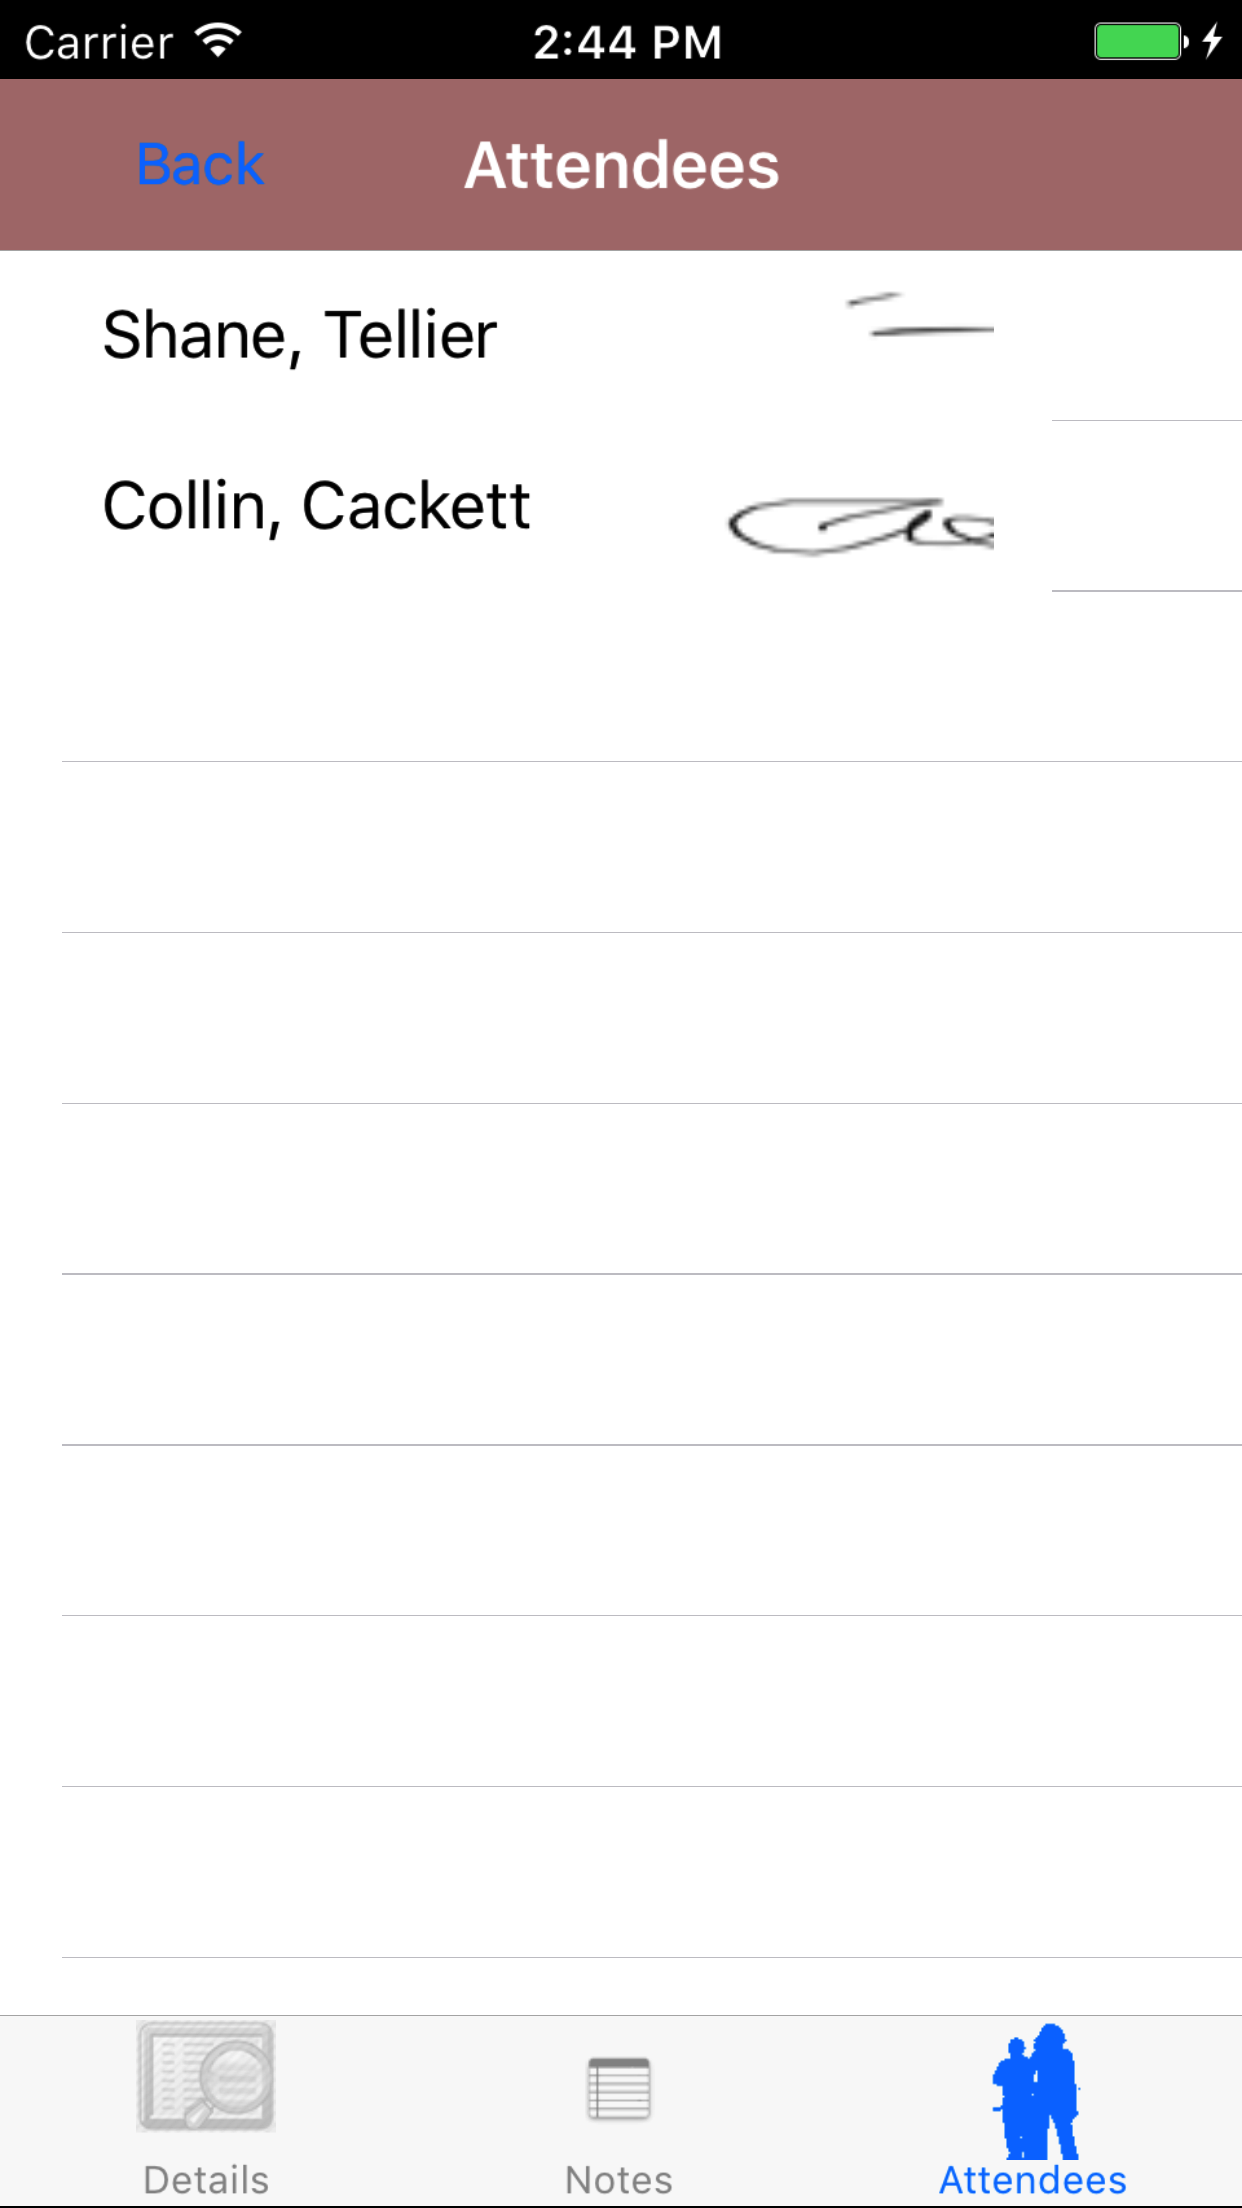
- Tap the third tab, the Meeting Attendee$s tab of the History view. This loads with the employee$s names and their signatures
of the employees who participated in the Meeting.
|
|

|
| Step 1 |
|
|
| Step 2 |
|
|
| Step 3 |
|
|
| Step 4 |
|
|
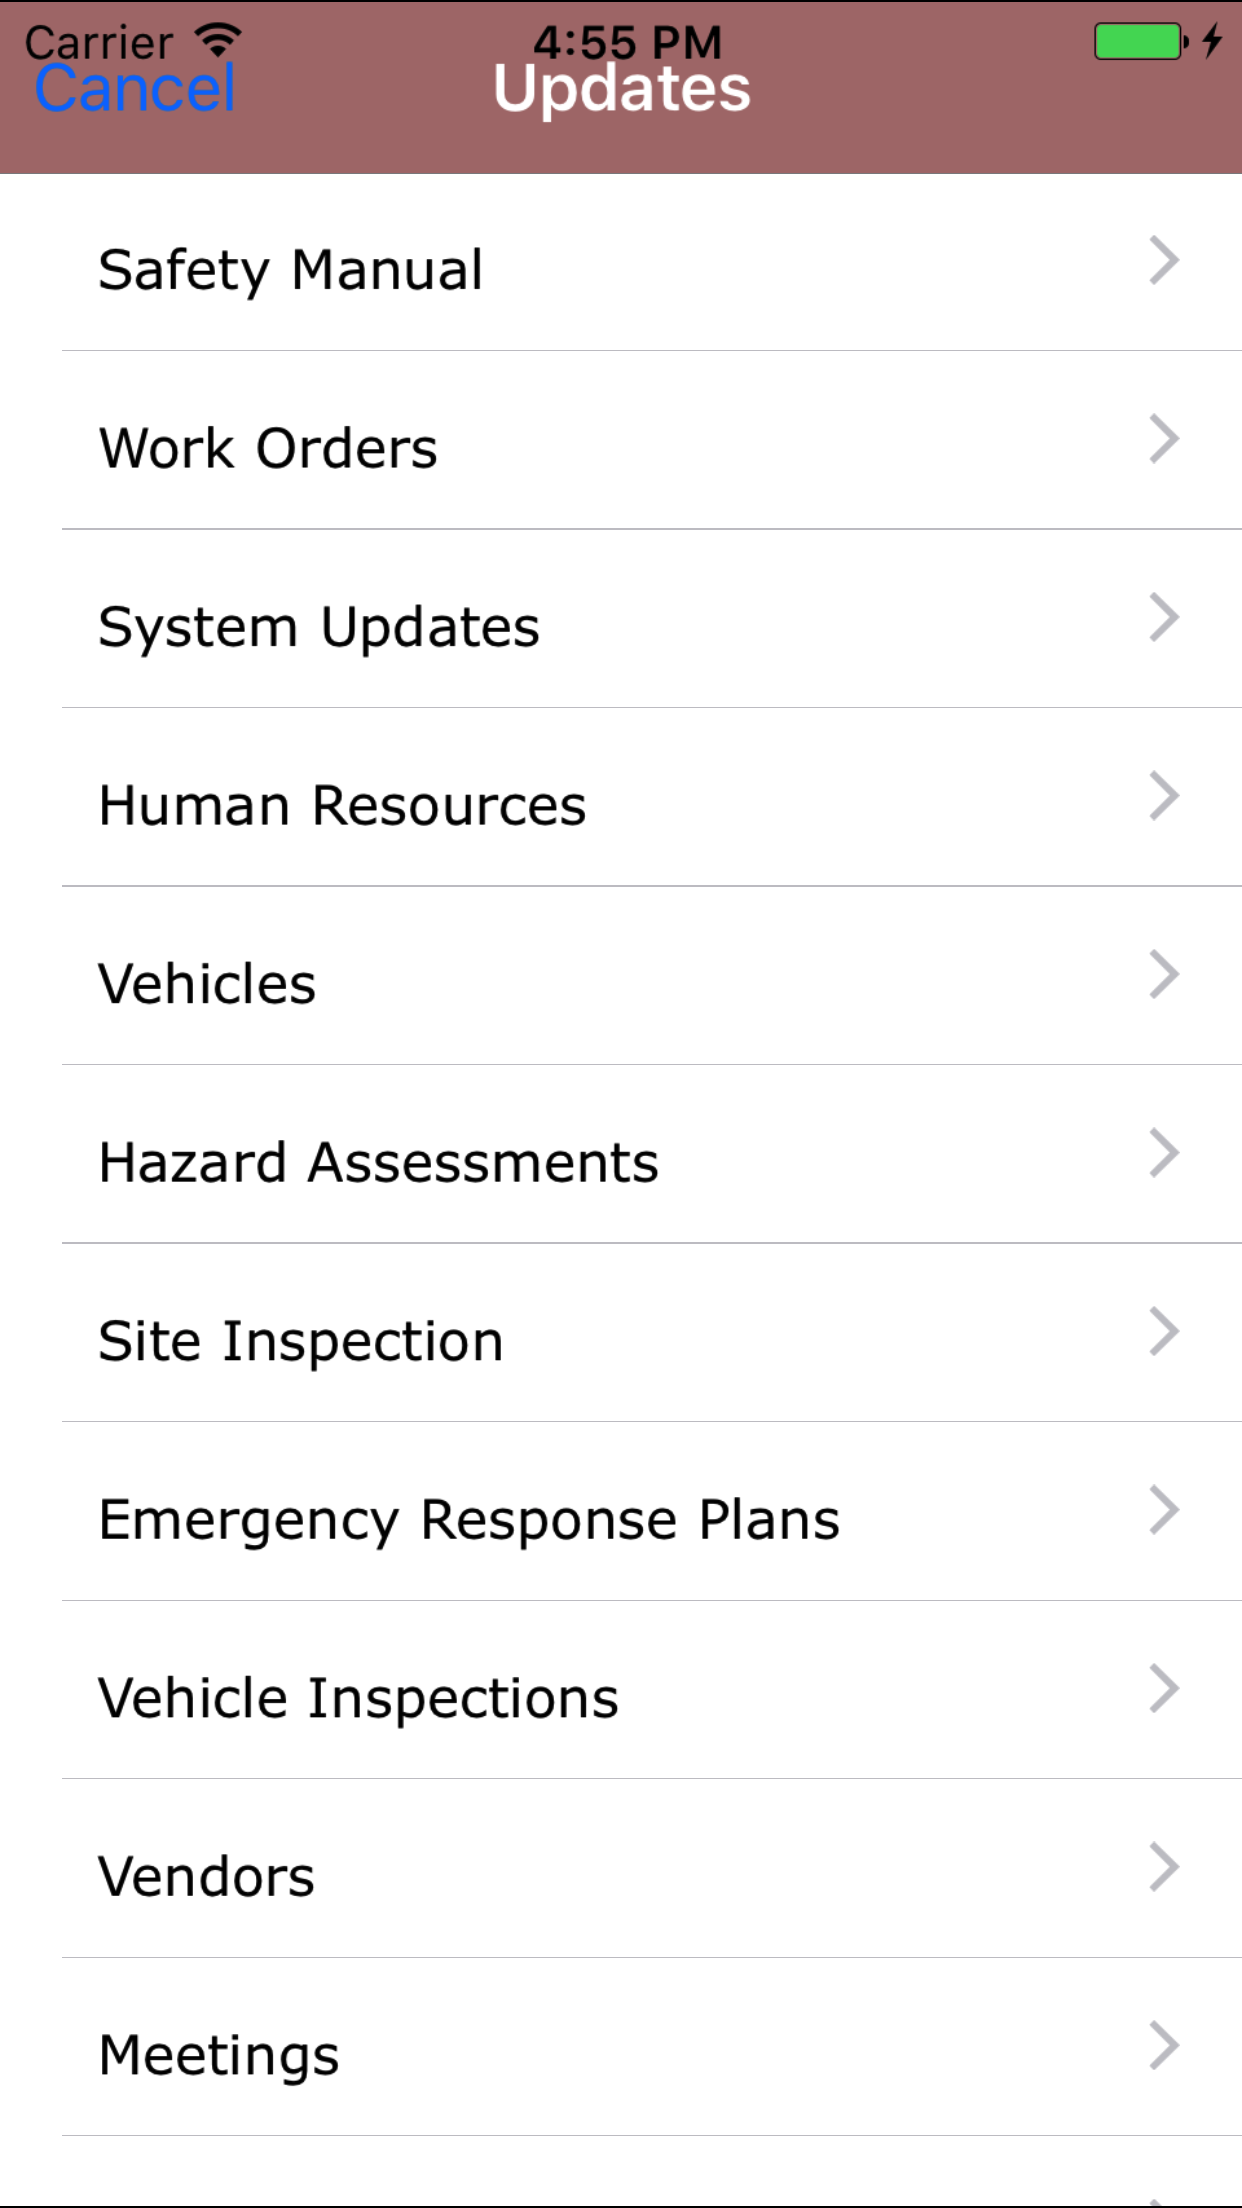
18.Update Meetings |
|
As employees create meetings others will have to update their phones in order to have a copy of meetings on their phone.
Steps
- From the Menu screen, tap the Updates button.
- Scroll the list of sections until you find the Meetings button.
- Tap on the Meetings button.
|
|
|
|
| Step 1 |
|
|
| Step 2 |
|
|