Manual Web Site Manual

Timecard

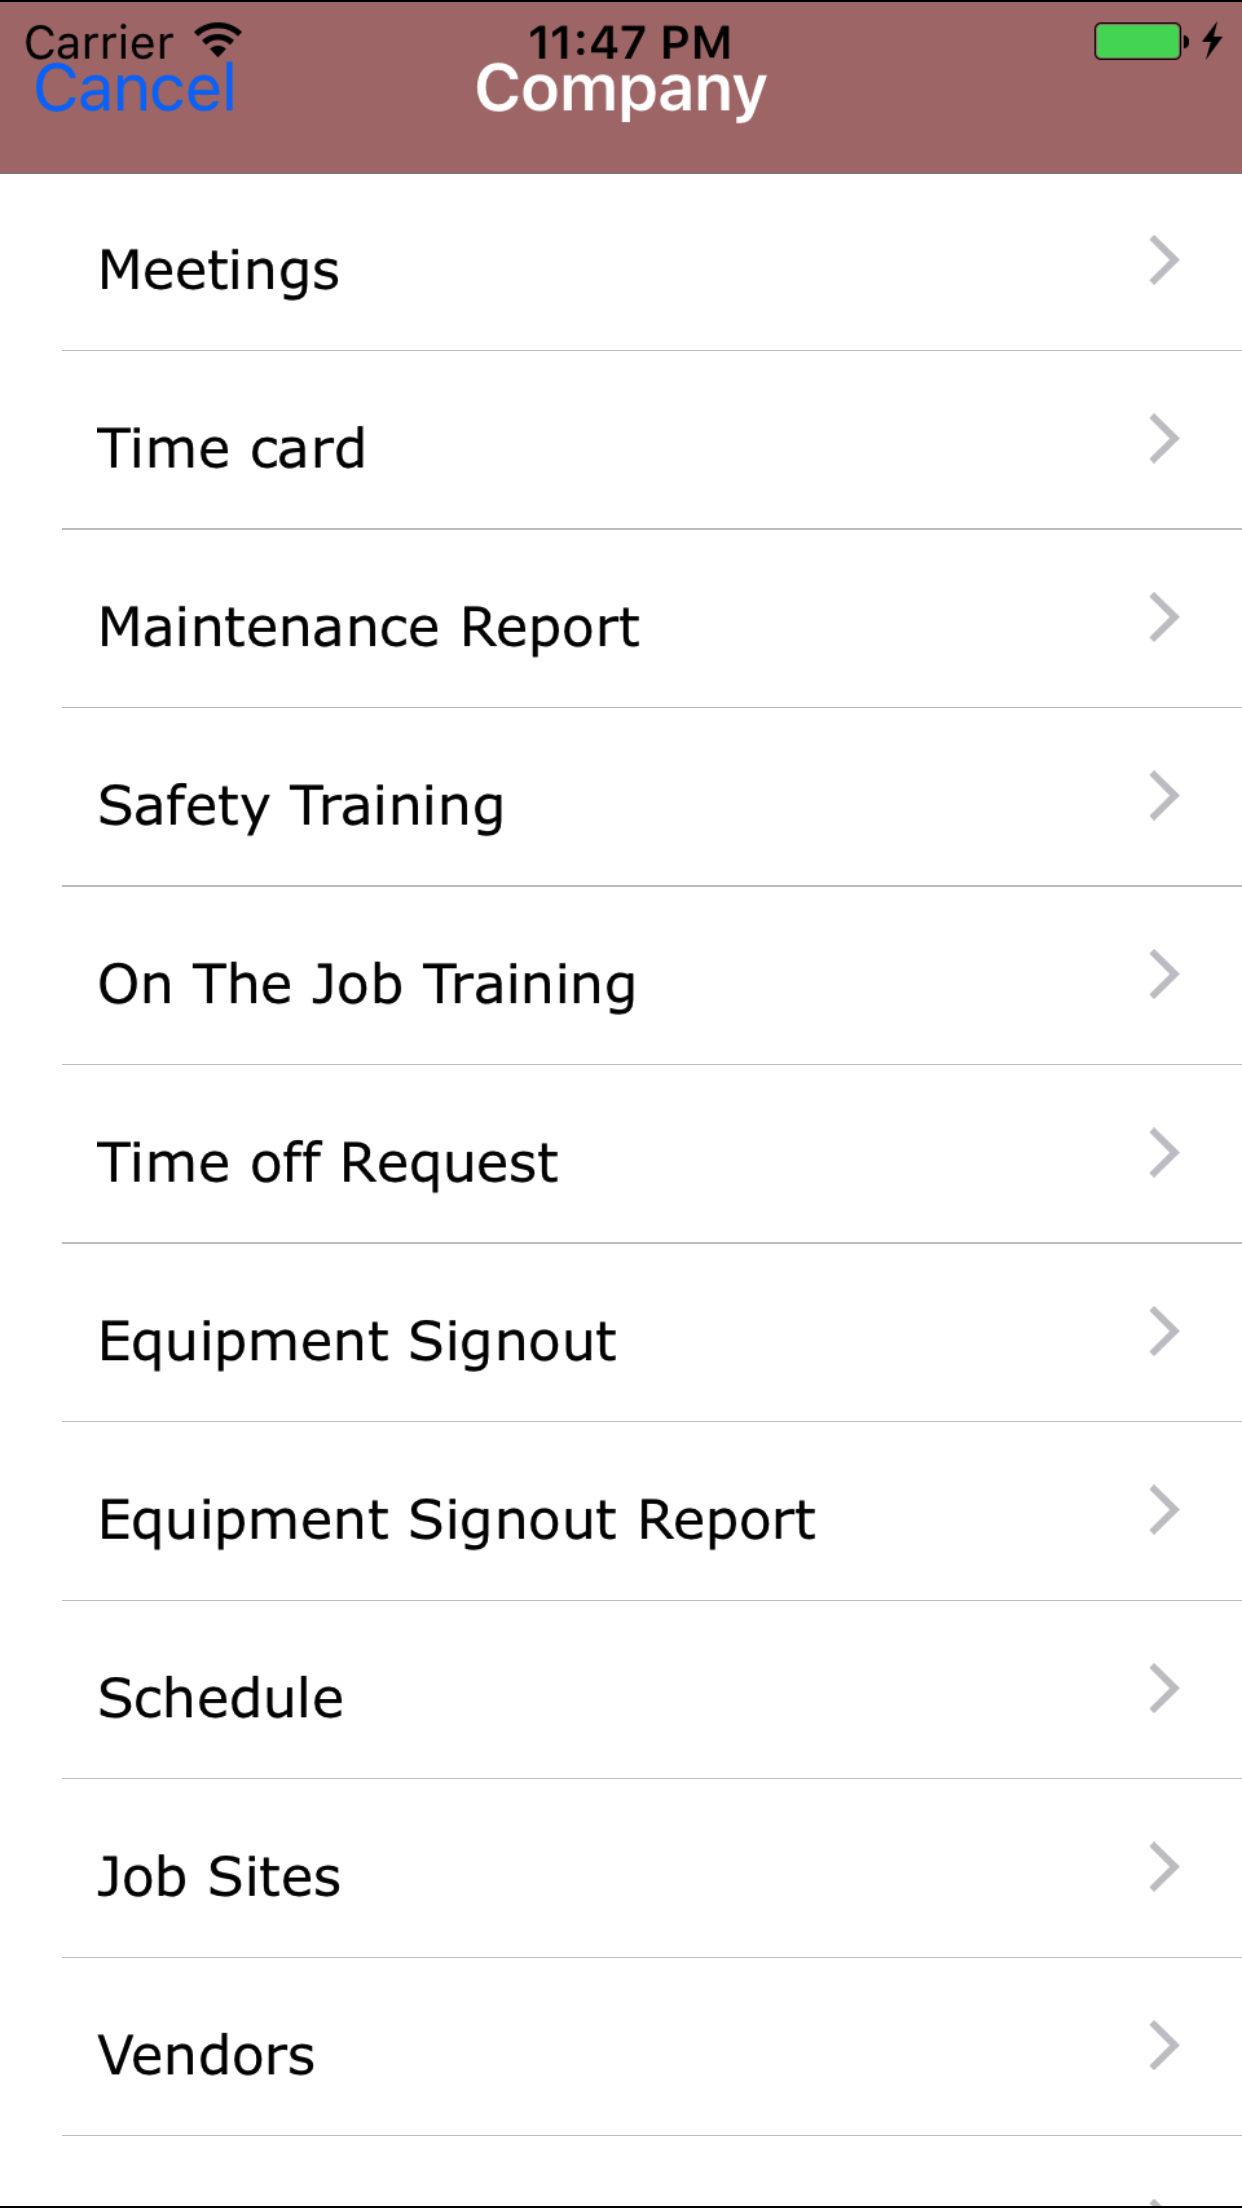
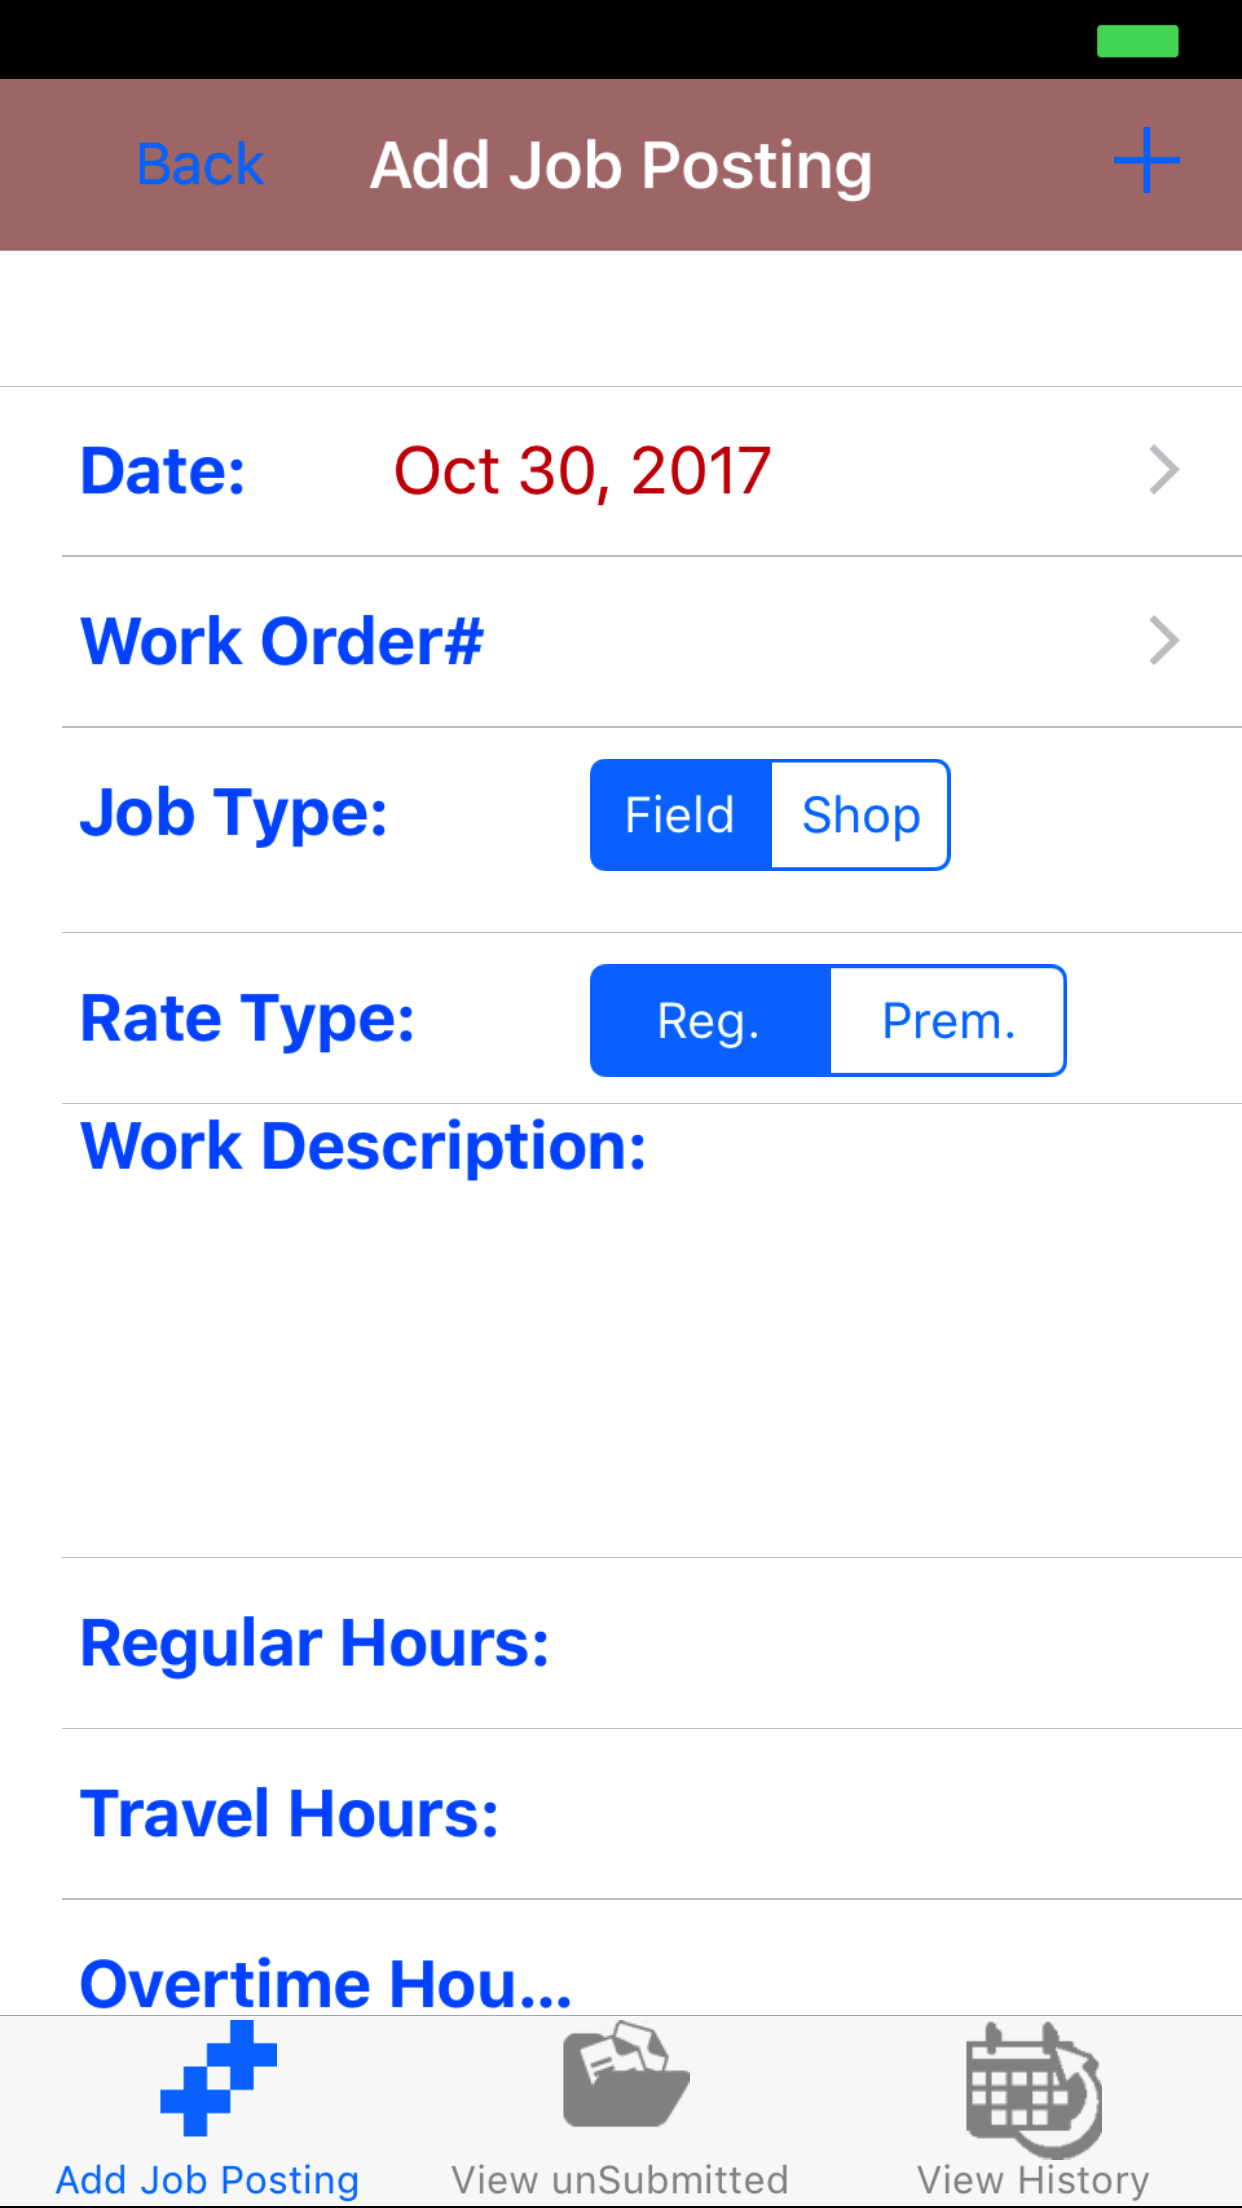
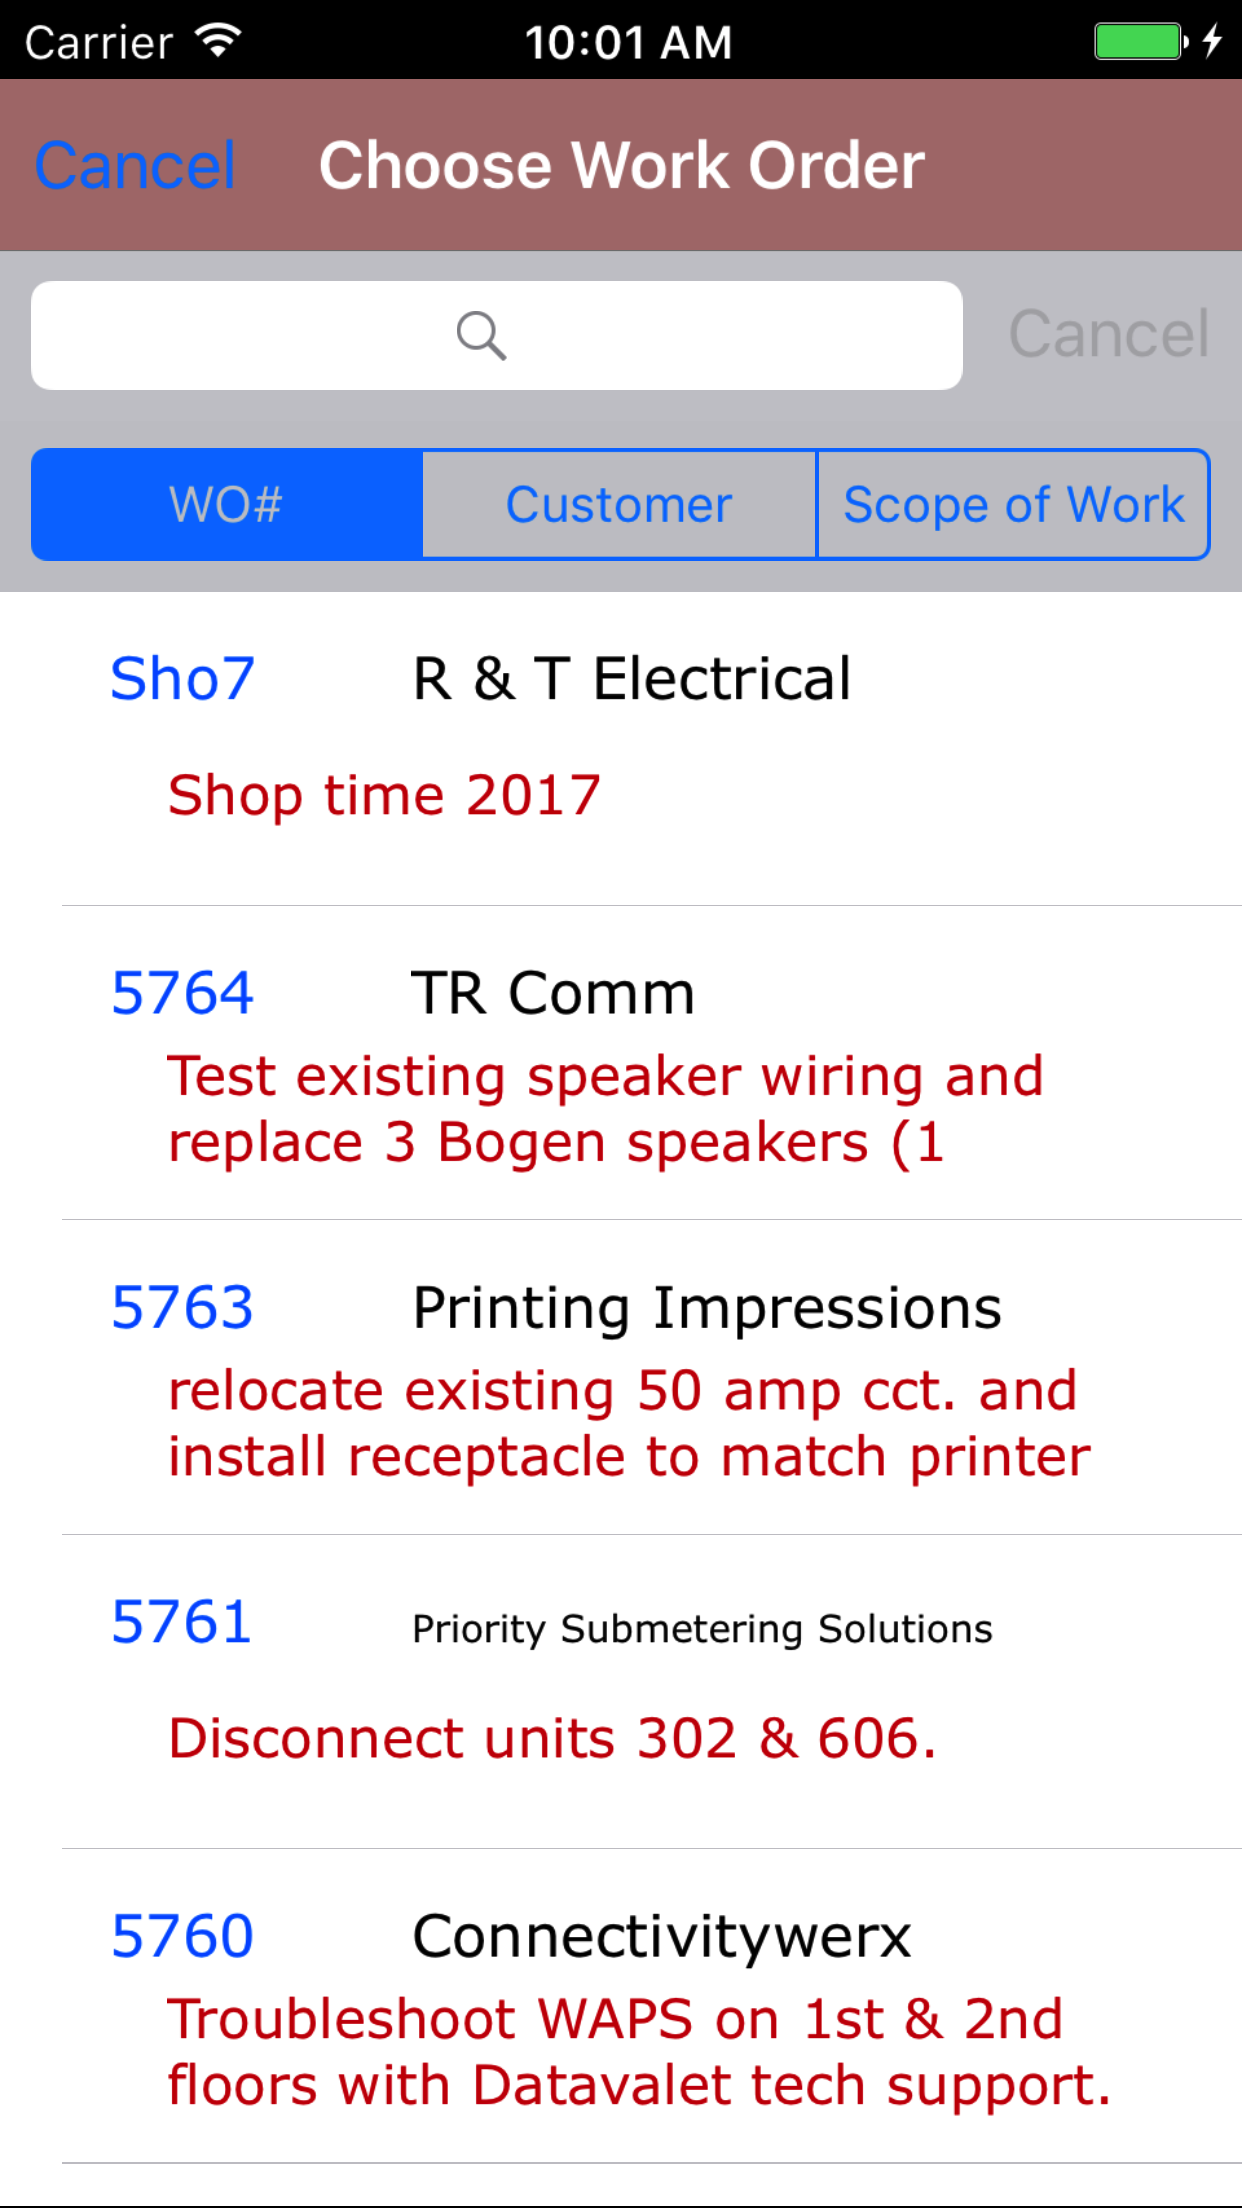
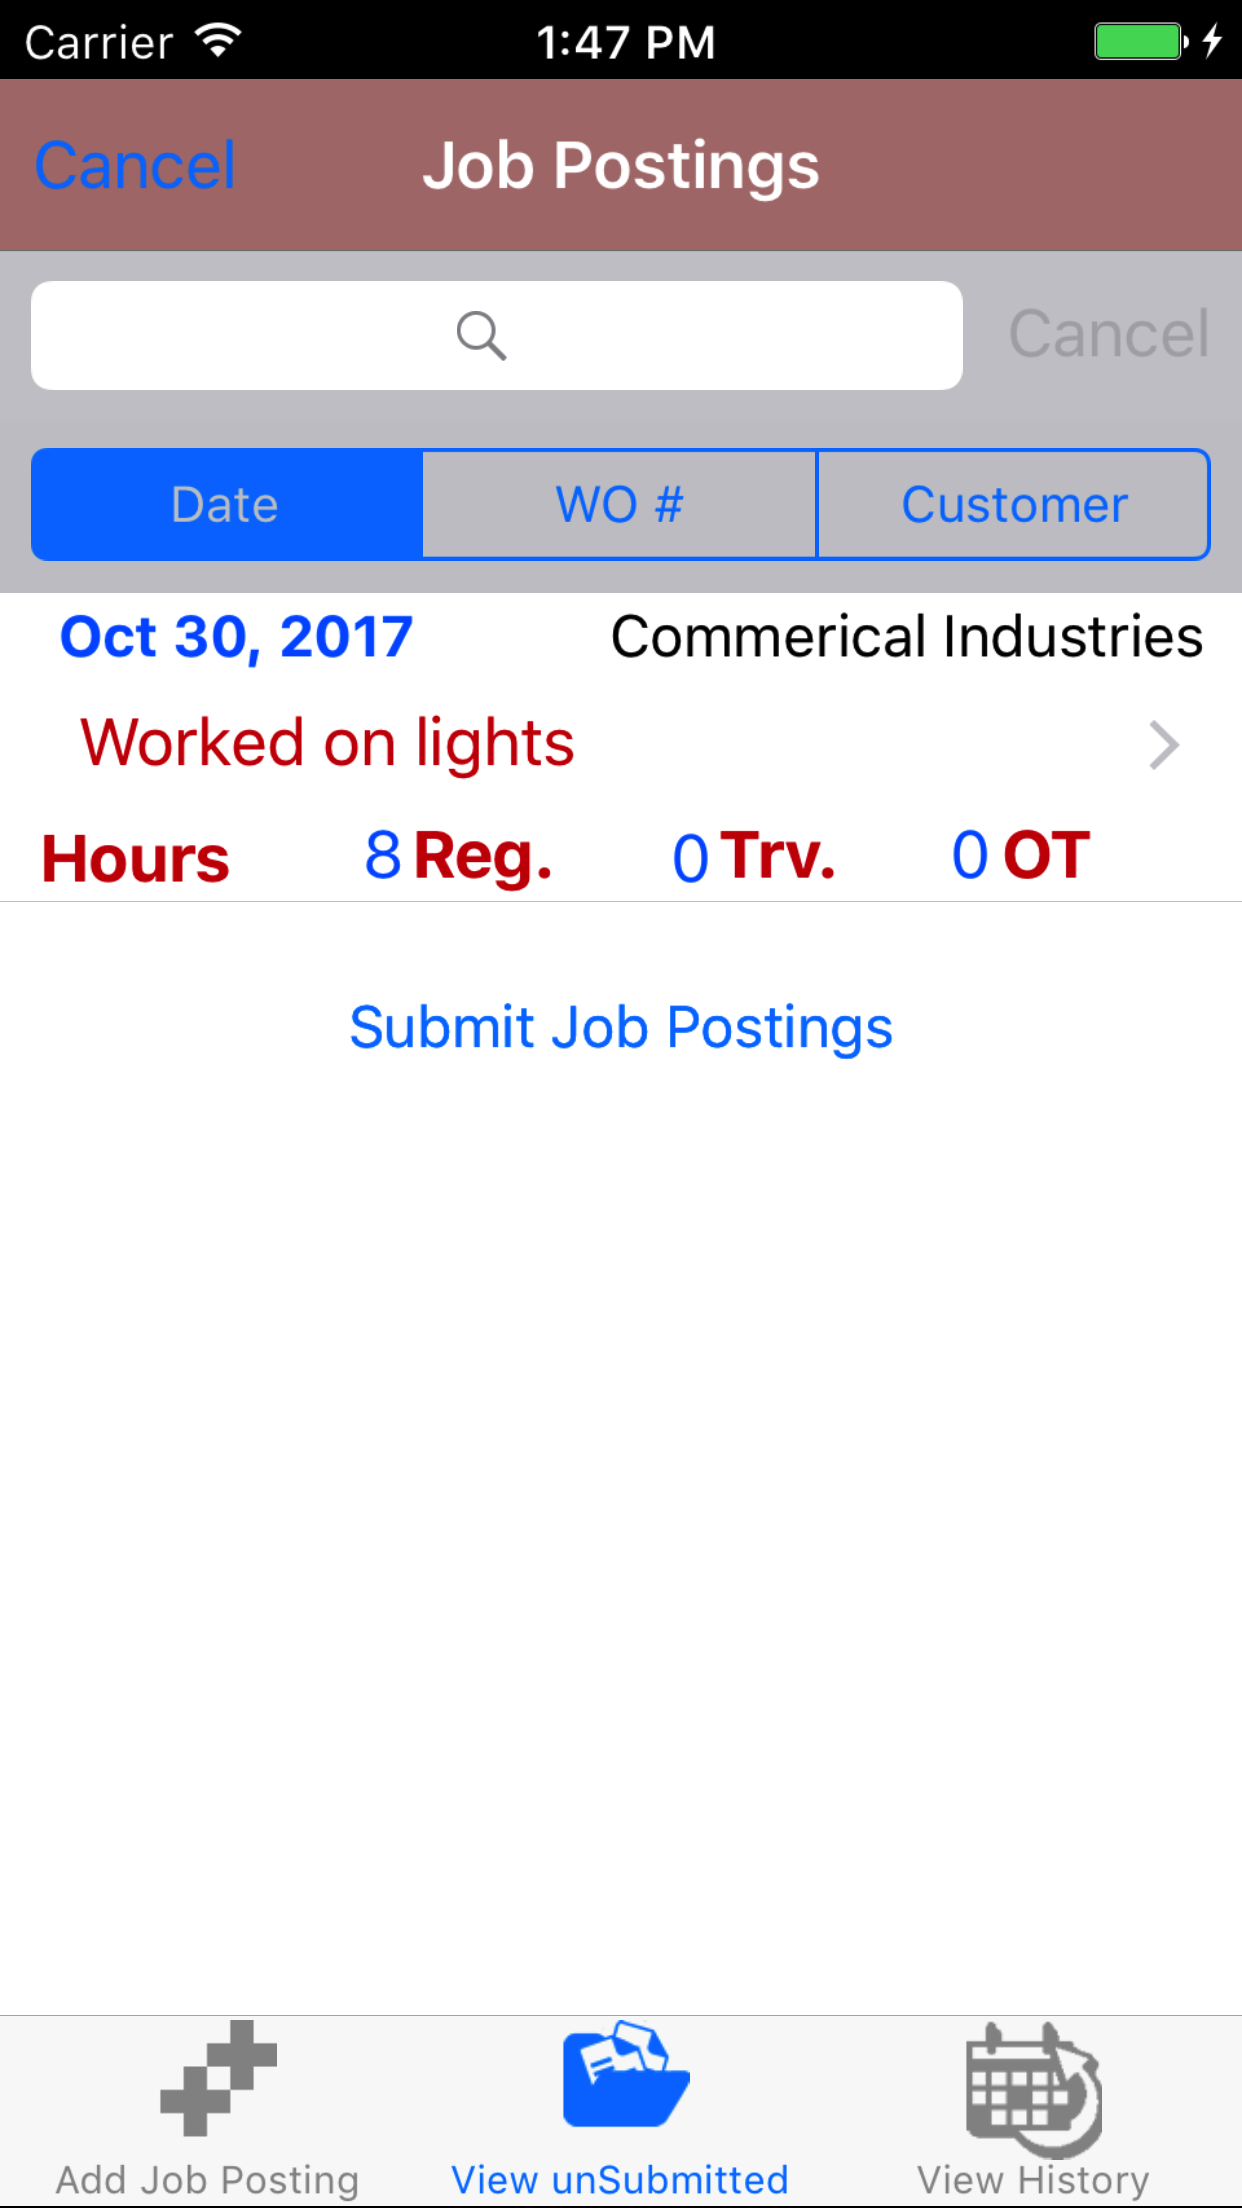
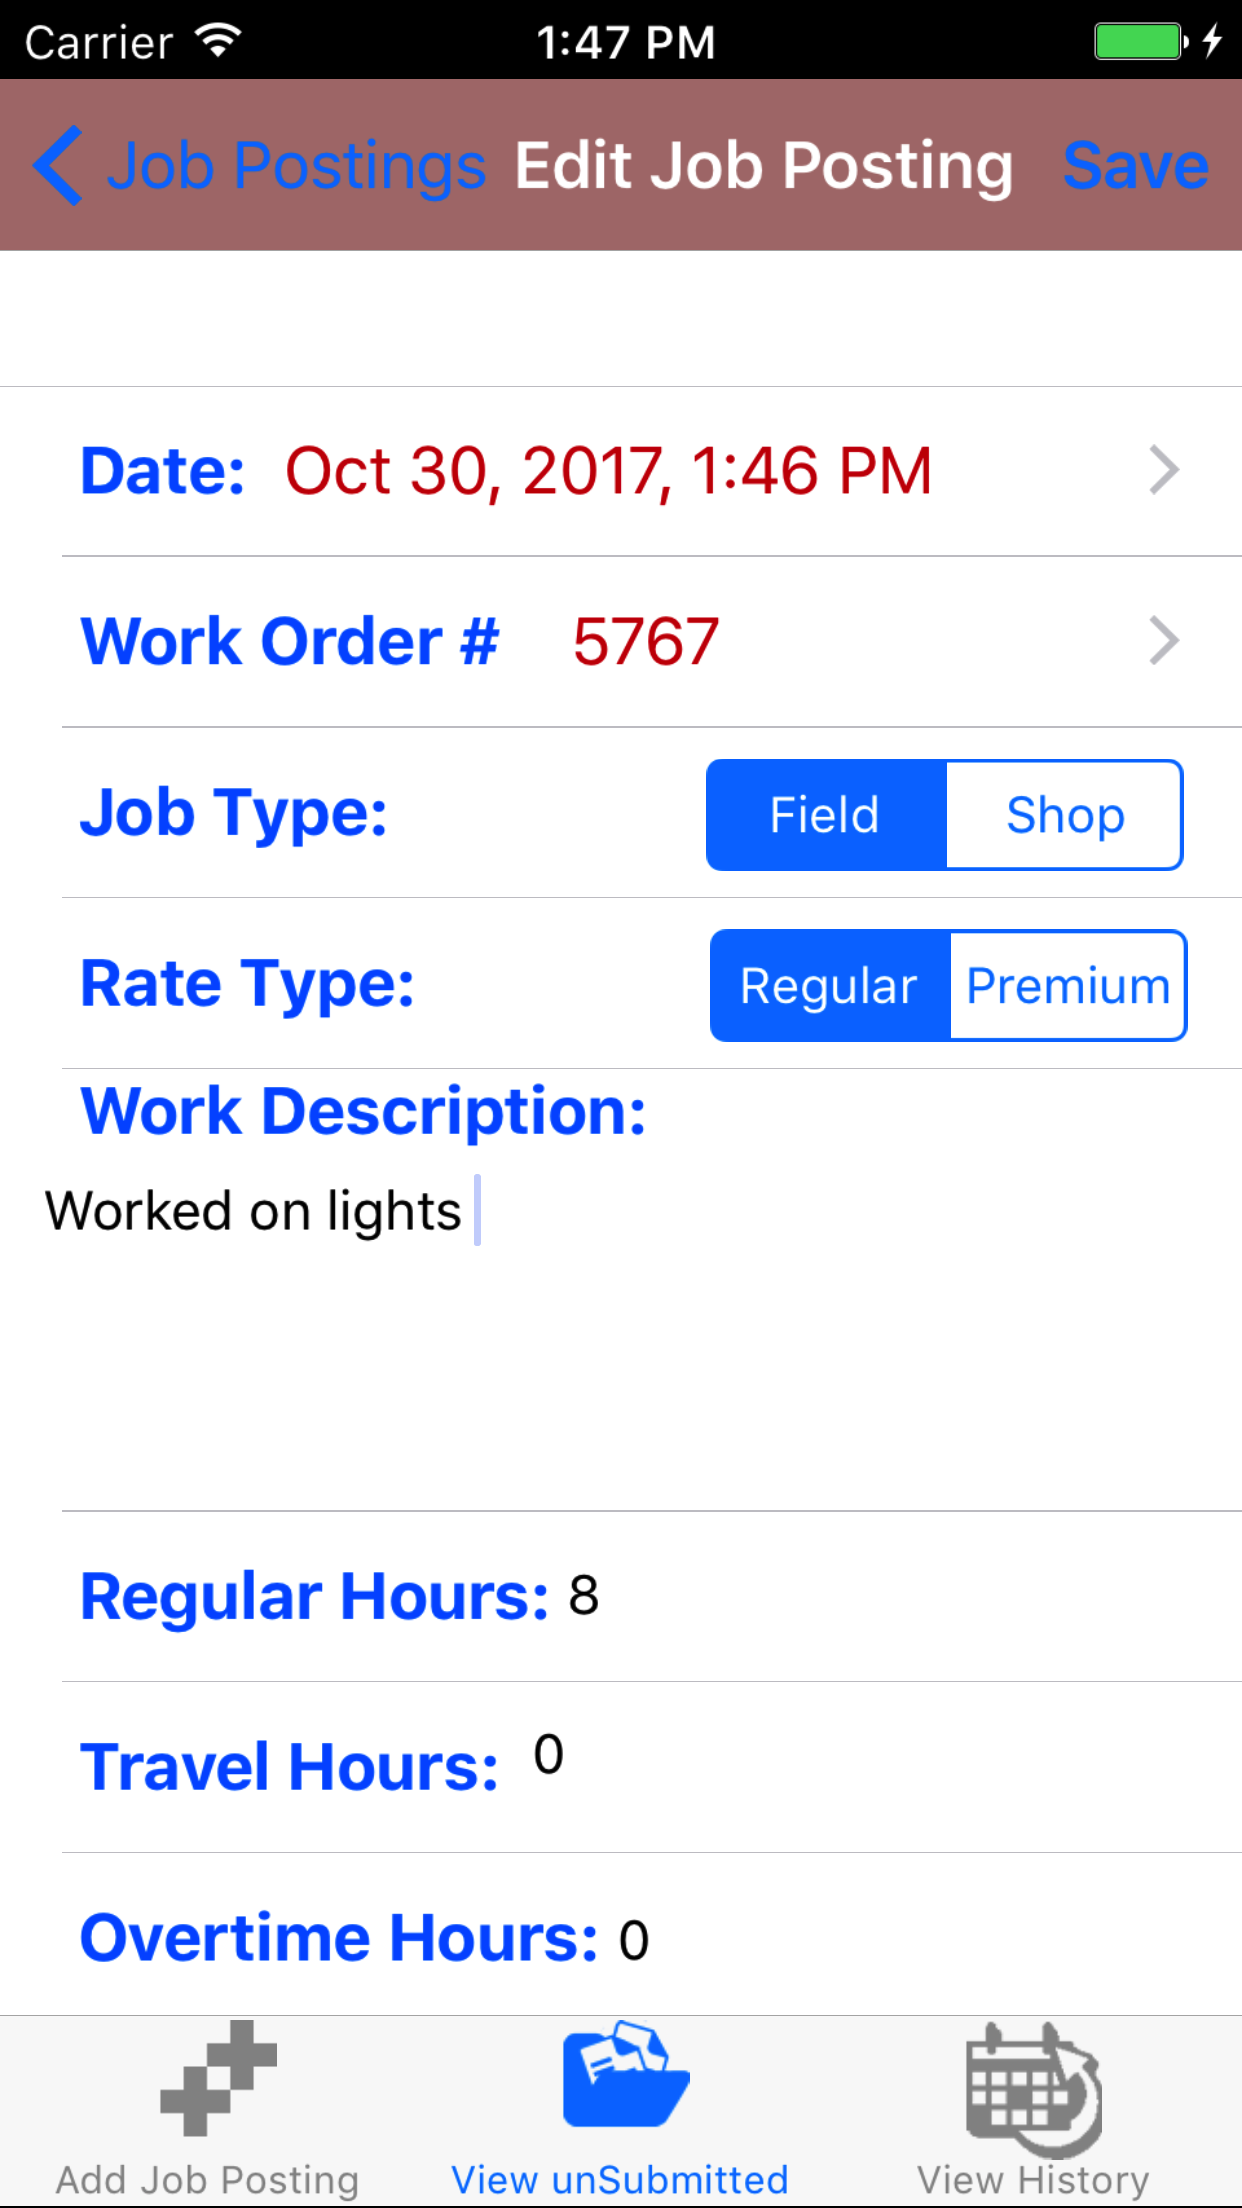
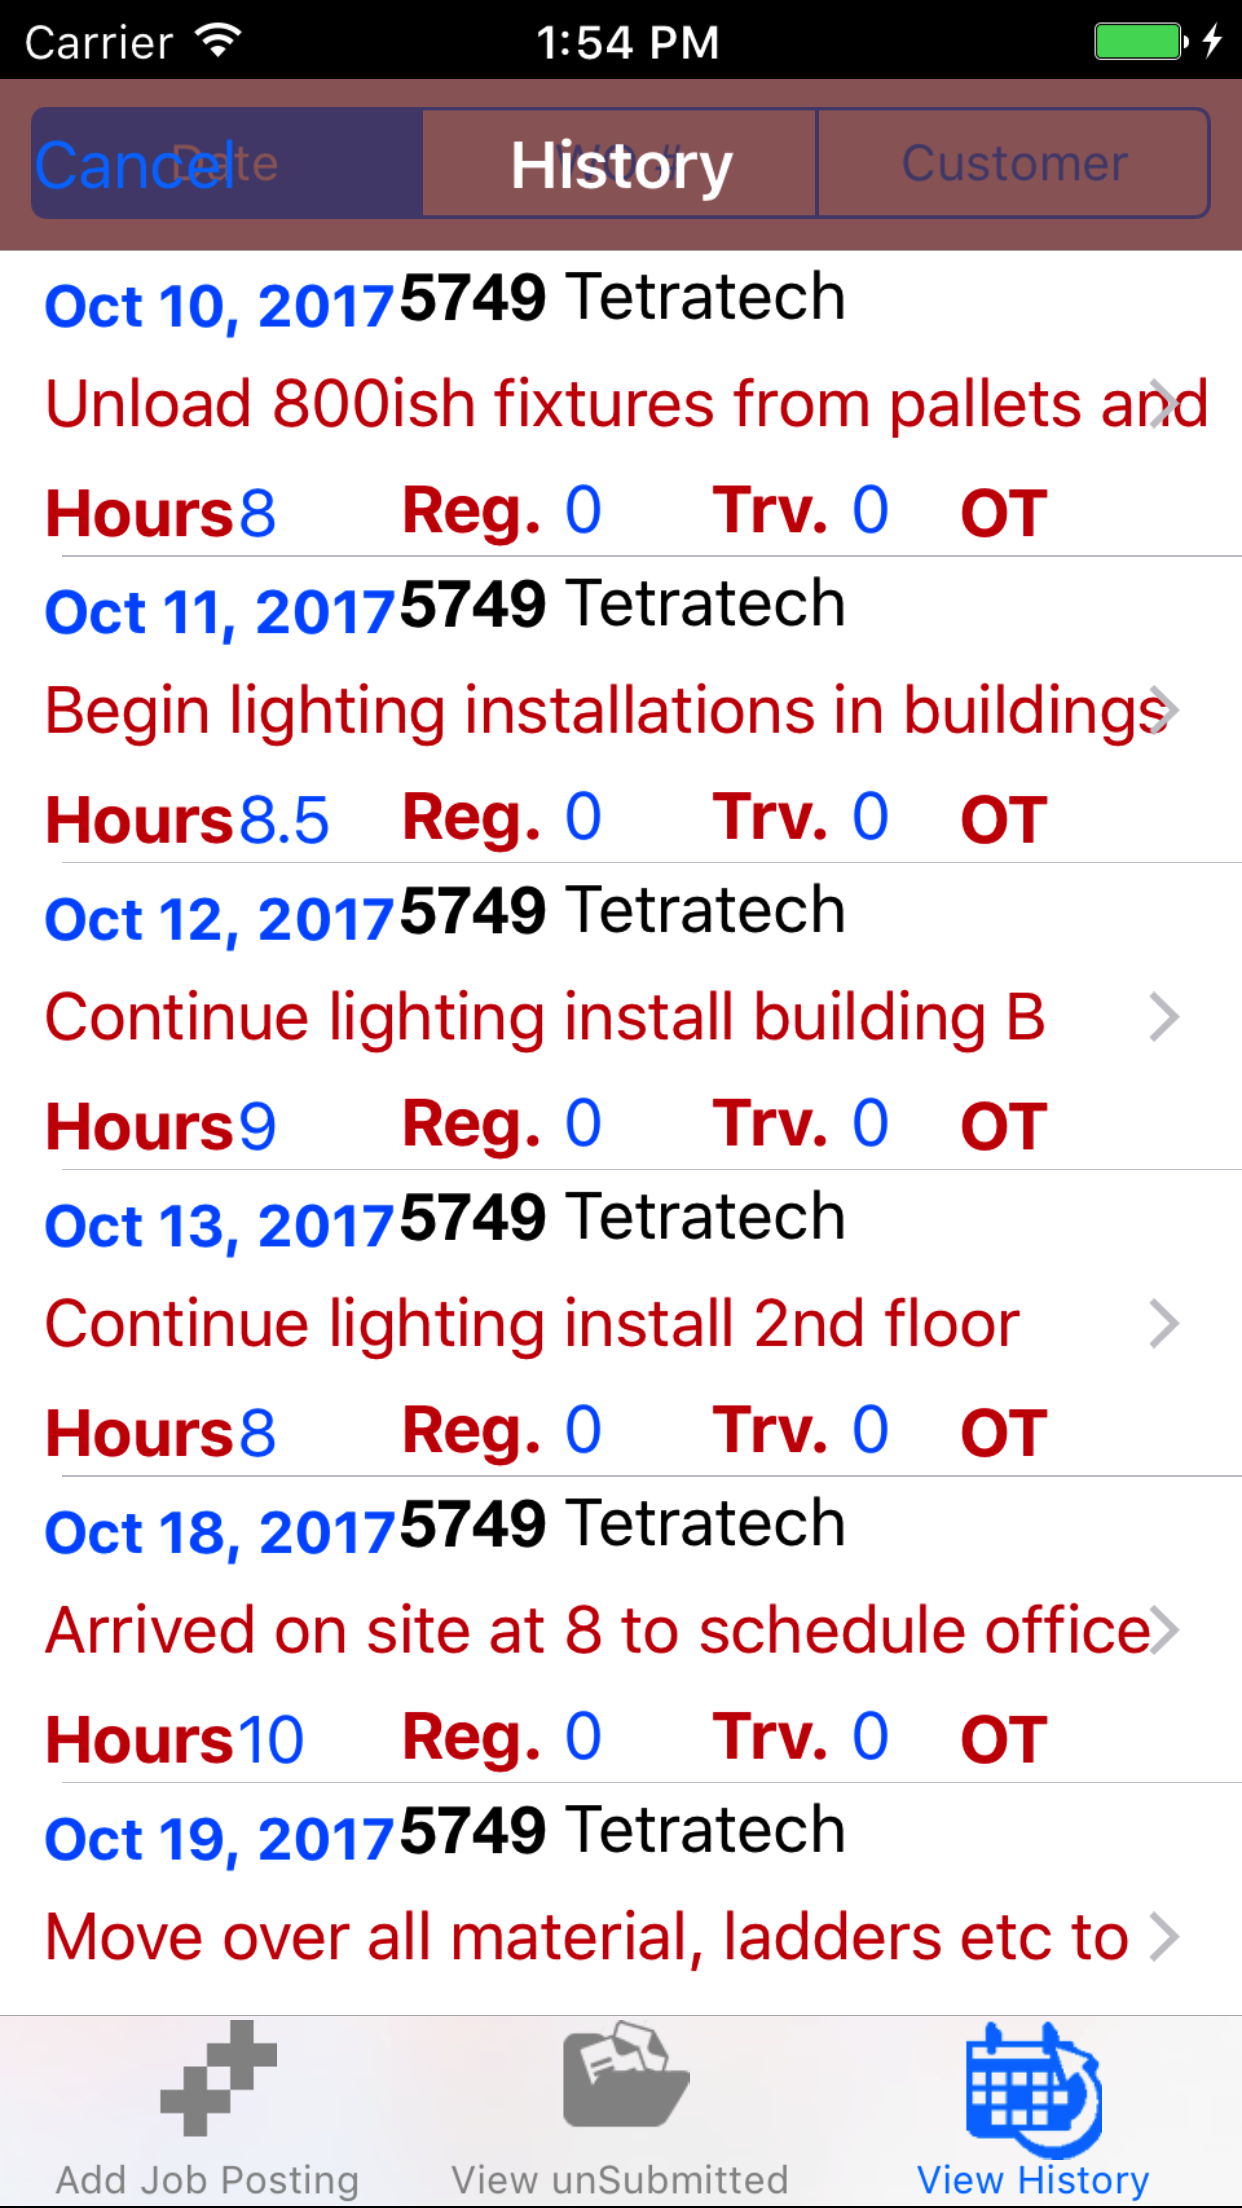
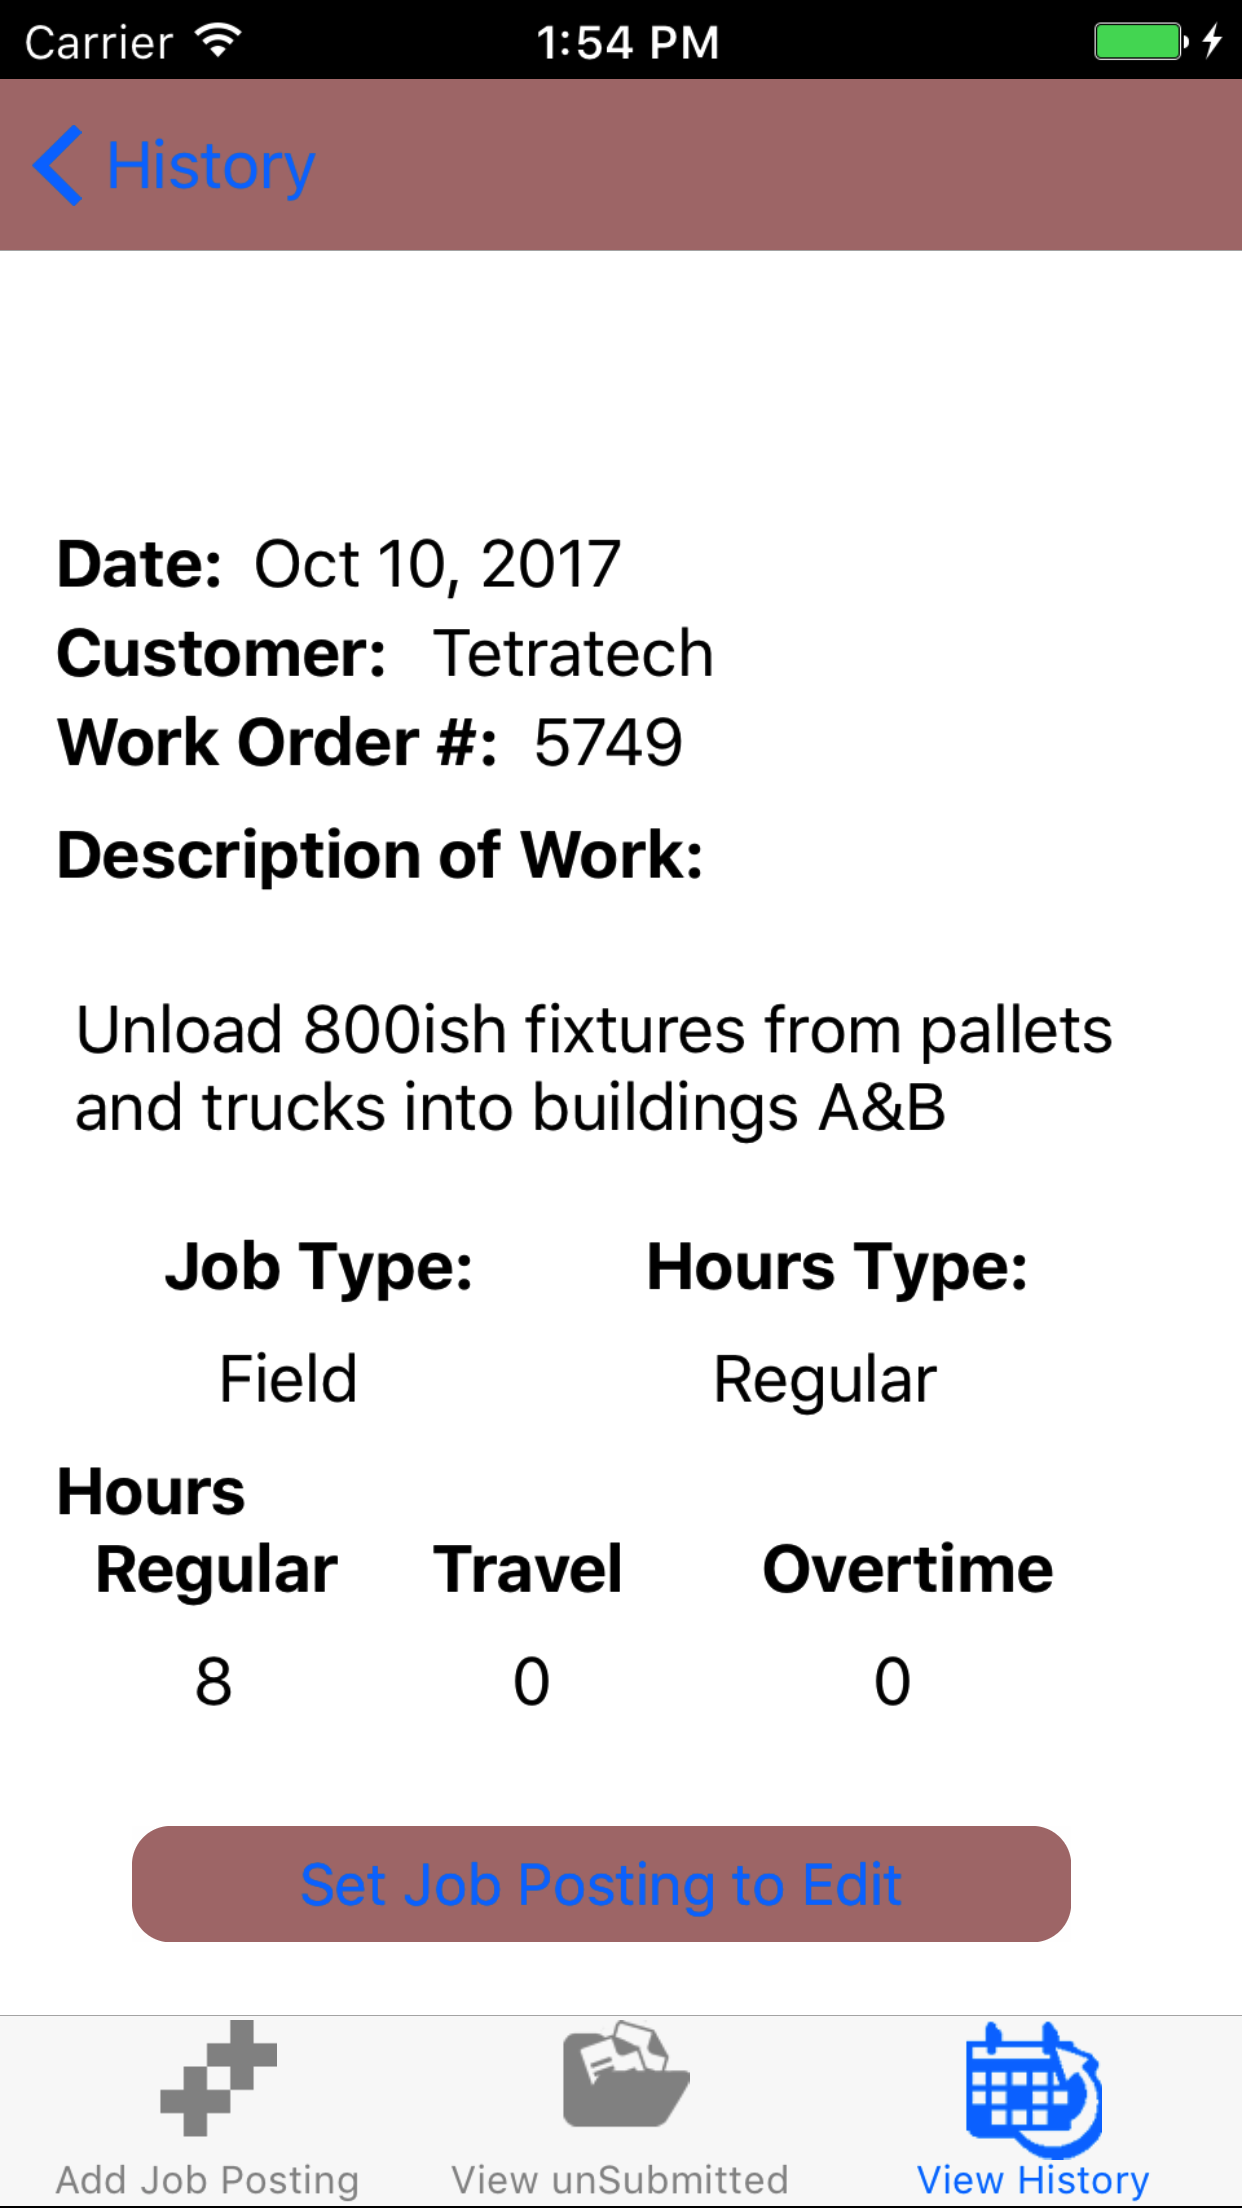
The Timecard section allows staff to enter their hours worked on specific work orders, with a description of the work completed and a field marking the time spent working as either field work or shop time. The time entered can be entered in up to seven different types of time, depending on a companies timecard settings. R & T Electric Pro tracks the total hours worked on work orders, job sites and for customers.

Timecard entries themselves and total hours entered are important to a companies safety program along with the corresponding hazard assessments and emergency response plans are used to calculate if companies are completing enough hazard assessments and emergency response plans.

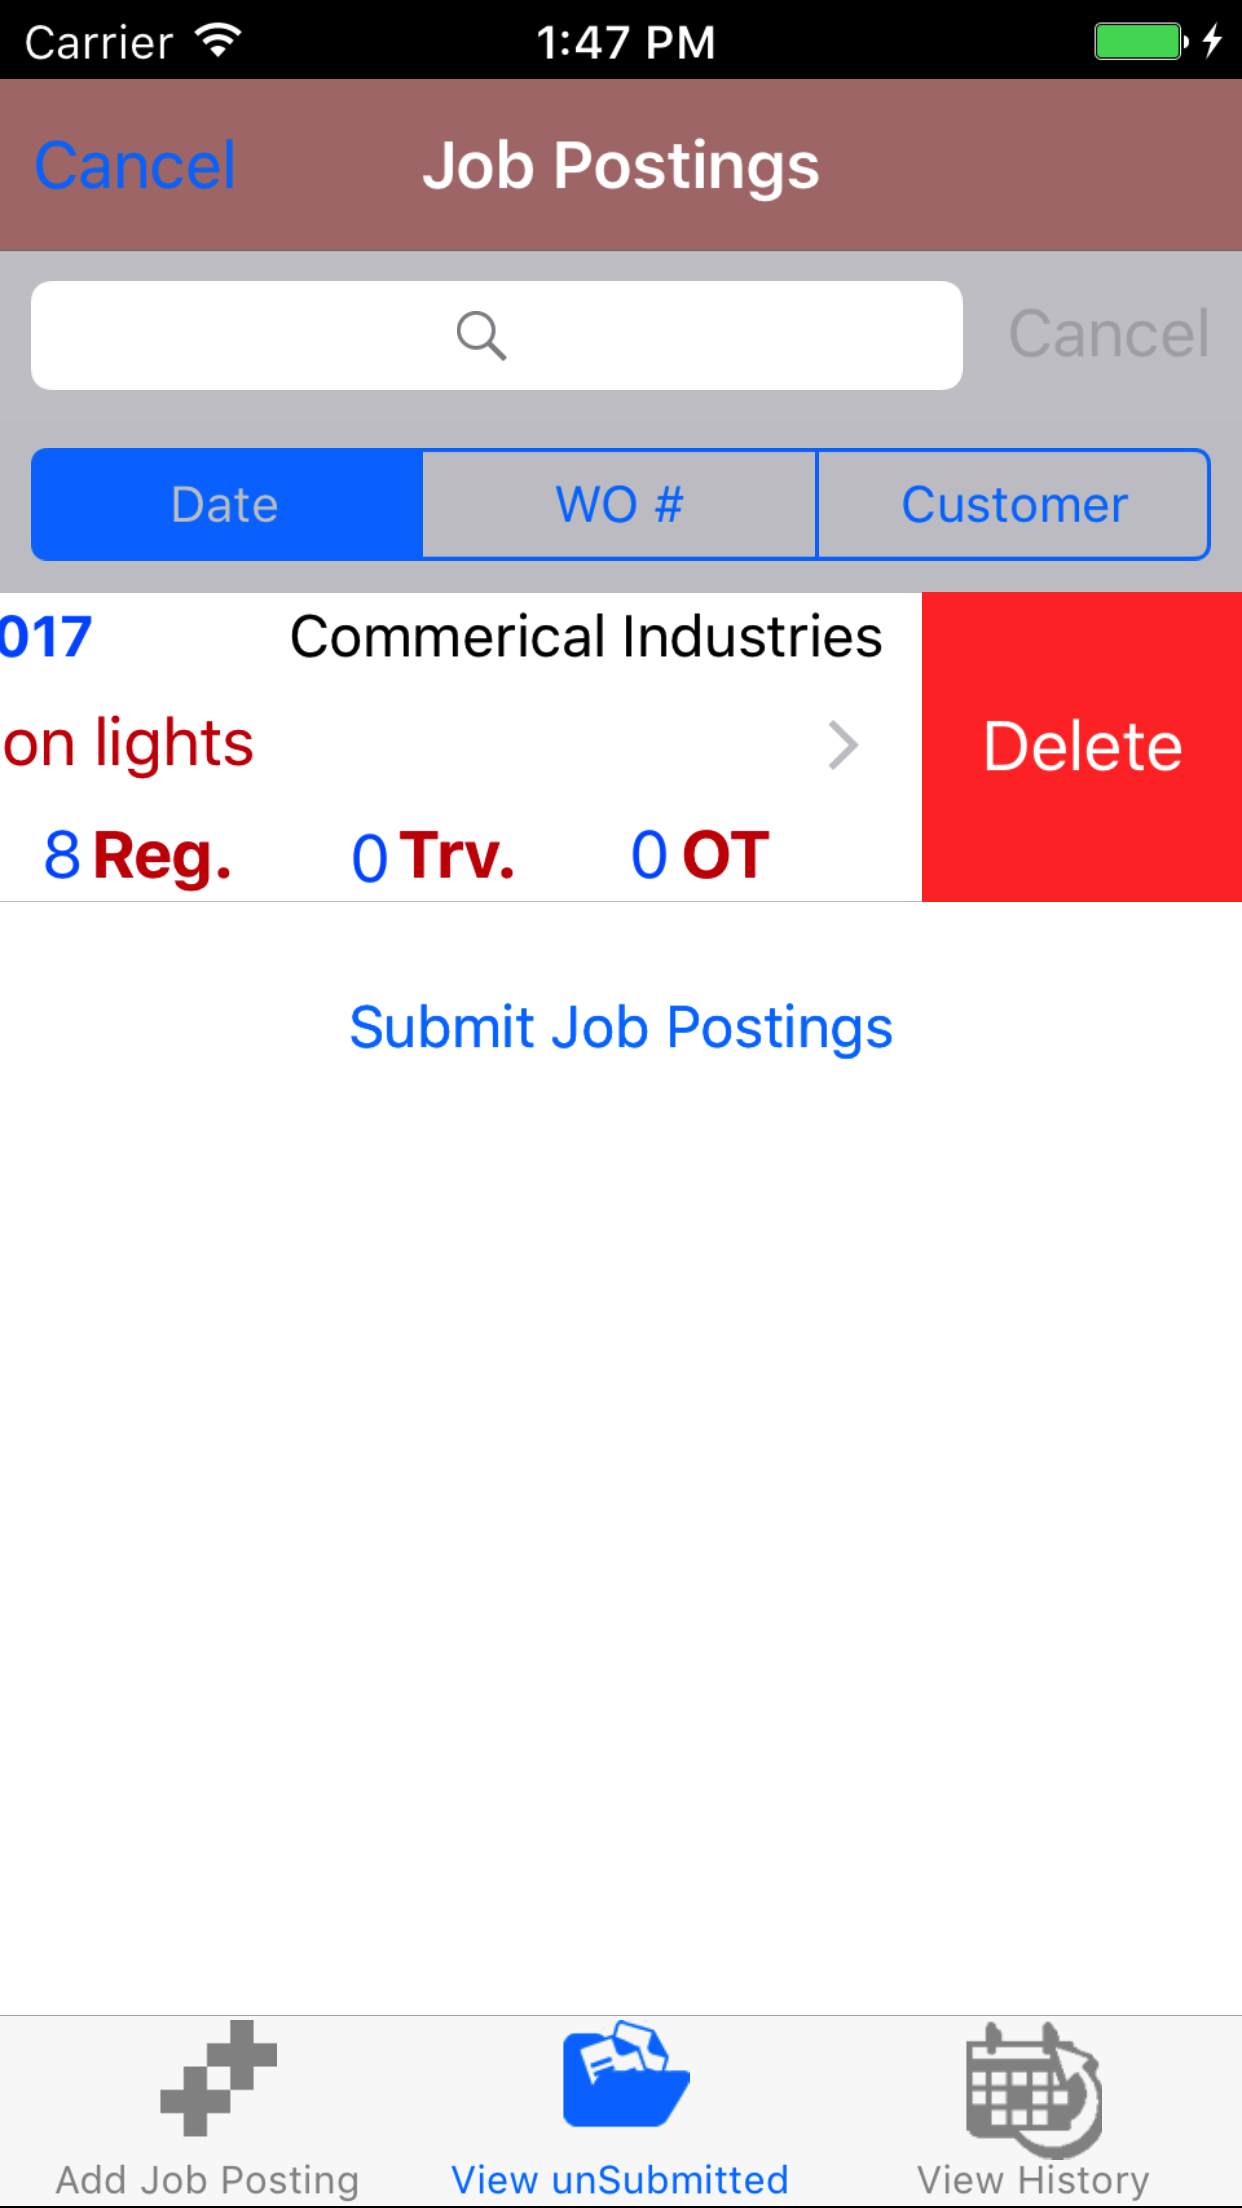
When Timecard entries are submitted to R & T Electric Pro a email is sent to the companies representative, with a record of what hours and what work order was worked on. The email also informs the representative if the hours or job description have been edited.

Configuring how often Hazard Assessments are to Occur

How often hazard assessments must occur is a function of your companies policy regarding hazard assessments. To configure Safety Net for how often hazard assessments should occur can be configured in the company safety settings.

Management, Office Staff and Safety Officers can edit how often hazard assessments should occur in the Company section when they edit the Company Safety settings. For more information about configuring your company safety settings in this web site manual click here to view the company section.

Configuring how often Emergency Response Plans are to Occur

How often emergency response plans must occur is a function of your companies policy regarding emergency response plans. To configure Safety Net for how often emergency response plans should occur can be configured in the company safety settings.

Management, Office Staff and Safety Officers can edit how often emergency response plans should occur in the Company section when they edit the Company Safety settings. For more information about configuring your company safety settings in this web site manual click here to view the company section.

Configuring Company Timecard Settings

Companies can configure up to seven separate time card hourly fields to capture your companies type of work completed. For each active field companies can have those fields count against apprenticeship hours.

Management, Office Staff and Safety Officers can edit companies timecard settings in the Timecard Settings section. For more information about configuring your timecard settings in this web site manual click here to view the timecard settings section.

Configuring Timecard Submission Email Alert

The company representative that receives a email from R & T Electric Pro, when a timecard submission occurs is a function of who is set up to receive the Timecard Submission. To configure Safety Net for whom receives receives this email alert in the Company Email Alert section.

Management, Office Staff and Safety Officers can edit who should receive the Timecard Submission email alert in the company email alert section. For more information about configuring your company email alerts in this web site manual click here to view the company email alert section.

Table of Contents

#Section Name#Section Name#Section Name
1Add Timecard Entry 2Look Up un submitted Timecard Entry 3Edit Timecard Entry
4Submit Timecard Entries 5Delete Timecard Entries 6View Historic Timecard Entries
7Set Timecard Entry Active 8Update Timecard Entries

1.Add Timecard Entry

At the end of the day/shift, a Timecard entry should be created for the work completed for that day/shift, its important that timecard entries are done as soon as possible so that field staff can write a accurate description of the work completed and that the hours completed of work are up to date.

Steps
  1. From the Main Menu screen, tap the Company button.
  2. Then tap on the Timecard button to open the Timecard section.
  3. This opens Timecard explantation screen, which gives the user a breakdown of the companies timecard settings. Tap on the Next button to open the Add Timecard entry screen.
  4. Date: The date field will mark the date the work was done.
    1. Tap the Date field to open the Choose Date screen.
    2. Scroll the date wheel on the far left of the screen until the desired date is highlighted.
    3. Return to the Add Timecard Entry screen by either tapping Save in the top right corner to select the highlighted date or tapping Cancel in the top left corner to leave the Date: field unchanged.
  5. Tap the Work Order # field to open the Choose Work Order screen.
  6. Work orders are listed in descending order with the work order number in blue text, the customer name in black text, and the scope of work in red text.

    Note: New work orders are not automatically added to the list when they are created, so it may be necessary to update the list click here to view information about updating for the desired work order to be included in the list.

    To Search Work Orders: Pull down on the list view, the search is defaulted to search by date enter the date in following format YYYY-MM-DD. The other options for the Work Order search are by work order number and customer. Enter your search criteria and click the Search button.

    1. Scroll the list of work orders until the desired work order is displayed on the screen.
    2. Tap the desired work order to select it or tap Back in the top left corner to leave the Work Order # field unchanged and return to the Add Hazard Assessment screen.
    3. Return to the Add Timecard Entry screen by either tapping Save in the top right corner to select the highlighted date or tapping Cancel in the top left corner to leave the Work Order field unchanged.
  7. Job Type: The Job Type Field should be set to Field when the work being done on the work order is being done on the job site. It should be set to Shop when the work being done on the work order is not being done on the job site. For example picking up material, delivering material, filling in paperwork all of these tasks do not require field staff to complete safety paperwork.
    1. Tap Field on the Field|Shop selector to indicate that a field work was done.
    2. Tap Shop on the Field|Shop selector to indicate that a shop work was done.
  8. Work Description: The Work Description field allows field staff to enter a description of the work they completed for the day/shift. The character limit of this field is 500.
  9. Depending on a companies timecard settings the number of time entry fields will vary between one and seven. Each field will appear with the name.

  10. Time Entry Fields: Each time entry field allows field staff to enter the number of hours of work completed on a given date/shift for a given work order and date.
  11. Tap the + icon in the top right corner to add the Timecard Entry.
    • A pop-up message that reads Timecard Entry Added indicates that the Timecard Entry has been saved.
Step 1
Step 2
Step 3
Step 4
Step 5

2.Look Up un submitted Timecard Entry

Once a timecard entry has been created, it can be accessed on the View un submitted tab. From this tab field staff can:

  1. Edit the timecard entries
  2. Submit timecard entries

Once in the Timecard section

Steps
  1. Tap the second tab on the menu, the Un submitted view. If their are timecard entries to view they will be listed with the date in blue, the work order number in red beside the customer name in black on the first line. The second line will be the entered work description in black and below that will be the list of time entry fields in blue with the corresponding hours in black.
  2. To Search Timecard Entries: Pull down on the list view, the search is defaulted to search by date enter the date in following format YYYY-MM-DD. The other options for the Timecard Entry search are by work order number and customer. Enter your search criteria and click the Search button.

  3. Scroll the list of Timecard entries until the desired Timecard entry is displayed on the screen.
  4. Tap on the Timecard entry you would like to view. This loads the timecard entry.
Steps 1-3

3.Edit Timecard Entry

Once on the Timecard Entry you would like to Edit

Steps
  1. Date: The date field will mark the date the work was done.
    1. Tap the Date field to open the Choose Date screen.
    2. Scroll the date wheel on the far left of the screen until the desired date is highlighted.
    3. Return to the Add Timecard Entry screen by either tapping Save in the top right corner to select the highlighted date or tapping Cancel in the top left corner to leave the Date: field unchanged.
  2. Tap the Work Order # field to open the Choose Work Order screen.
  3. Work orders are listed in descending order with the work order number in blue text, the customer name in black text, and the scope of work in red text.

    Note: New work orders are not automatically added to the list when they are created, so it may be necessary to update the list click here to view information about updating for the desired work order to be included in the list.

    To Search Work Orders: Pull down on the list view, the search is defaulted to search by date enter the date in following format YYYY-MM-DD. The other options for the Work Order search are by work order number and customer. Enter your search criteria and click the Search button.

    1. Scroll the list of work orders until the desired work order is displayed on the screen.
    2. Tap the desired work order to select it or tap Back in the top left corner to leave the Work Order # field unchanged and return to the Add Hazard Assessment screen.
    3. Return to the Add Timecard Entry screen by either tapping Save in the top right corner to select the highlighted date or tapping Cancel in the top left corner to leave the Work Order field unchanged.
  4. Job Type: The Job Type Field should be set to Field when the work being done on the work order is being done on the job site. It should be set to Shop when the work being done on the work order is not being done on the job site. For example picking up material, delivering material, filling in paperwork all of these tasks do not require field staff to complete safety paperwork.
    1. Tap Field on the Field|Shop selector to indicate that a field work was done.
    2. Tap Shop on the Field|Shop selector to indicate that a shop work was done.
  5. Work Description: The Work Description field allows field staff to enter a description of the work they completed for the day/shift. The character limit of this field is 500.
  6. Depending on a companies timecard settings the number of time entry fields will vary between one and seven. Each field will appear with the name.

  7. Time Entry Fields: Each time entry field allows field staff to enter the number of hours of work completed on a given date/shift for a given work order and date.
  8. Tap Save in the top right corner to save any changes to the Timecard entry.
    • A pop-up message that reads Timecard entry have been Saved indicates that the timecard entry details have been saved.
Step 1
Step 2
Steps 3-6

4.Submit Timecard Entries

Once one or many timecard entries have been entered, the timecard entries need to be submitted to R & T Electric Pro.

Once in the Timecard section

Steps
  1. Tap the second tab on the menu, the Un submitted view.
  2. Scroll the to the end of the list of Timecard entries.
  3. Tap on the Submit Timecard Entries button.
    • A pop-up message that reads Timecard entry have been Submitted indicates that the timecard entries have been submitted to R & T Electric Pro.
Steps 1-3

5.Delete Timecard Entries

Once in the Timecard section

Steps
  1. Tap the second tab on the menu, the Un submitted view. If their are timecard entries to view they will be listed with the date in blue, the work order number in red beside the customer name in black on the first line. The second line will be the entered work description in black and below that will be the list of time entry fields in blue with the corresponding hours in black.
  2. To Search Timecard Entries: Pull down on the list view, the search is defaulted to search by date enter the date in following format YYYY-MM-DD. The other options for the Timecard Entry search are by work order number and customer. Enter your search criteria and click the Search button.

  3. Scroll the list of Timecard entries until the desired Timecard entry is displayed on the screen.
  4. Swipe from the right edge to the left to bring up the delete button for the timecard entry.
  5. Tap the Delete button. The timecard entry will be deleted from the IPhone application.
Steps 1-3

6.View Historic Timecard Entries

Once in the Timecard section

  1. Tap the third tab on the menu, the History tab of the main menu view. If their are timecard entries to view they will be listed with the date in blue, the work order number in red beside the customer name in black on the first line. The second line will be the entered work description in black and below that will be the list of time entry fields in blue with the corresponding hours in black.
  2. To Search Timecard Entries: Pull down on the list view, the search is defaulted to search by date enter the date in following format YYYY-MM-DD. The other options for the Timecard Entry search are by work order number and customer. Enter your search criteria and click the Search button.

  3. Scroll the list of Timecard Entry until the desired Timecard Entry is displayed on the screen.
  4. Tap on the Timecard entry you would like to view. This loads the timecard entry.
  5. View the details of the time card entry
Steps 1-3
Step 4

7.Set Timecard Entry Active

Once on the Historic Timecard entry you would like to make active.

Steps
  1. Tap on the Set Timecard Posting to Edit button on the bottom of the screen.
Step 1

8.Update Update Timecard Entries

To ensure field staff have the most up to date copy work orders and timecard entries a company is using make sure to update your phone on a regular basis.

Safety Net handles this for Timecard Entries, by updating Human Resources including: employee, safety training, customer, job site, work order, schedule and timecard information.

Steps
  1. From the Menu screen, tap the Updates button.
  2. Scroll the list of sections until you find the Human Resources button.
  3. Tap on the Human Resources button.
Step 1
Steps 2-3