Manual

Company Fall Protection Plan Ladder Check

Through SafetyNet's company fall protection plan ladder check section companies can manage the list of things to review a company wants their staff to keep in mind on fall protection plan. Fall Protection Plan will need to occur when a company employee is involved in work at height.

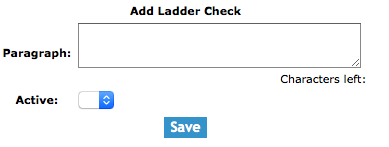
These fall protection plan ladder check are set up so companies can build a list of ladder checks their staff can review before starting work. Companies can choose from default ladder check SafetyNet provides. Companies may need to alter their fall protection plan ladder checks lists as things change over time, as safety regulations by companies have changed.

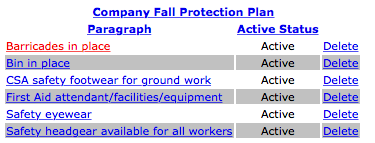
To view how your companies' fall protection plan will appear with all active methods of restraint for each hazard, pre checks, ladder checks and fall protection plan notes click the "Company Fall Protection Plan" link, which will show what the fall protection plan will look like.

The fall protection plan section is only available to users that have the fall protection plan section turned on for their users group. To change users access to fall protection plans, management and office staff can change access in Application Section to view the information about the Application Section Click Here

Table of Contents

#Section Name#Section Name#Section Name
1Add Company Fall Protection Plan Ladder Check 2Add Company Fall Protection Plan Ladder Check from Default 3Delete Company Fall Protection Plan Ladder Check
4Look up Company Fall Protection Plan Ladder Check 5Edit Company Fall Protection Plan Ladder Check

1.Add Company Fall Protection Plan Ladder Check

To add a Company Fall Protection Plan Ladder Check, click on the 'Add Company Fall Protection Plan Ladder Check' link.

On the next screen, under Add Company Fall Protection Ladder Check heading, select:

Fields

Paragraph: Allows the user to input the paragraph. Its best to be descriptive of what field staff should be considering before they begin their work at height. The character limit of this field is 250.

Active: Allows a user to select the active status. Only ladder checks set to active will be added to a fall protection plan.

Then click the 'Save' button. The edit company fall protection plan ladder check screen will load. From here, proceed to edit as per the instructions below.

2.Add Company Fall Protection Plan Ladder Check from Default

To add a Company fall protection plan ladder check from Default, click on the 'Add Company Fall Protection Plan Ladder Check From Default' link.

On the next screen, under Default Fall Protection Plan Ladder Check heading, select:

Then click the 'Add Default Ladder Check For Company' link of the default fall protection plan ladder check.

3.Delete Company Fall Protection Plan Ladder Check

Deleting company fall protection plan ladder check may have to be done if the company fall protection plan ladder checks was added to the system incorrectly. Only company fall protection plan ladder checks that have not do not have been included in a fall protection plan can be deleted.

To delete a company fall protection plan ladder check click the 'Delete' link of the company fall protection plan ladder check you want to delete.

4.Look up Company Fall Protection Plan Ladder Check

To get to the edit screen of a fall protection plan ladder check, click on the name of the company ladder check that you would like to edit.

5.Edit Company Fall Protection Plan Ladder Check

The company fall protection plan ladder check section allows users to edit the company fall protection plan ladder check. Ladder checks includes the paragraph descriptions, and active status.

Once on the edit fall protection plan ladder check screen

Fields

Paragraph: Allows the user to input the paragraph. Its best to be descriptive of what field staff should be considering before they begin their work at height. The character limit of this field is 250.

Active: Allows a user to select the active status. Only ladder checks set to active will be added to a fall protection plan.

Once the necessary information has been input, click the 'Save' button.