|
The safety investigation section allows a user to input the results of safety investigations performed on job sites for a specific work order after. Safety Investigations will need to occur
when a company employee is involved in a safety incident.
- Safety incident is when employees is injured or requires first aid.
- Near Miss is when no employees are injured or property is damaged.
- Property Damage is when no employees are injured, but property is damaged.
- Spill or Release is when there is a spill or release on a site.
These safety investigation tasks is set up in eight sections
- Incident Type
- Contact With
- Unsafe Acts
- Unsafe Conditions
- Personal Factors
- Job Factors
- Root Cause
- Prevention
Once a safety investigation is submitted:
- An email can be sent to the person in charge of the investigation. (For more information about email alerts check the email alerts section of the manual)
- Safety Net Statistics are updated for number of safety investigations completed for companies, employees, work orders, job sites, and customers.
Configuring Safety Net Safety Investigation Task Lists
These safety investigation tasks is set up in eight sections; Incident Types check list, Contact With check list, Unsafe Acts check list, Unsafe Conditions check list,
Personal Factors check list, Job Factors check list, Root Cause check list, and Prevention check list. Companies can build their safety investigation task lists from
default tasks SafetyNet provides. Companies may need to alter their safety investigation task lists as things change over time, as safety regulations or vehicles being used by companies have change
For more information about company safety investigation tasks lists check out the Safety Investigation Tasks lists section of the manual.
The safety investigation section is only available to users that have the safety investigation section turned on for their users group.
To change users access to safety investigations, management and office staff
can change access in Application Section to view the information about the Application Section Click Here
|
|
|
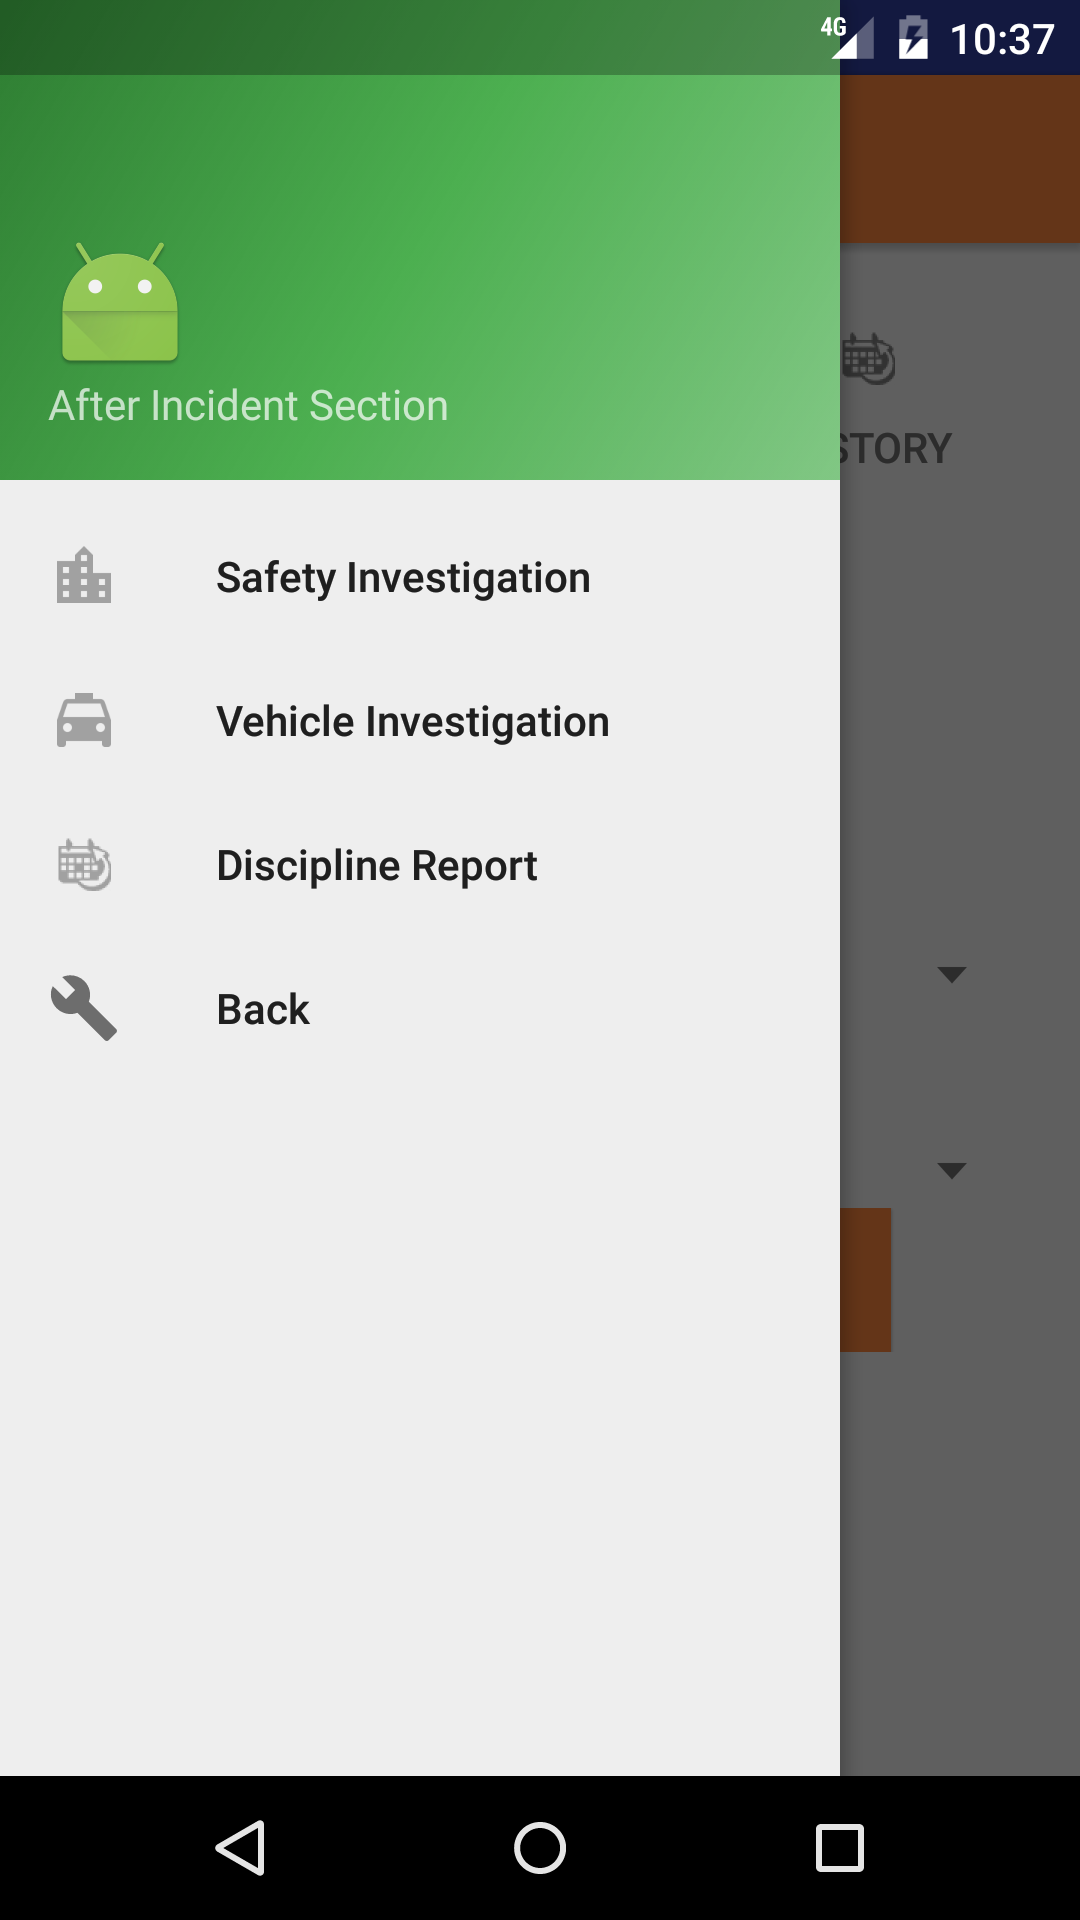
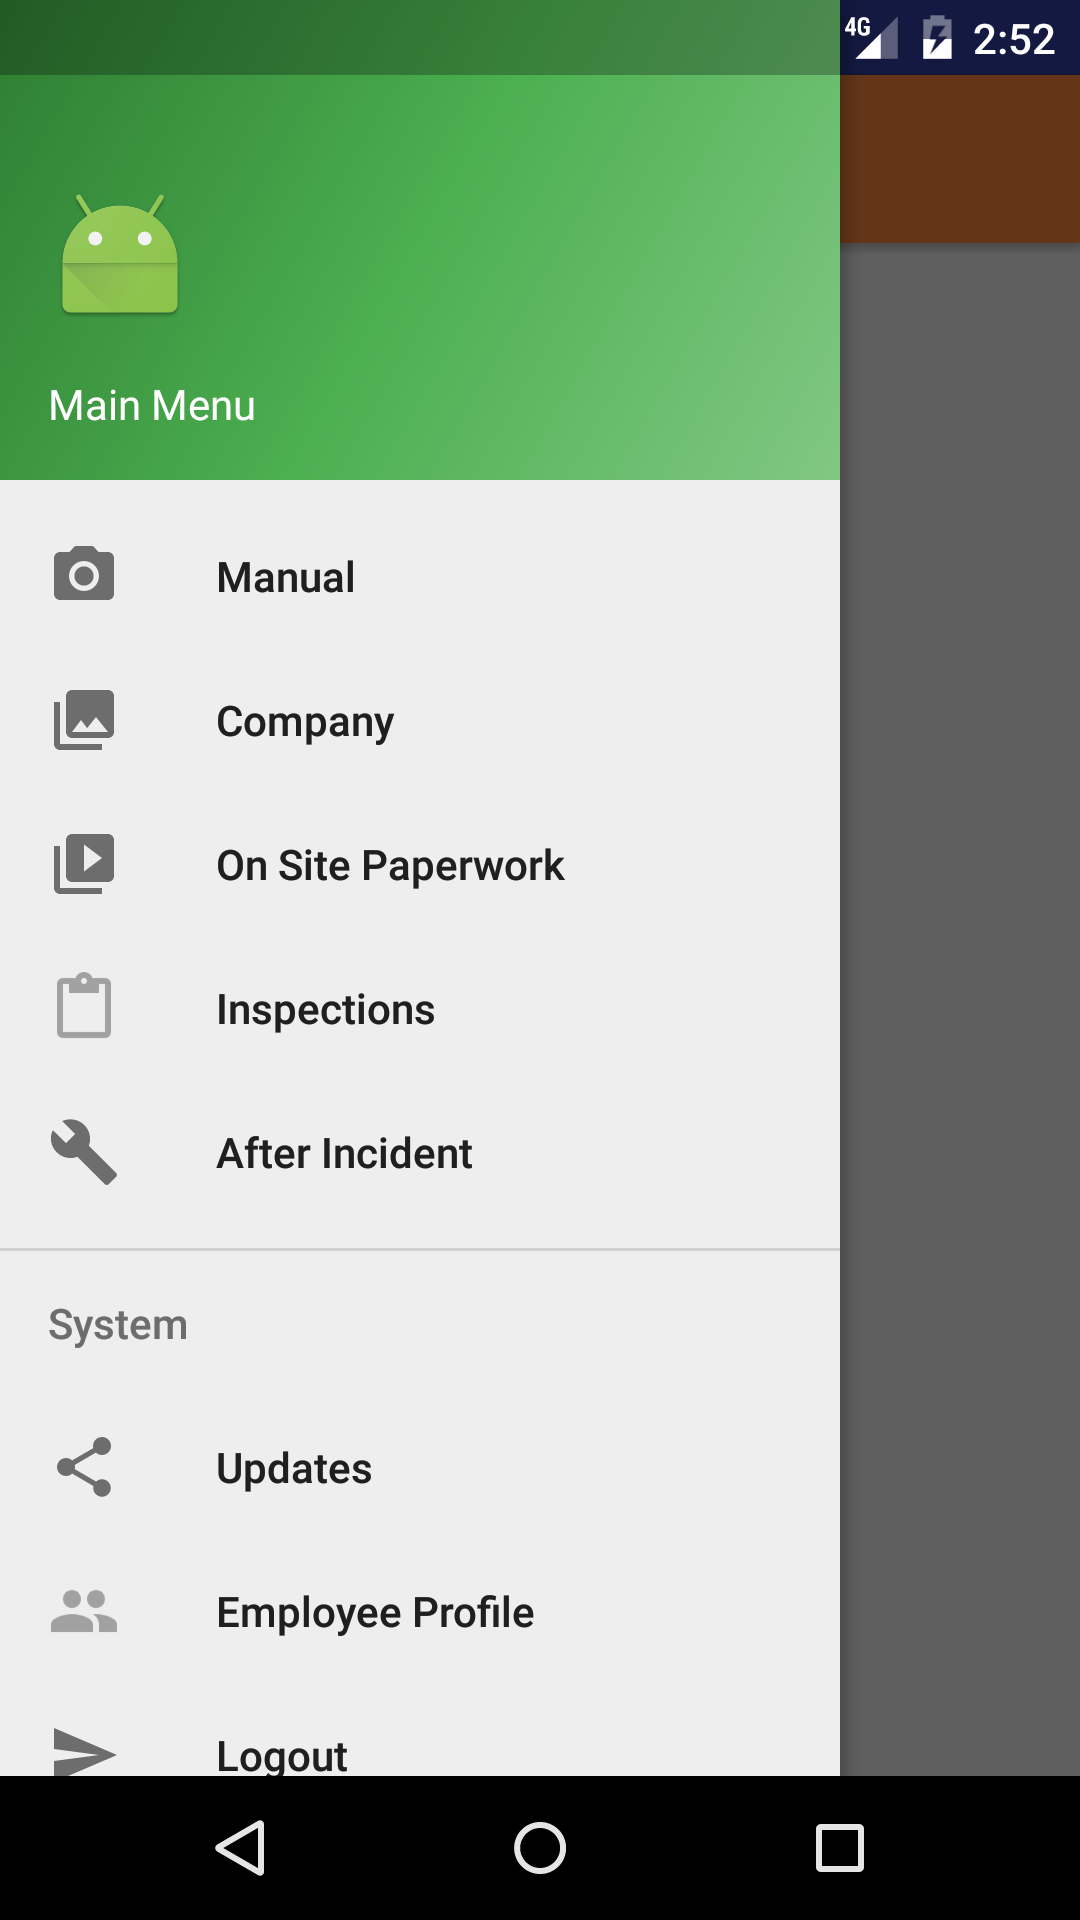
1.Add Safety Investigation |
Steps
- From the Main Menu screen, tap the After Incident button.
- Then tap on the Safety Investigation button.
- Date: The date field allow field staff to choose the date the safety investigation occurs.
- Tap the Date button to open the Choose Date screen.
- Scroll the calender screen and select the date from the calender.
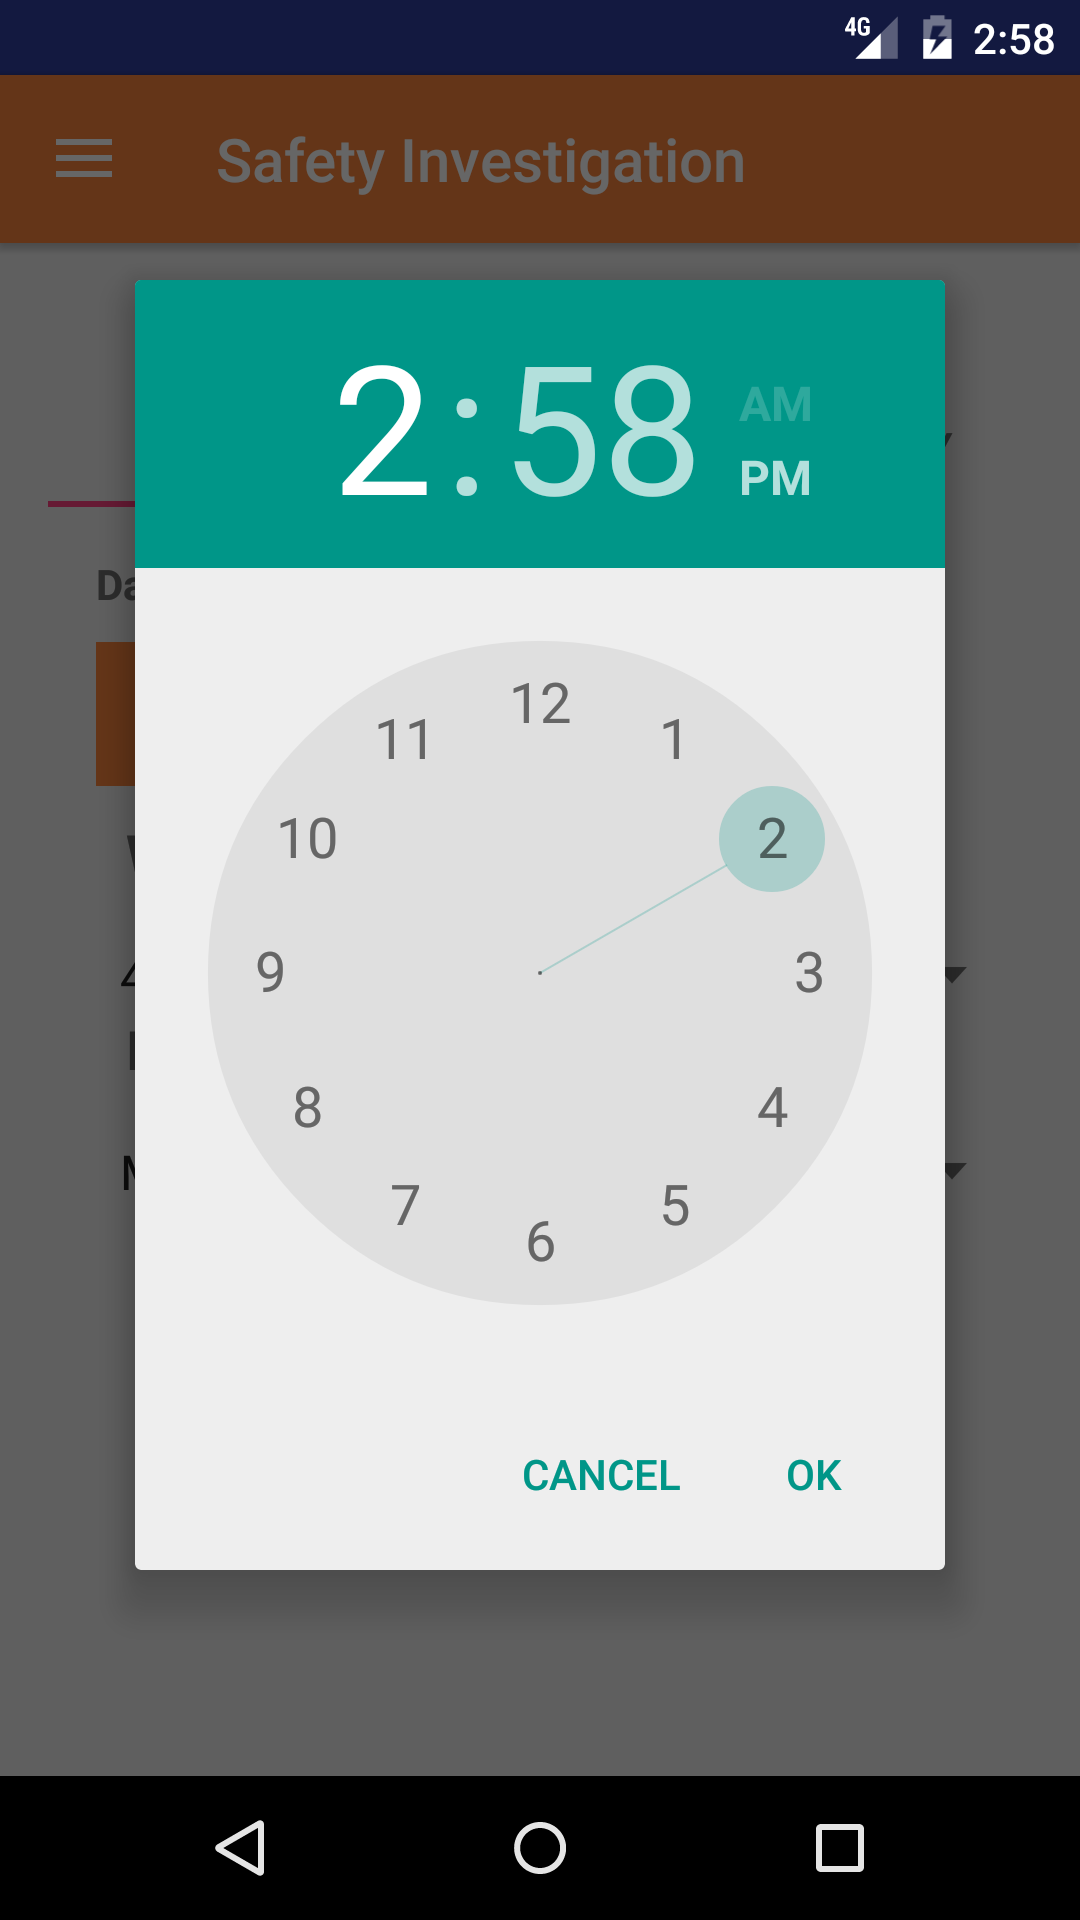
- Time: The time field allow field staff to choose the time the safety investigation occurs.
- Tap the Time button to open the Choose Time screen.
- Scroll the clock screen and select the time from the time.
- Investigation Type select box.
Investigation type are listed in descending order with the investigation type name.
- Scroll the list of investigation type until the desired investigation type is displayed on the screen.
- Tap the desired investigation type to select it.
- Work Order # select box.
Work orders are listed in descending order with the work order number, and the scope of work.
Note: New work orders are not automatically added to the list when they are created, so it may be necessary to update the list click here to view information about updating for the desired work order to be included in the list.
- Scroll the list of work orders until the desired work order is displayed on the screen.
- Tap the desired work order to select it
- Tap the Add Safety Investigation button to add the Safety Investigation.
- A pop-up message that reads Safety Investigation Added indicates that the Safety Investigation is ready to have details to be entered and checklists of investigation tasks checked off.
|
|
|
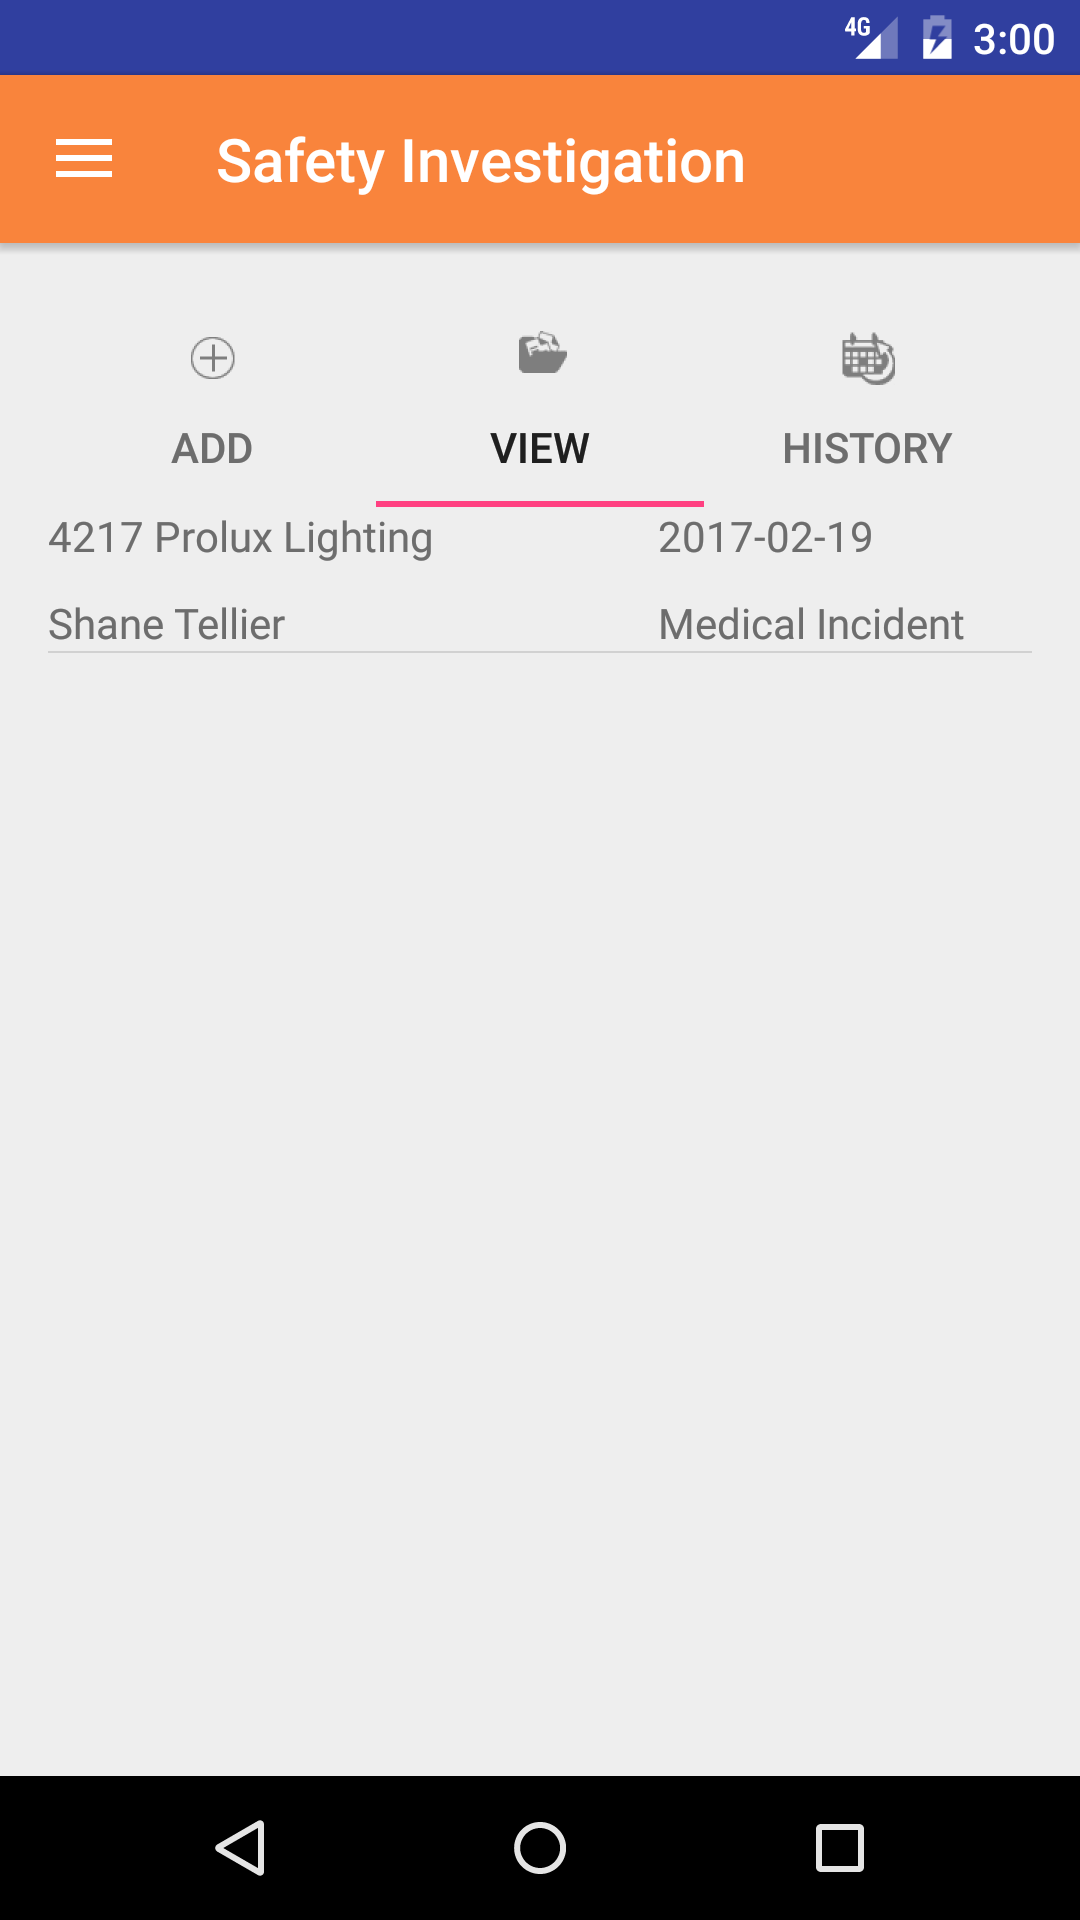
2.Look Up Open Safety Investigation |
|
Once in the Safety Investigation section
Steps
- Tap the second tab on the menu, the Safety Investigation view.
- Scroll the list of Safety Investigations until the desired Safety Investigation is displayed on the screen.
Listing the safety investigation date, the work order number.
- Tap on the Safety Investigation you would like to view. This loads the safety investigation edit screen.
|
|
| Steps 1-2 |
|
|
3.Edit Safety Investigation |
|
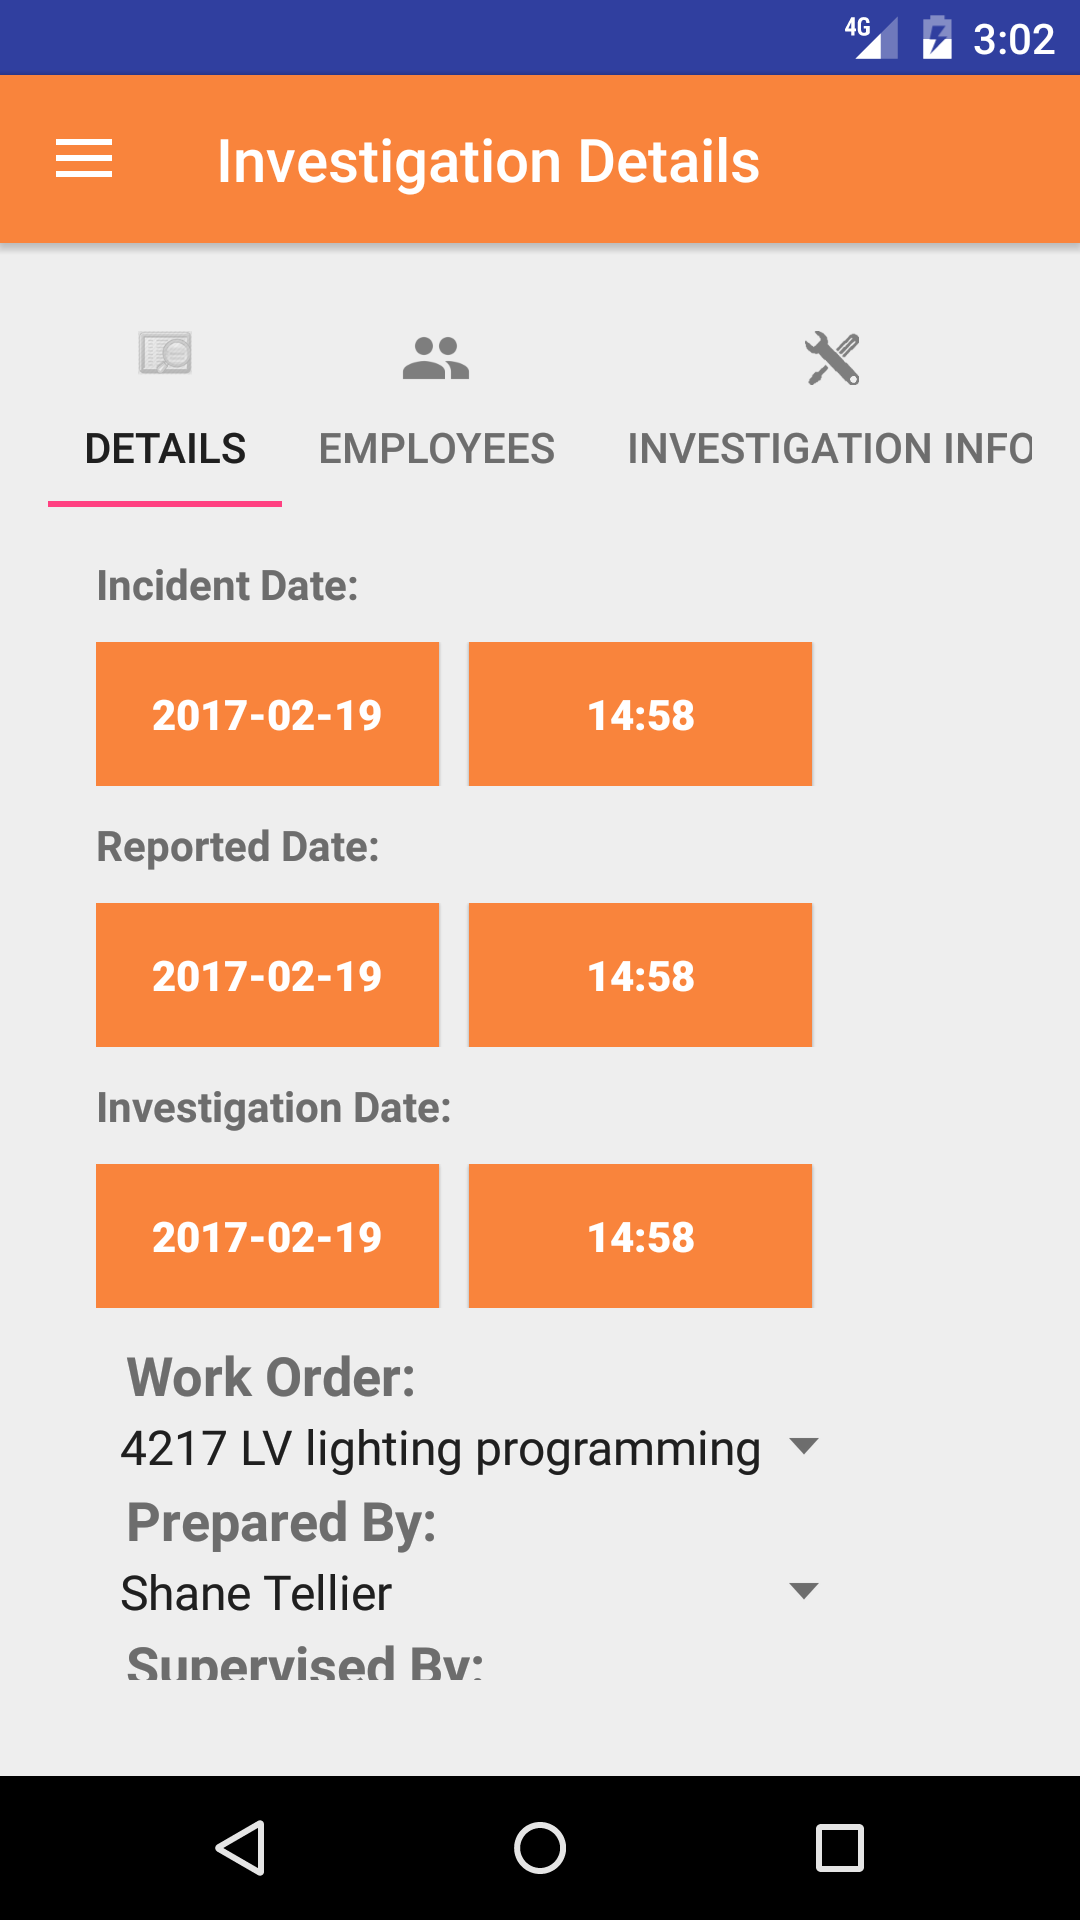
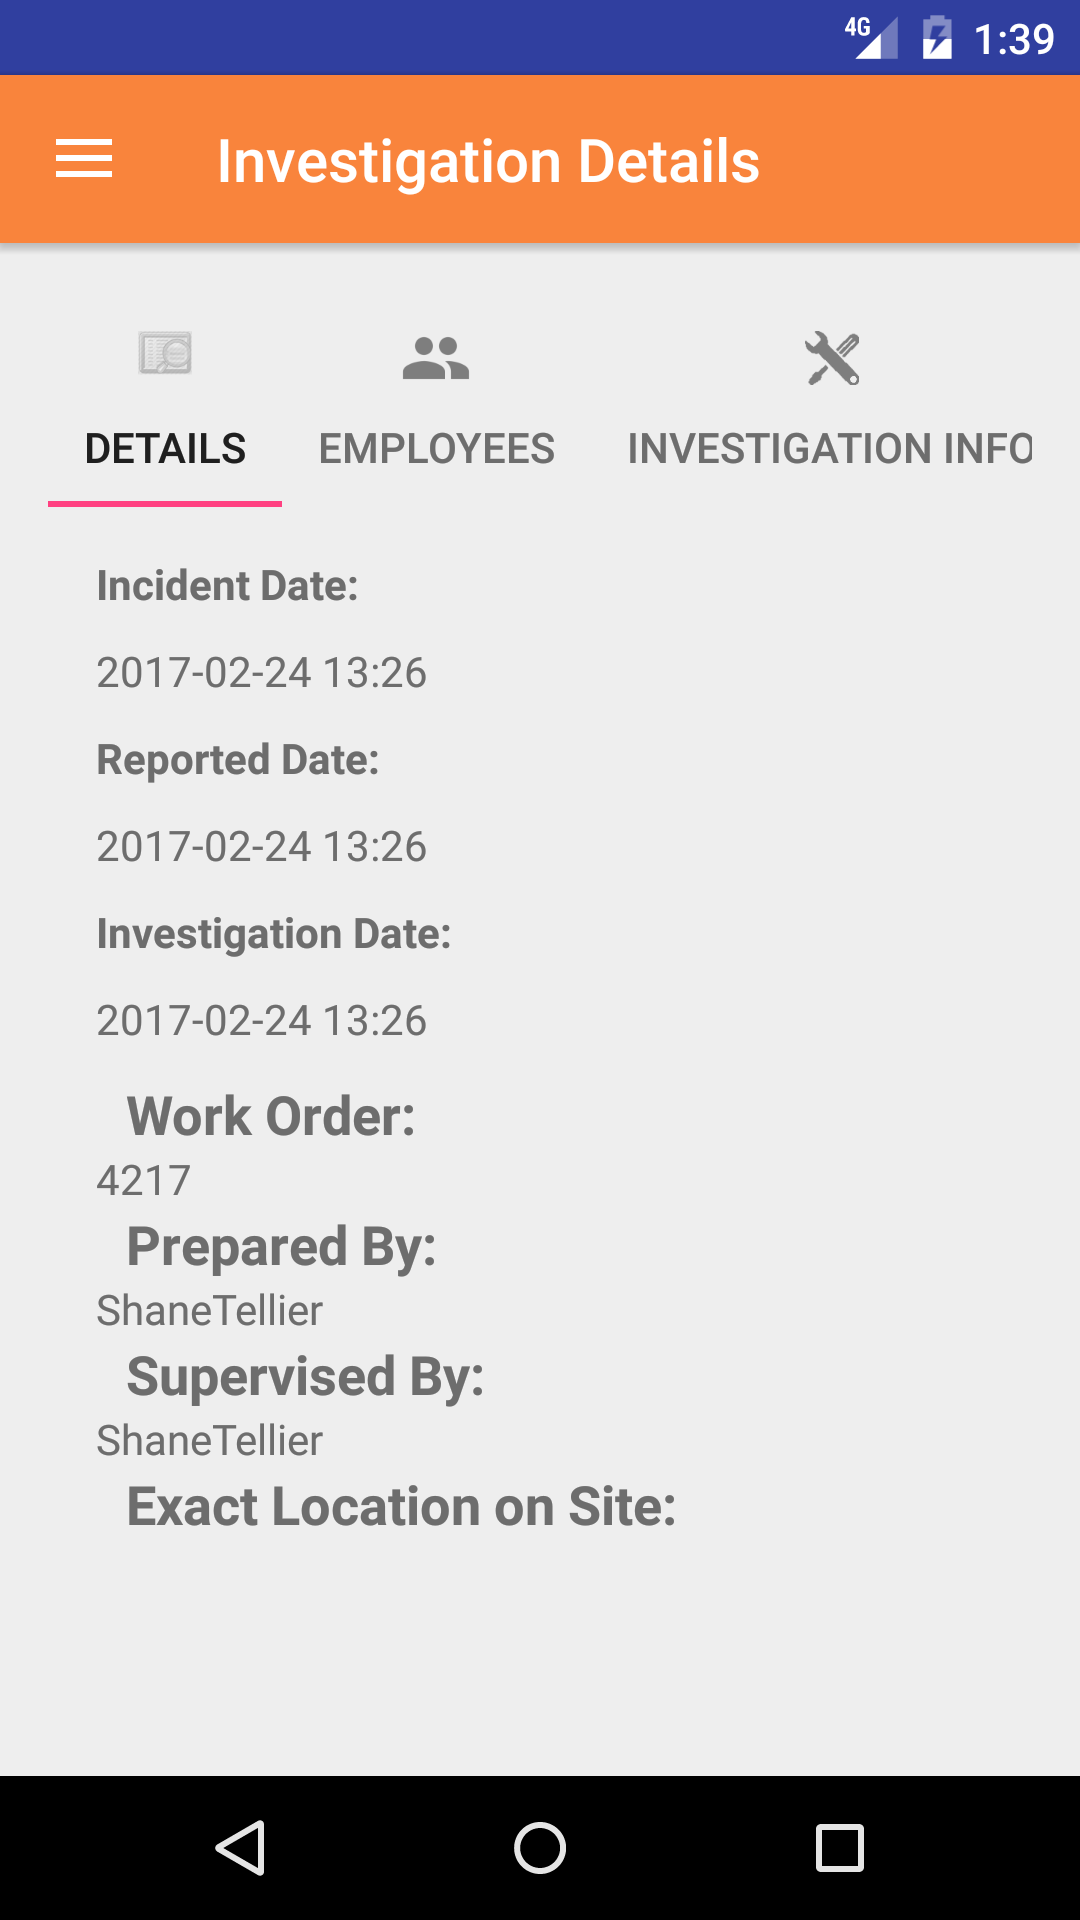
The first step in completing a Safety Investigation is completing the details of the investigation; including date, setting the employee whom inspected the job site,
work order number, scope of work and notes.
Once on the Safety Investigation you would like to Edit, on the details tab.
Steps
- Work Order # select box.
Work orders are listed in descending order with the work order number, and the scope of work.
Note: New work orders are not automatically added to the list when they are created, so it may be necessary to update the list click here to view information about updating for the desired work order to be included in the list.
- Scroll the list of work orders until the desired work order is displayed on the screen.
- Tap the desired work order to select it
- Incident Date: The date field allow field staff to choose the incident date the safety investigation occurs.
- Tap the Date button to open the Choose Date screen.
- Scroll the calender screen and select the date from the calender for the incident date.
- Incident Time: The time field allow field staff to choose the incident time the safety investigation occurs.
- Tap the Time button to open the Choose Time screen.
- Scroll the clock screen and select the time from the clock for the incident time.
- Report Date: The date field allow field staff to choose the report date the safety investigation occurs.
- Tap the Date button to open the Choose Date screen.
- Scroll the calender screen and select the date from the calender for the report date.
- Report Time: The time field allow field staff to choose the report time the safety investigation occurs.
- Tap the Time button to open the Choose Time screen.
- Scroll the clock screen and select the time from the clock for the report time.
- Investigation Date: The date field allow field staff to choose the investigation date the safety investigation occurs.
- Tap the Date button to open the Choose Date screen.
- Scroll the calender screen and select the date from the calender for the investigation date.
- Investigation Time: The time field allow field staff to choose the investigation time the safety investigation occurs.
- Tap the Time button to open the Choose Time screen.
- Scroll the clock screen and select the time from the clock for the investigation time.
- Prepared By select box.
The prepared by field initialy displays the name of the person who added the Safety Investigation and should be updated to indicate the employee whom prepared the safety investigation report.
Employees are listed in the order they were added to the Safety Investigation.
- Tap the desired employee to select it
- Exact Location on Site: The Exact Location on Site field should describe where on the job site the incident occurred. The character limit of this field is 150.
- Tap Save in the top right corner to save any changes to the Safety Investigation Details.
- A pop-up message that reads Safety Investigation Details have been Saved indicates that the safety investigation details have been saved.
|
|

|
| Steps 1,3,5 |
|
|
| Steps 2,4,6 |
|
|
| Steps 7-9 |
|
|
4.Add Employee to Safety Investigation |
|
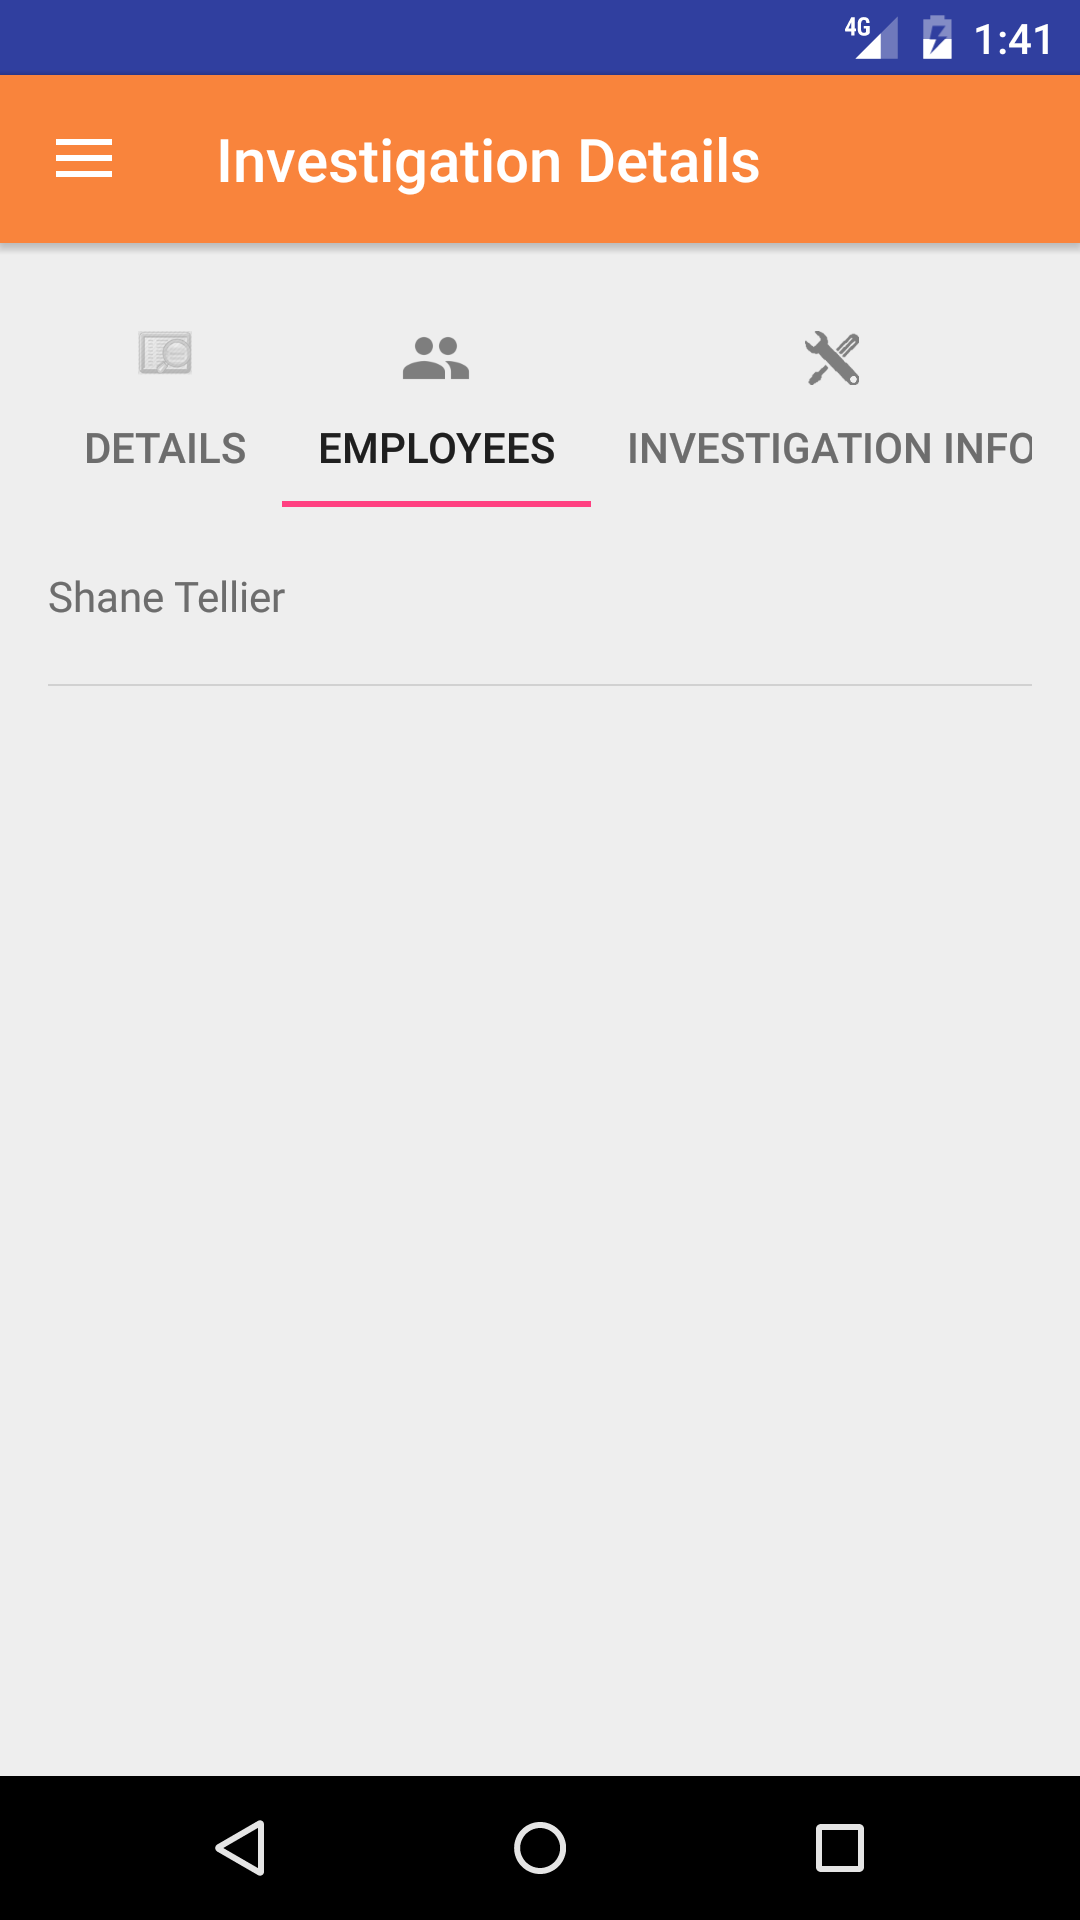
Adding employees to the Safety Investigation is crucial to reporting accurately. Adding other field staff to the safety investigation allows a group of
workers to share and complete a safety investigation as a group. Once a safety investigation is submitted all employee's added to the safety investigation will have access to the safety investigation.
Here are the steps on how to do it:
Once on the Safety Investigation you would like to Edit
Steps
- Tap the Employees icon at the top of the screen to open the Employees screen.
- Tap the + icon in the top right corner to open the Employees list or tap Employees in the top left corner to return to the Employees screen.
Employees are listed in descending order of last name.
- Scroll the list of employees until the desired employee is displayed on the screen.
- If the desired employee is in the list, tap the employee to add them to the Safety Investigation.
A pop-up message that reads Employee Added indicates that the employee is now listed on the Safety Investigation Employees screen.
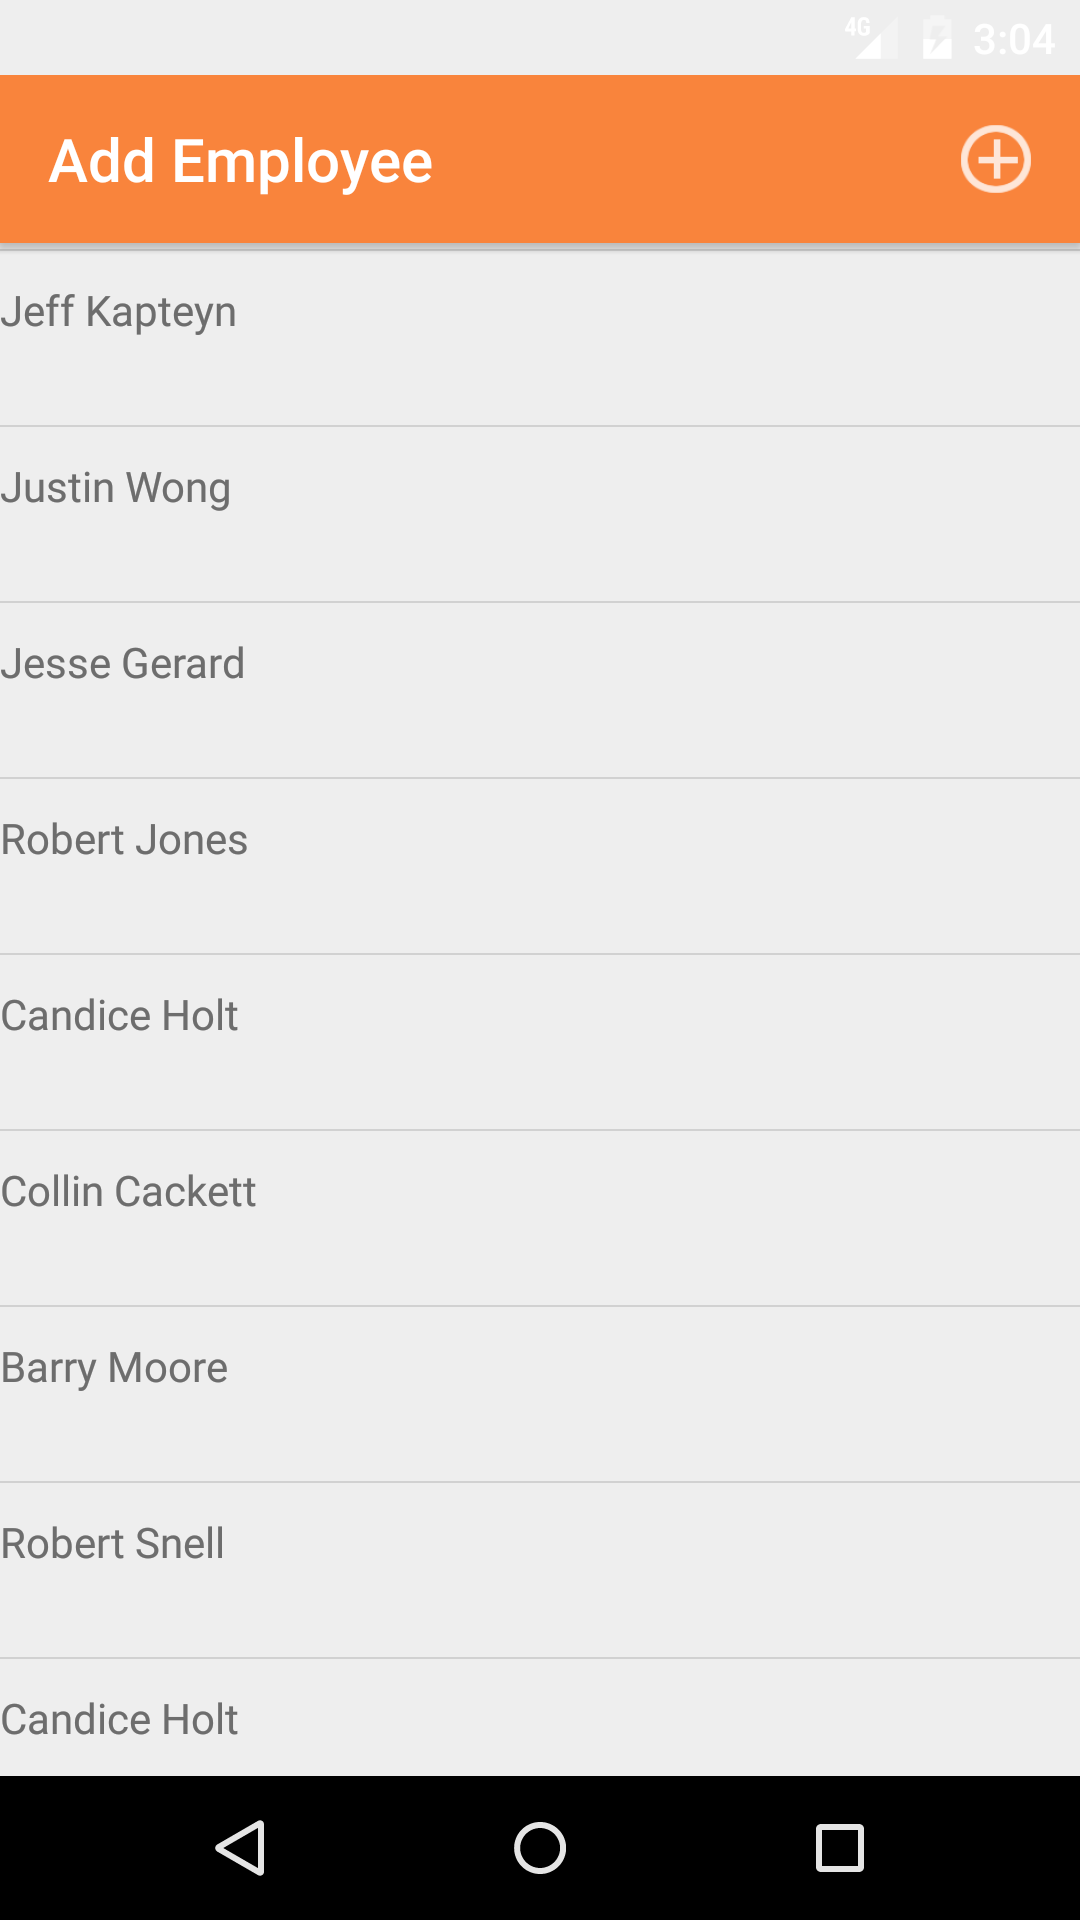
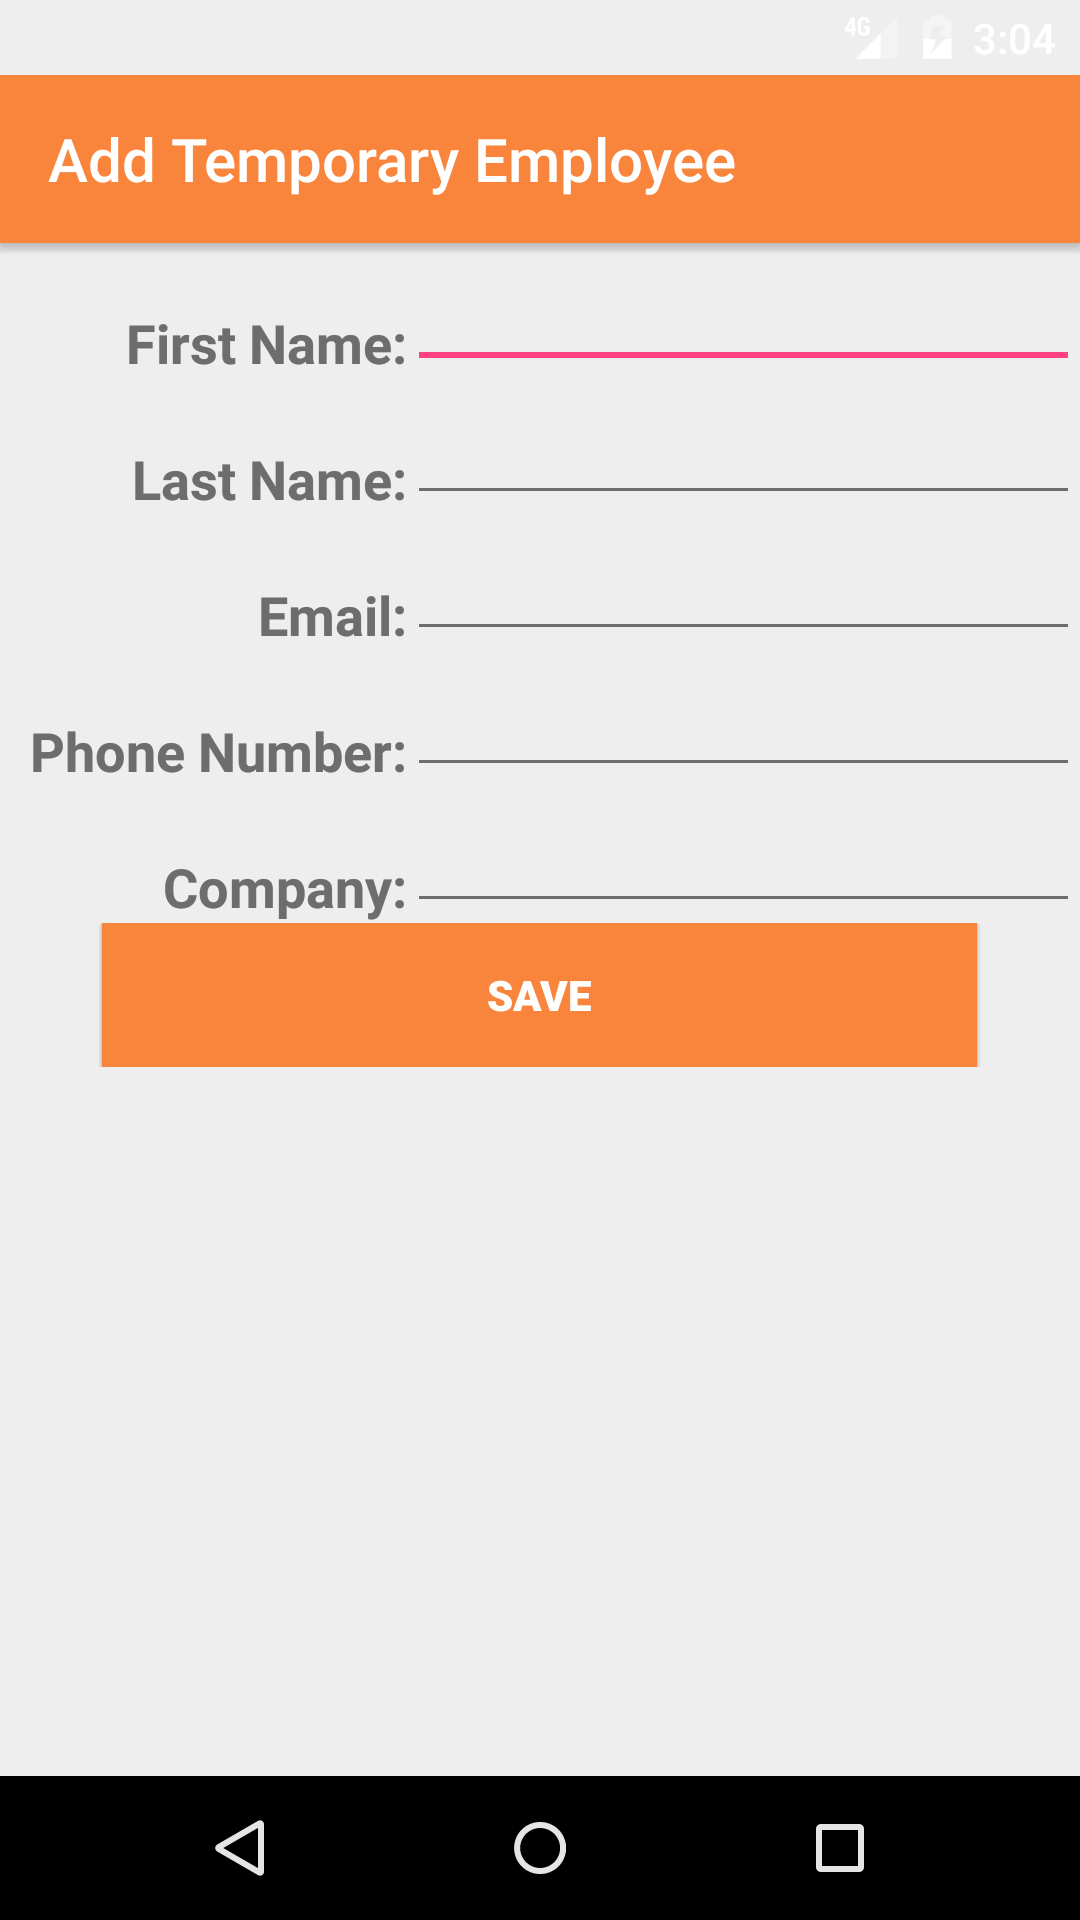
- If the desired employee is not in the list, tap Add Outside Employee in the top left corner of the screen to open the New Employee screen.
- First Name: The First Name field should indicate the legal given name of the employee. The character limit of this field is 25.
- Last Name: The Last Name field should indicate the legal surname of the employee. The character limit of this field is 25.
- Email: The Email field should indicate the best (i.e., most often used for business purposes) e-mail address for the employee. The character limit of this field is 25.
- Phone Number: The Phone Number field should indicate the best (i.e., most often used for business purposes) telephone number (land line or cellular) for the employee. The character limit of this field is 13.
- Company: The Company field should indicate the name of the company for which the employee works. The character limit of this field is 75.
- Tap Save in the top right corner of the screen to add the outside employee to the Safety Investigation.
|
|
|
|
5.Delete Employee from Safety Investigation |
|
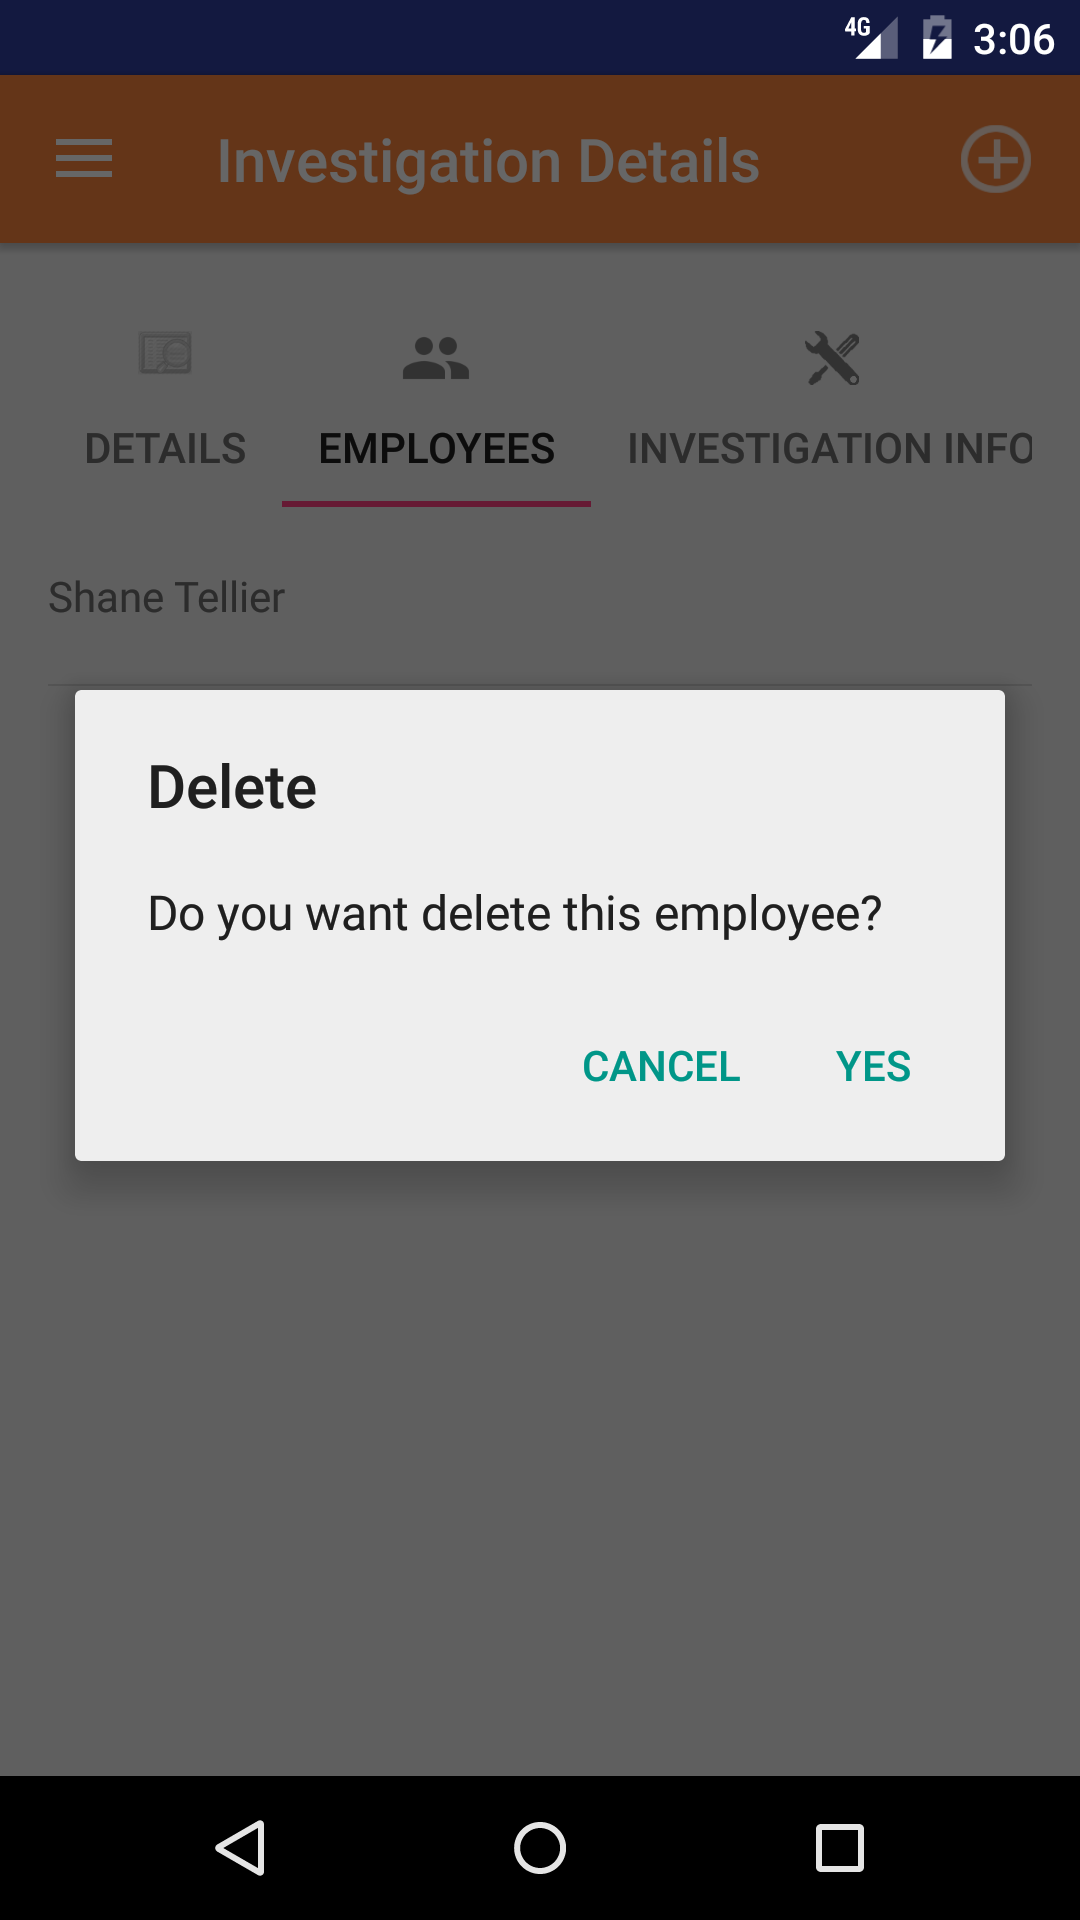
Once on the Safety Investigation you would like to Edit
Steps
- Tap the Employees icon at the top of the screen to open the Employees screen.
- Scroll the list of employees until the desired employee is displayed on the screen.
- Long Tap the employee to bring up the delete screen for the employee.
- Tap the Delete button. The employee will be deleted.
|

|
| Steps 1-2 |
|
|
| Steps 3-4 |
|
|
|
6.Add Employee Signature |
|
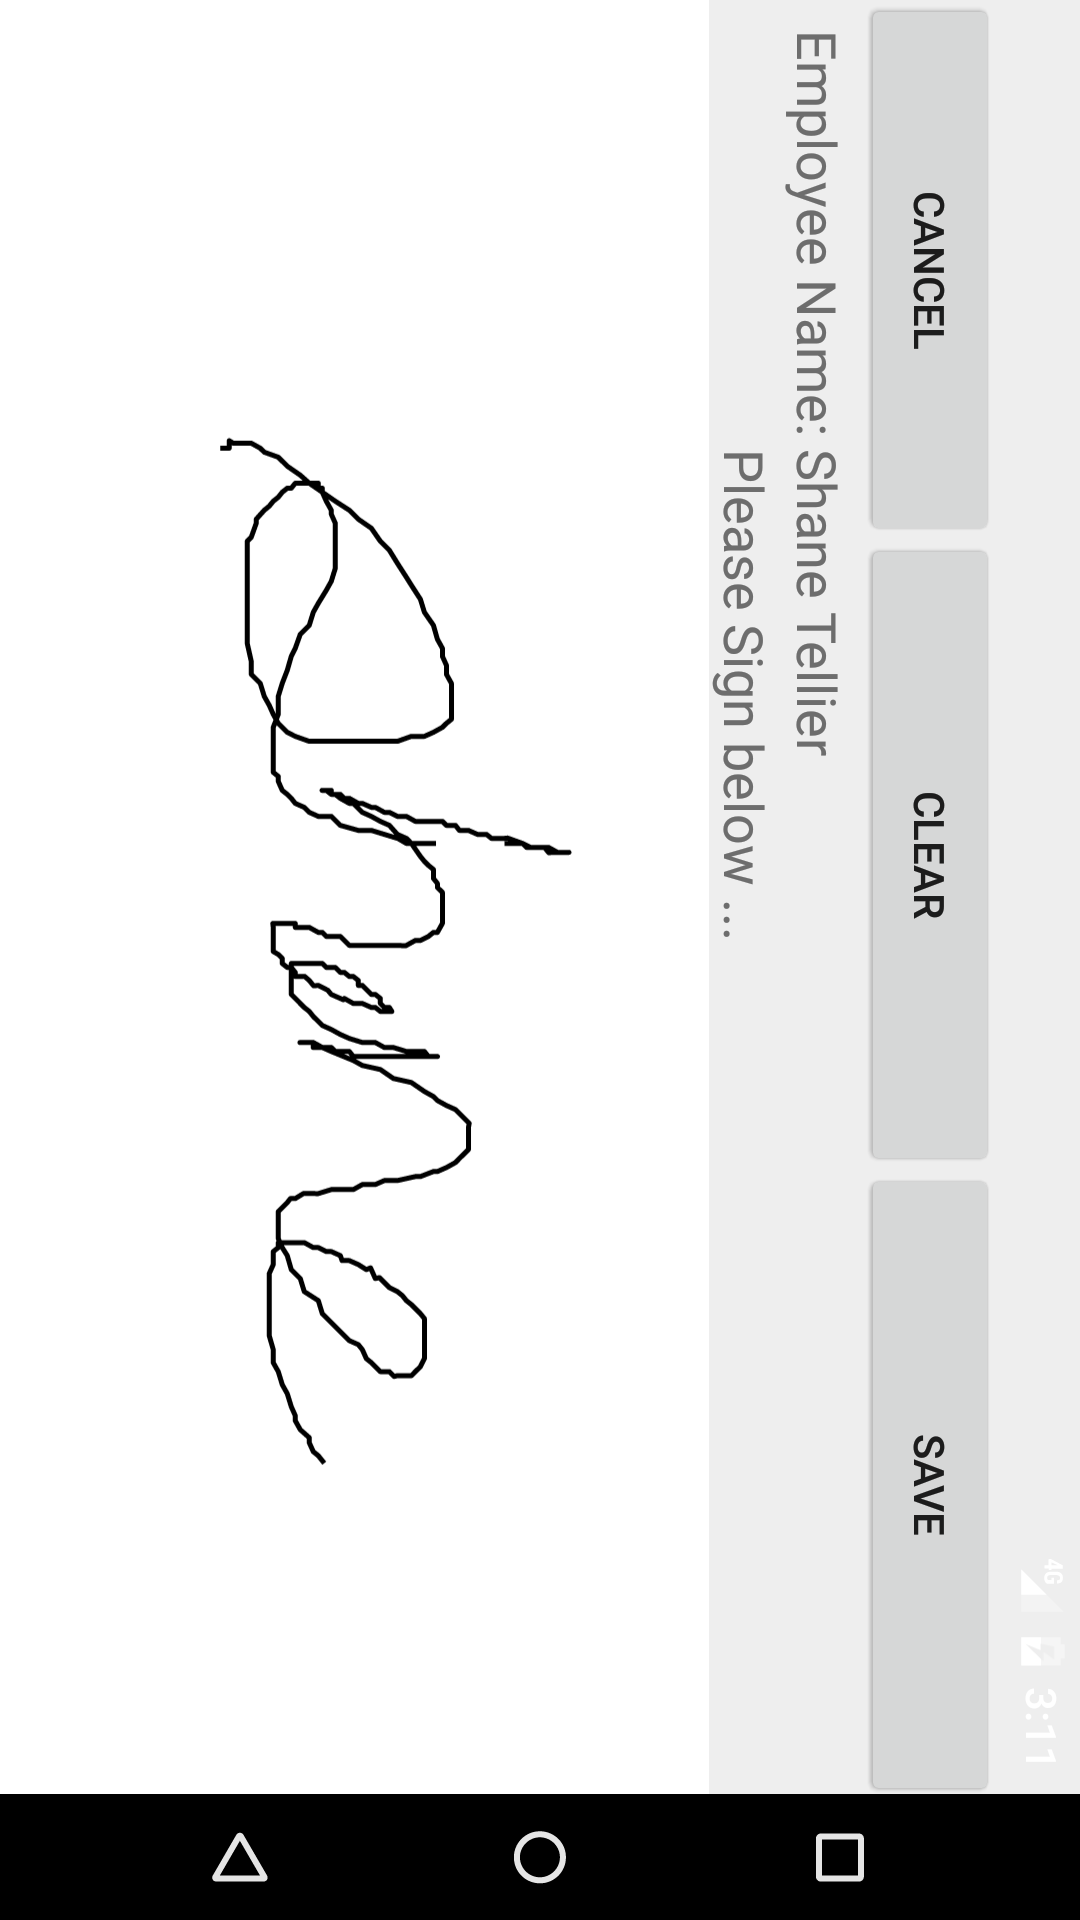
Each employee added to the Safety Investigation must provide an electronic signature to indicate that they taken part in the investigation.
Once on the Safety Investigation you would like to Edit
Steps
- Tap the Employees icon at the top of the screen to open the Employees screen.
- Scroll the list of employees until the desired employee is displayed on the screen.
- Tap the desired employee to select them and open the View Employee Signature screen
- Have the selected employee sign in the white space beneath the Please Sign Below label.
- Tap Save in the top right corner of the screen to update the Saved Signature field.
The saved signature will appear below the signature entry screen.
|
|
|
| Steps 1-3 |
|
|
| Steps 4-6 |
|
|
|
7.Add Incident Type Checklist Item |
|
Incident Type Investigation Tasks are safety investigation incident type investigation tasks that a company has set up for their field staff to complete
as part of their safety investigation. To ensure field staff have the most up to date copy of the investigation tasks a company is
using make sure to update your phone on a regular basis. For more information about updating your phone click here.
Once on the Safety Investigation you would like to Edit
Steps
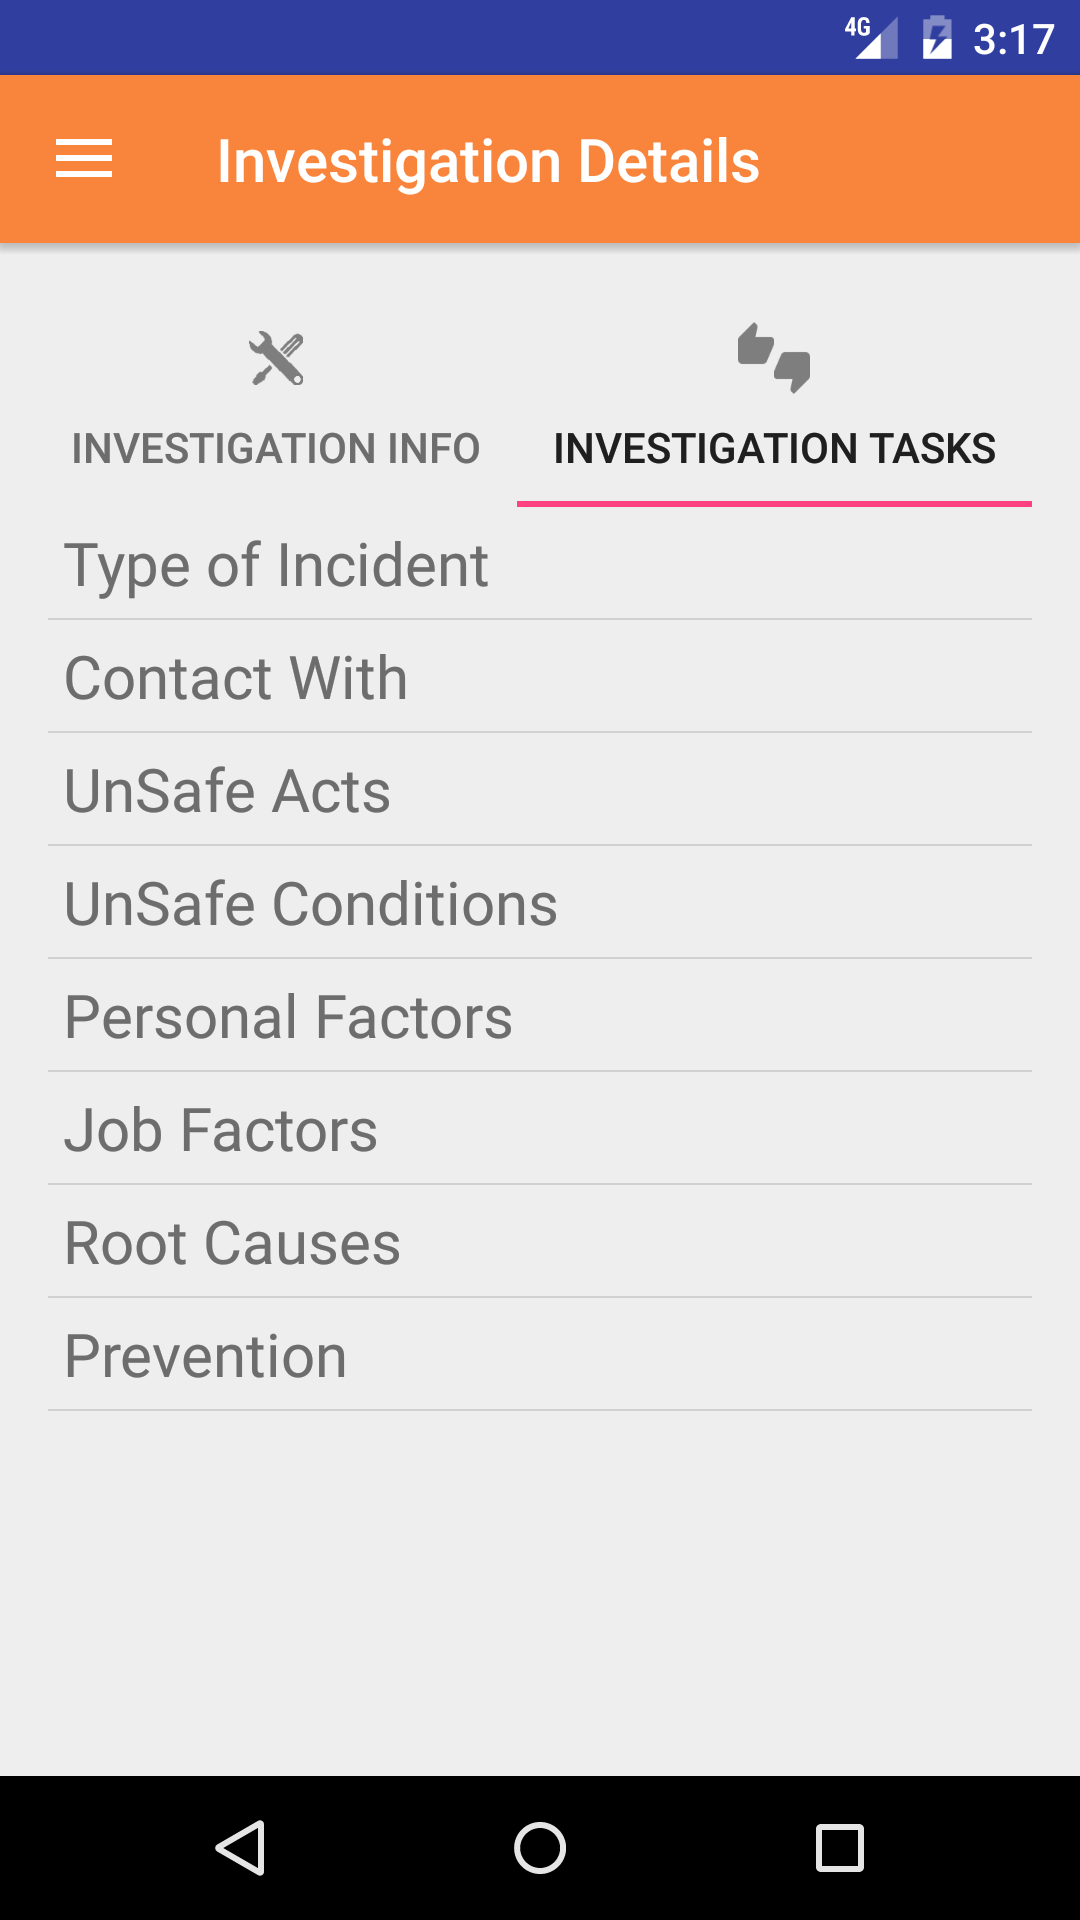
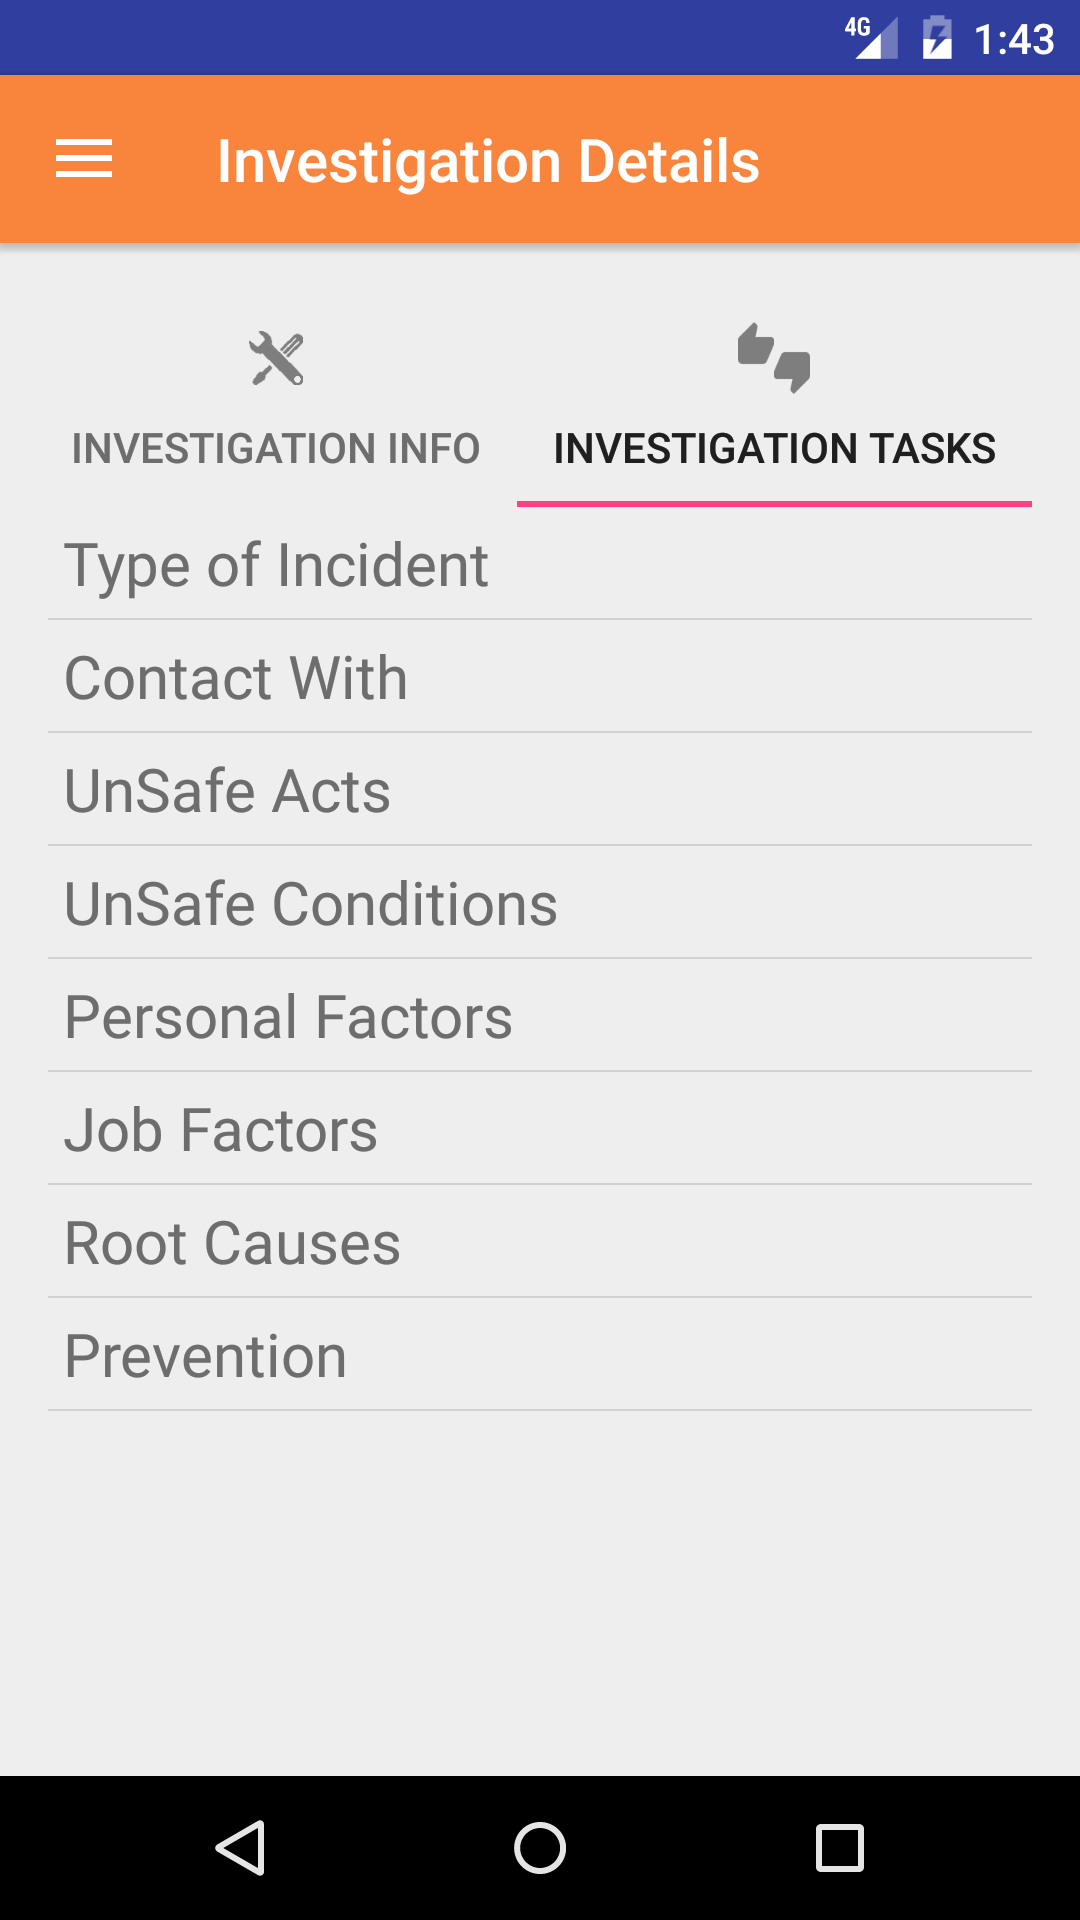
- Tap the Investigation Tasks icon at the top of the screen to open the Investigation Tasks Checklist screen. The screen loads
with the list of the 8 checklist categories of the safety investigation.
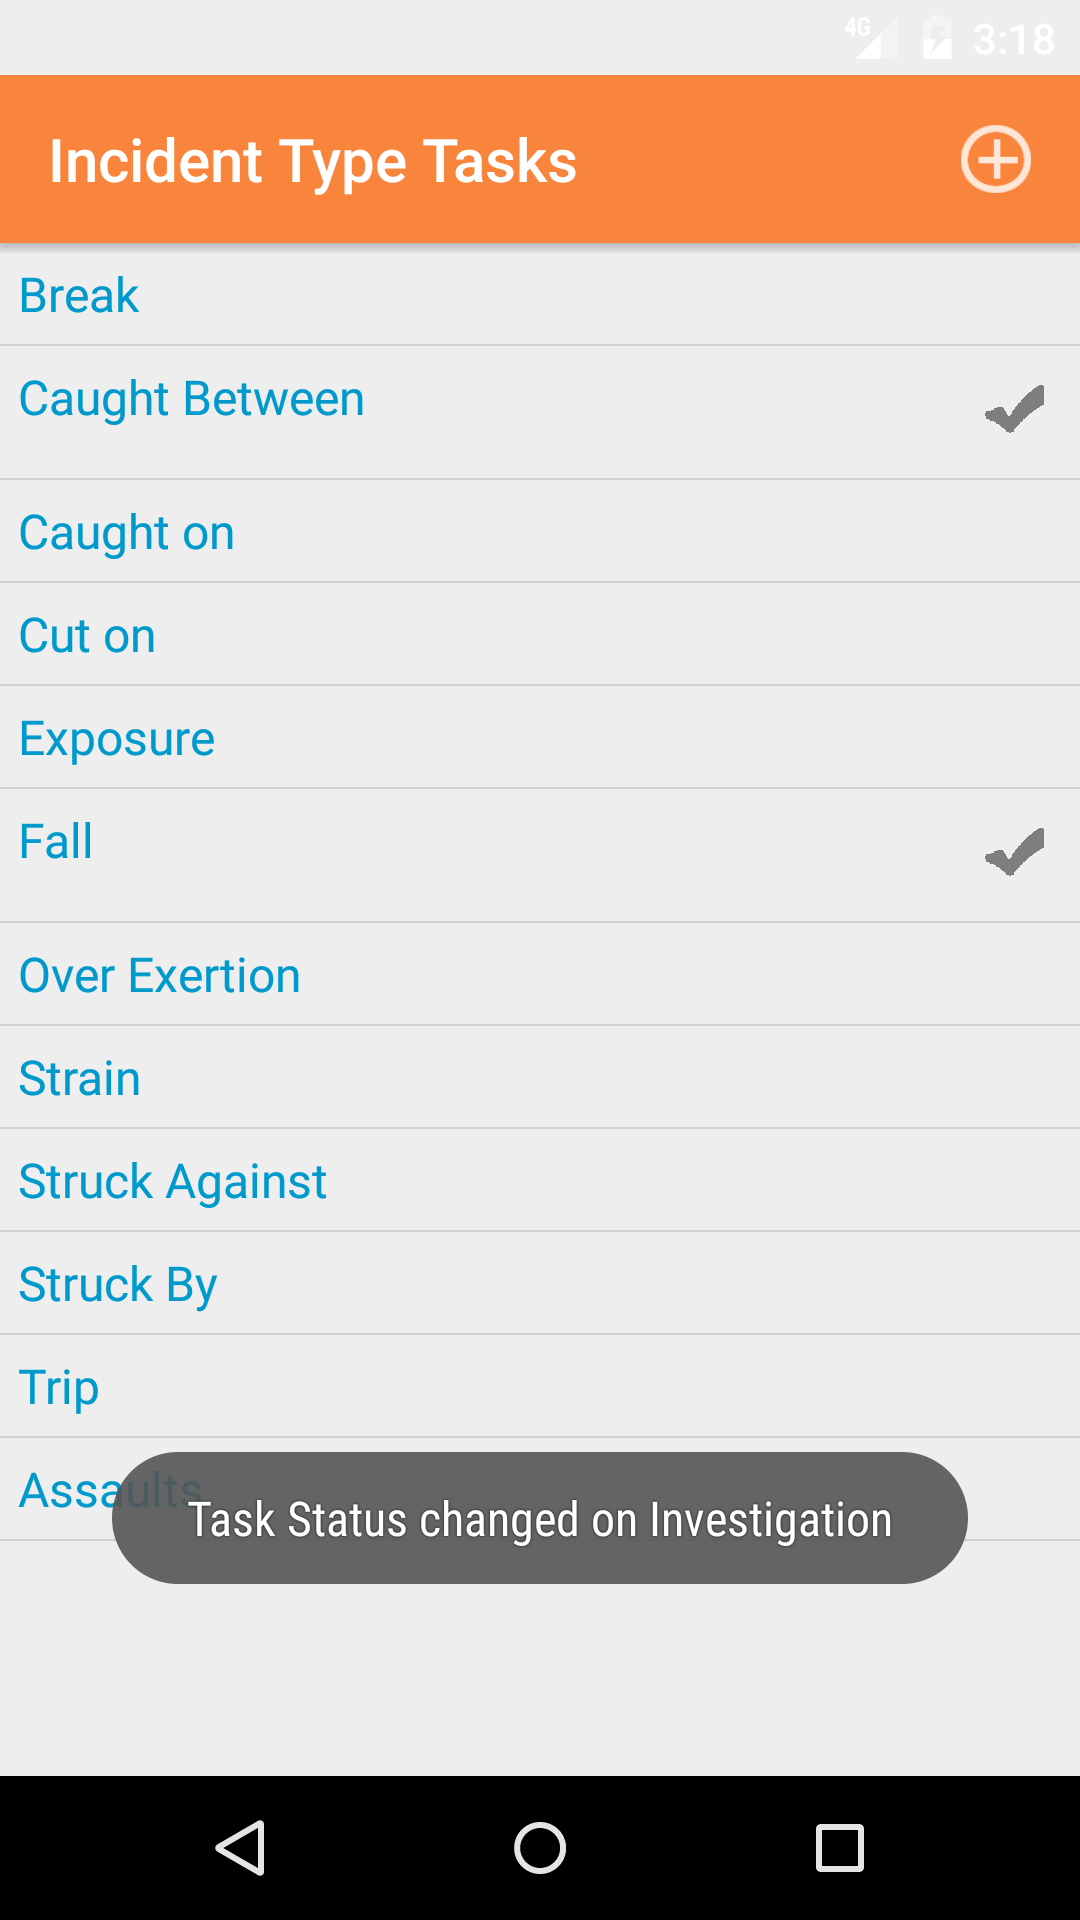
- Tap the Type of Incident button which loads with the type of incident investigation tasks listed with Task Name
in black, if the task is checked a checkmark will appear.
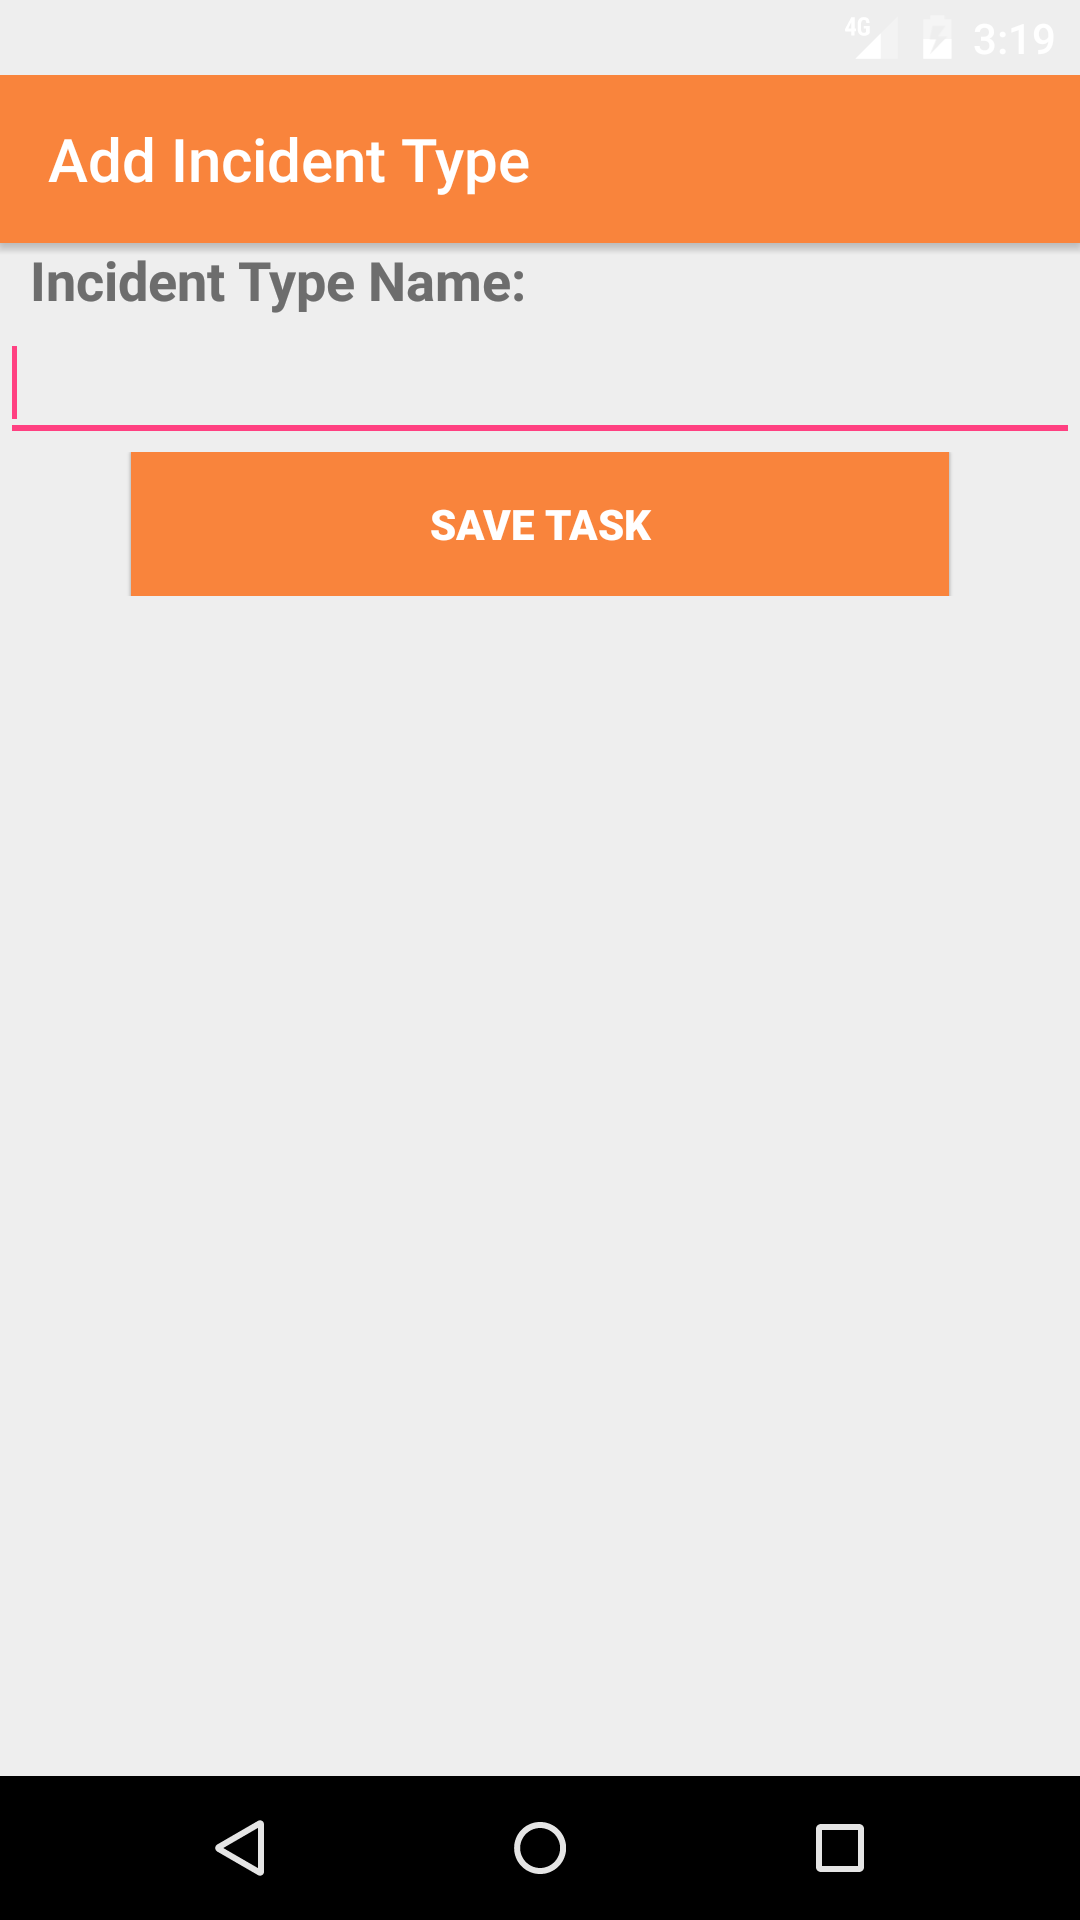
- Tap the + icon in the top right corner to add the Type of Incident screen.
- Incident Type Name: The Incident Type Name field gives the user to add a incident type that did not appear on investigation task list. The character limit of this field is 75.
- Tap the + icon in the top right corner to add the Type of Incident.
|
|
|
|
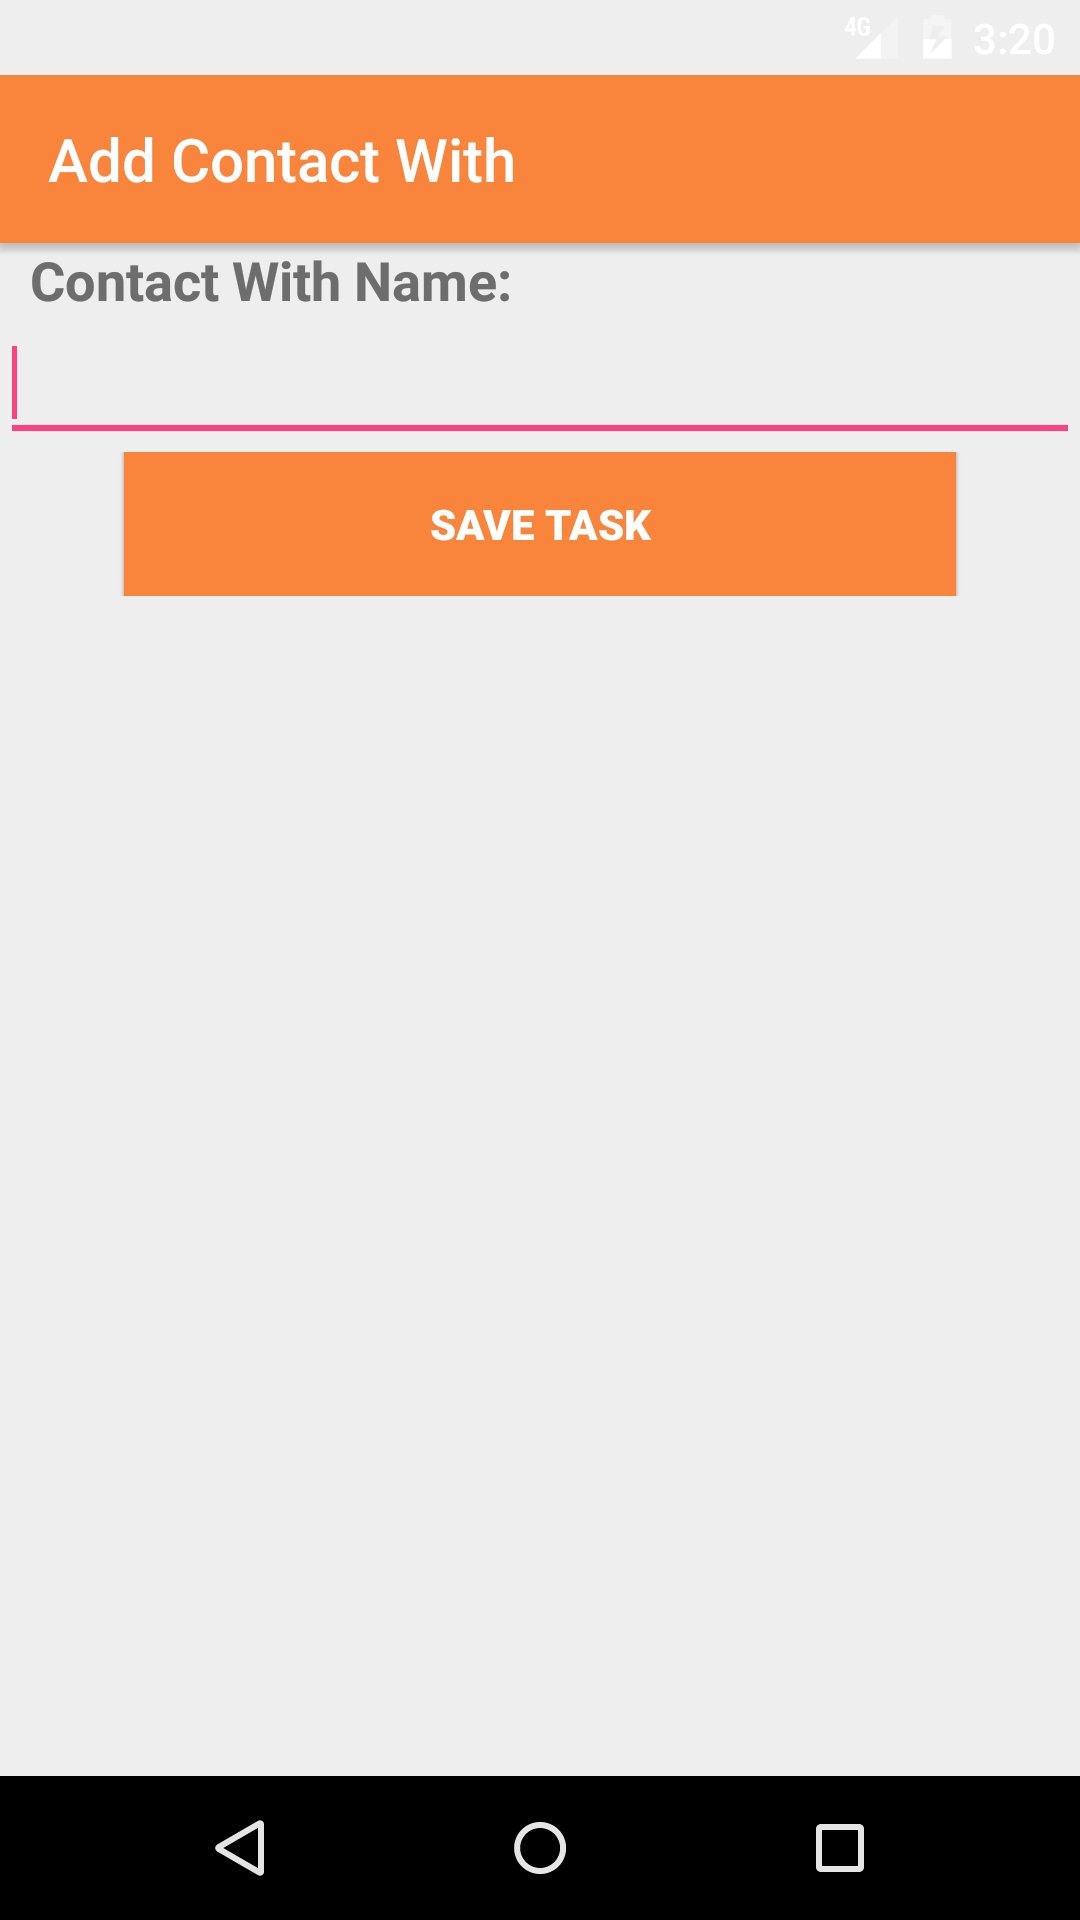
8.Add Contact With Checklist Item |
|
Contact With Investigation Tasks are safety investigation contact with investigation tasks that a company has set up for their field staff to complete
as part of their safety investigation. To ensure field staff have the most up to date copy of the investigation tasks a company is
using make sure to update your phone on a regular basis. For more information about updating your phone click here.
Once on the Safety Investigation you would like to Edit
Steps
- Tap the Investigation Tasks icon at the top of the screen to open the Investigation Tasks Checklist screen. The screen loads
with the list of the 8 checklist categories of the safety investigation.
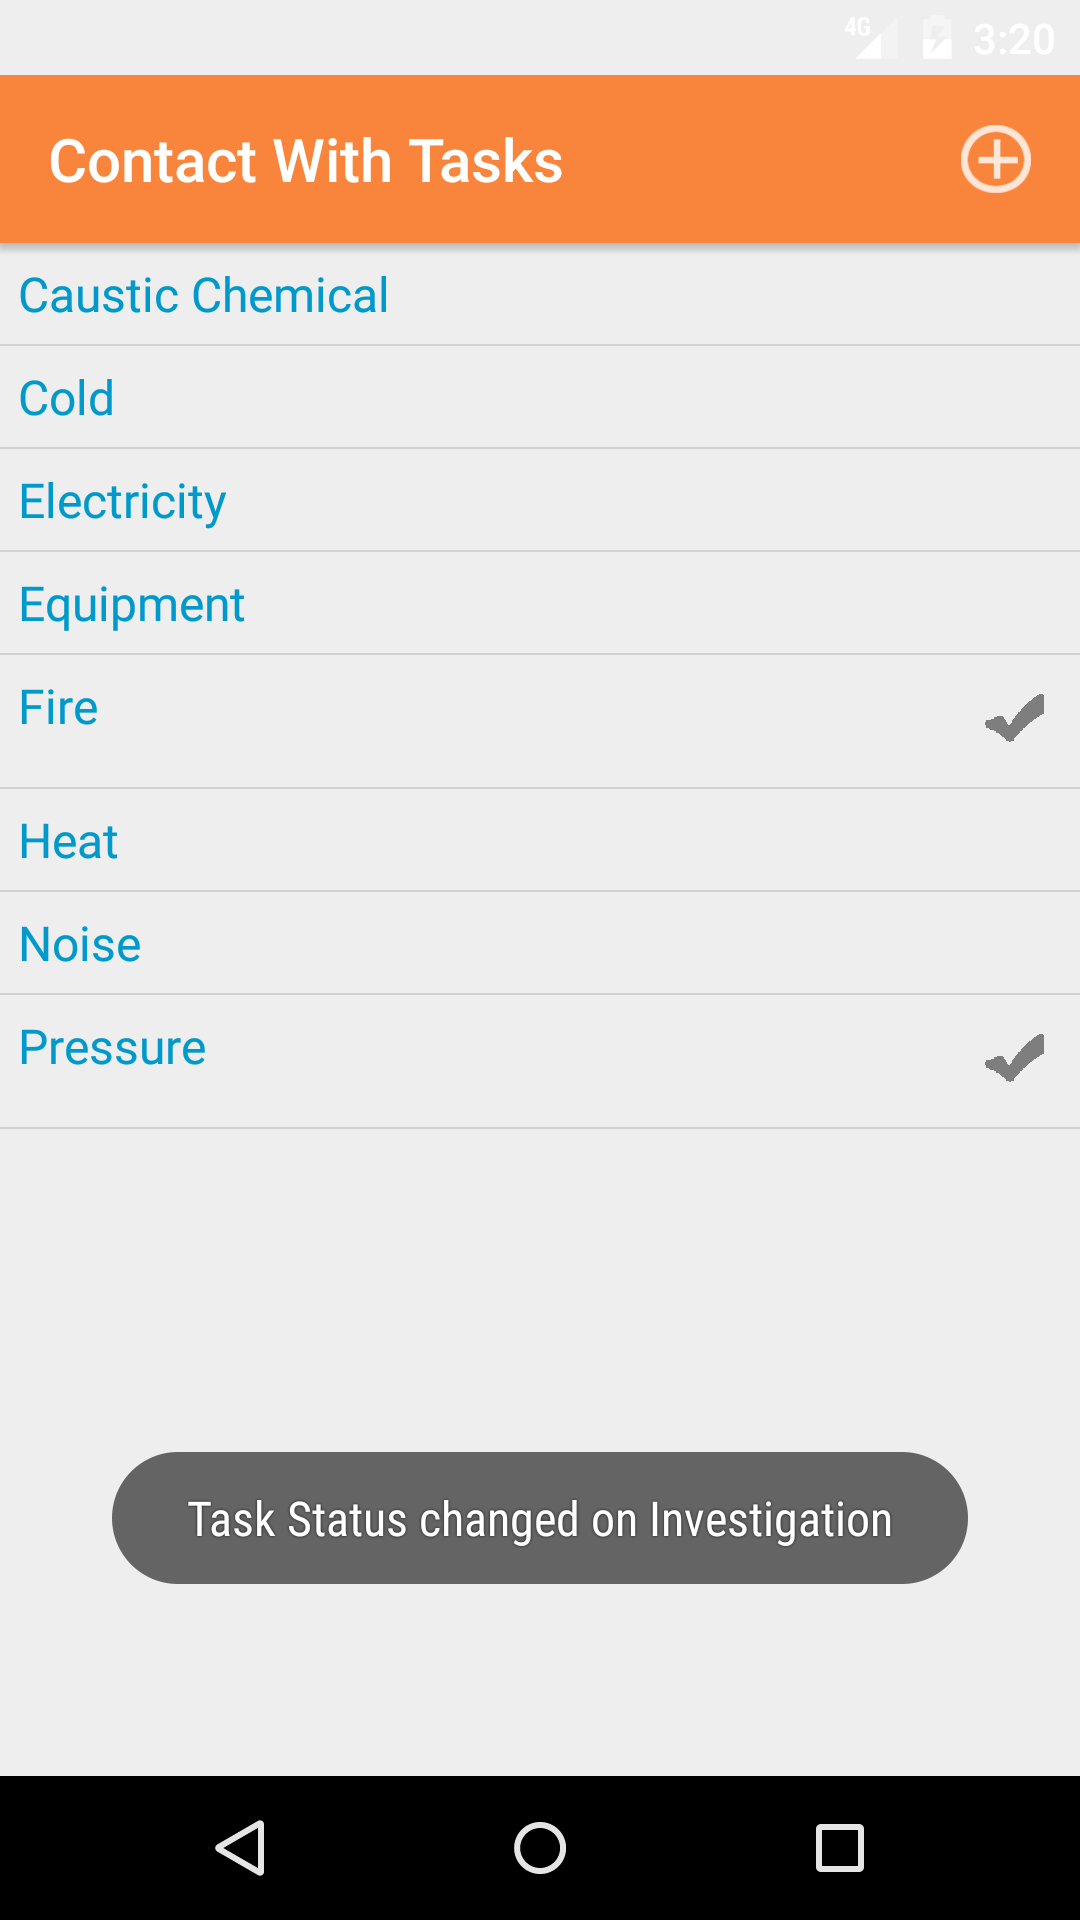
- Tap the Contact With button which loads with the contact with investigation tasks listed with Task Name
in black, if the task is checked a checkmark will appear.
- Tap the + icon in the top right corner to add the Contact With screen.
- Contact With Name: The Contact With Name field gives the user to add a contact with that did not appear on investigation task list. The character limit of this field is 75.
- Tap the + icon in the top right corner to add the Contact With.
|
|
|
|
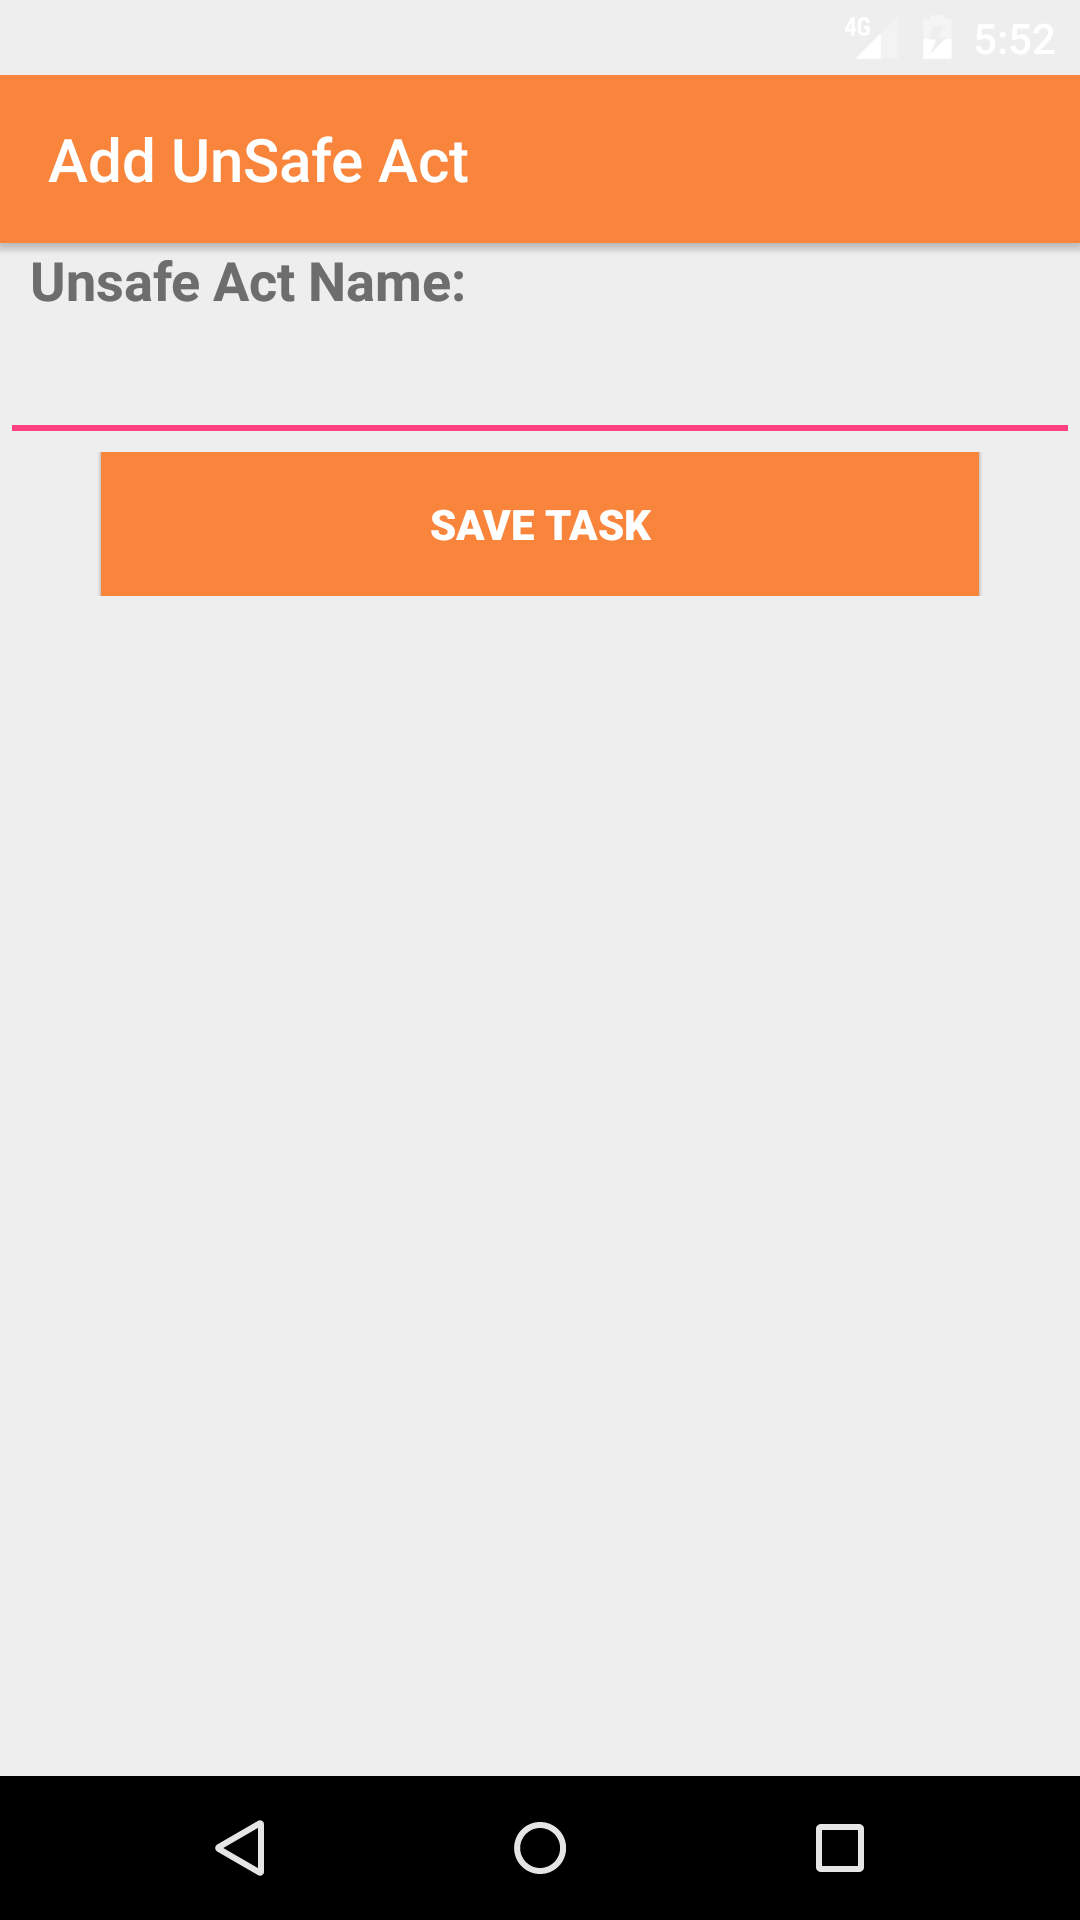
9.Add Unsafe Act Checklist Item |
|
Unsafe Acts Investigation Tasks are safety investigation unsafe acts investigation tasks that a company has set up for their field staff to complete
as part of their safety investigation. To ensure field staff have the most up to date copy of the investigation tasks a company is
using make sure to update your phone on a regular basis. For more information about updating your phone click here.
Once on the Safety Investigation you would like to Edit
Steps
- Tap the Investigation Tasks icon at the top of the screen to open the Investigation Tasks Checklist screen. The screen loads
with the list of the 8 checklist categories of the safety investigation.
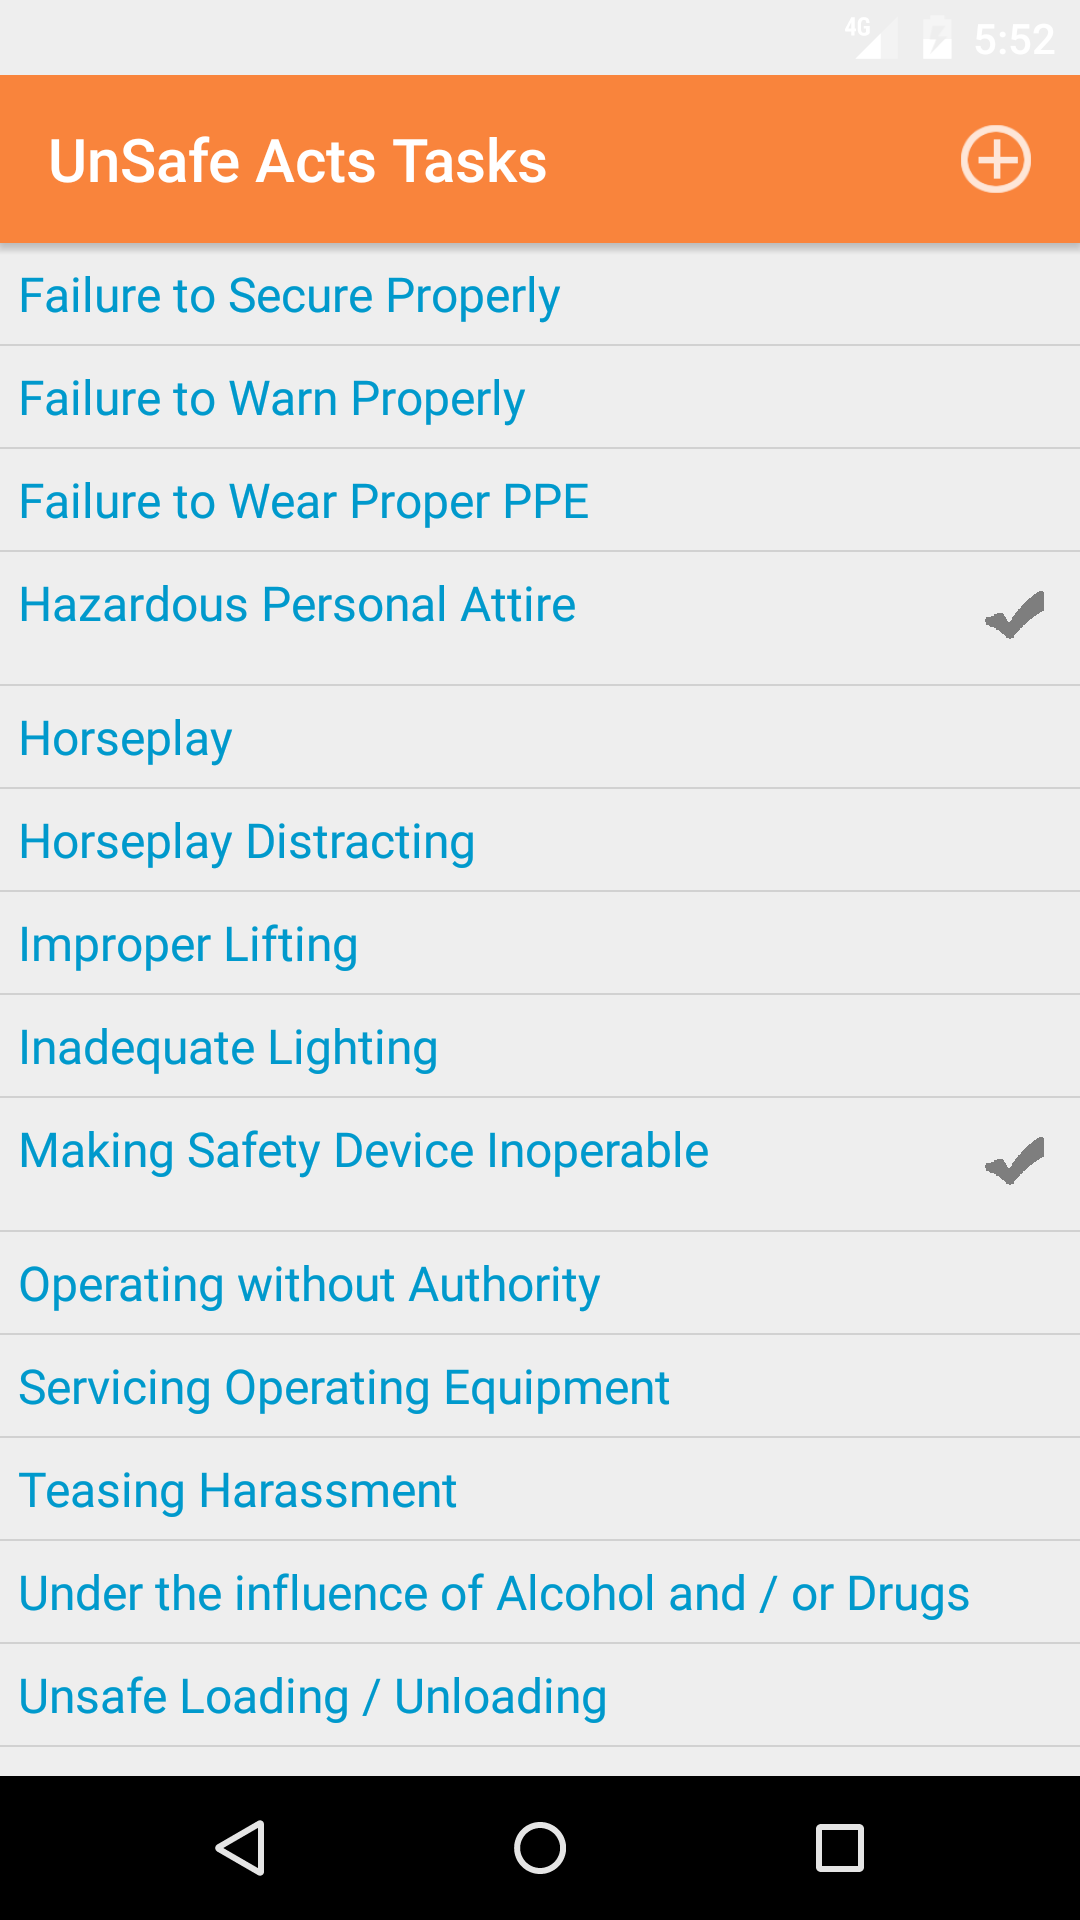
- Tap the Unsafe Acts button which loads with the unsafe acts investigation tasks listed with Task Name
in black, if the task is checked a checkmark will appear.
- Tap the + icon in the top right corner to add the Unsafe Acts screen.
- Unsafe Acts Name: The Unsafe Acts Name field gives the user to add a unsafe acts that did not appear on investigation task list. The character limit of this field is 75.
- Tap the + icon in the top right corner to add the Unsafe Acts.
|
|
|
|
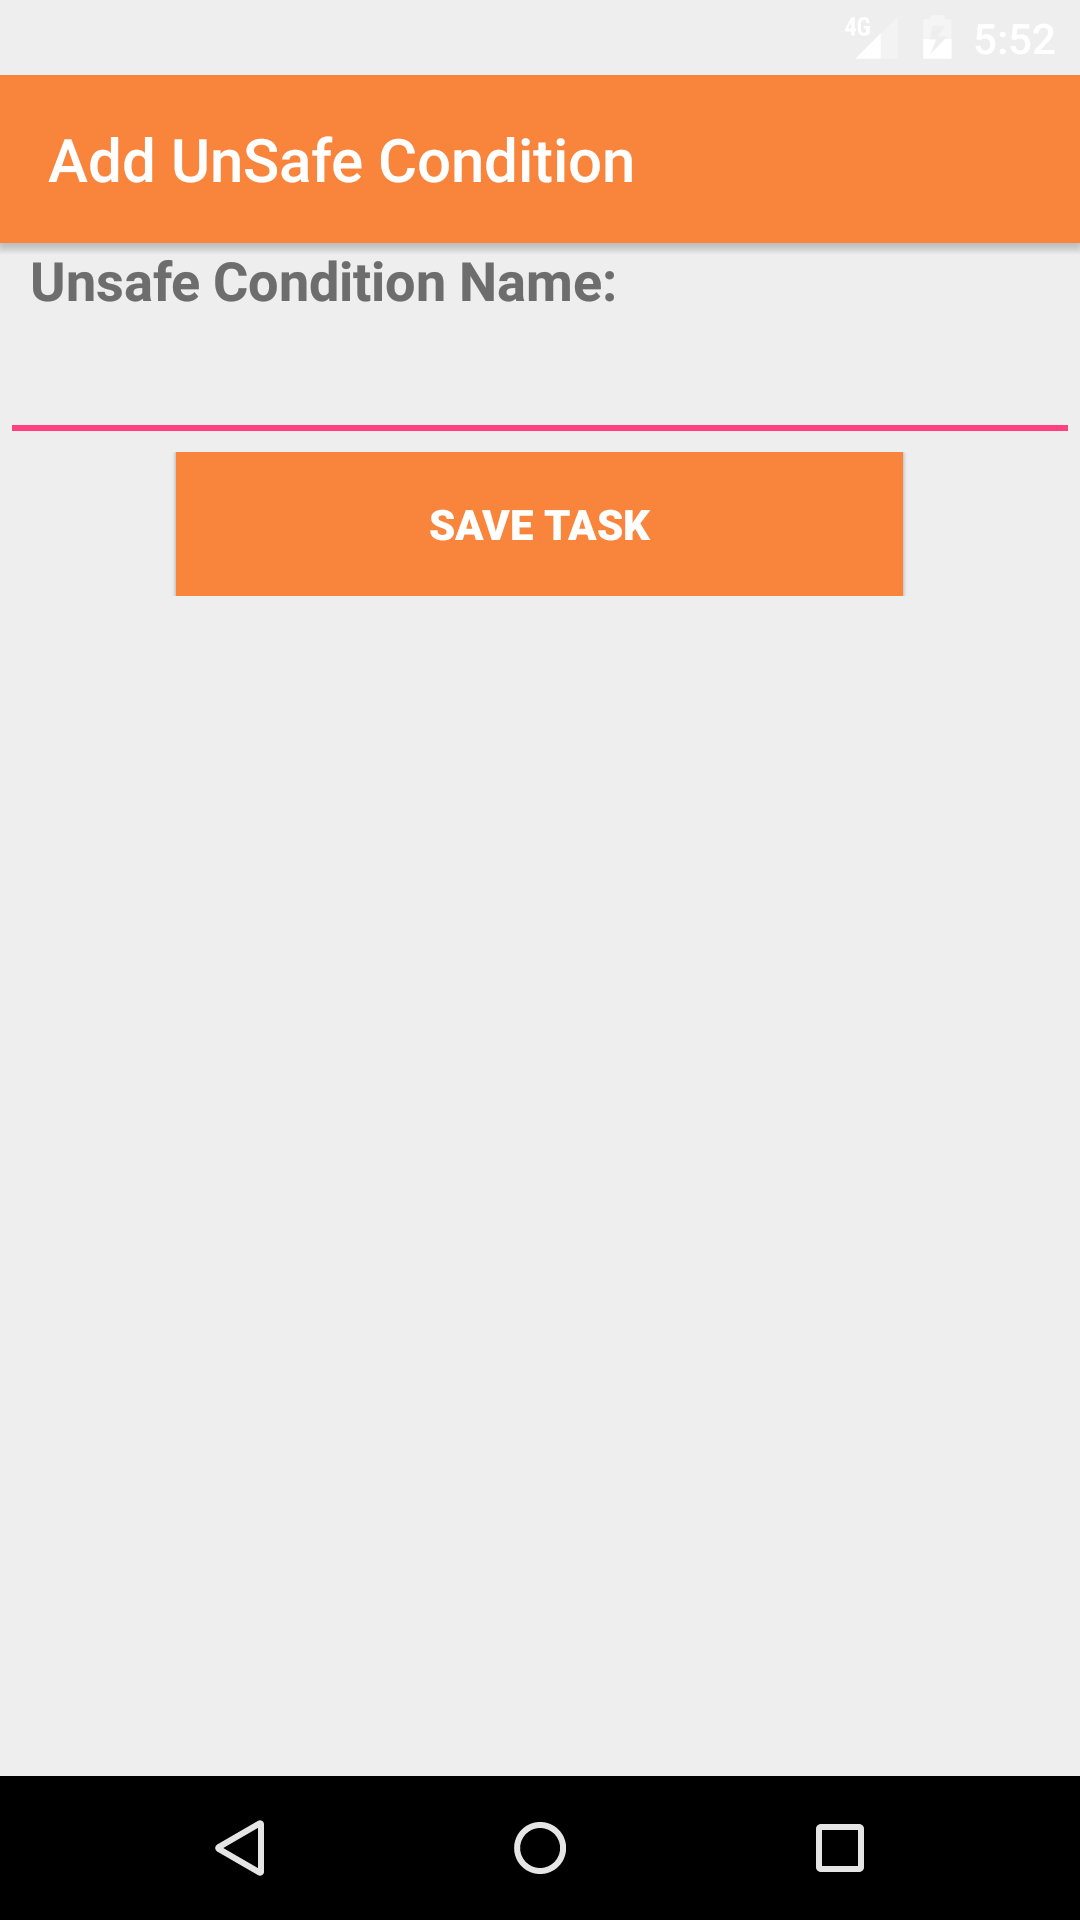
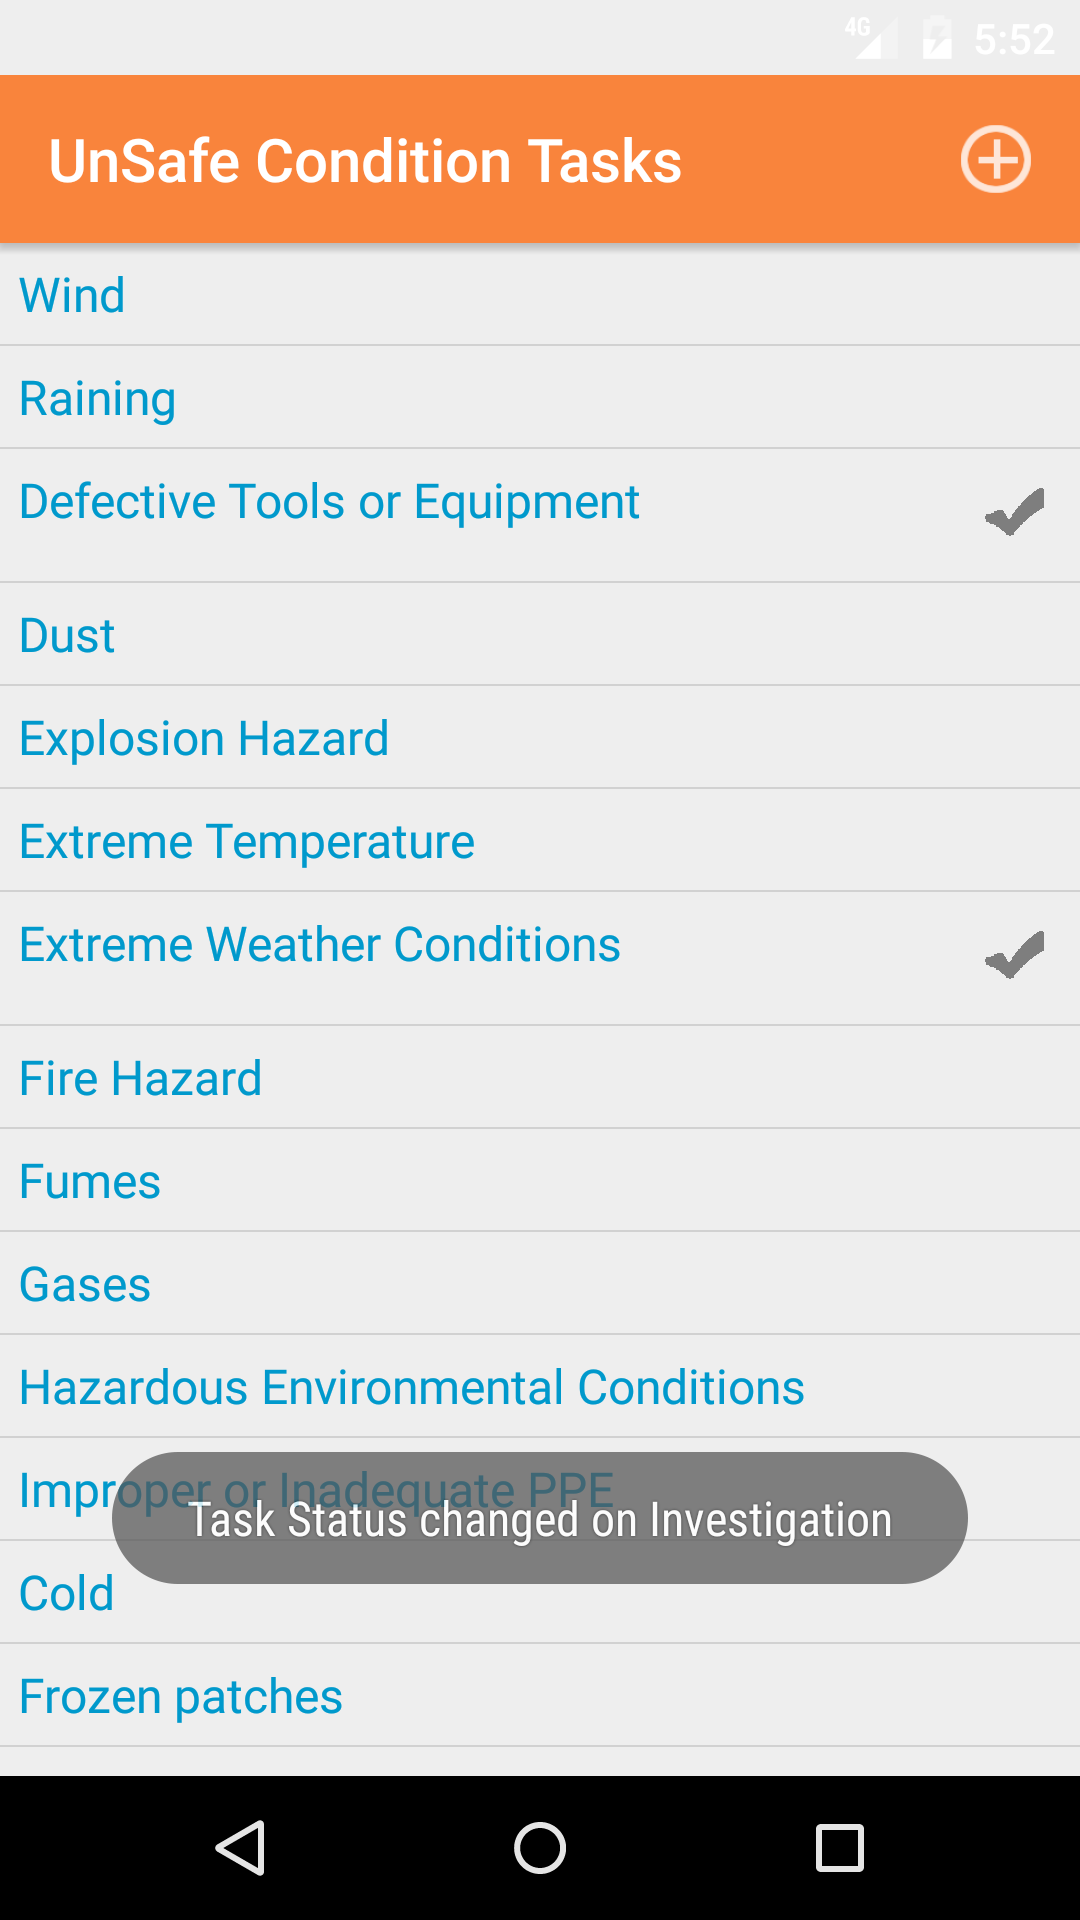
10.Add Unsafe Conditions Checklist Item |
|
Unsafe Conditions Investigation Tasks are safety investigation unsafe conditions investigation tasks that a company has set up for their field staff to complete
as part of their safety investigation. To ensure field staff have the most up to date copy of the investigation tasks a company is
using make sure to update your phone on a regular basis. For more information about updating your phone click here.
Once on the Safety Investigation you would like to Edit
Steps
- Tap the Investigation Tasks icon at the top of the screen to open the Investigation Tasks Checklist screen. The screen loads
with the list of the 8 checklist categories of the safety investigation.
- Tap the Unsafe Conditions button which loads with the unsafe conditions investigation tasks listed with Task Name
in black, if the task is checked a checkmark will appear.
- Tap the + icon in the top right corner to add the Unsafe Conditions screen.
- Unsafe Conditions Name: The Unsafe Conditions Name field gives the user to add a unsafe conditions that did not appear on investigation task list. The character limit of this field is 75.
- Tap the + icon in the top right corner to add the Unsafe Conditions.
|
|
|
|
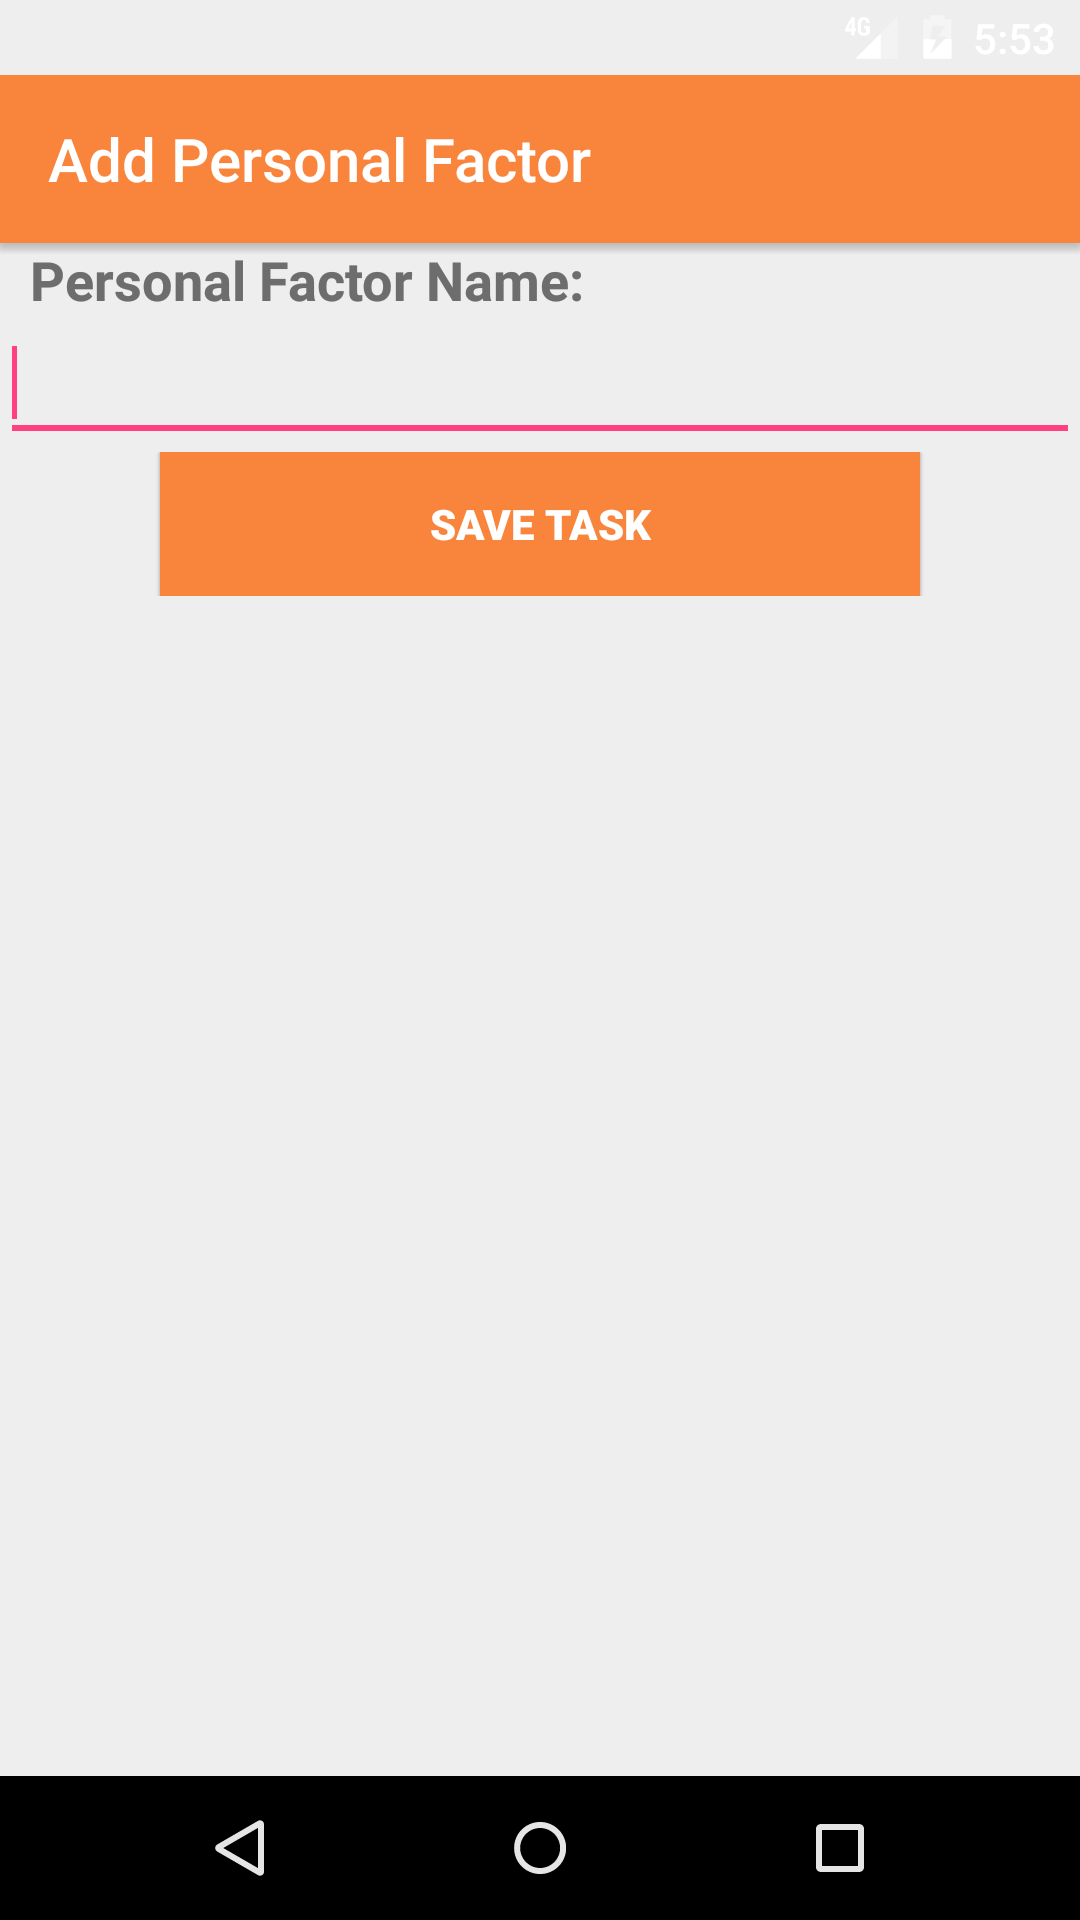
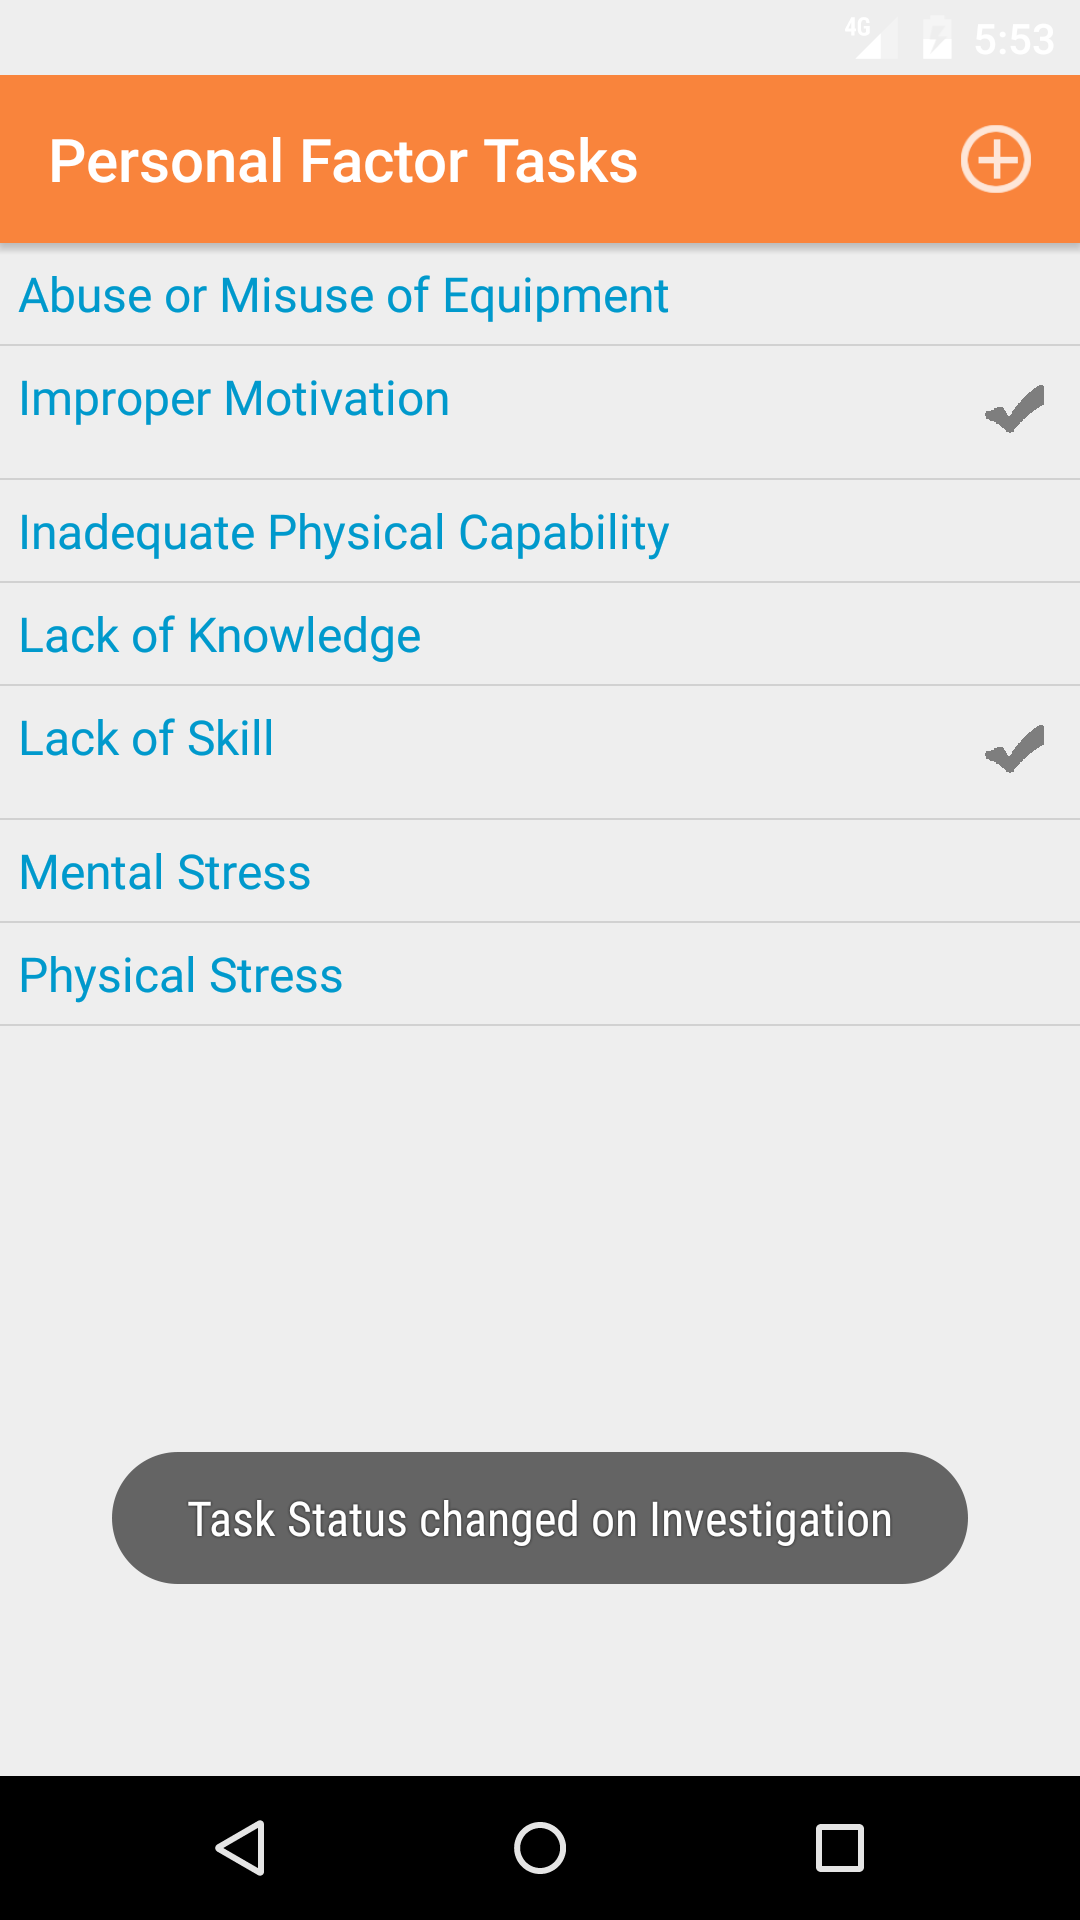
11.Add Personal Factor Checklist Item |
|
Personal Factors Investigation Tasks are safety investigation personal factors investigation tasks that a company has set up for their field staff to complete
as part of their safety investigation. To ensure field staff have the most up to date copy of the investigation tasks a company is
using make sure to update your phone on a regular basis. For more information about updating your phone click here.
Once on the Safety Investigation you would like to Edit
Steps
- Tap the Investigation Tasks icon at the top of the screen to open the Investigation Tasks Checklist screen. The screen loads
with the list of the 8 checklist categories of the safety investigation.
- Tap the Personal Factors button which loads with the personal factors investigation tasks listed with Task Name
in black, if the task is checked a checkmark will appear.
- Tap the + icon in the top right corner to add the Personal Factor screen.
- Personal Factor Name: The Personal Factor Name field gives the user to add a personal factor that did not appear on investigation task list. The character limit of this field is 75.
- Tap the + icon in the top right corner to add the Personal Factor.
|
|
|
|
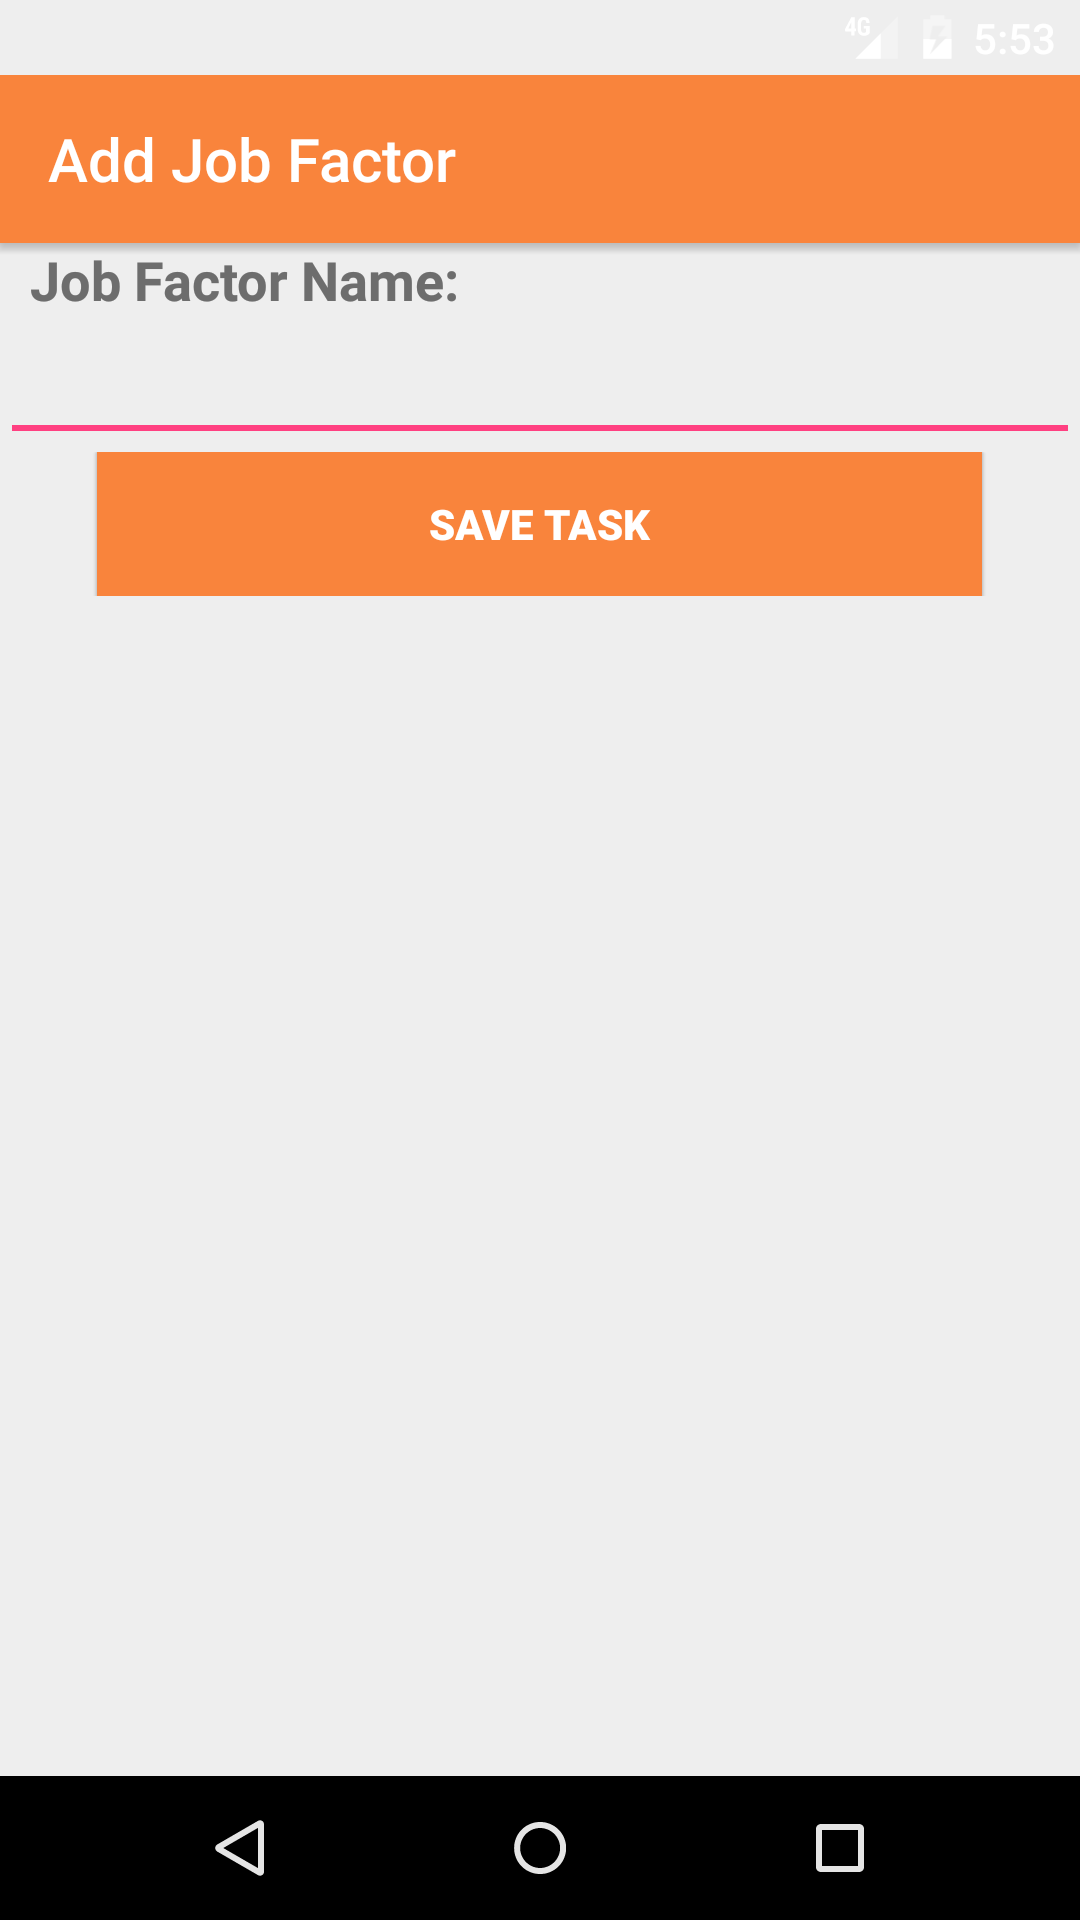
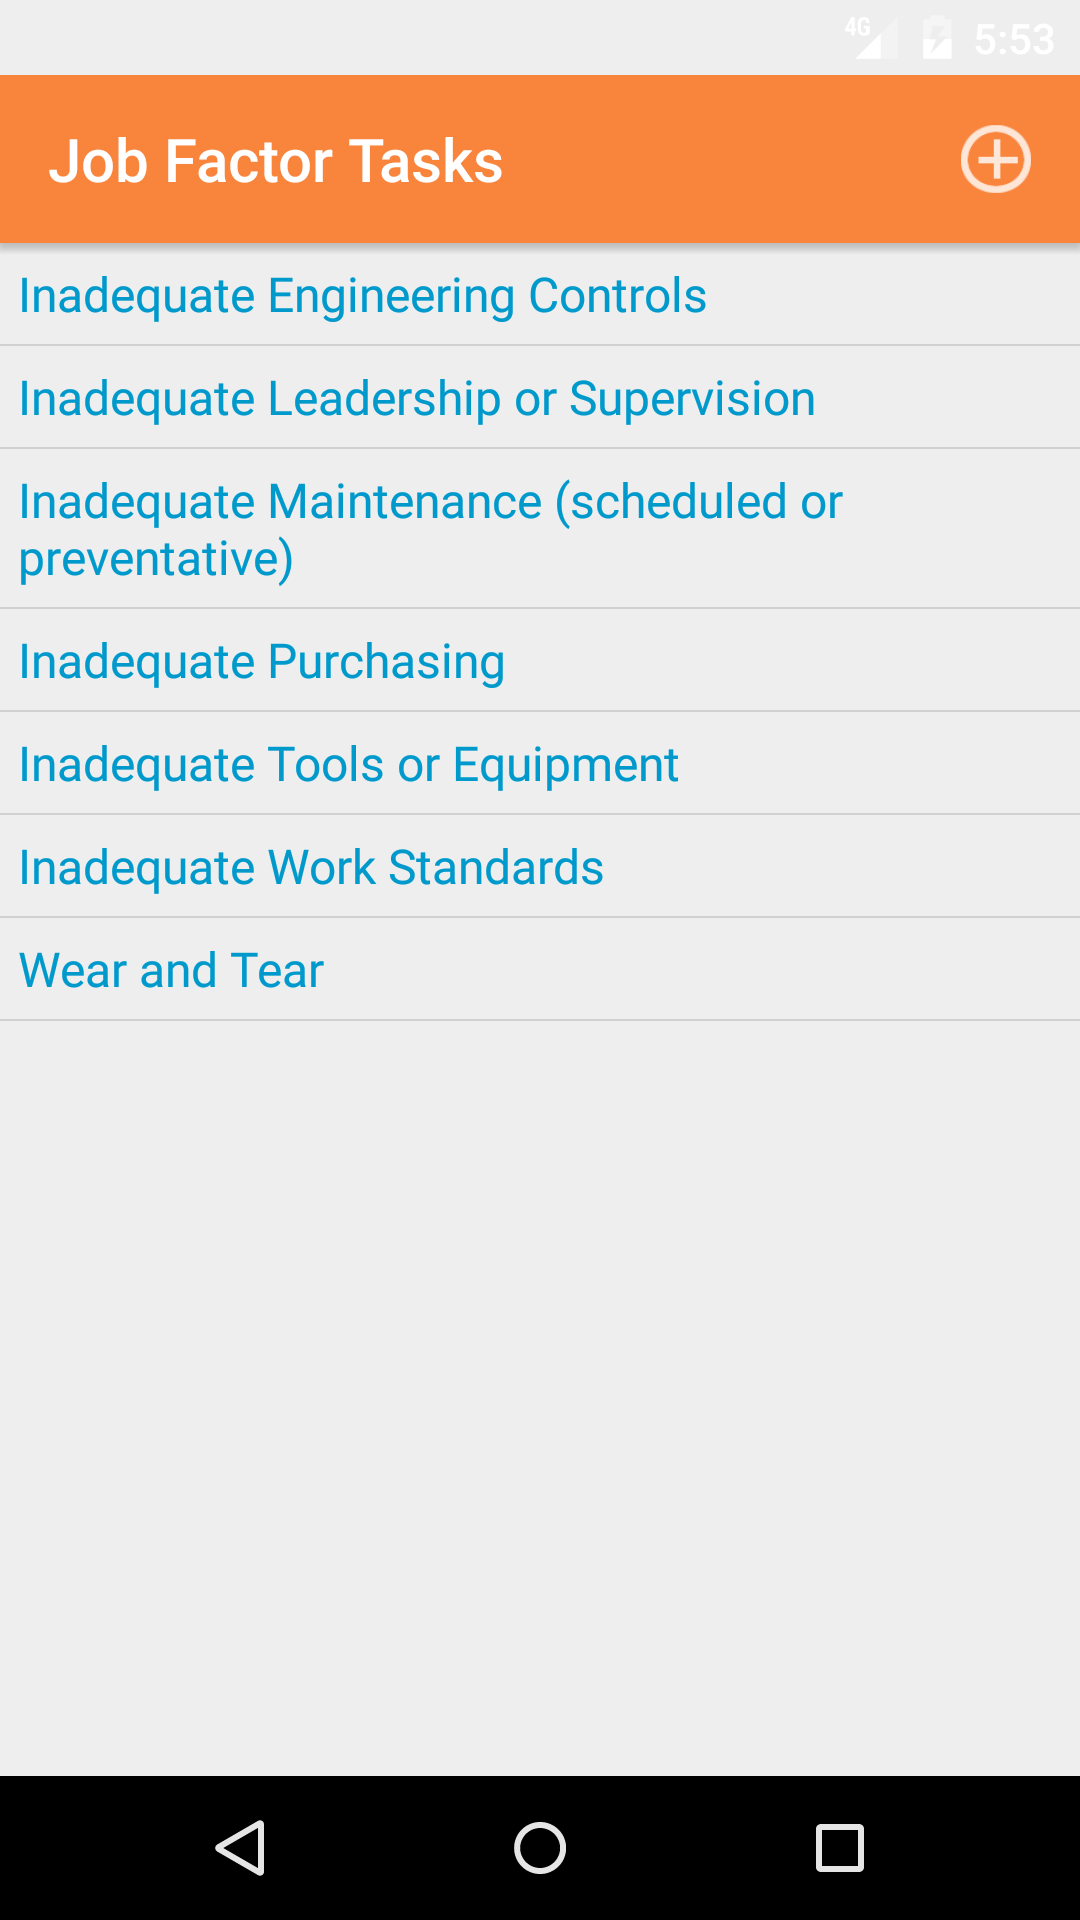
12.Add Job Factor Checklist Item |
|
Job Factors Investigation Tasks are safety investigation job factors investigation tasks that a company has set up for their field staff to complete
as part of their safety investigation. To ensure field staff have the most up to date copy of the investigation tasks a company is
using make sure to update your phone on a regular basis. For more information about updating your phone click here.
Once on the Safety Investigation you would like to Edit
Steps
- Tap the Investigation Tasks icon at the top of the screen to open the Investigation Tasks Checklist screen. The screen loads
with the list of the 8 checklist categories of the safety investigation.
- Tap the Job Factors button which loads with the job factors investigation tasks listed with Task Name
in black, if the task is checked a checkmark will appear.
- Tap the + icon in the top right corner to add the Job Factor screen.
- Job Factor Name: The Job Factor Name field gives the user to add a job factor that did not appear on investigation task list. The character limit of this field is 75.
- Tap the + icon in the top right corner to add the Job Factor.
|
|
|
|
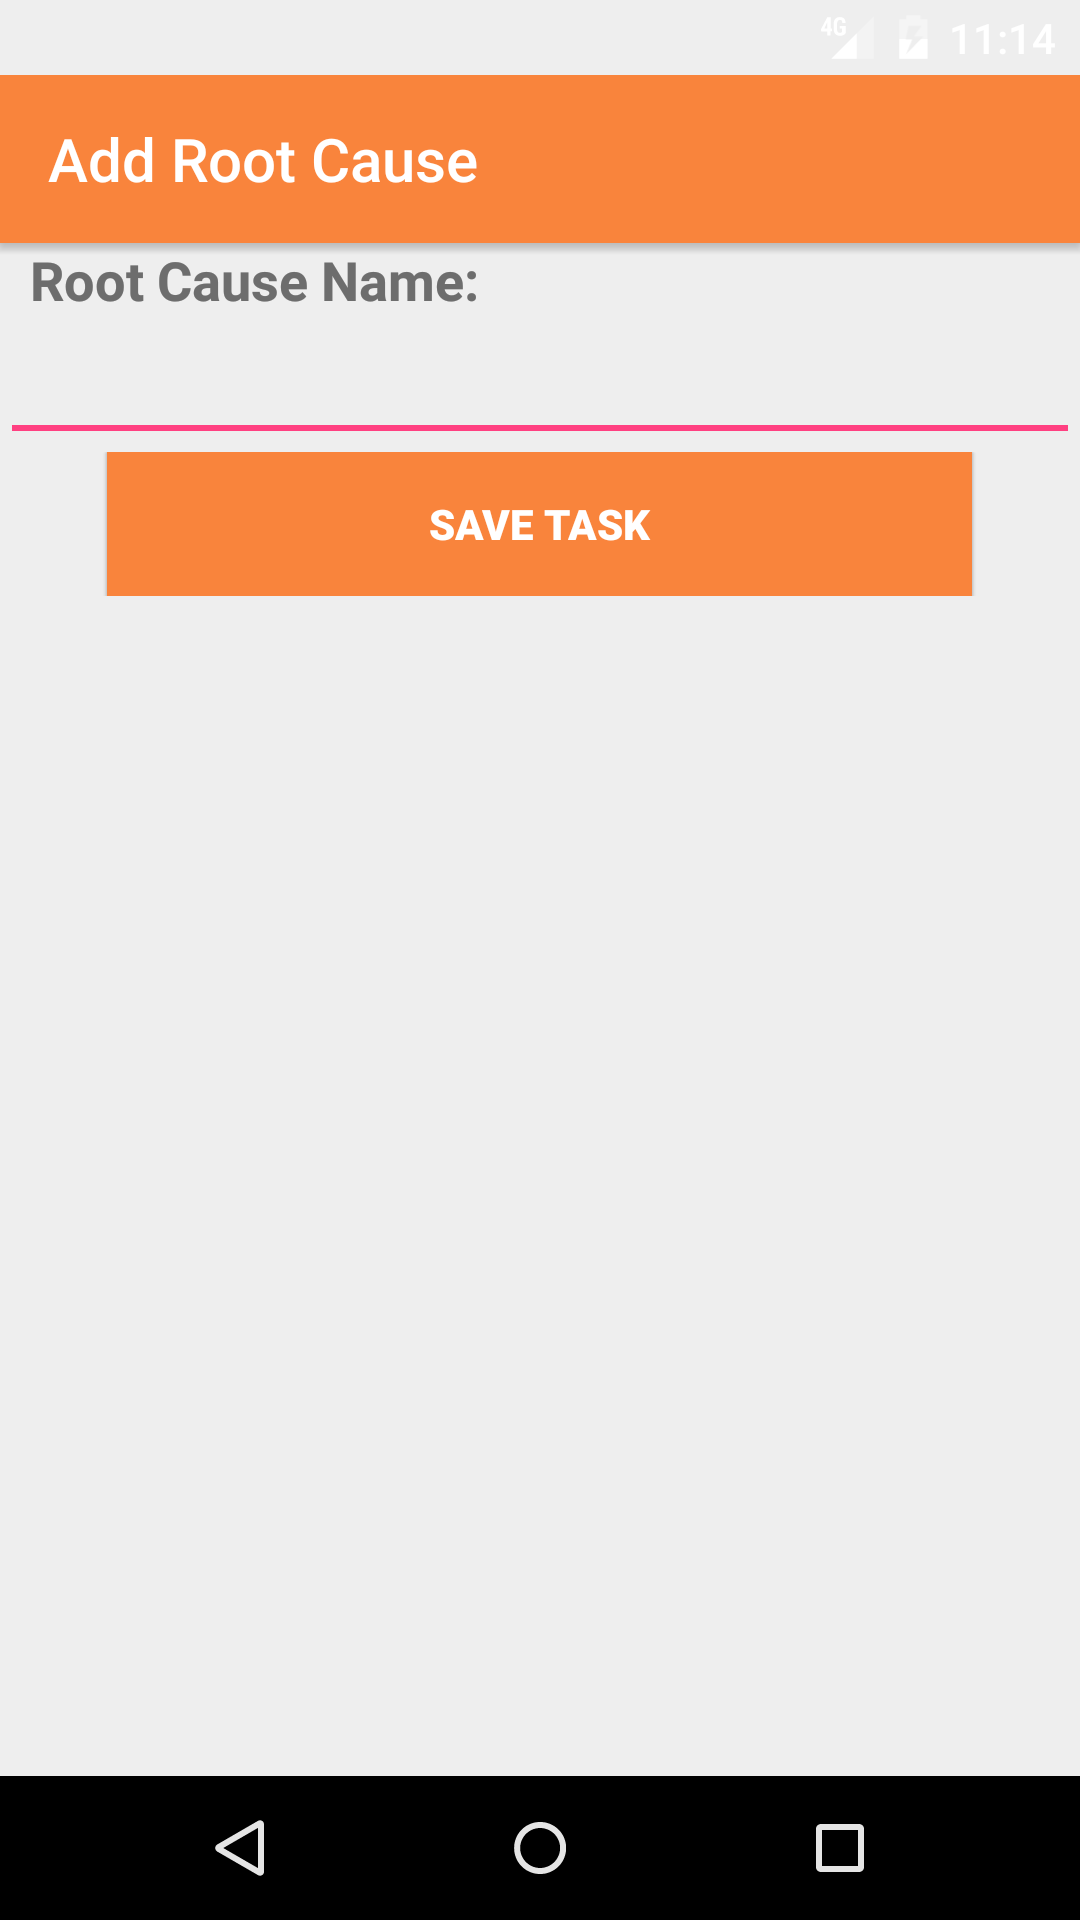
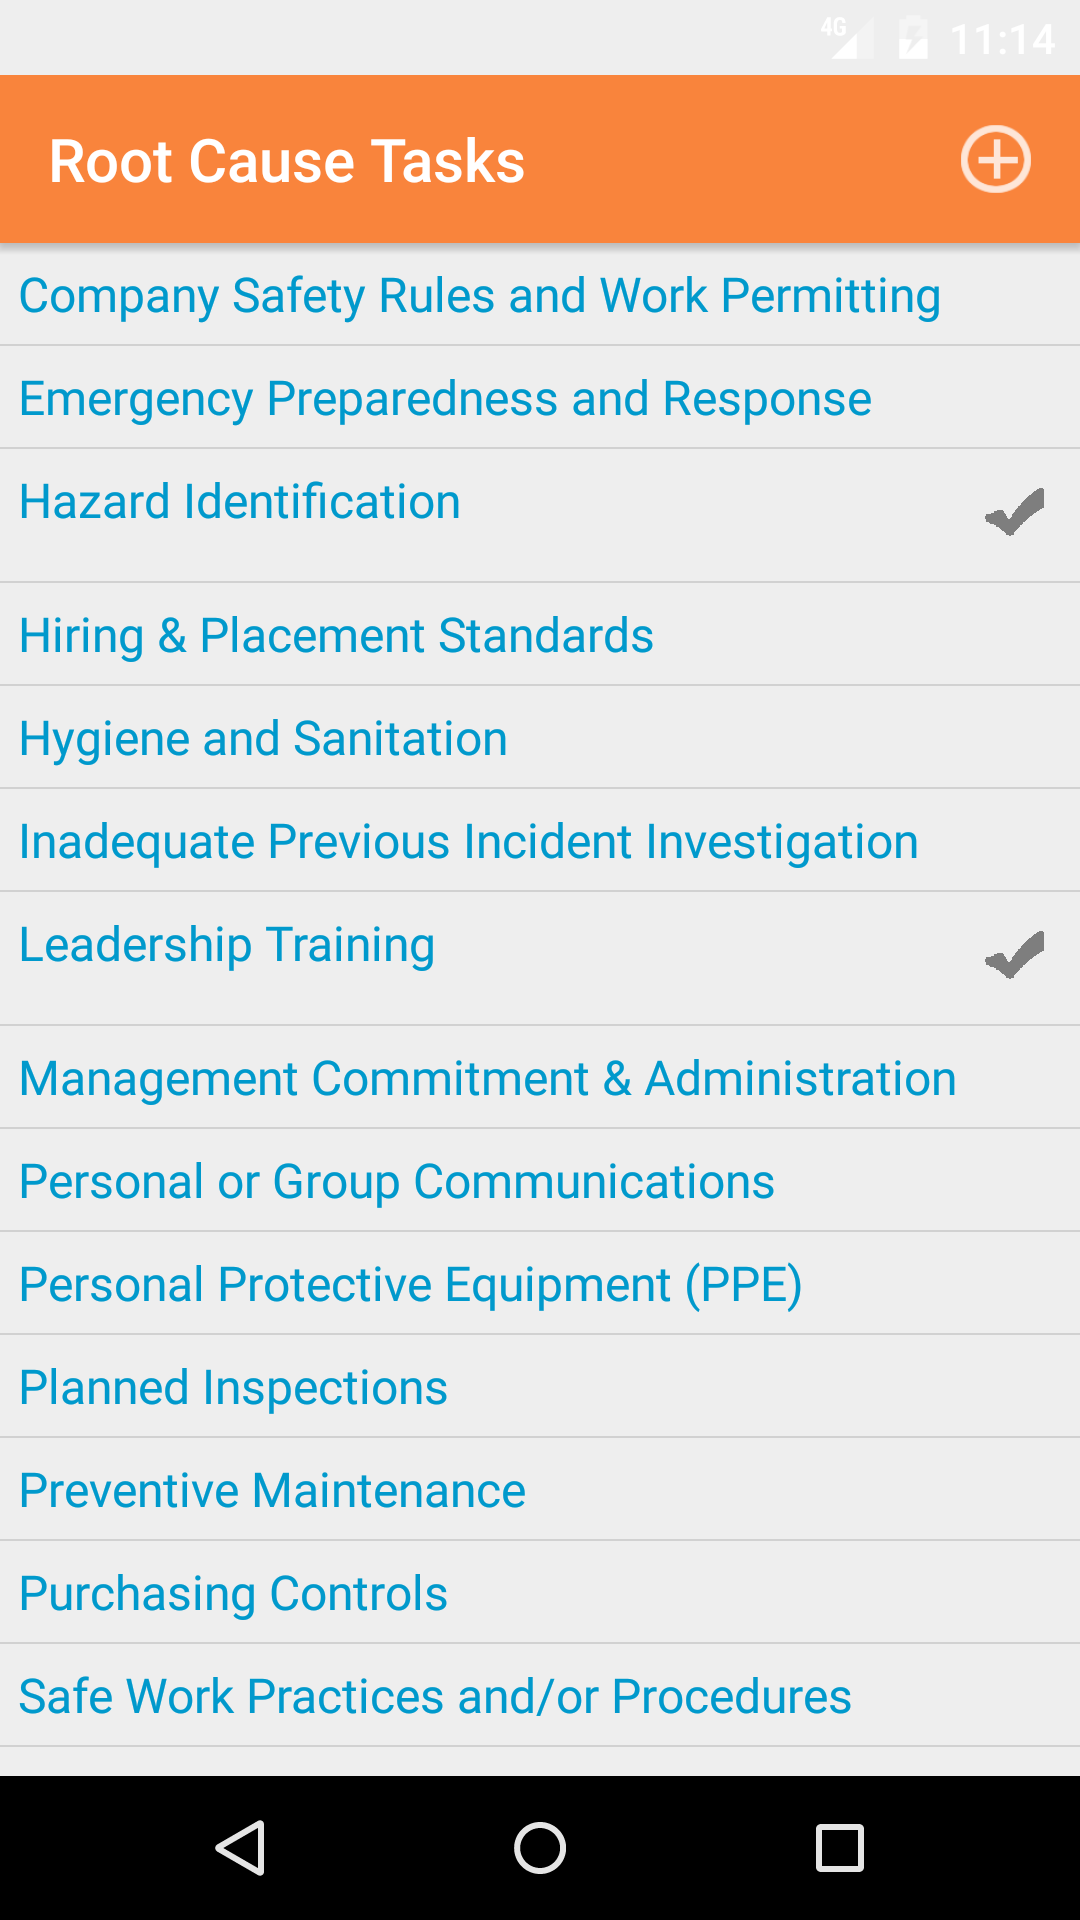
13.Add Root Cause Checklist Item |
|
Root Causes Investigation Tasks are safety investigation job factors investigation tasks that a company has set up for their field staff to complete
as part of their safety investigation. To ensure field staff have the most up to date copy of the investigation tasks a company is
using make sure to update your phone on a regular basis. For more information about updating your phone click here.
Once on the Safety Investigation you would like to Edit
Steps
- Tap the Investigation Tasks icon at the top of the screen to open the Investigation Tasks Checklist screen. The screen loads
with the list of the 8 checklist categories of the safety investigation.
- Tap the Root Causes button which loads with the root causes investigation tasks listed with Task Name
in black, if the task is checked a checkmark will appear.
- Tap the + icon in the top right corner to add the Root Cause screen.
- Root Cause Name: The Job Factor Name field gives the user to add a root cause that did not appear on investigation task list. The character limit of this field is 75.
- Tap the + icon in the top right corner to add the Root Cause.
|
|
|
|
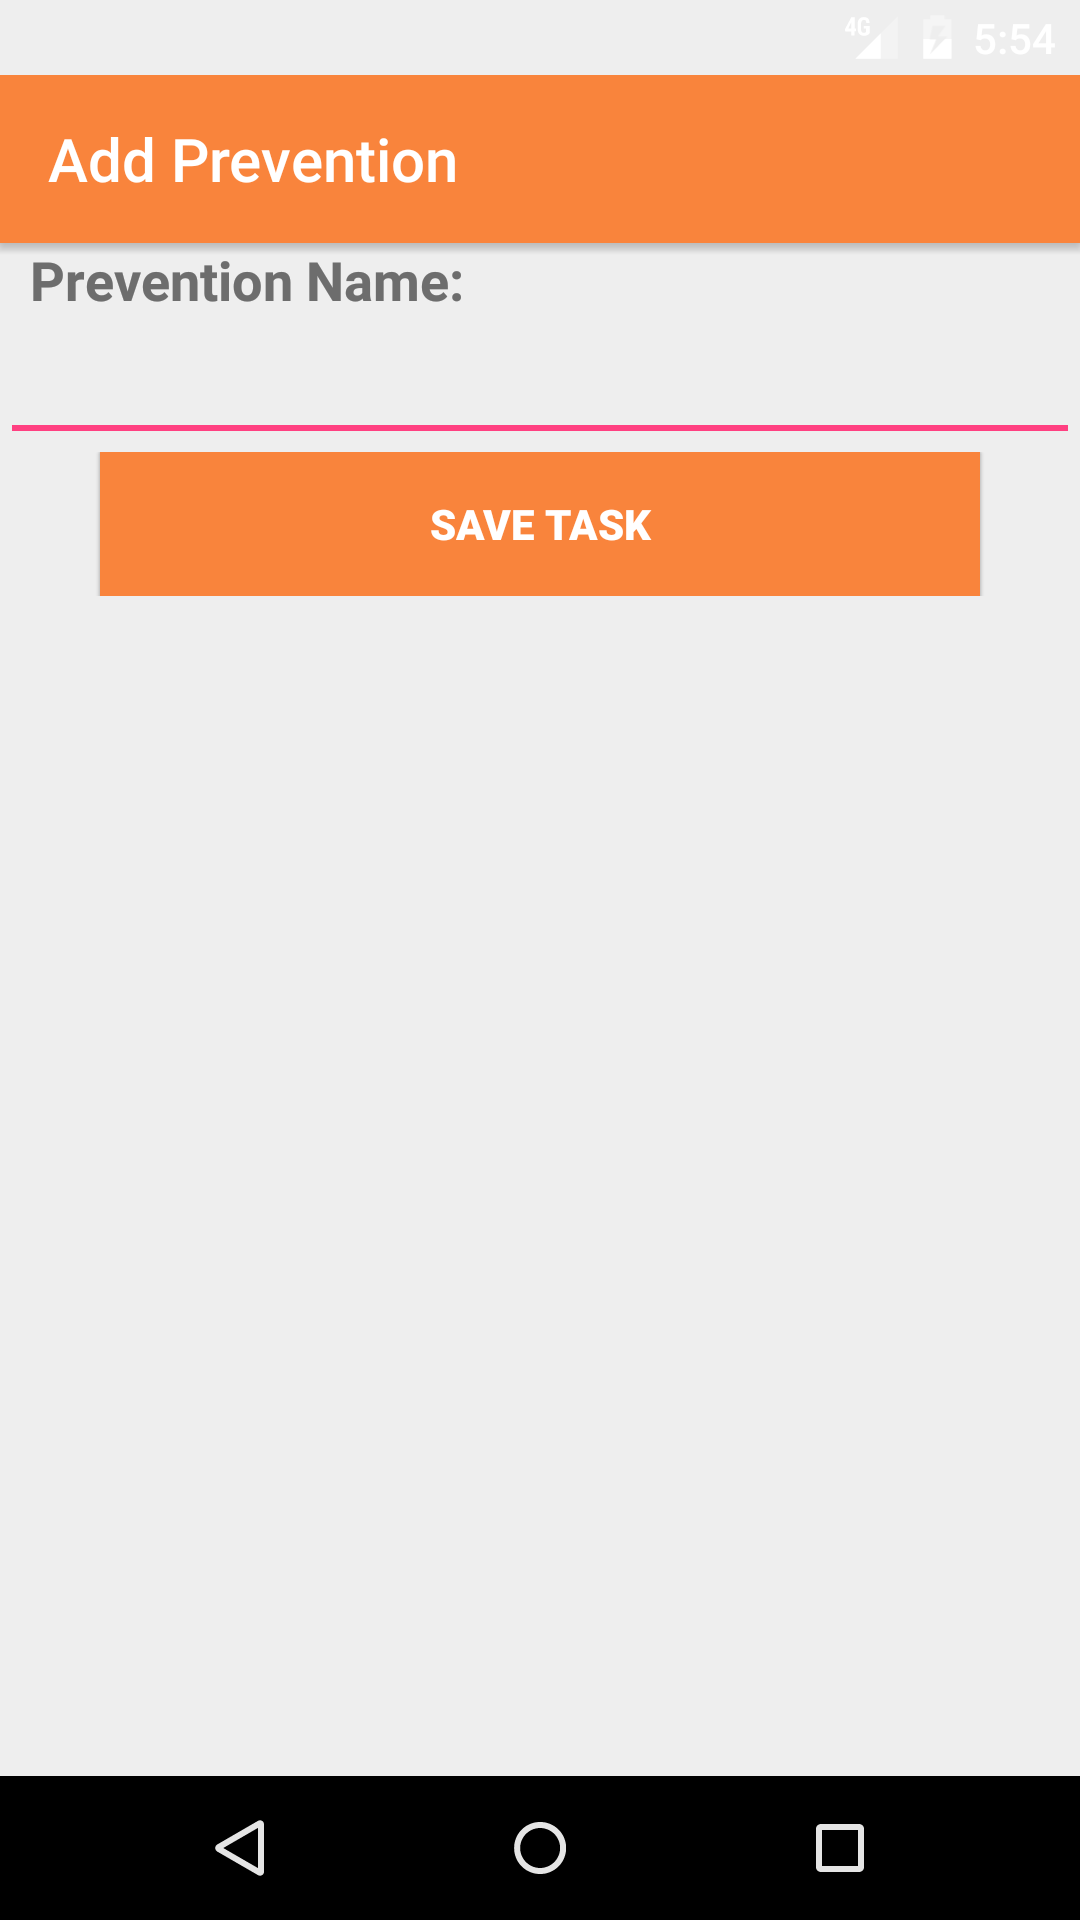
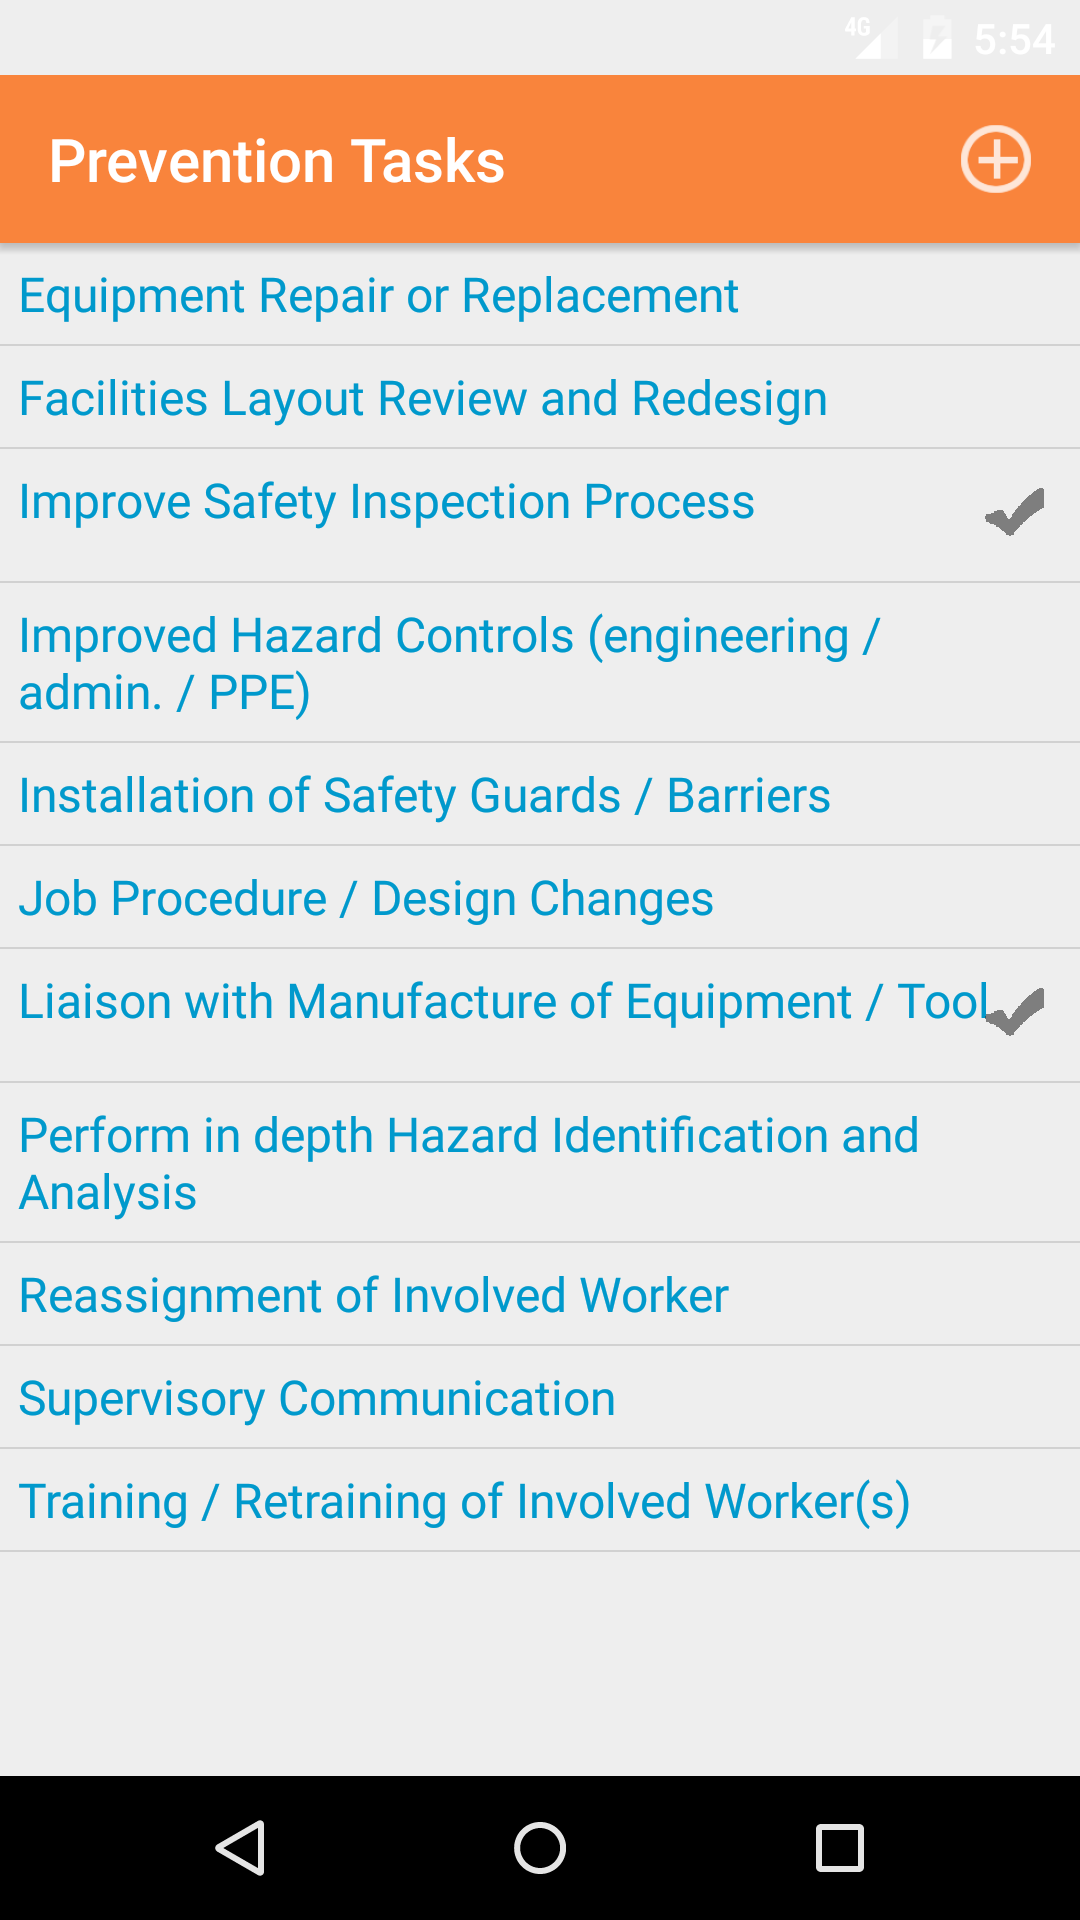
14.Add Prevention Checklist Item |
|
Preventions Investigation Tasks are safety investigation preventions investigation tasks that a company has set up for their field staff to complete
as part of their safety investigation. To ensure field staff have the most up to date copy of the investigation tasks a company is
using make sure to update your phone on a regular basis. For more information about updating your phone click here.
Once on the Safety Investigation you would like to Edit
Steps
- Tap the Investigation Tasks icon at the top of the screen to open the Investigation Tasks Checklist screen. The screen loads
with the list of the 8 checklist categories of the safety investigation.
- Tap the Preventions button which loads with the preventions investigation tasks listed with Task Name
in black, if the task is checked a checkmark will appear.
- Tap the + icon in the top right corner to add the Prevention screen.
- Prevention Name: The Prevention Name field gives the user to add a prevention that did not appear on investigation task list. The character limit of this field is 75.
- Tap the + icon in the top right corner to add the Prevention.
|
|
|
|
15.Edit Incident Type Checklist |
|
Incident Type Investigation Tasks are safety investigation incident type investigation tasks that a company has set up for their field staff to complete
as part of their safety investigation. To ensure field staff have the most up to date copy of the investigation tasks a company is
using make sure to update your phone on a regular basis. For more information about updating your phone click here.
Once on the Safety Investigation you would like to Edit
Steps
- Tap the Investigation Tasks icon at the top of the screen to open the Investigation Tasks Checklist screen. The screen loads
with the list of the 8 checklist categories of the safety investigation.
- Tap the Type of Incident button which loads with the type of incident investigation tasks listed with Task Name
in black, if the task is checked a checkmark will appear.
- Scroll the list of tasks until the desired task is displayed on the screen.
- Tap on the Task, which will check or un check a task.
|
|
| Step 1 |
|
|
| Steps 2-3 |
|
|
|
16.Edit Contact With Checklist |
|
Contact With Investigation Tasks are safety investigation contact with investigation tasks that a company has set up for their field staff to complete
as part of their safety investigation. To ensure field staff have the most up to date copy of the investigation tasks a company is
using make sure to update your phone on a regular basis. For more information about updating your phone click here.
Once on the Safety Investigation you would like to Edit
Steps
- Tap the Investigation Tasks icon at the top of the screen to open the Investigation Tasks Checklist screen. The screen loads
with the list of the 8 checklist categories of the safety investigation.
- Tap the Contact With button which loads with the contact with investigation tasks listed with Task Name
in black, if the task is checked a checkmark will appear.
- Scroll the list of tasks until the desired task is displayed on the screen.
- Tap on the Task, which will check or un check a task.
|
|
|
| Step 1 |
|
|
| Steps 2-3 |
|
|
|
17.Edit Unsafe Act Checklist |
|
Unsafe Acts Investigation Tasks are safety investigation unsafe acts investigation tasks that a company has set up for their field staff to complete
as part of their safety investigation. To ensure field staff have the most up to date copy of the investigation tasks a company is
using make sure to update your phone on a regular basis. For more information about updating your phone click here.
Once on the Safety Investigation you would like to Edit
Steps
- Tap the Investigation Tasks icon at the top of the screen to open the Investigation Tasks Checklist screen. The screen loads
with the list of the 8 checklist categories of the safety investigation.
- Tap the Unsafe Acts button which loads with the unsafe acts investigation tasks listed with Task Name
in black, if the task is checked a checkmark will appear.
- Scroll the list of tasks until the desired task is displayed on the screen.
- Tap on the Task, which will check or un check a task.
|
|
|
| Step 1 |
|
|
| Steps 2-3 |
|
|
|
18.Edit Unsafe Conditions Checklist |
|
Unsafe Conditions Investigation Tasks are safety investigation unsafe conditions investigation tasks that a company has set up for their field staff to complete
as part of their safety investigation. To ensure field staff have the most up to date copy of the investigation tasks a company is
using make sure to update your phone on a regular basis. For more information about updating your phone click here.
Once on the Safety Investigation you would like to Edit
Steps
- Tap the Investigation Tasks icon at the top of the screen to open the Investigation Tasks Checklist screen. The screen loads
with the list of the 8 checklist categories of the safety investigation.
- Tap the Unsafe Conditions button which loads with the unsafe conditions investigation tasks listed with Task Name
in black, if the task is checked a checkmark will appear.
- Scroll the list of tasks until the desired task is displayed on the screen.
- Tap on the Task, which will check or un check a task.
|
|
|
| Step 1 |
|
|
| Steps 2-3 |
|
|
|
19.Edit Personal Factor Checklist |
|
Personal Factors Investigation Tasks are safety investigation personal factors investigation tasks that a company has set up for their field staff to complete
as part of their safety investigation. To ensure field staff have the most up to date copy of the investigation tasks a company is
using make sure to update your phone on a regular basis. For more information about updating your phone click here.
Once on the Safety Investigation you would like to Edit
Steps
- Tap the Investigation Tasks icon at the top of the screen to open the Investigation Tasks Checklist screen. The screen loads
with the list of the 8 checklist categories of the safety investigation.
- Tap the Personal Factors button which loads with the personal factors investigation tasks listed with Task Name
in black, if the task is checked a checkmark will appear.
- Scroll the list of tasks until the desired task is displayed on the screen.
- Tap on the Task, which will check or un check a task.
|
|
|
| Step 1 |
|
|
| Steps 2-3 |
|
|
|
20.Edit Job Factor Checklist |
|
Job Factors Investigation Tasks are safety investigation job factors investigation tasks that a company has set up for their field staff to complete
as part of their safety investigation. To ensure field staff have the most up to date copy of the investigation tasks a company is
using make sure to update your phone on a regular basis. For more information about updating your phone click here.
Once on the Safety Investigation you would like to Edit
Steps
- Tap the Investigation Tasks icon at the top of the screen to open the Investigation Tasks Checklist screen. The screen loads
with the list of the 8 checklist categories of the safety investigation.
- Tap the Job Factors button which loads with the job factors investigation tasks listed with Task Name
in black, if the task is checked a checkmark will appear.
- Scroll the list of tasks until the desired task is displayed on the screen.
- Tap on the Task, which will check or un check a task.
|
|
|
| Step 1 |
|
|
| Steps 2-3 |
|
|
|
21.Edit Root Cause Checklist |
|
Root Causes Investigation Tasks are safety investigation job factors investigation tasks that a company has set up for their field staff to complete
as part of their safety investigation. To ensure field staff have the most up to date copy of the investigation tasks a company is
using make sure to update your phone on a regular basis. For more information about updating your phone click here.
Once on the Safety Investigation you would like to Edit
Steps
- Tap the Investigation Tasks icon at the top of the screen to open the Investigation Tasks Checklist screen. The screen loads
with the list of the 8 checklist categories of the safety investigation.
- Tap the Root Causes button which loads with the root causes investigation tasks listed with Task Name
in black, if the task is checked a checkmark will appear.
- Scroll the list of tasks until the desired task is displayed on the screen.
- Tap on the Task, which will check or un check a task.
|
|
|
| Step 1 |
|
|
| Steps 2-3 |
|
|
|
22.Edit Prevention Checklist |
|
Preventions Investigation Tasks are safety investigation job factors investigation tasks that a company has set up for their field staff to complete
as part of their safety investigation. To ensure field staff have the most up to date copy of the investigation tasks a company is
using make sure to update your phone on a regular basis. For more information about updating your phone click here.
Once on the Safety Investigation you would like to Edit
Steps
- Tap the Investigation Tasks icon at the top of the screen to open the Investigation Tasks Checklist screen. The screen loads
with the list of the 8 checklist categories of the safety investigation.
- Tap the Preventions button which loads with the preventions investigation tasks listed with Task Name
in black, if the task is checked a checkmark will appear.
- Scroll the list of tasks until the desired task is displayed on the screen.
- Tap on the Task, which will check or un check a task.
|
|
|
| Step 1 |
|
|
| Steps 2-3 |
|
|
|
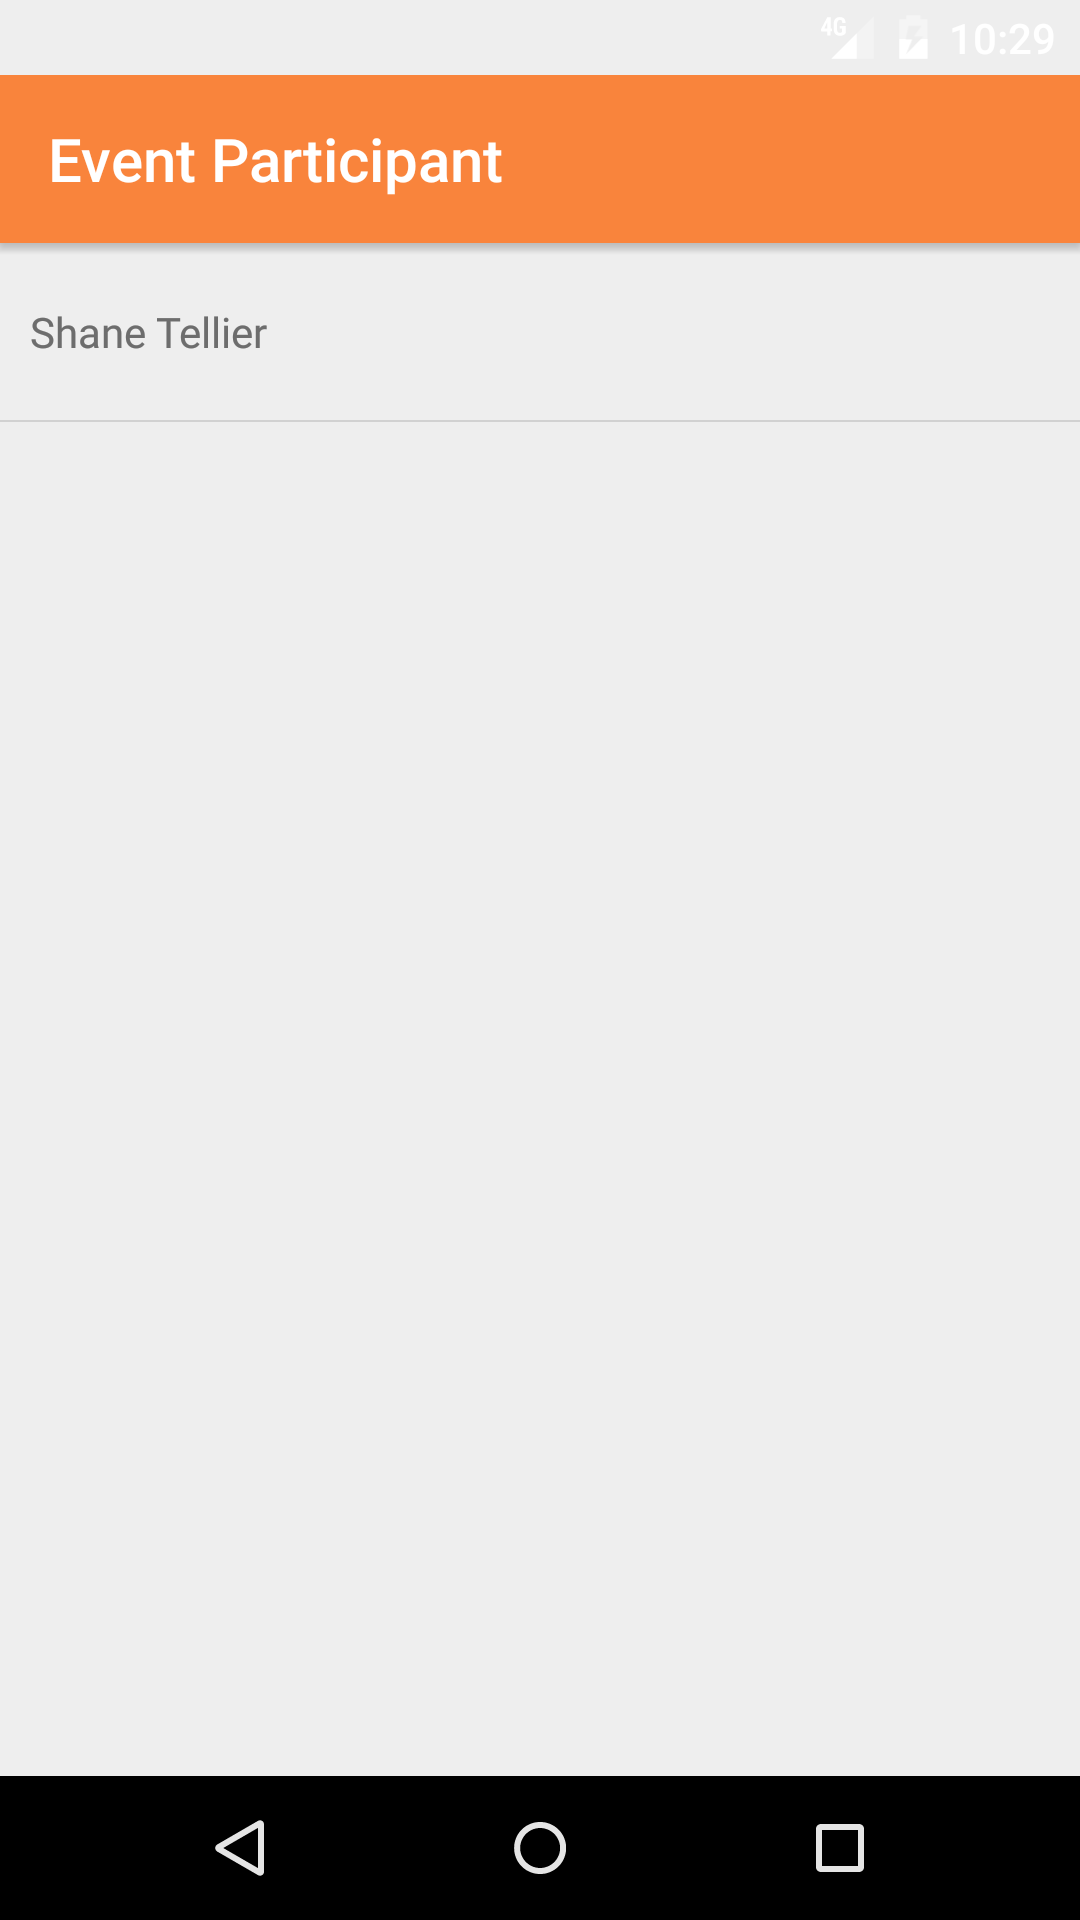
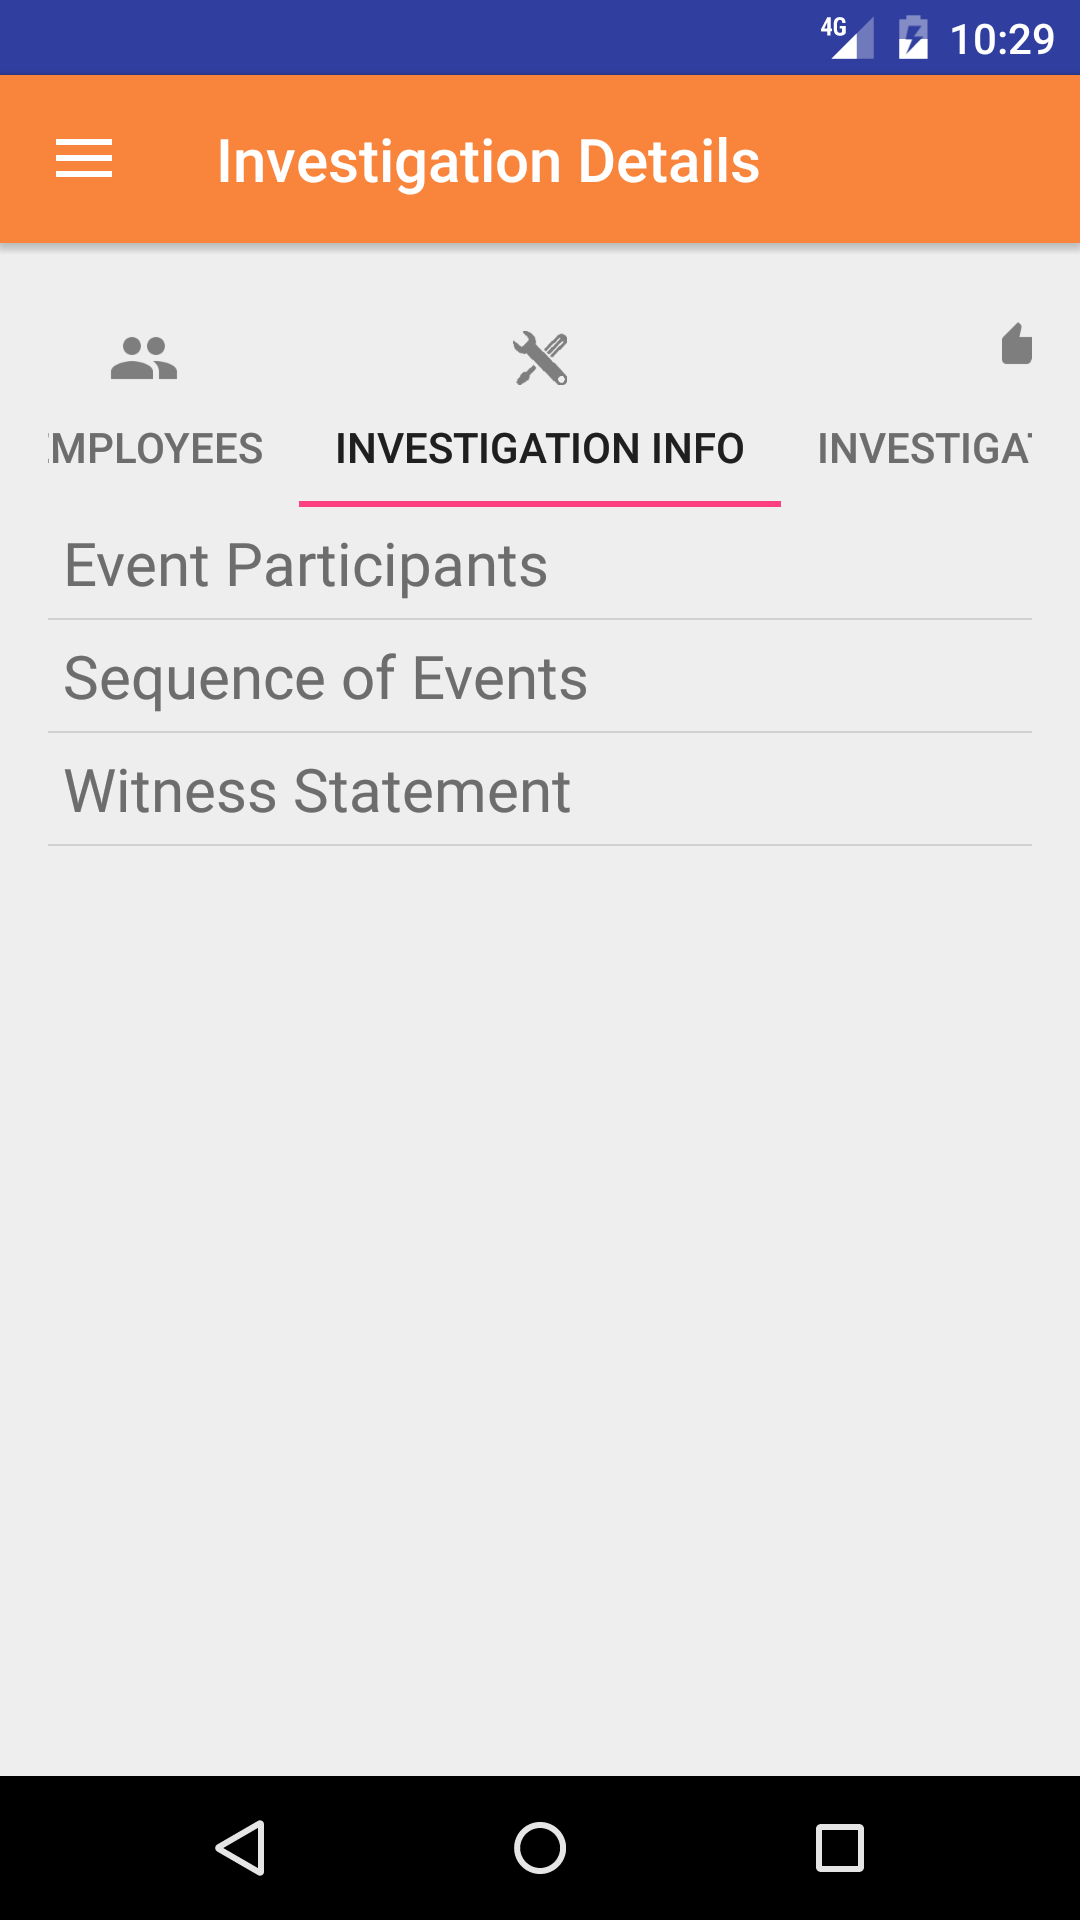
23.Add Event Participant |
|
Event Participant are field staff that are involved in the event. In the case of a near miss investigation, not all people involved
were at fault during the near miss.
Once on the Safety Investigation you would like to edit.
Steps
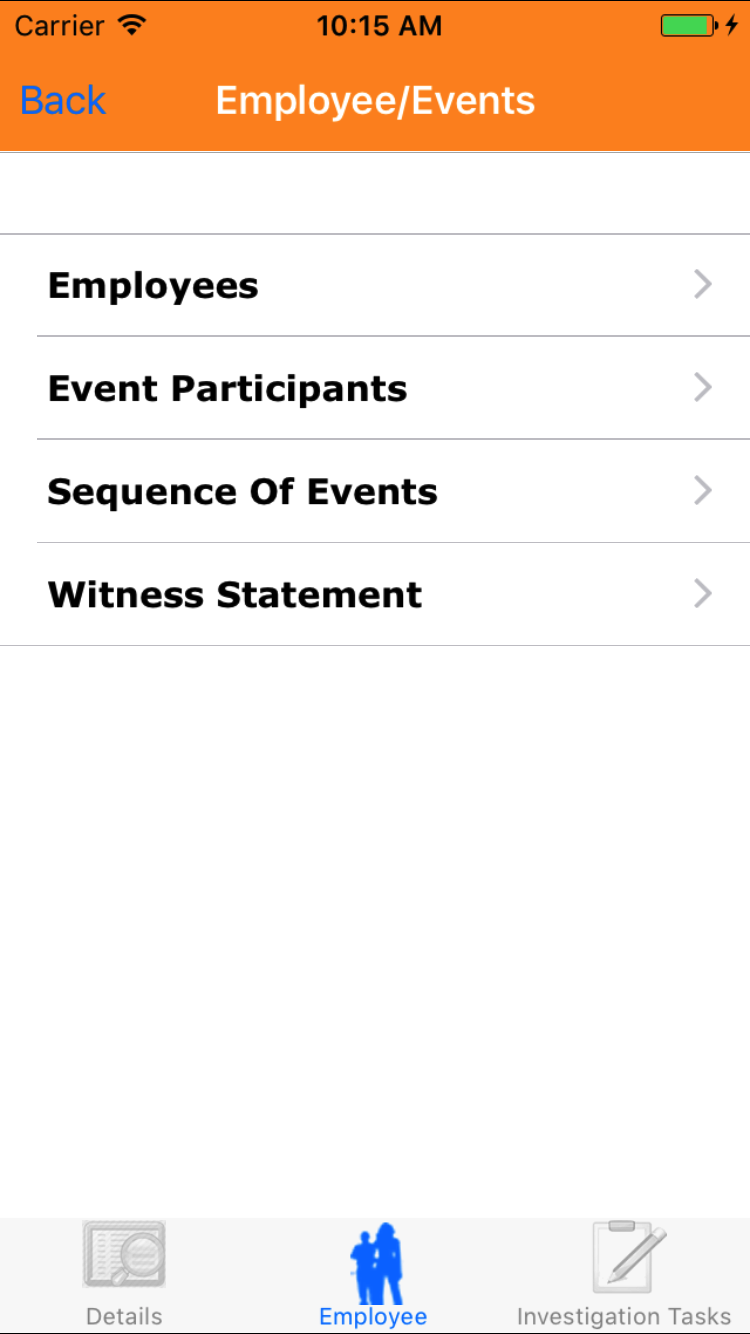
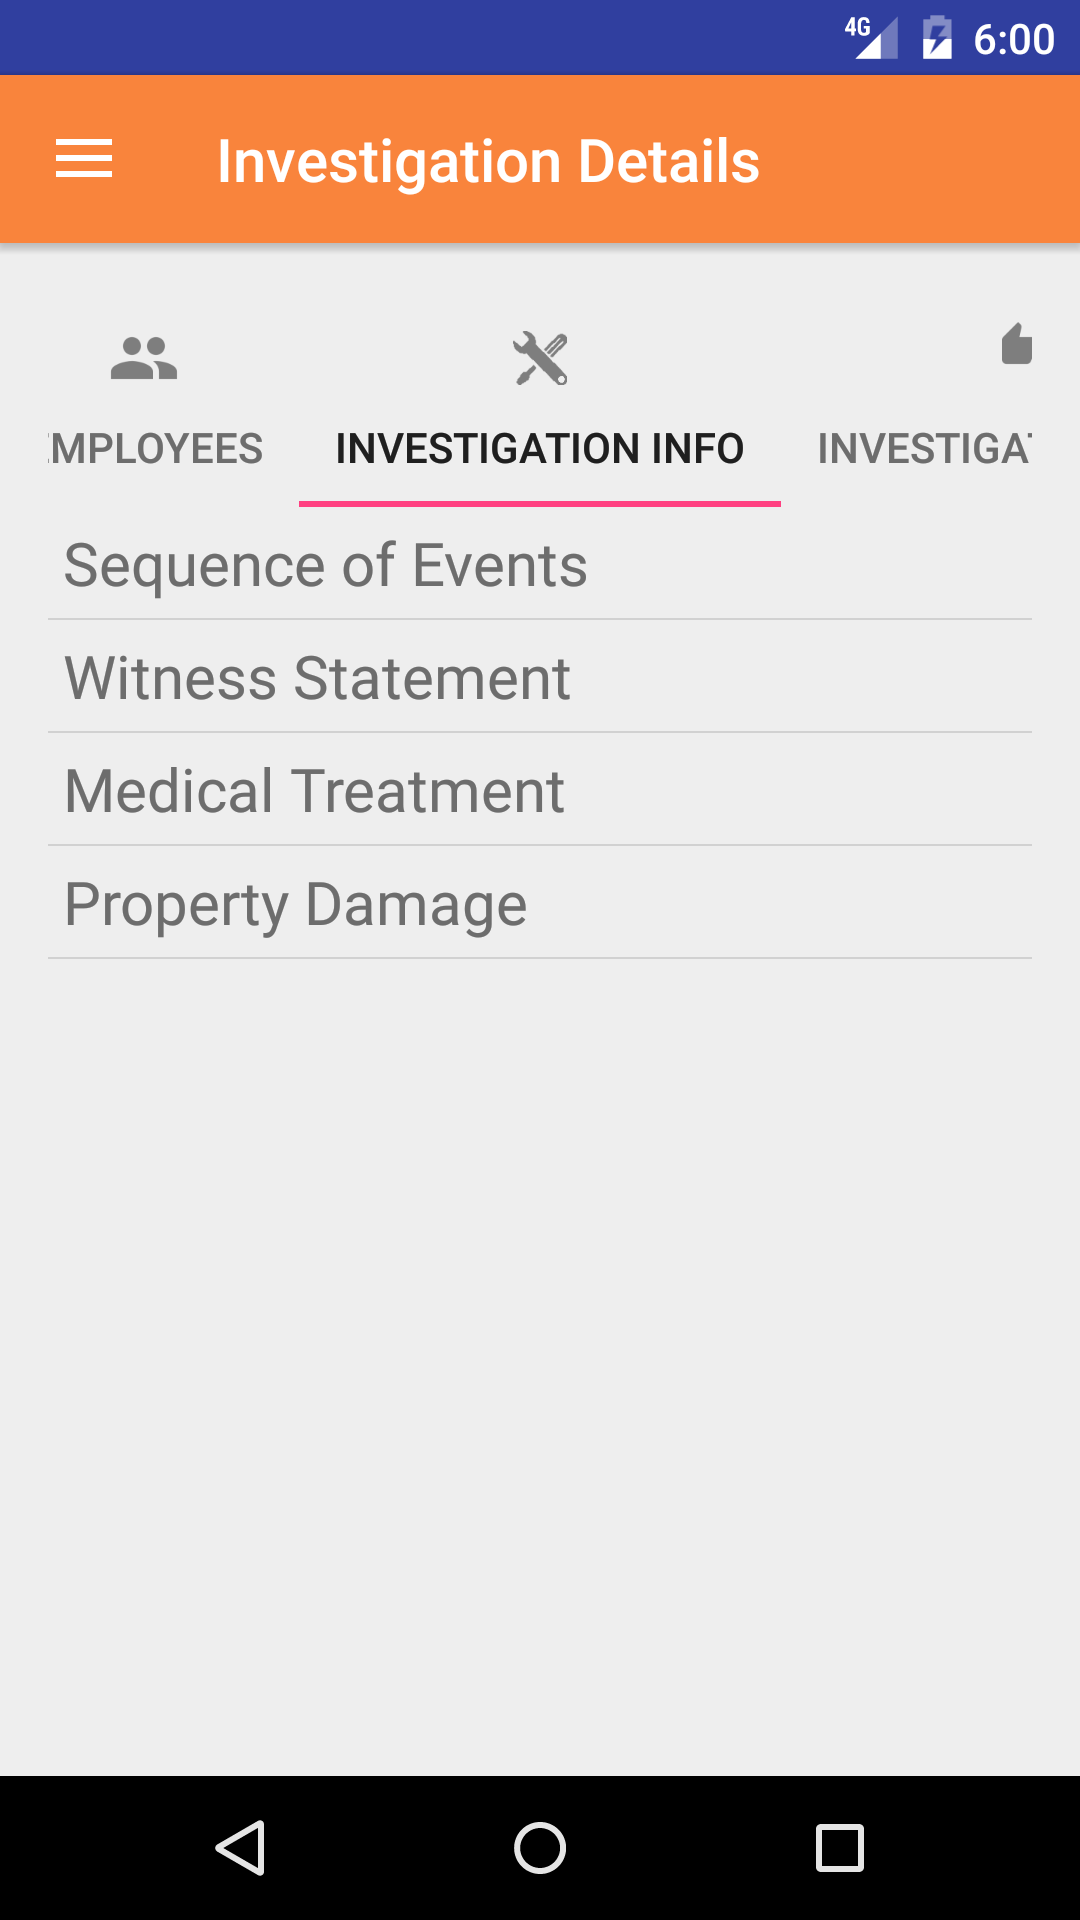
- Tap the Investigation Info icon, the third tab. This opens the list of Event Participants, Sequence of Events, Witness Statement, Medical Treatment, and Property Damage.
- Tap the Event Participants button
- Tap the + icon in the top right corner to load the add event participants screen
- Scroll the list of Safety Investigation Employees until the desired employee is displayed on the screen.
- Tap the Employee name and they will be added as a event participant
|
|
|
| Steps 1-2 |
|

|
| Step 3 |
|
|
| Steps 4-6 |
|
|
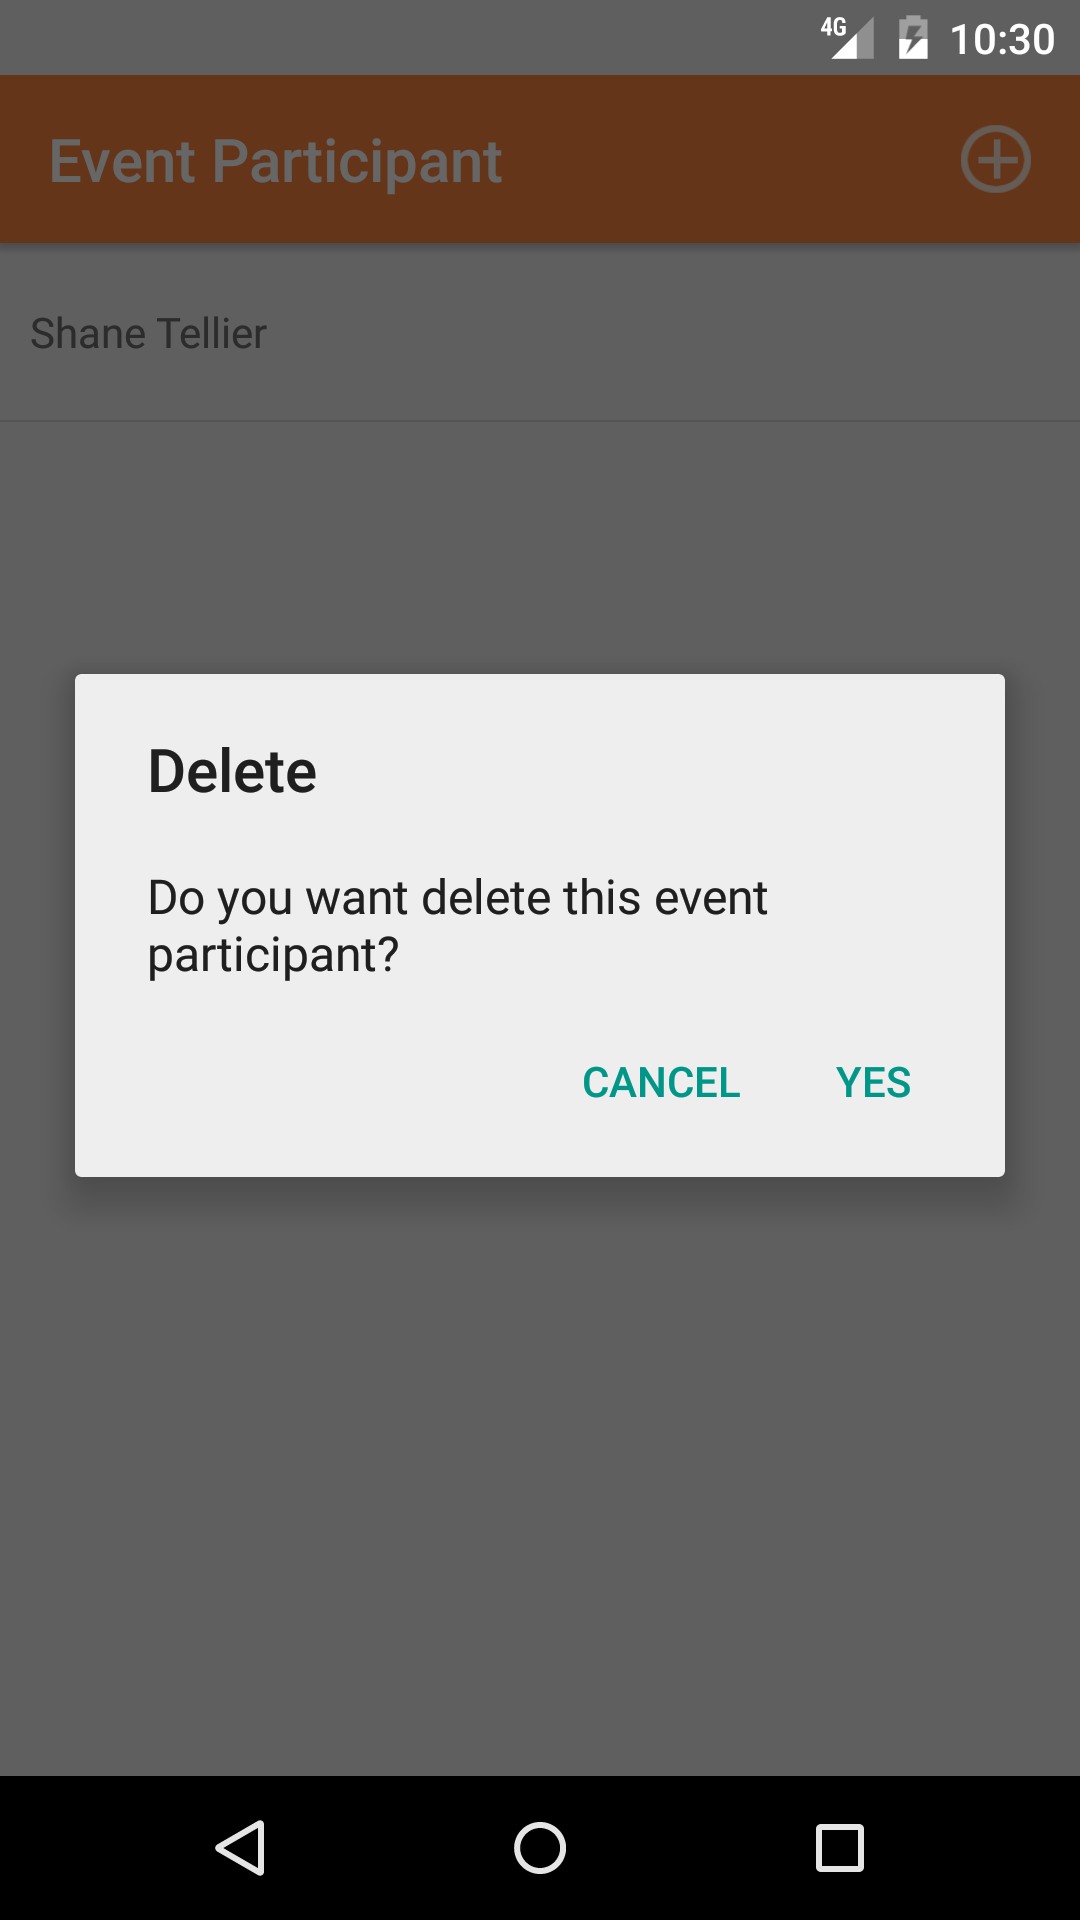
24.Delete Event Participant |
|
Once on the Safety Investigation you would like to edit.
Steps
- Tap the Investigation Info icon, the third tab. This opens the list of Sequence of Events, Witness Statement, Medical Treatment, and Property Damage.
- Tap the Event Participants button
- Scroll the list of Safety Investigation Employees until the desired employee is displayed on the screen.
- Long Tap the event participant to bring up the delete screen for the event participant.
- Tap the Delete button. The event participant will be deleted.
|
|
| Steps 1-5 |
|
|
|
25.Add Sequence of Events |
|
Once on the Safety Investigation you would like to edit.
Steps
- Tap the Investigation Info icon, the third tab. This opens the list of Sequence of Events, Witness Statement, Medical Treatment, and Property Damage.
- Tap the Sequence of Events button
- Tap the + icon in the top right corner to load the add sequence of events screen
Fields
- Order of Events: The order of events field allows users to add sequence of events paragraphs in a specific order in any order they see fit.
The Order of Events select box loads with plus one over the number of sequence of events paragraphs
- Scroll the list of order of events paragraph numbers until the desired order of events paragraph number is displayed in the select box.
- Tap the order of events paragraph number to select it
- Description of Events: The Description of Events field gives the user the ability to describe the sequence of events that has occurred. The user should enter a description of the injury. The character limit of this field is 500.
- Tap Save in the top right corner of the screen to save the sequence of events.
|
|
|
| Steps 1-2 |
|
|
| Step 3 |
|

|
| Steps 4-6 |
|
|
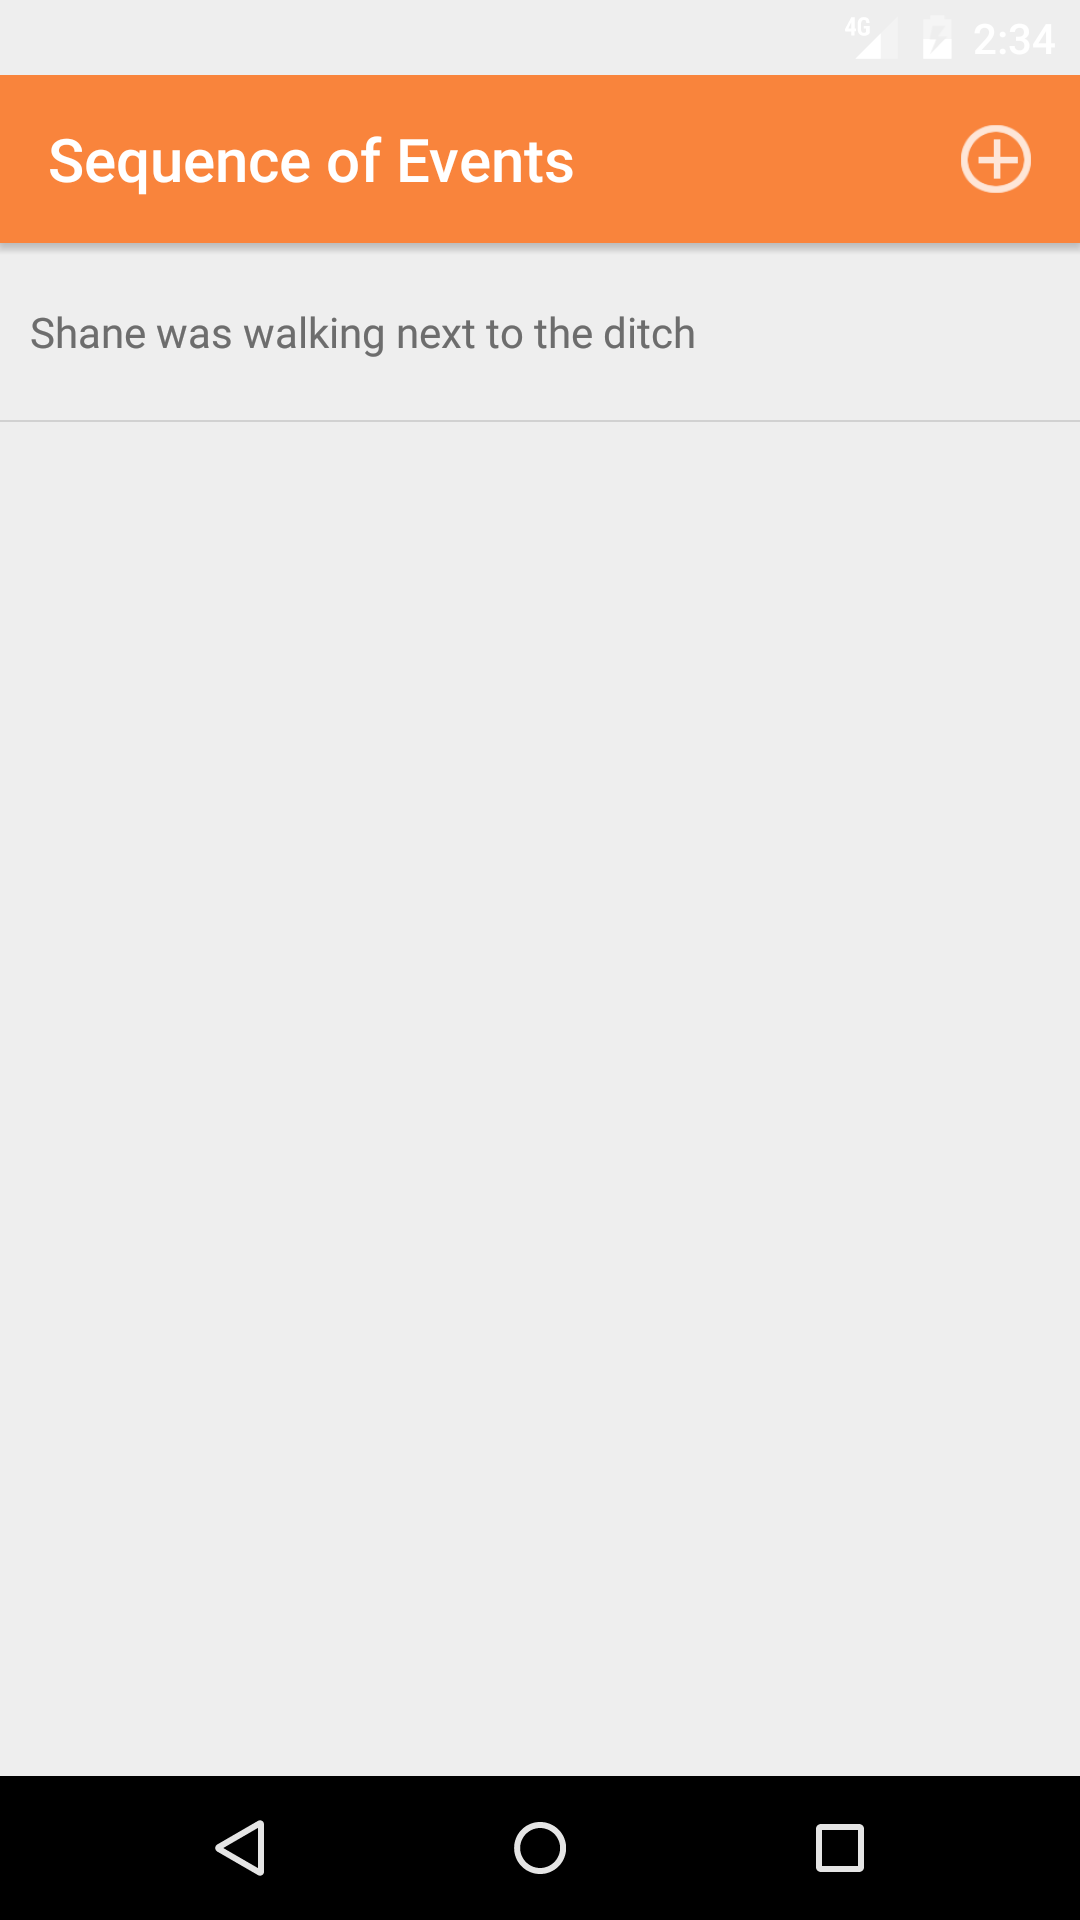
26.Look Up Sequence of Events |
|
Once on the Safety Investigation you would like to edit.
Steps
- Tap the Investigation Info icon, the third tab. This opens the list of Sequence of Events, Witness Statement, Medical Treatment, and Property Damage.
- Tap the Sequence of Events button
- Scroll the list of Sequence of Events until the desired Sequence of Events is displayed on the screen. The order of events in black text,
with the description of events in black text.
- Tap on the Sequence of Events you would like to view. This loads the sequence of events edit screen.
|
|
|
| Steps 1-2 |
|
|
|
| Step 3 |
|
|
|
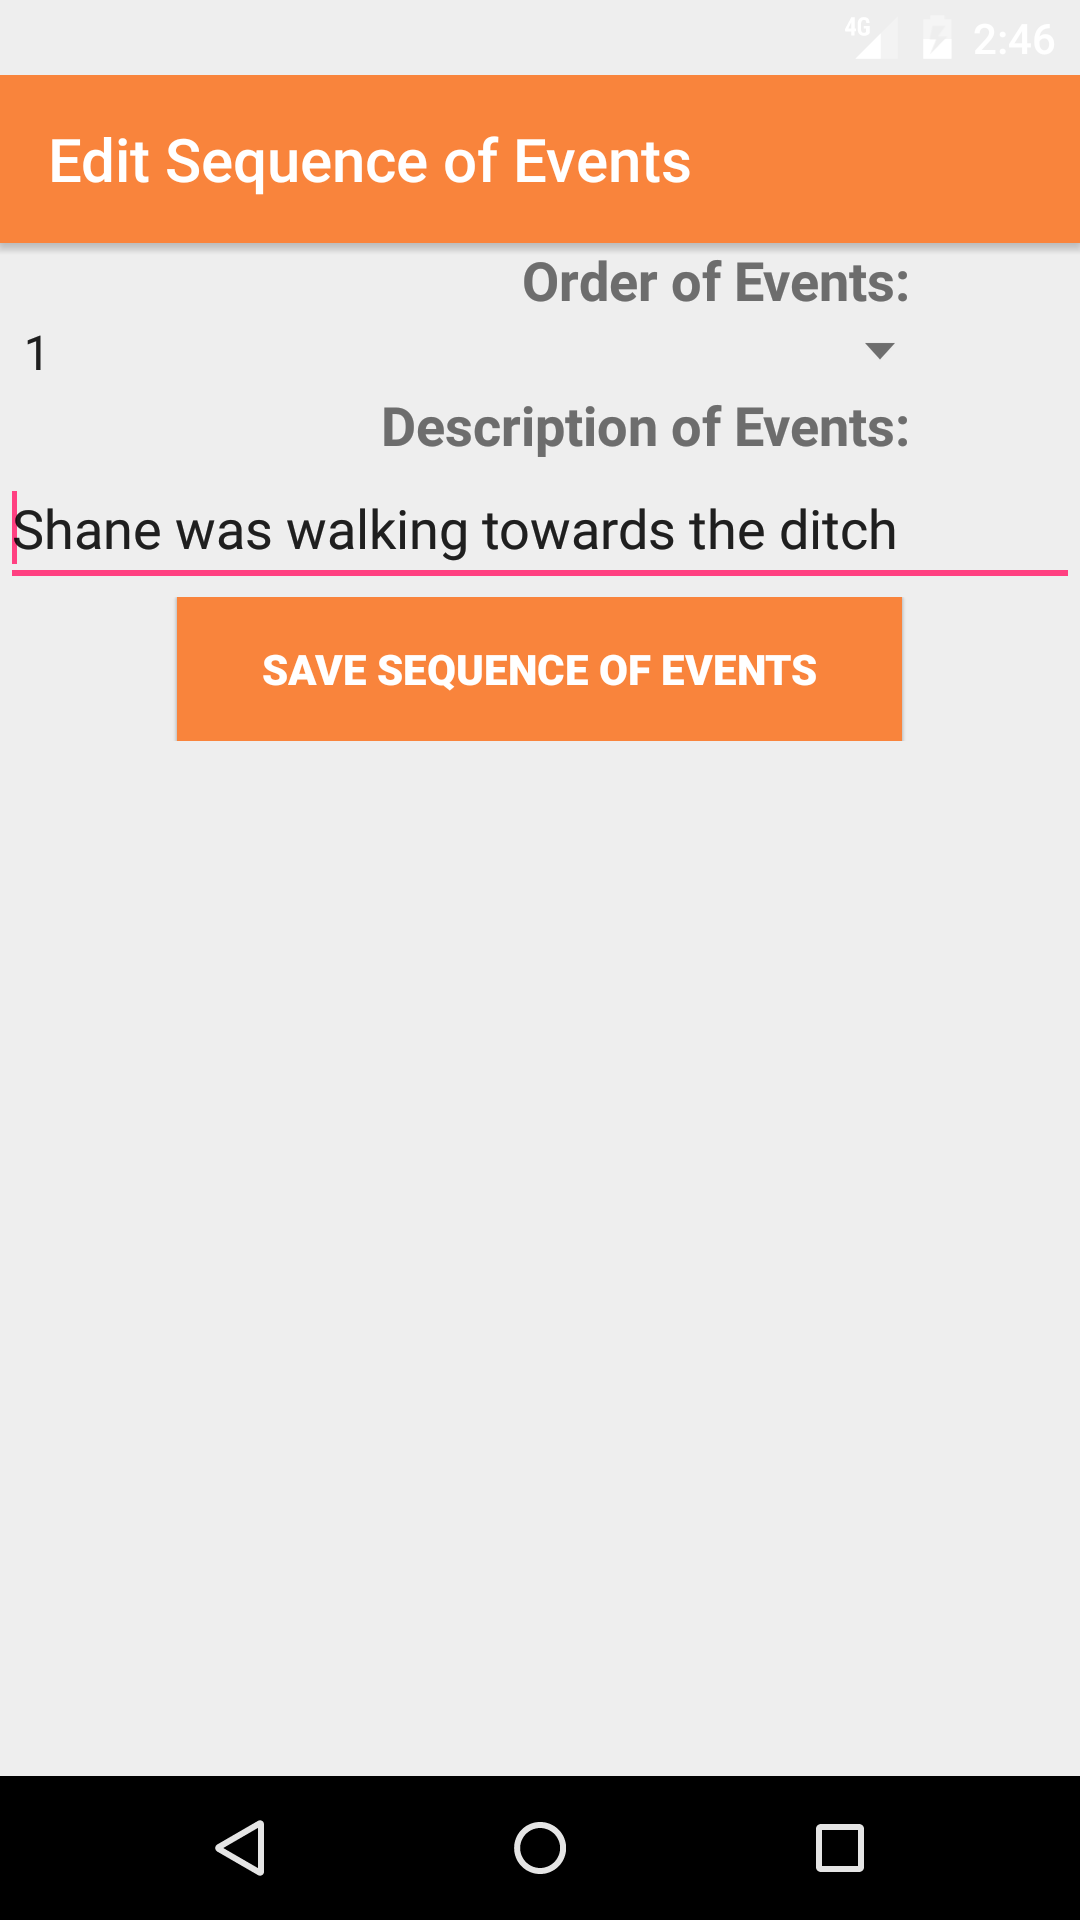
27.Edit Sequence of Events |
|
Once on the Sequence of Events edit screen
Fields
- Order of Events: The order of events field allows users to edit sequence of events paragraphs in a specific order in any order they see fit.
The Order of Events select box loads with plus one over the number of sequence of events paragraphs
- Scroll the list of order of events paragraph numbers until the desired order of events paragraph number is displayed in the select box.
- Tap the order of events paragraph number to select it
- Description of Events: The Description of Events field gives the user the ability to describe the sequence of events that has occurred. The user should enter a description of the injury. The character limit of this field is 500.
- Tap Save in the top right corner of the screen to save the sequence of events.
|
|
| Steps 1-3 |
|
|
|
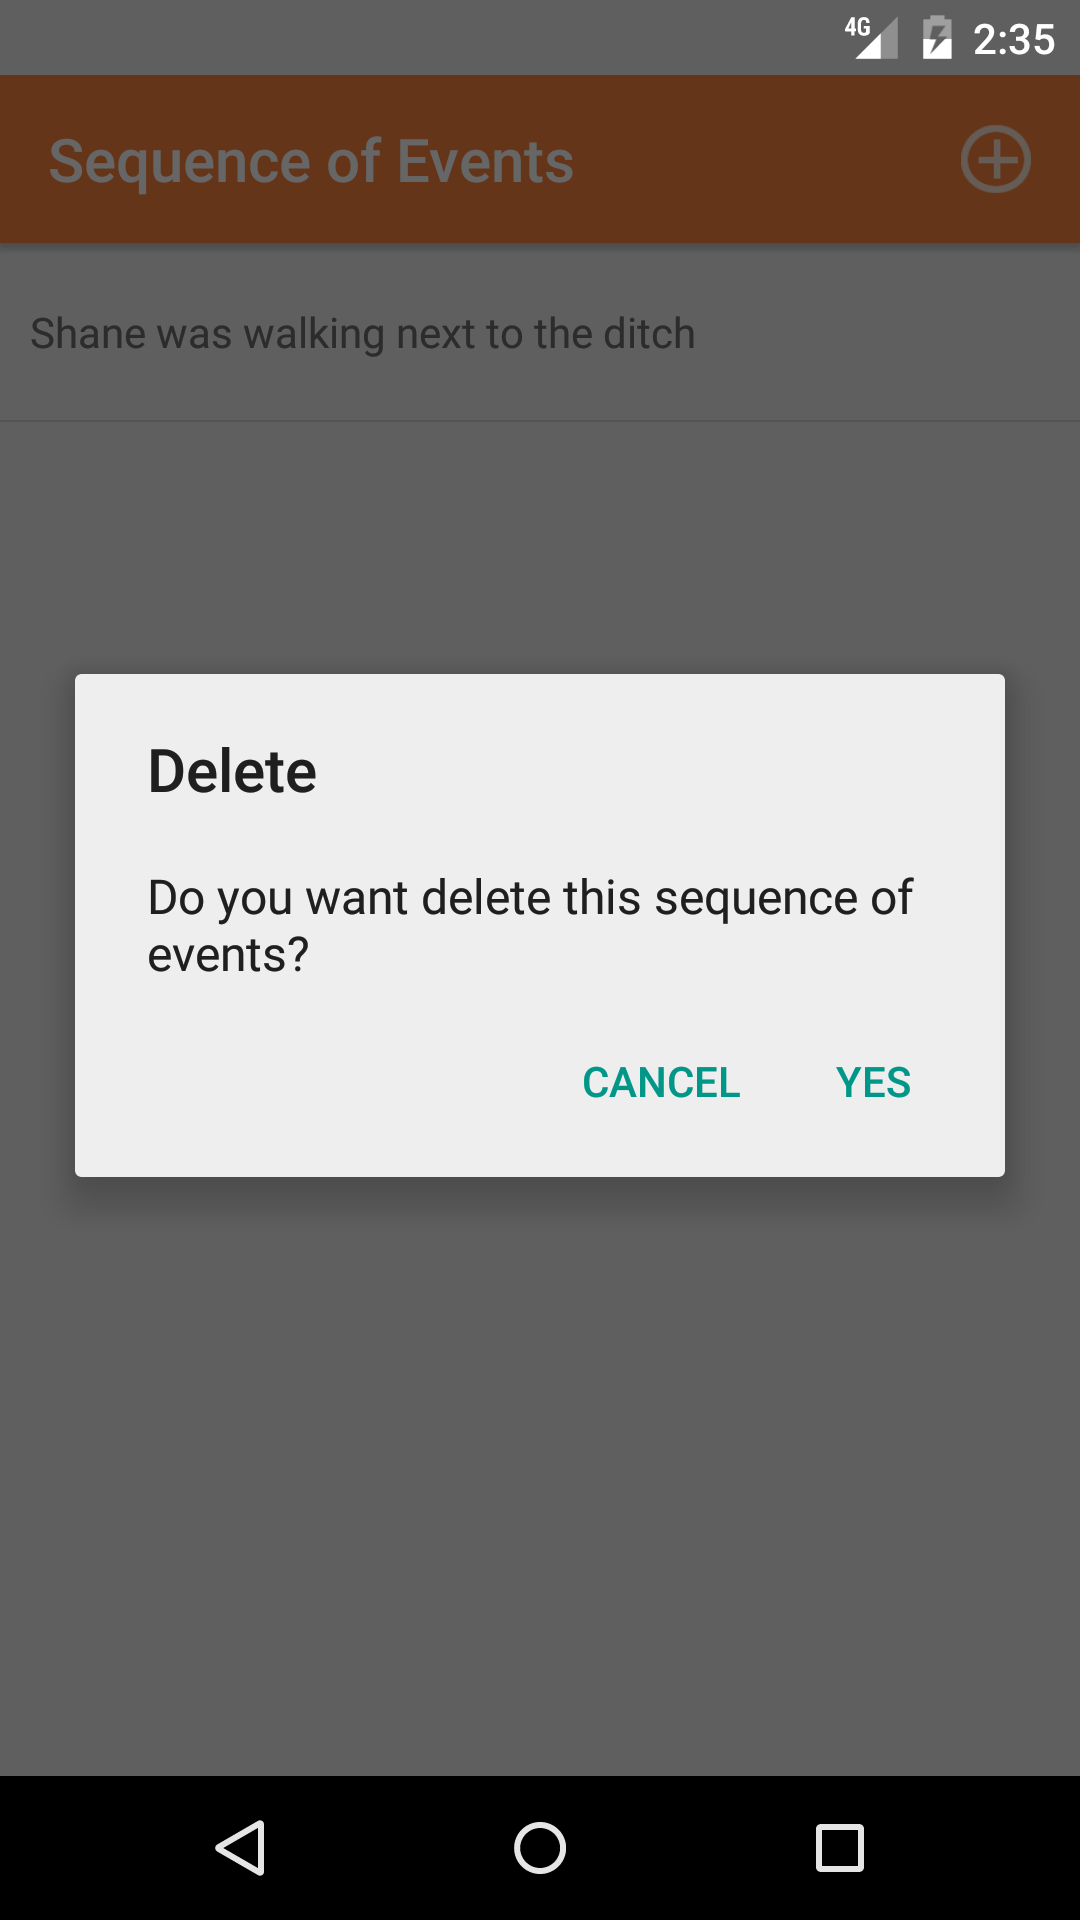
28.Delete Sequence of Events |
|
Once on the Safety Investigation you would like to edit.
Steps
- Tap the Investigation Info icon, the third tab. This opens the list of Sequence of Events, Witness Statement, Medical Treatment, and Property Damage.
- Tap the Sequence of Events button
- Scroll the list of Sequence of Events until the desired Sequence of Events is displayed on the screen. The order of events in black text,
with the description of events in black text.
- Long Tap the sequence of events to bring up the delete button for the sequence of events.
- Tap the Delete button. The sequence of event will be deleted.
|
|
| Step 1 |
|
|
|
29.Add Witness Statement Employee |
|
Once on the Safety Investigation you would like to edit.
Steps
- Tap the Investigation Info icon, the third tab. This opens the list of Sequence of Events, Witness Statement, Medical Treatment, and Property Damage.
- Tap the Witness Statement button
- Scroll the list of Safety Investigation Employees until the desired employee is displayed on the screen.
- Tap the employees name to add a witness statement for selected employee.
|
|
|
| Steps 1-2 |
|
|
| Step 3 |
|
|
| Steps 4-6 |
|
|
30.Add Witness Statement |
|
Once on the Safety Investigation you would like to edit.
Steps
- Tap the Investigation Info icon, the third tab. This opens the list of Sequence of Events, Witness Statement, Medical Treatment, and Property Damage.
- Tap the Witness Statement button
- Scroll the list of witness statement for employees until the desired employee is displayed on the screen.
- This loads the list witness statement paragraphs.
- Tap the + icon in the top right corner to load the add witness statement screen
Fields
- Witness Statement: The Witness Statement field gives the user the ability to describe the what happened. The character limit of this field is 500.
- Tap Save in the top right corner of the screen to save the witness statement.
|
|
|
|
| Steps 1-2 |
|
|
|
| Step 3 |
|
|
| Steps 4-5 |
|
|
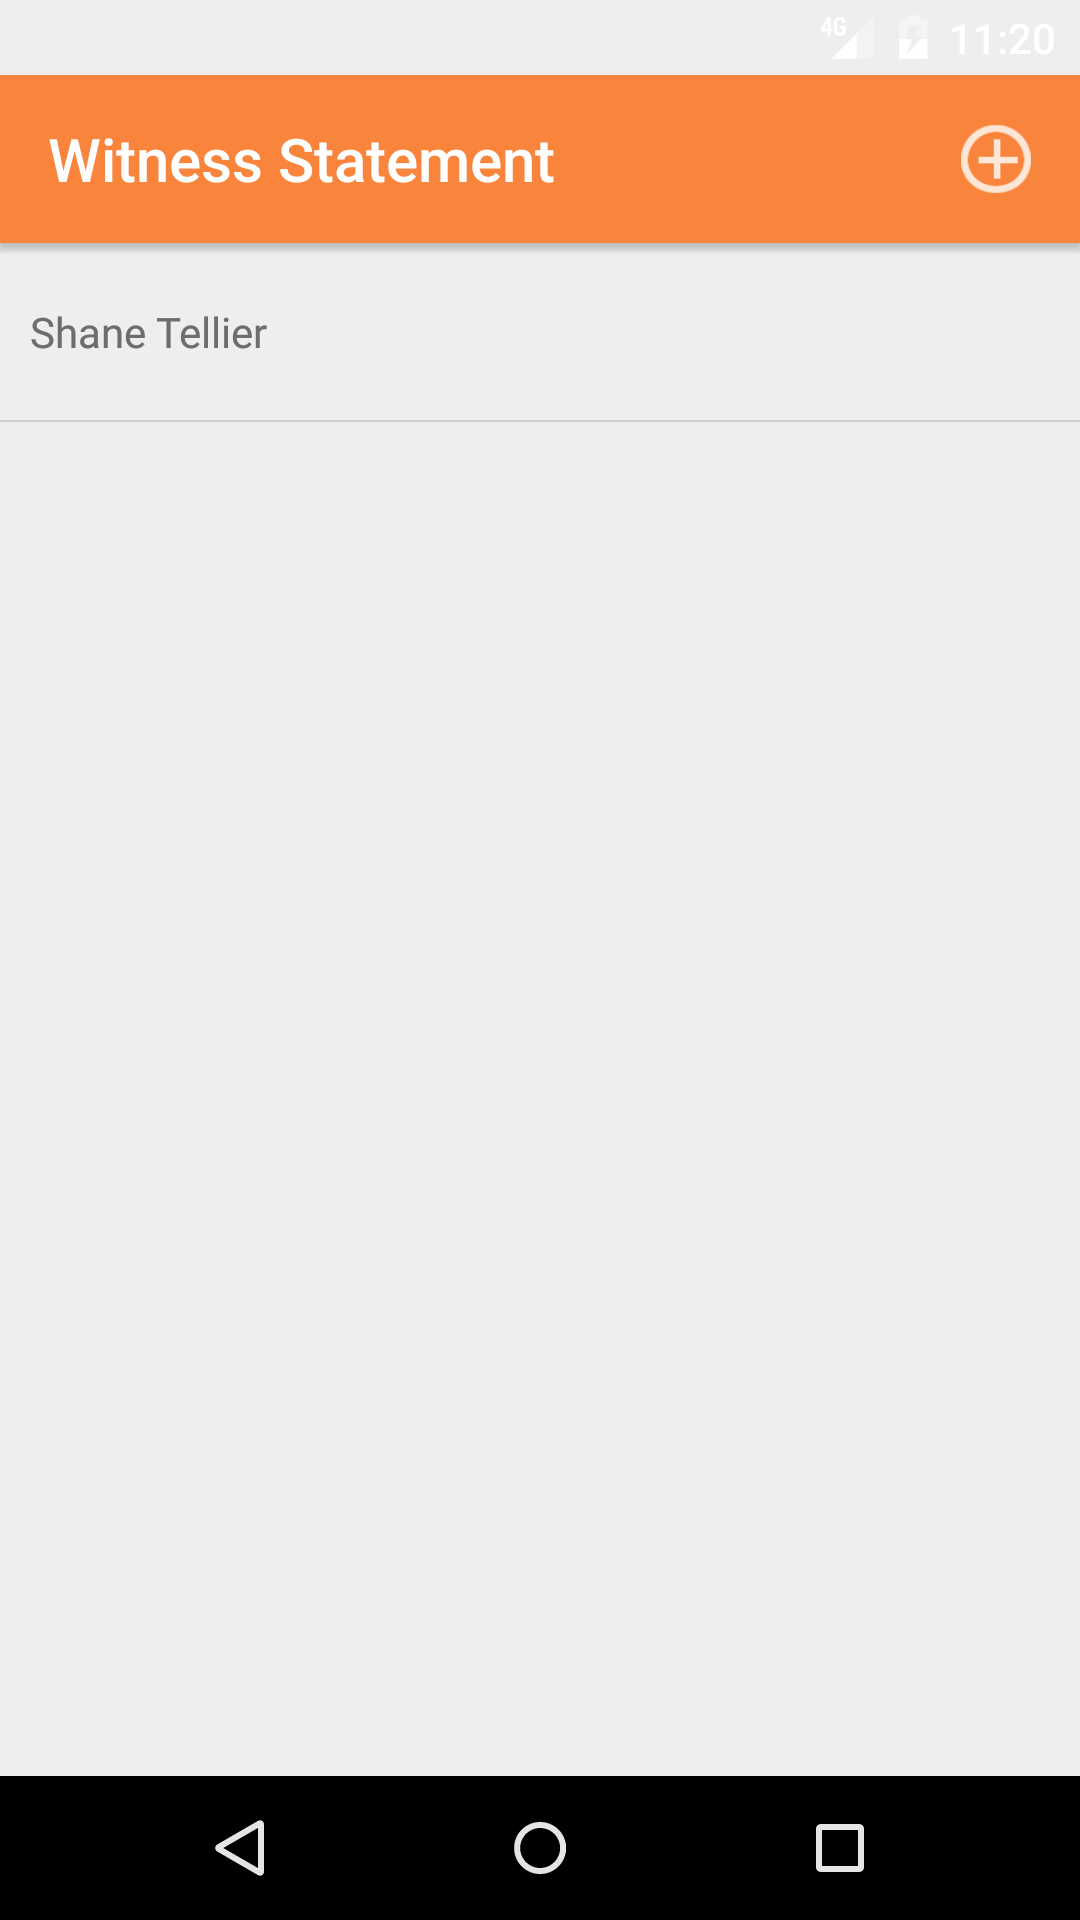
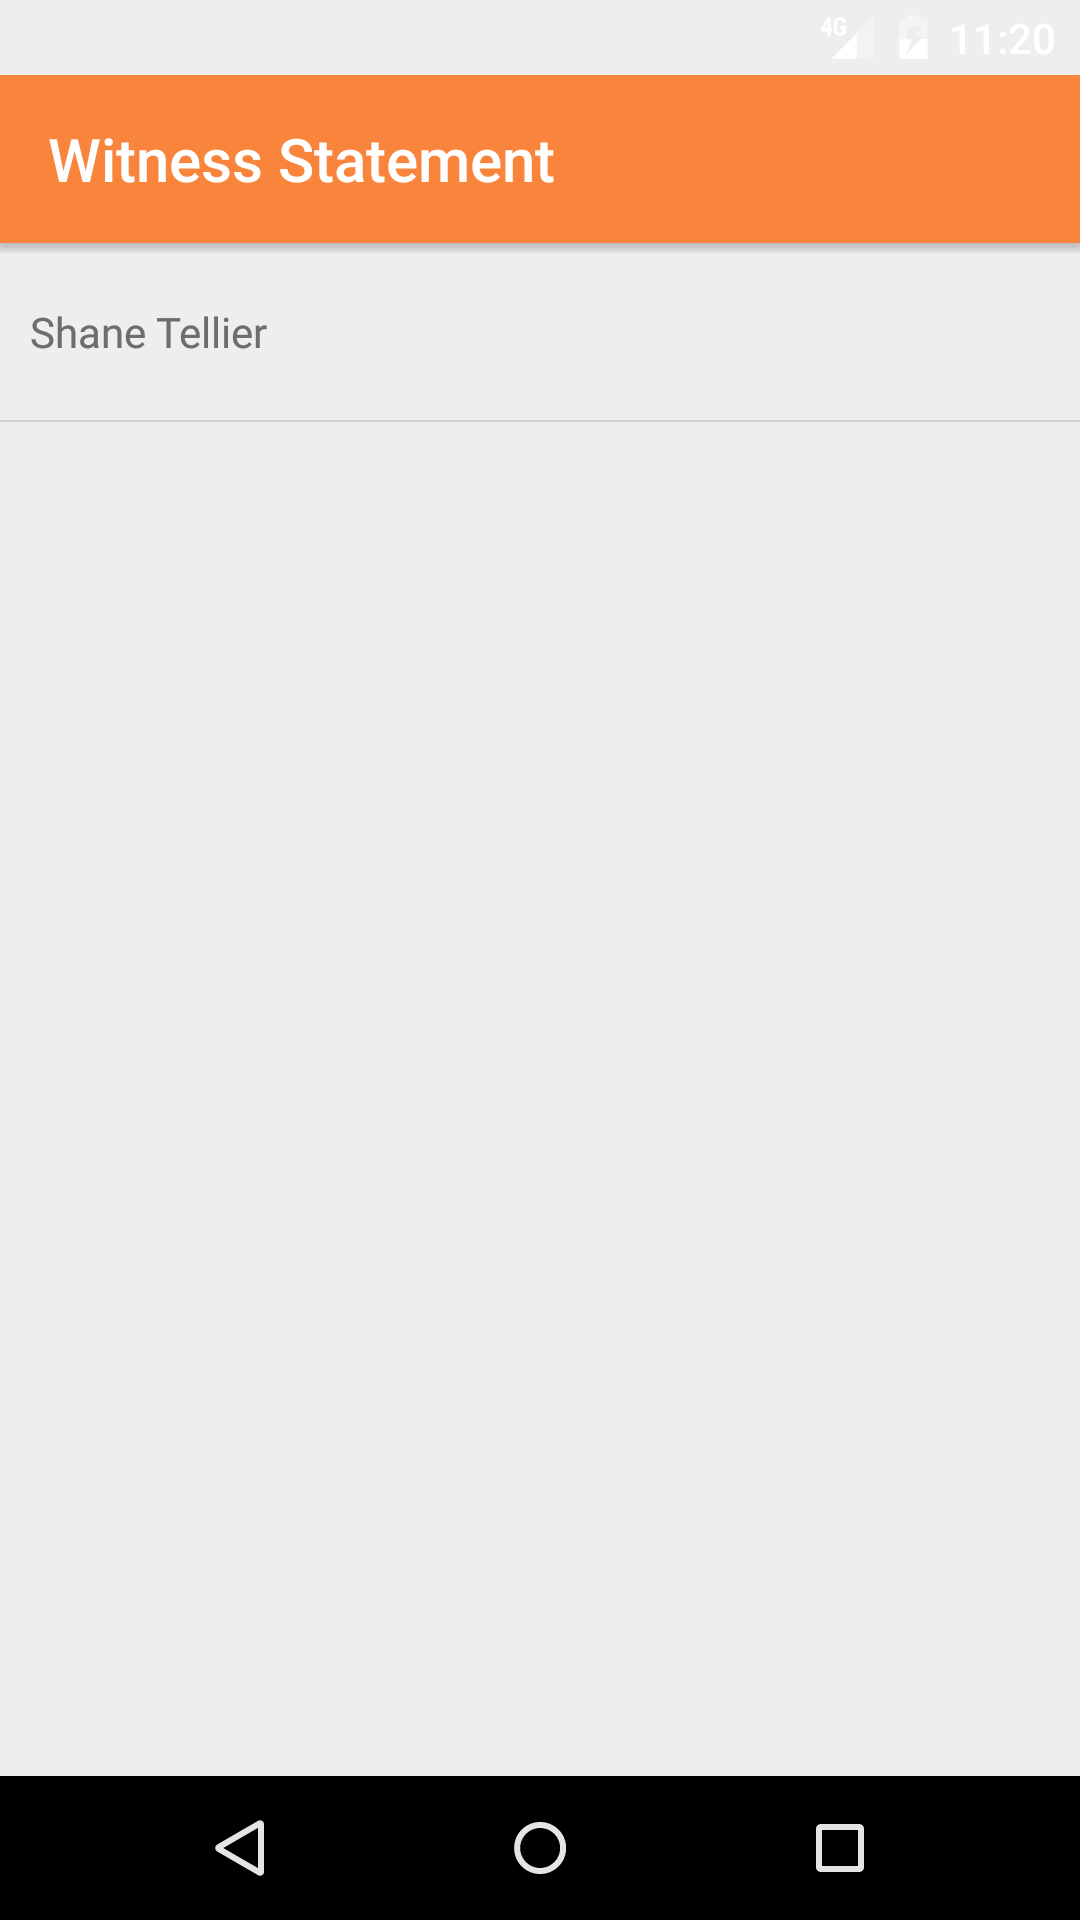
31.Look Up Witness Statement |
|
Once on the Safety Investigation you would like to edit.
Steps
- Tap the Investigation Info icon, the third tab. This opens the list of Sequence of Events, Witness Statement, Medical Treatment, and Property Damage.
- Tap the Sequence of Events button
- Scroll the list of Witness Statement until the desired Witness Statement is displayed on the screen. The witness statement in black text.
- Tap on the witness statements you would like to view. This loads the witness statement edit screen.
|
|
|
| Steps 1-2 |
|
|
|
| Step 3 |
|
|
|
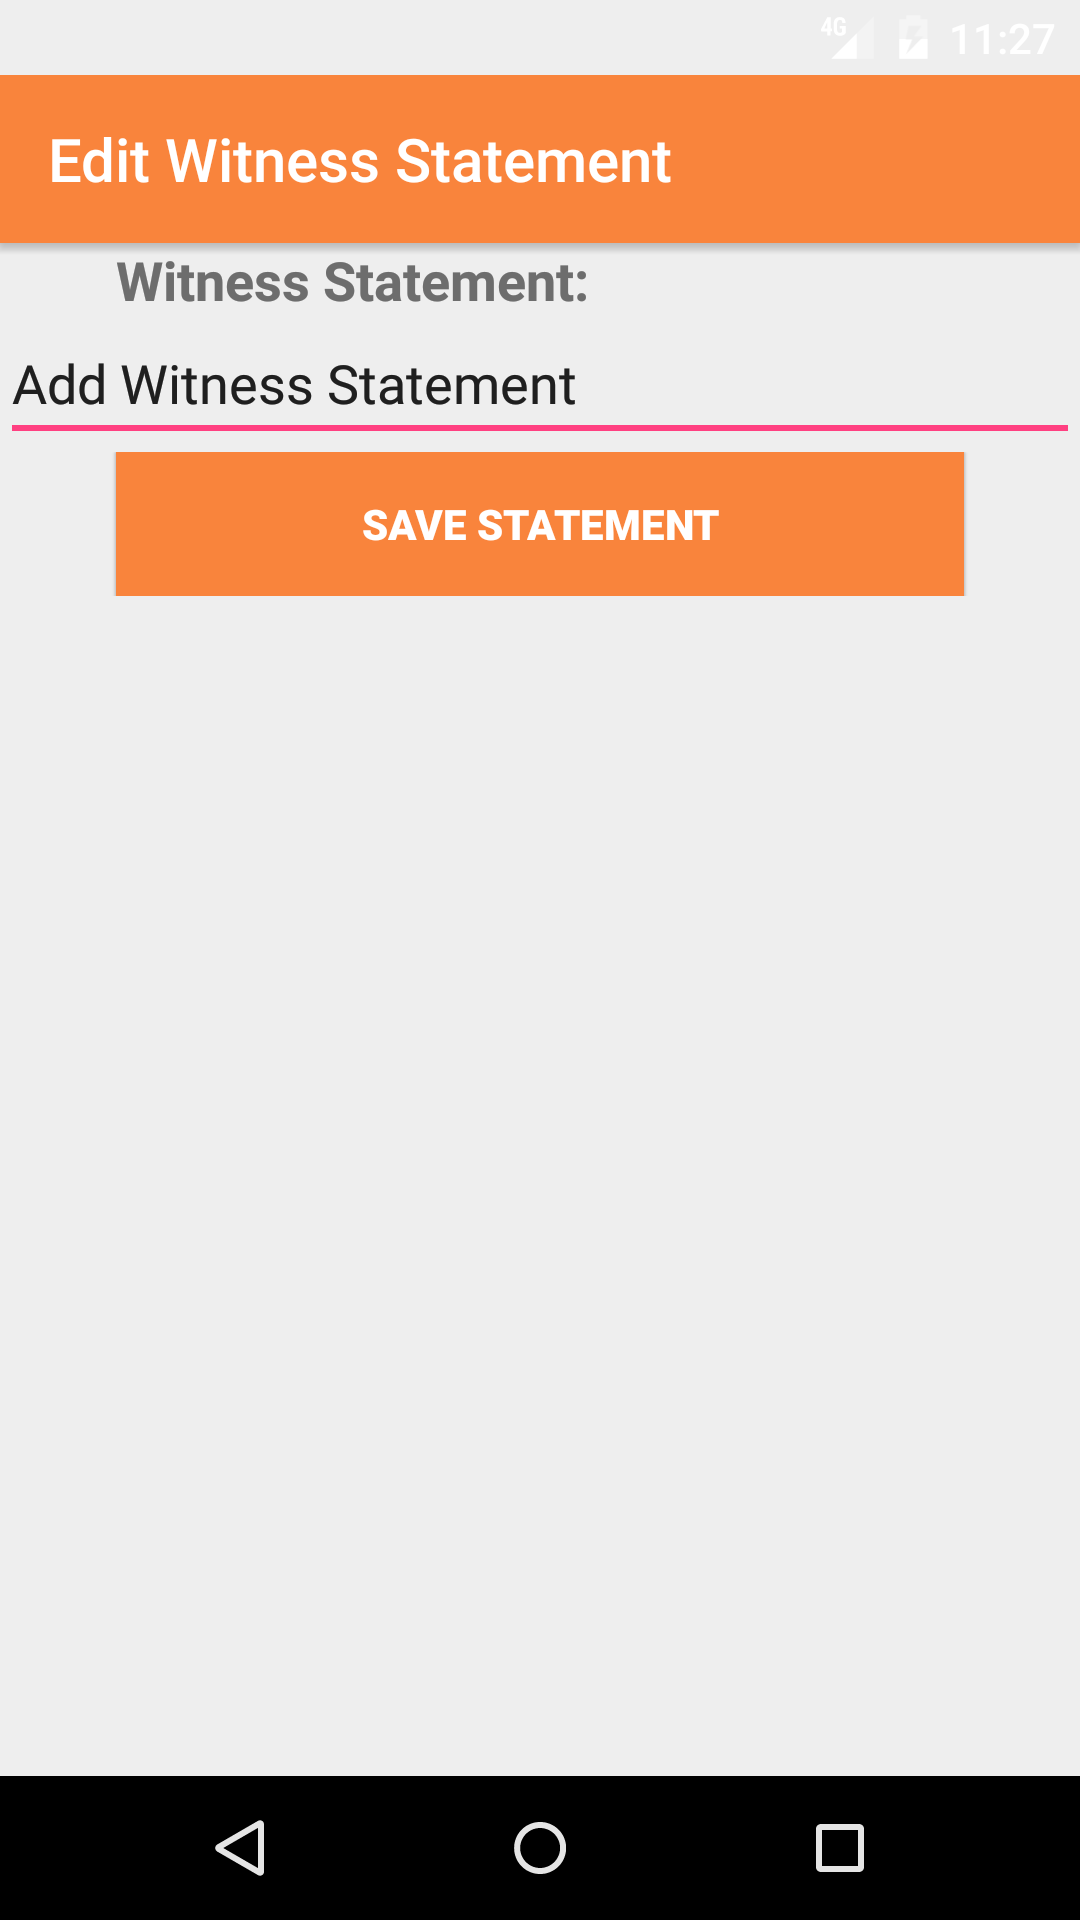
32.Edit Witness Statement |
|
Once on the Witness Statement edit screen
Fields
- Witness Statement: The Witness Statement field gives the user the ability to describe
the how a witness saw the event occurred. The character limit of this field is 500.
- Tap Save in the top right corner of the screen to save the witness statement.
|
|
|
| Steps 1-3 |
|
|
|
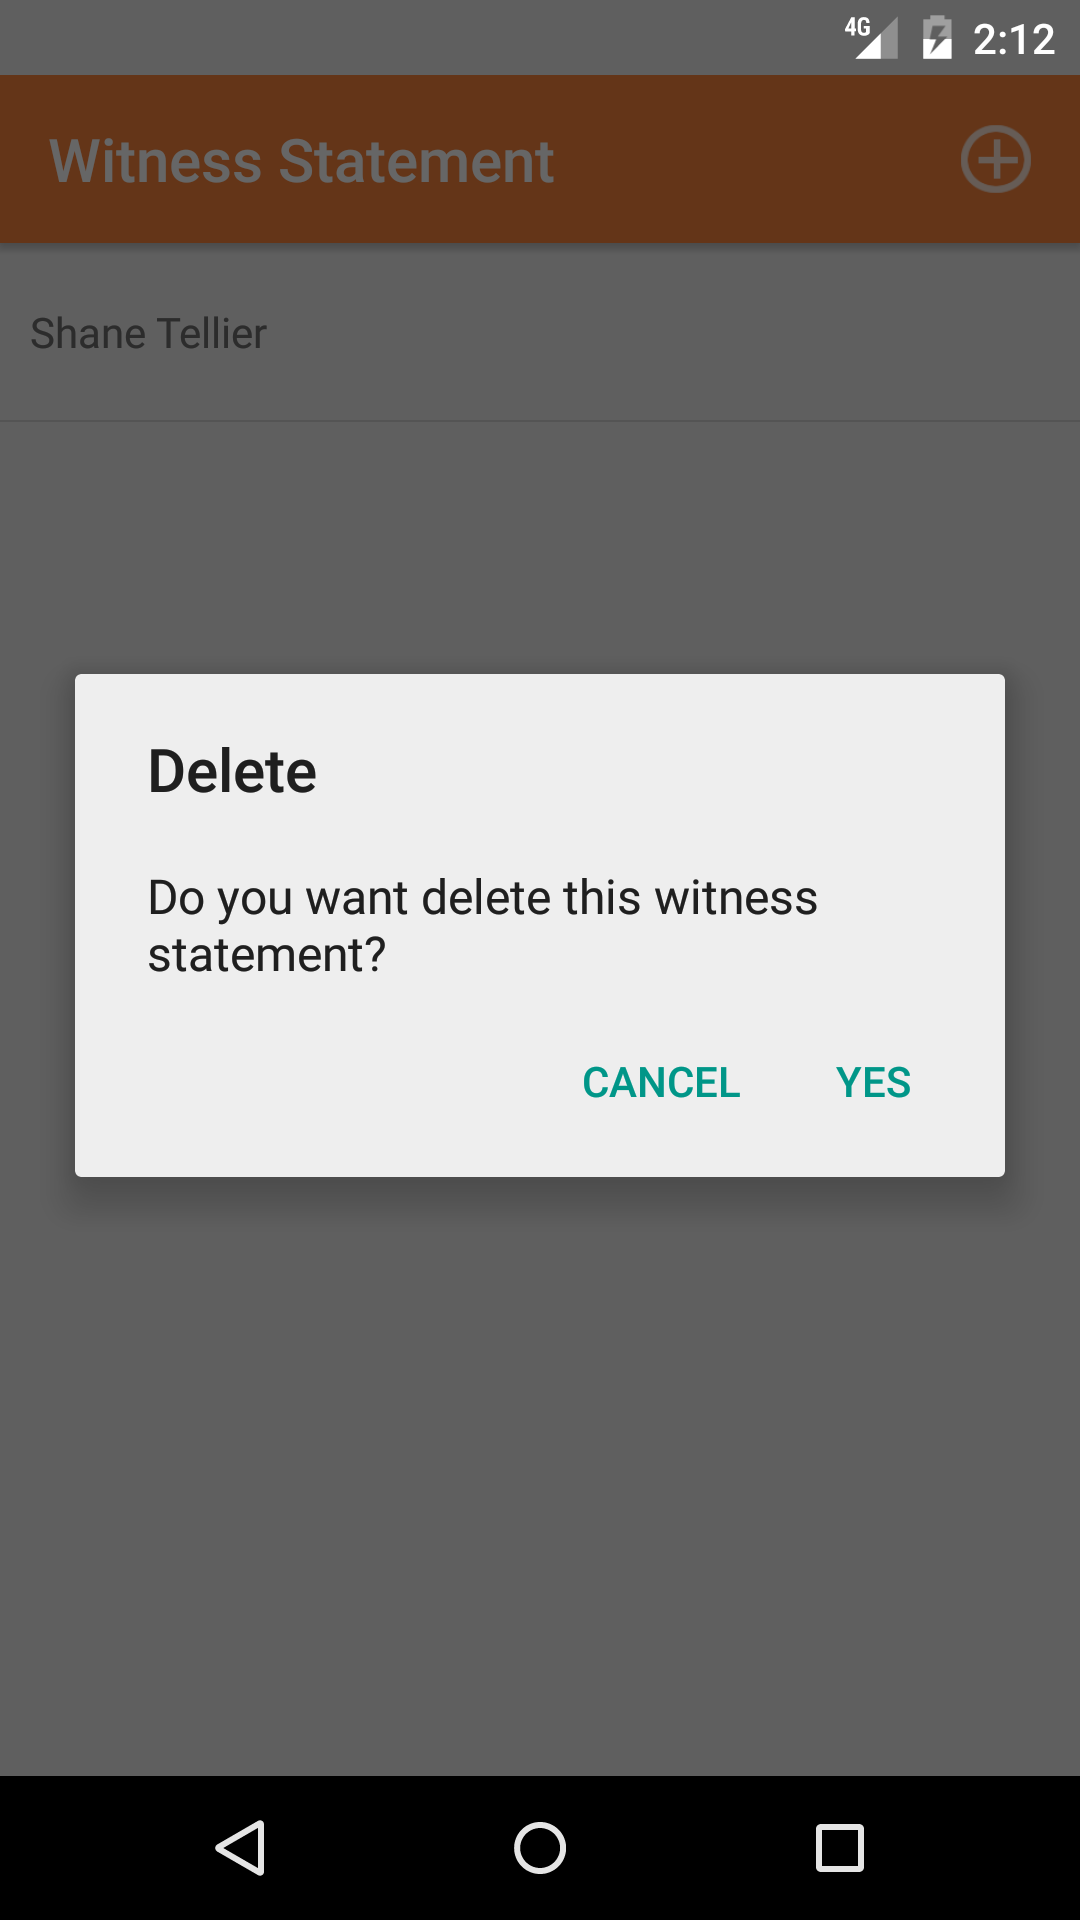
33.Delete Witness Statement |
|
Once on the Safety Investigation you would like to edit.
Steps
- Tap the Investigation Info icon, the third tab. This opens the list of Sequence of Events, Witness Statement, Medical Treatment, and Property Damage.
- Tap the Witness Statements button
- Scroll the list of Witness Statements until the desired Witness Statements is displayed on the screen. The witness statement in black text.
- Long Tap the witness statements to bring up the delete button for the witness statement.
- Tap the Delete button. The witness statement will be deleted.
|
|
| Step 1 |
|
|
|
34.Add Medical Treatment |
|
Once on the Safety Investigation you would like to edit.
If the Safety Investigation is set to Safety Incident, users can add medical treatment details to the Safety Investigation.
Steps
- Tap the Investigation Info icon, the third tab. This opens the list of Employees, Sequence of Events, Witness Statement, Medical Treatment, and Property Damage.
- Tap the Medical Treatment button
- Tap the + icon in the top right corner to load the add medical treatment screen
Fields
- Injured Employee: select box.
The injured employee field initialy displays the name of the person who added the Safety Investigation and should be updated to indicate the employee who was injured.
Employees are listed in the order they were added to the Safety Investigation.
- Tap the desired employee to select it
- First Aid By: select box.
The first aid by employee field initialy displays the name of the person who added the Safety Investigation and should be updated to indicate the employee who performed the needed first aid.
Employees are listed in the order they were added to the Safety Investigation.
- Tap the desired employee to select it
- Injury Type: select box.
The injury type field initialy displays first aid, if clicked on it can be changed to better describe the situation.
Injury Type are listed in the order they were added to the Safety Investigation.
- Tap the desired injury type to select it
- Injury Description: The Injury Description field gives the user the ability to describe the injury that has occurred. The user should enter a description of the injury. The character limit of this field is 250.
- Treatment: The Treatment field gives the user the ability to provide a description of the first aid treatment given. The character limit of this field is 250.
- Facility Visited: The Facility Visited field gives the user the ability to describe the facility visited to take care of the injury. The character limit of this field is 250.
- Attended By: The Attended By field gives the user the ability to provide a name of the medical professional that handled the care. The character limit of this field is 125.
- Other Attended By: The Other Attended By field gives the user the ability to provide a name of the secondary medical professional that handled the care. The character limit of this field is 125.
- Lost Time: select box.
The lost time field initialy displays no, if clicked on it can be changed to better describe the situation.
- Lost Time: Injured Employee will be missing work based on the injury sustained.
- Modified Work: Injured Employee will be on a modified work schedule until they recover from the injury.
- No: Injured Employee will NOT be missing work based on the injury sustained.
Lost Time are listed in the order they were added to the Safety Investigation.
- Tap the desired lost time to select it
- WCB Report Completed: select box.
The WCB (Workers Compensation Board) Report Completed field should be set to Yes if a WCB report for the incident has been
filled in. Most areas of operation require that a WCB Report is filled in by the Injured Employee and the Employer.
- Select Yes or No from select box
- Recurring Injury: select box.
The Recurring Injury field should be set to Yes if the injury sustain is a recurring injury for the injured employee. When a injury is considered recurring some issues how it will be handled changed.
- Select Yes or No from select box
- Recurring Injury Description: The Recurring Injury Description field gives the user the ability to provide a description of the recurring injury. The character limit of this field is 150.
- Tap Add Medical Treatment button on the bottom of the screen to save the medical treatment
|
|
|
|
| Steps 1-2 |
|
|
| Step 3 |
|
|
| Steps 4-15 |
|
|
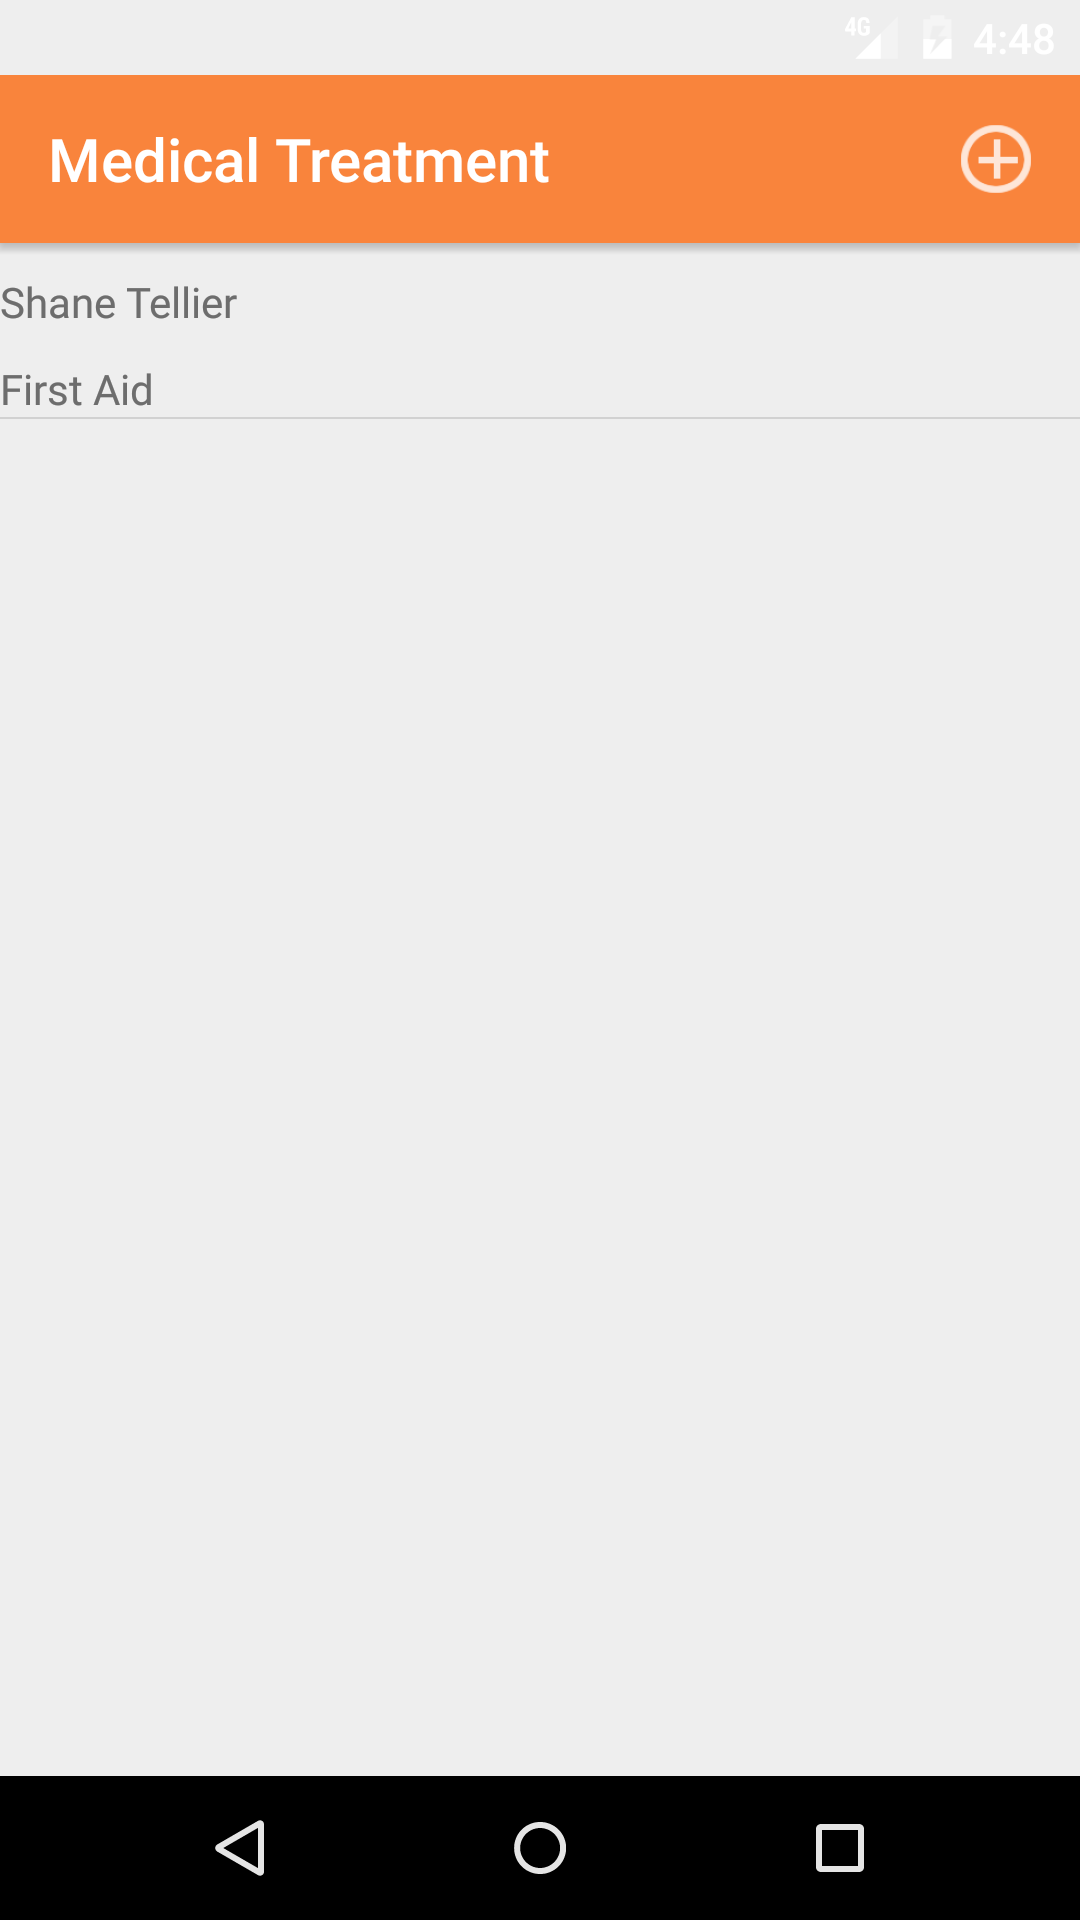
36.Look Up Medical Treatment |
|
Once on the Safety Investigation you would like to edit.
Steps
- Tap the Investigation Info icon, the third tab. This opens the list of Sequence of Events, Witness Statement, Medical Treatment, and Property Damage.
- Tap the Medical Treatment button
- Scroll the list of Medical Treatments until the desired Medical Treatment is displayed on the screen. The employee injured in black text,
with the injury type.
- Tap on the Medical Treatments you would like to view. This loads the medical treatment edit screen.
|
|
|
| Steps 1-2 |
|
|
|
| Step 3 |
|
|
|
37.Edit Medical Treatment |
|
Once on the Medical Treatment edit screen
Fields
- Injured Employee: select box.
The injured employee field initialy displays the name of the person who added the Safety Investigation and should be updated to indicate the employee who was injured.
Employees are listed in the order they were added to the Safety Investigation.
- Tap the desired employee to select it
- First Aid By: select box.
The first aid by employee field initialy displays the name of the person who added the Safety Investigation and should be updated to indicate the employee who performed the needed first aid.
Employees are listed in the order they were added to the Safety Investigation.
- Tap the desired employee to select it
- Injury Type: select box.
The injury type field initialy displays first aid, if clicked on it can be changed to better describe the situation.
Injury Type are listed in the order they were added to the Safety Investigation.
- Tap the desired injury type to select it
- Injury Description: The Injury Description field gives the user the ability to describe the injury that has occurred. The user should enter a description of the injury. The character limit of this field is 250.
- Treatment: The Treatment field gives the user the ability to provide a description of the first aid treatment given. The character limit of this field is 250.
- Facility Visited: The Facility Visited field gives the user the ability to describe the facility visited to take care of the injury. The character limit of this field is 250.
- Attended By: The Attended By field gives the user the ability to provide a name of the medical professional that handled the care. The character limit of this field is 125.
- Other Attended By: The Other Attended By field gives the user the ability to provide a name of the secondary medical professional that handled the care. The character limit of this field is 125.
- Lost Time: select box.
The lost time field initialy displays no, if clicked on it can be changed to better describe the situation.
- Lost Time: Injured Employee will be missing work based on the injury sustained.
- Modified Work: Injured Employee will be on a modified work schedule until they recover from the injury.
- No: Injured Employee will NOT be missing work based on the injury sustained.
Lost Time are listed in the order they were added to the Safety Investigation.
- Tap the desired lost time to select it
- WCB Report Completed: select box.
The WCB (Workers Compensation Board) Report Completed field should be set to Yes if a WCB report for the incident has been
filled in. Most areas of operation require that a WCB Report is filled in by the Injured Employee and the Employer.
- Select Yes or No from select box
- Recurring Injury: select box.
The Recurring Injury field should be set to Yes if the injury sustain is a recurring injury for the injured employee. When a injury is considered recurring some issues how it will be handled changed.
- Select Yes or No from select box
- Recurring Injury Description: The Recurring Injury Description field gives the user the ability to provide a description of the recurring injury. The character limit of this field is 150.
- Tap Save Medical Treatment button on the bottom of the screen to save the medical treatment
|
|
|
| Steps 1-13 |
|
|
|
38.Delete Medical Treatment |
|
Once on the Safety Investigation you would like to edit.
Steps
- Tap the Investigation Info icon, the third tab. This opens the list of Sequence of Events, Witness Statement, Medical Treatment, and Property Damage.
- Tap the Property Damage button
- Scroll the list of Medical Treatments until the desired Medical Treatment is displayed on the screen. The employee injured,
with the injury type.
- Scroll the list of Medical Treatment until the desired Medical Treatment is displayed on the screen.
- Long Press the medical treatment to bring up the delete button for the medical treatment.
- Tap the Delete button. The medical treatment will be deleted.
|

|
| Step 1 |
|
|
|
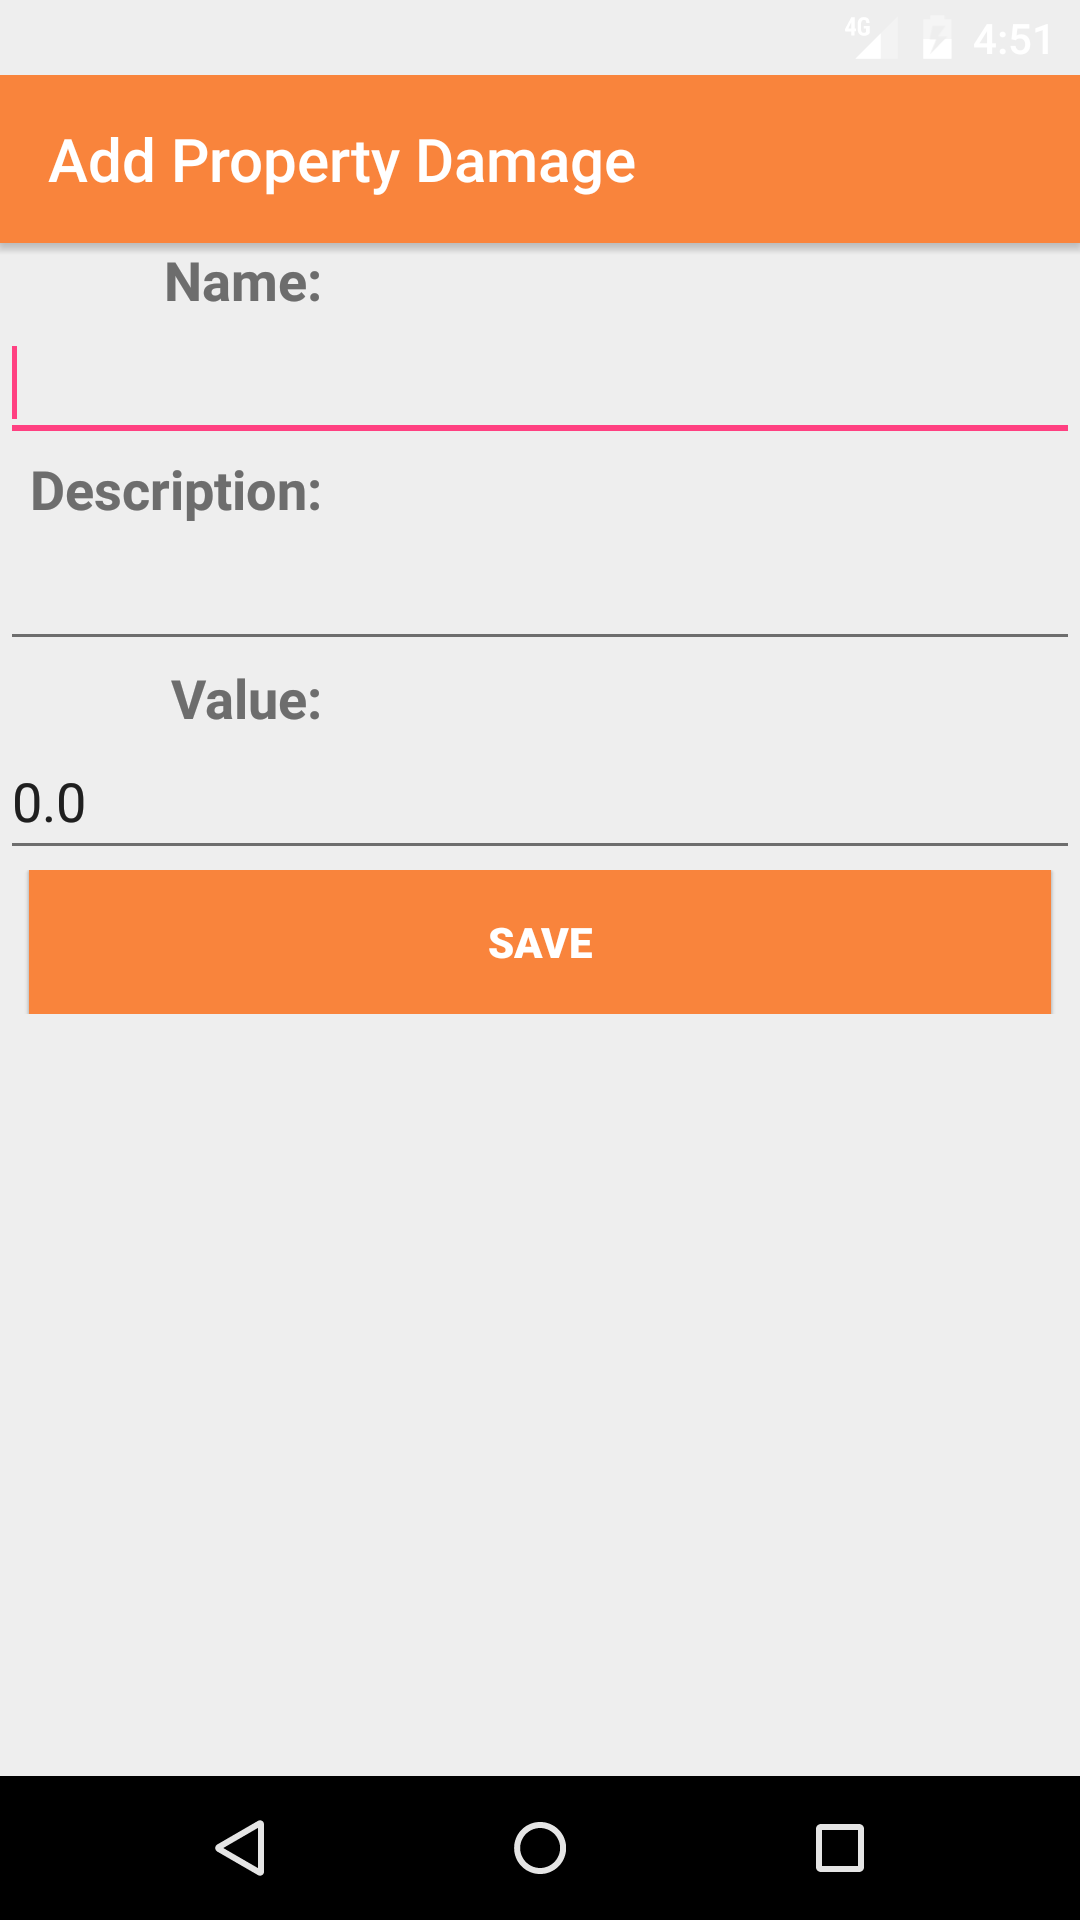
39.Add Property Damage |
|
Once on the Safety Investigation you would like to edit.
If the Safety Investigation is set to Safety Incident / Spill Release or Property Damage, users can add property damage details to the Safety Investigation.
Steps
- Tap the Investigation Info icon, the third tab. This opens the list of Employees, Sequence of Events, Witness Statement, Medical Treatment, and Property Damage.
- Tap the Property Damage button
- Tap the + icon in the top right corner to load the add property damage screen
Fields
- Name: The Name field gives the user the ability to describe the property damaged. The character limit of this field is 50.
- Description: The Description field gives the user the ability to further describe in detail of what was damaged. The character limit of this field is 250.
- Value: The Value field gives the user the ability to enter a cost of the damages to the property. The field only excepts a number value.
- Tap Save Property Damage button on the bottom of the screen to save the property damage
|
|
|
|
| Steps 1-2 |
|
|
| Step 3 |
|
|
| Steps 4-7 |
|
|
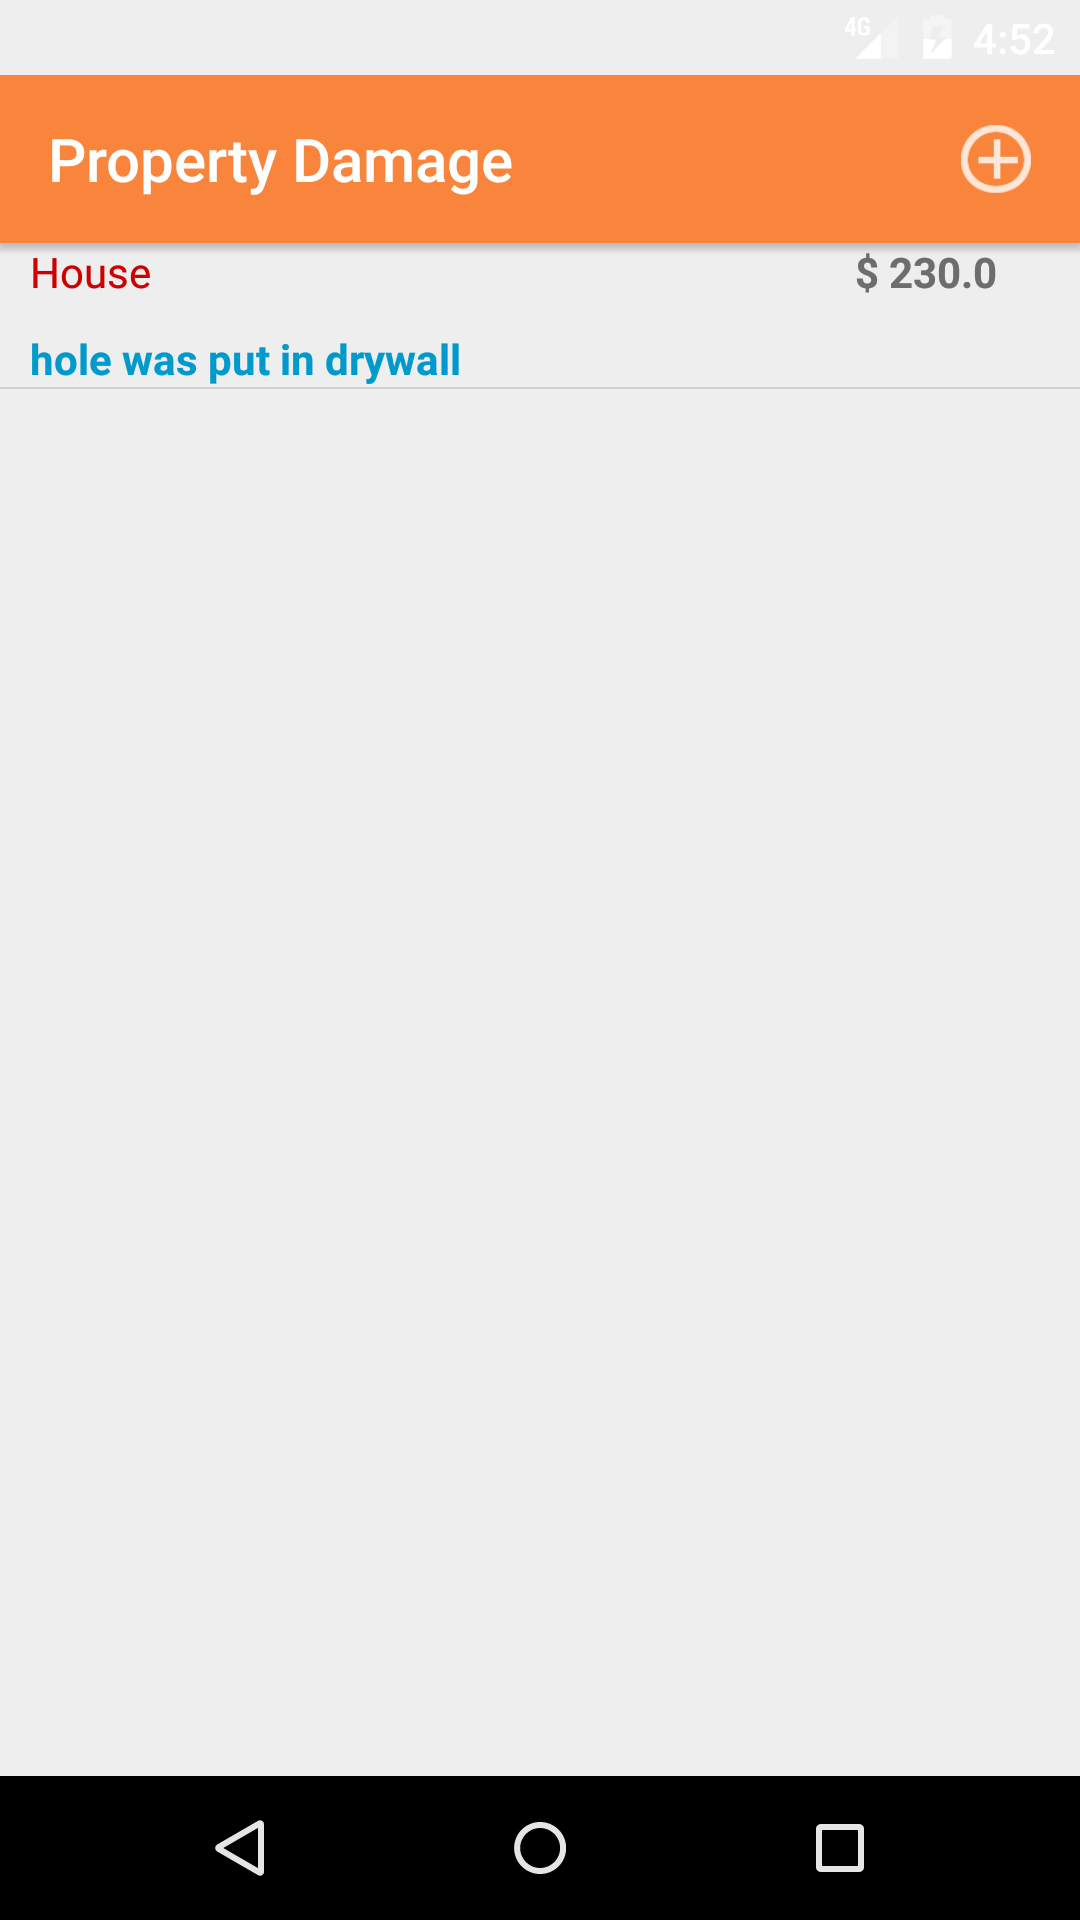
40.Look Up Property Damage |
|
Once on the Safety Investigation you would like to edit.
Steps
- Tap the Investigation Info icon, the third tab. This opens the list of Sequence of Events, Witness Statement, Medical Treatment, and Property Damage.
- Tap the Property Damage button
- Scroll the list of Property Damages until the desired Property Damage is displayed on the screen. The property damage name in red,
with the $ value in black text on the right side and the description in blue text.
- Tap on the Property Damage you would like to view. This loads the property damage edit screen.
|
|
|
| Steps 1-2 |
|
|
|
| Step 3 |
|
|
|
41.Edit Property Damage |
|
Once on the Property Damage edit screen
Fields
- Date: The date field allow field staff to choose the date the issue should is resolved by.
- Tap the Date field to open the Choose Date screen.
- Scroll the date wheel on the far left of the screen until the desired date is highlighted.
- Return to the Add Follow Up screen by either tapping Save in the top right corner to select the highlighted date or tapping Cancel in the top left corner to leave the Date: field unchanged.
- Follow Up Description: The Follow up Description field gives the user the ability to describe the solution to solve the problem. The character limit of this field is 250.
- Tap Save in the top right corner of the screen to save the property damage
|
|
|
| Steps 1-4 |
|
|
|
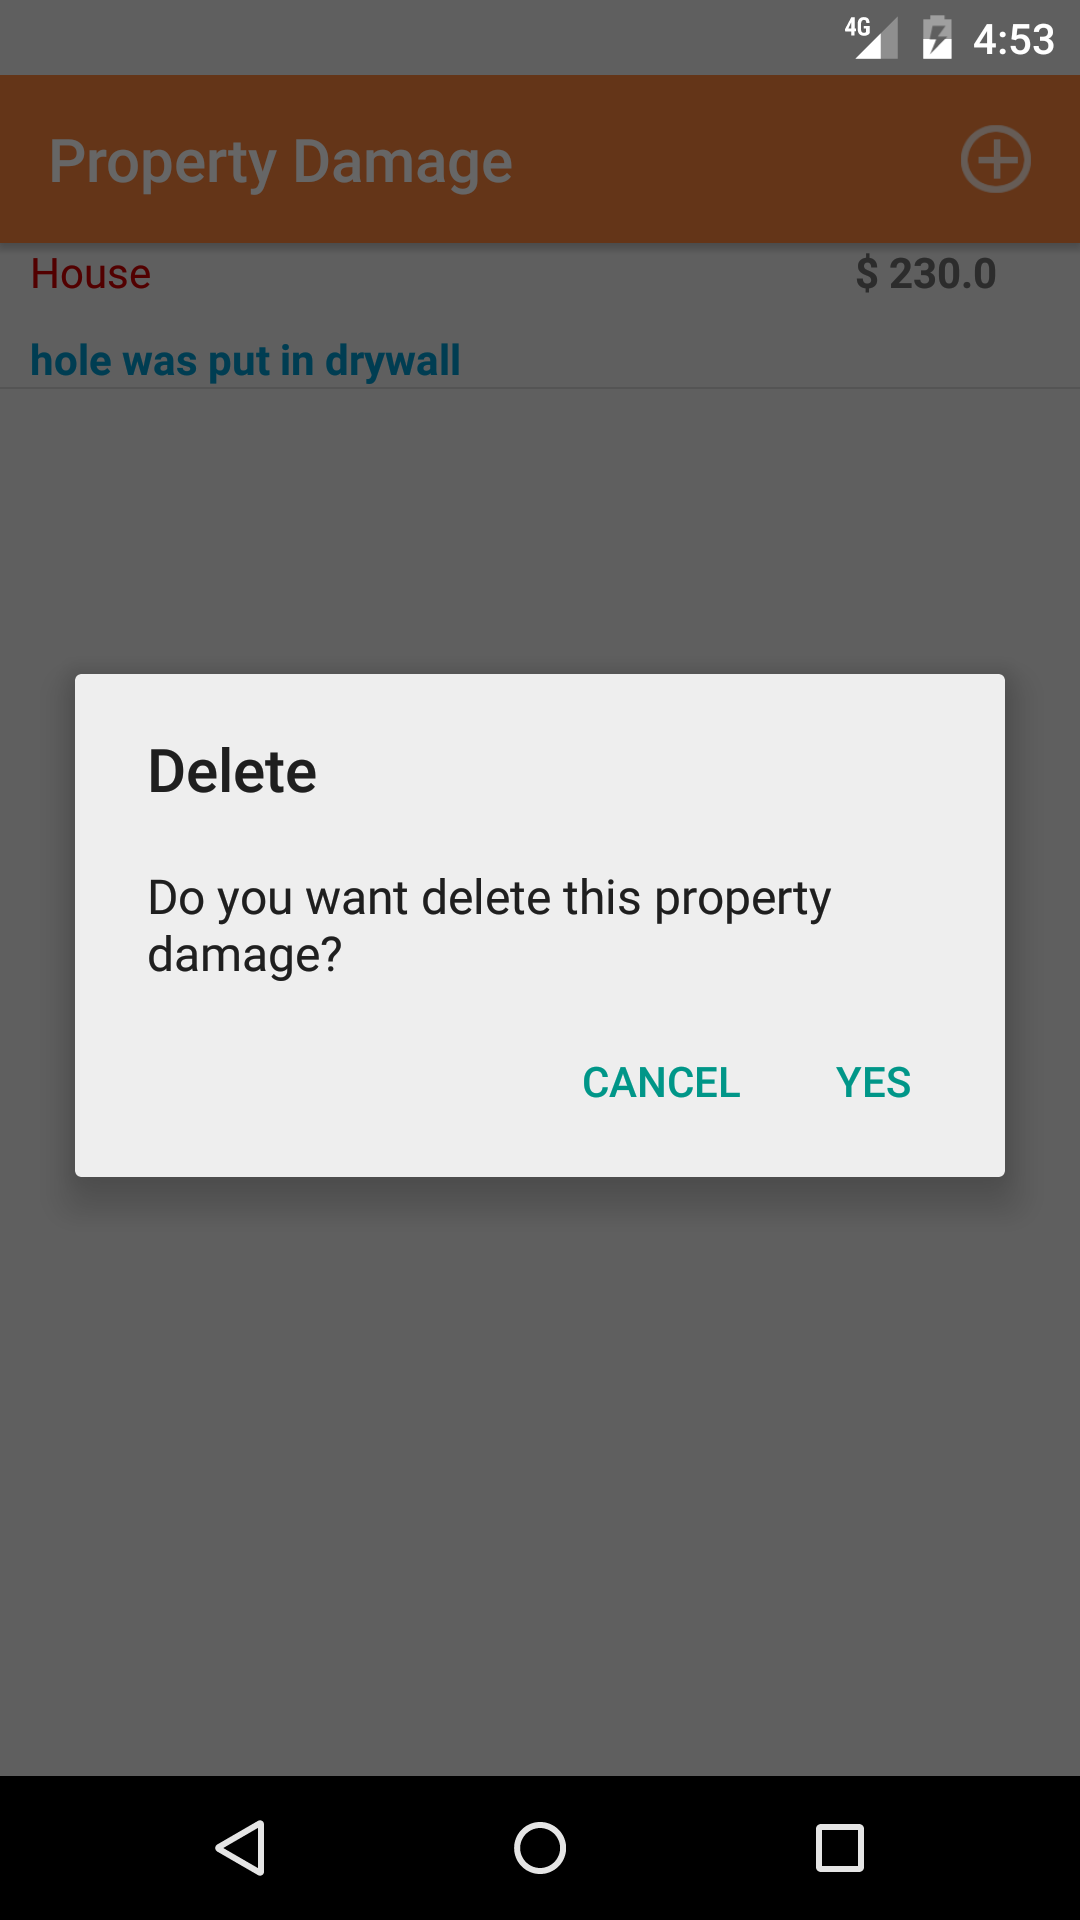
42.Delete Property Damage |
|
Once on the Safety Investigation you would like to edit.
Steps
- Tap the Investigation Info icon, the third tab. This opens the list of Sequence of Events, Witness Statement, Medical Treatment, and Property Damage.
- Tap the Property Damage button
- Scroll the list of Property Damages until the desired Property Damage is displayed on the screen. The property damage name in red,
with the $ value in black text on the right side and the description in blue text.
- Swipe from the right edge to the left to bring up the delete button for the property damage.
- Tap the Delete button. The property damage will be deleted.
|
|
| Step 1 |
|
|
|
43.Submit Safety Investigation |
|
Once on the Safety Investigation you would like to Submit, on the details tab.
Steps
- Tap the Submit Safety Investigation button.
|
|
|
| Step 1 |
|
|
|
44.Delete Safety Investigation |
|
Once in the Safety Investigation section
Steps
- Tap the second tab on the menu, the Safety Investigation view.
- Safety Investigations are divided into three categories
- Medical Incident
- Near Miss Incident
- Property Damage / Spill Release
- Tap the Submit Safety Investigation button.
|
|
| Steps 1-3 |
|
|
45.View Closed Safety Investigation |
|
After Safety Investigations have been closed out, they will be available to look at through the History view on the iPhone Application.
Once on the Safety Investigation section
Steps
|
|
|
- Tap the third tab on the menu, the History tab of the main menu view. This loads with a list of the closed out
Safety Investigations listing the the date, work order number, customer and job site name of the Safety Investigation in black.
- Scroll the list of Safety Investigations until the desired Safety Investigation is displayed on the screen.
- Tap on the Safety Investigation you would like to view. This loads the first tab, the Safety Investigation details tab of the History view.
It loads the following details including date, customer name, scope of work, notes, signature and inspected by name.
- Tap the second tab, the Employee's tab of the History view. This loads with the employee's names and their signatures
of the employees assigned to the Safety Investigation.
- Tap the third tab, the Investigation Details tab of the History view. This loads with the medical treatment and property damage, tapping
into each section then each detail.
- Tap the fourth tab, the Investigation Categories tab of the History view.The screen loads
with the list of the 8 checklist categories of the safety investigation. Tap on each category to view the investigation tasks.
|
|
| Steps 1-2 |
|
|
|
|
| Step 3 |
|
|
|
| Step 4 |
|
|

|
| Step 5 |
|
|

|
| Step 6 |
|
|
|
| Step 7 |
|
|
|
| Step 8 |
|
|
|
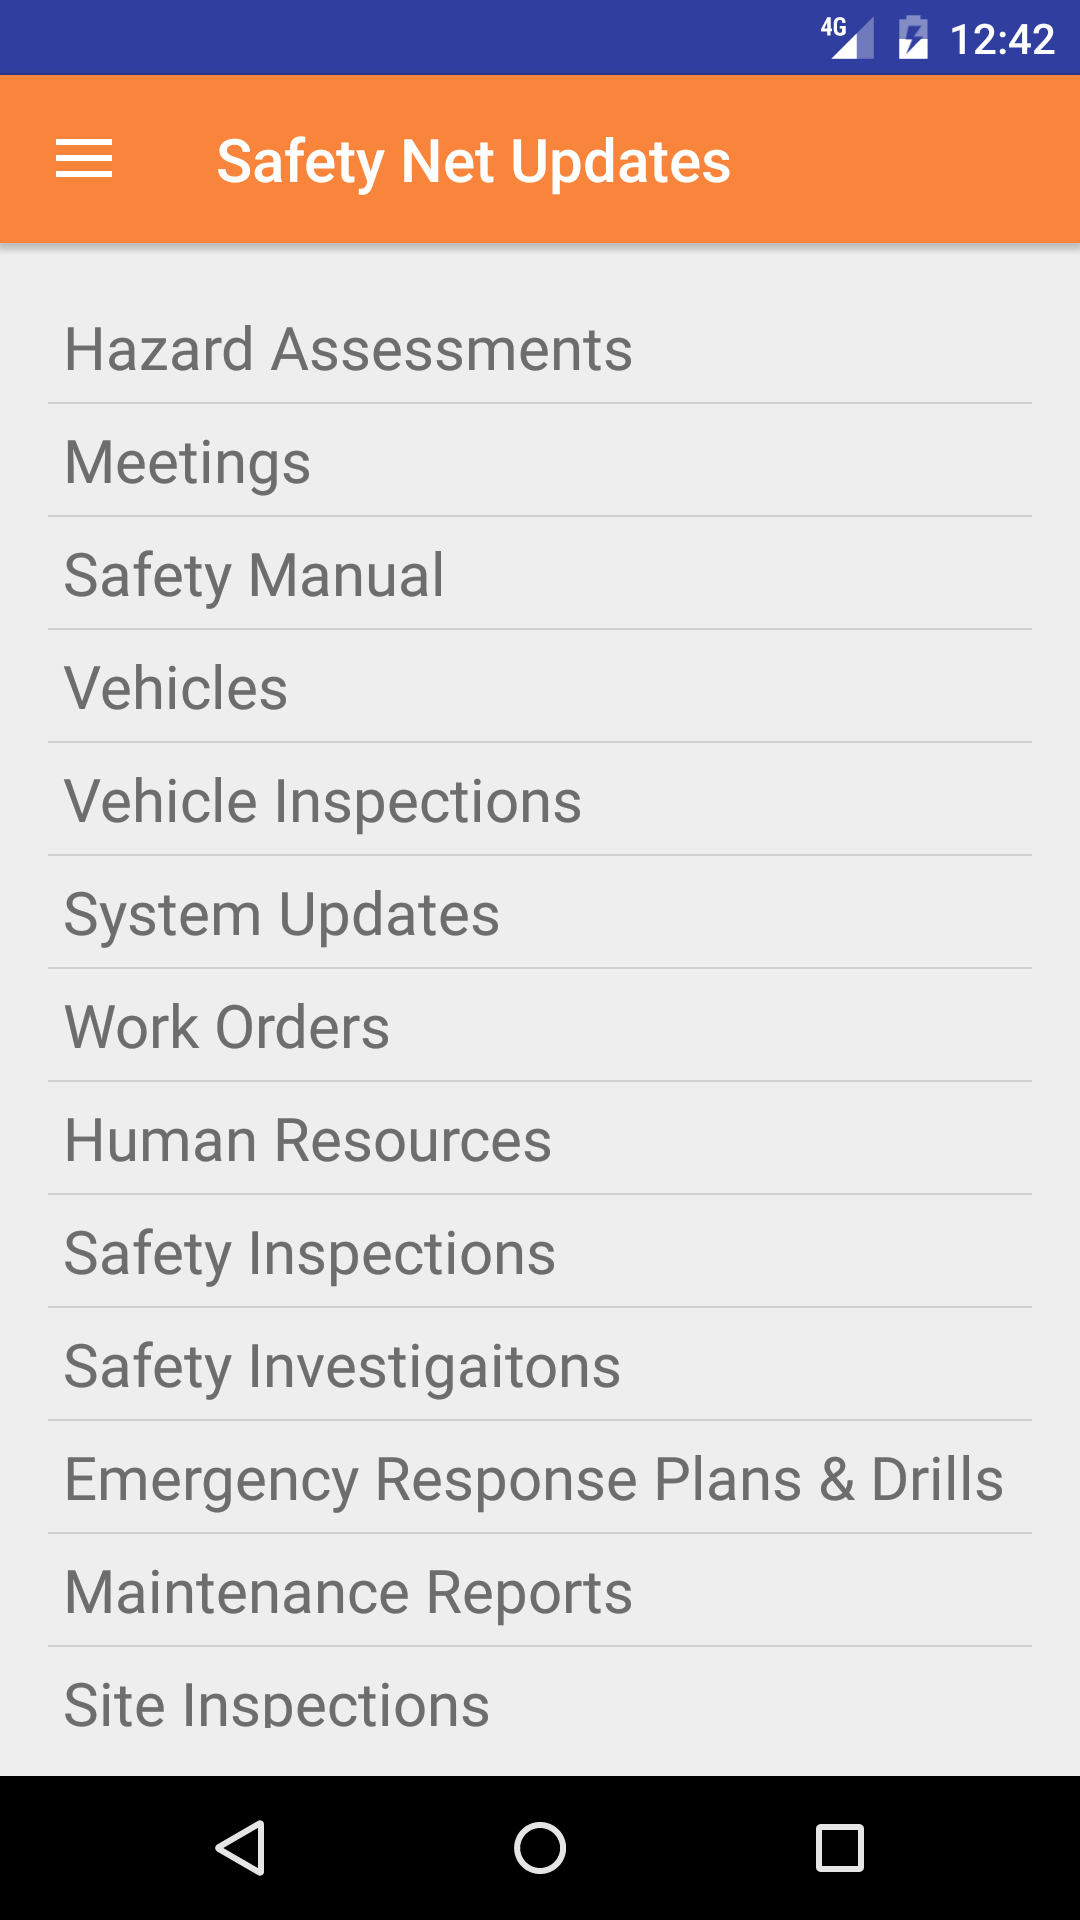
46.Update Safety Investigations |
|
To ensure field staff have the most up to date copy of the investigation tasks a company is
using make sure to update your phone on a regular basis. For more information about updating your phone.
Steps
- From the Menu screen, tap the Updates button.
- Scroll the list of sections until you find the Safety Investigation button.
- Tap on the Safety Investigation button.
|
|
|
| Step 1 |
|
|
| Steps 2-3 |
|
|