Manual Web Site Manual App Manual

Equipment Inspection

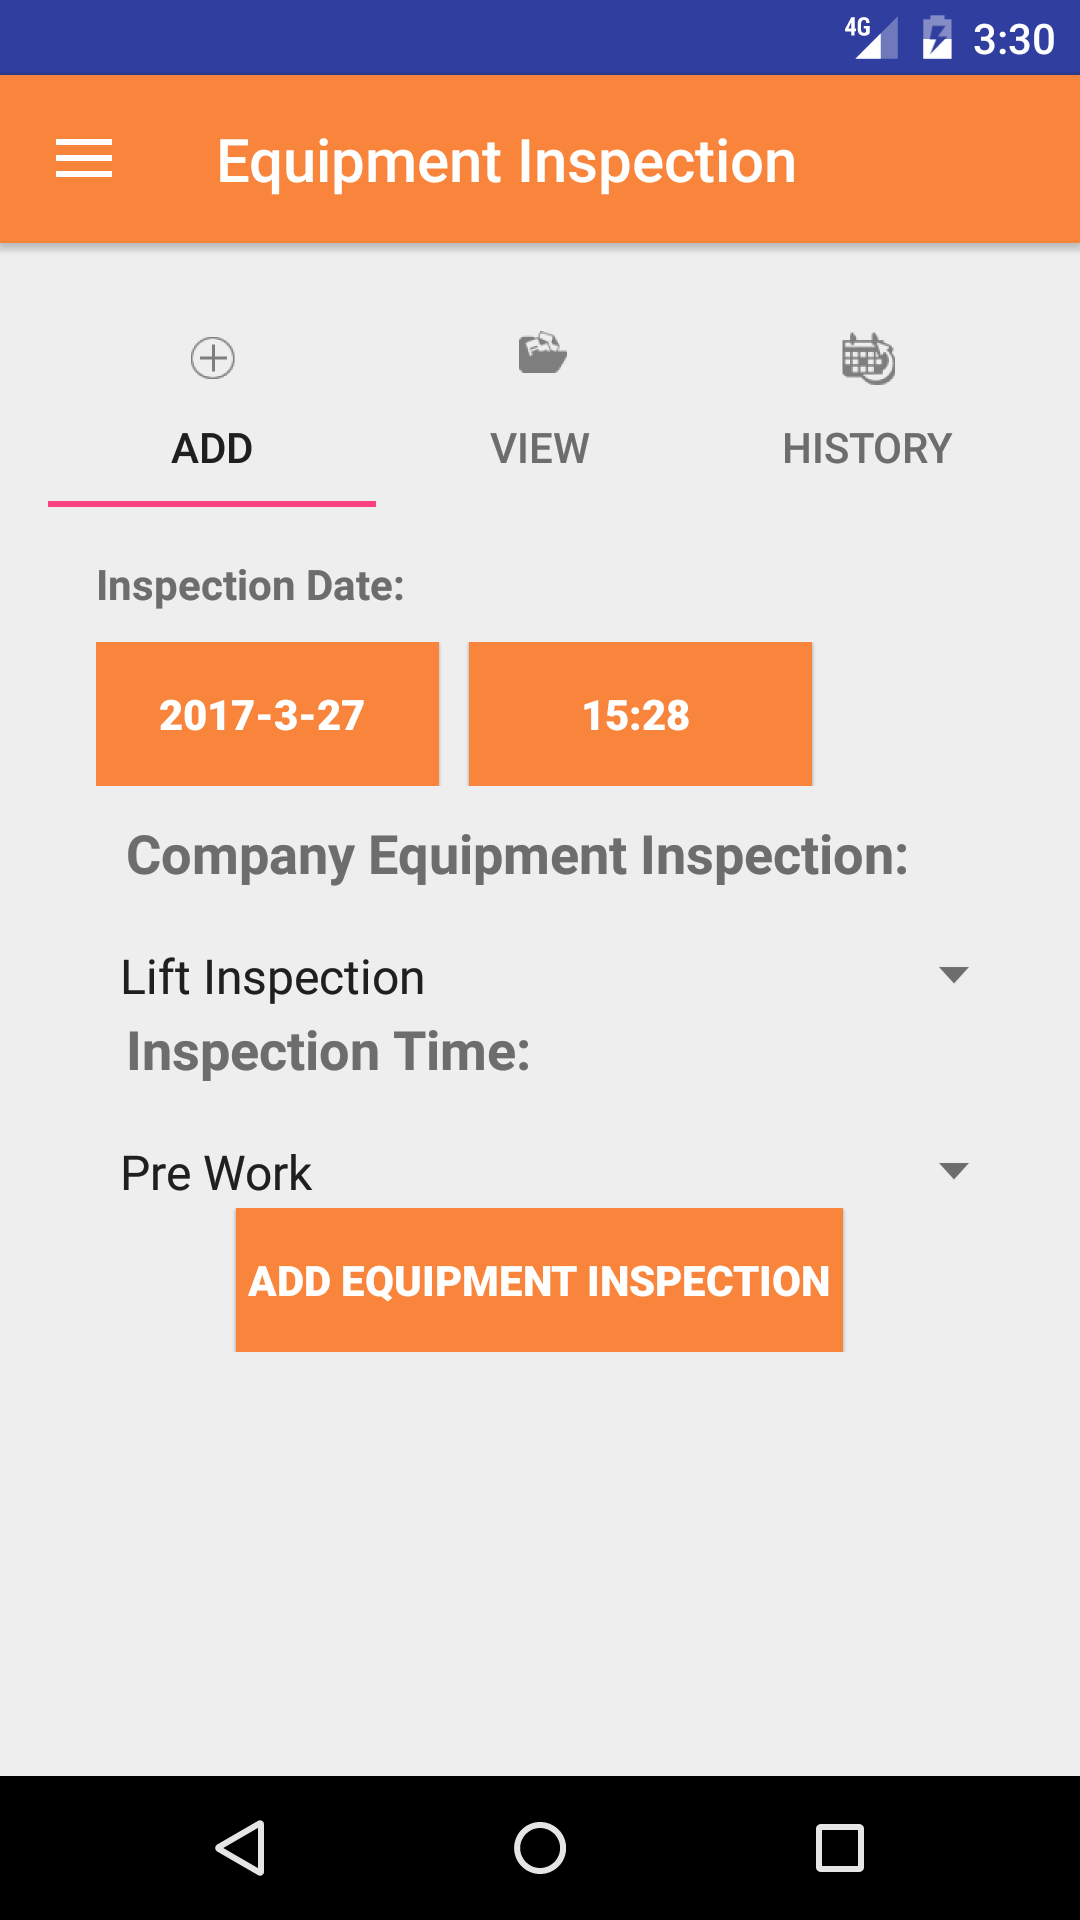
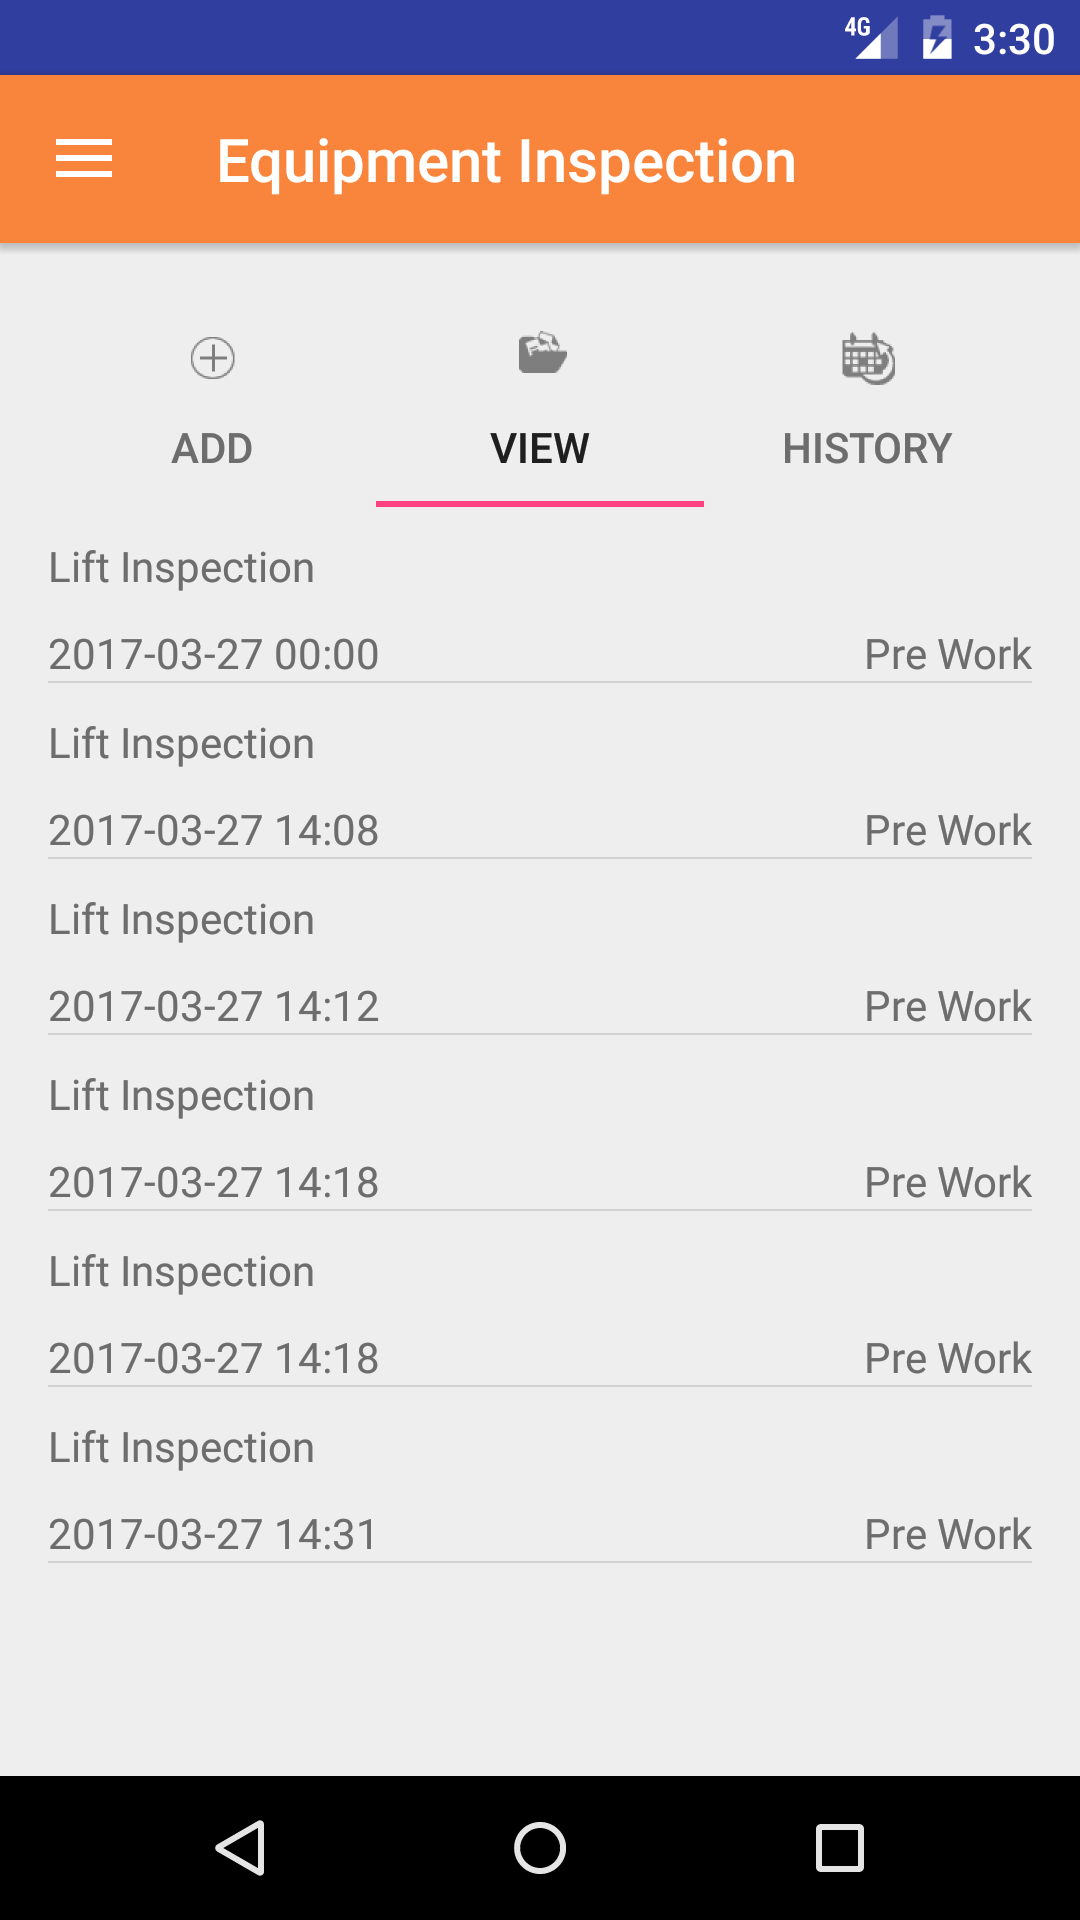
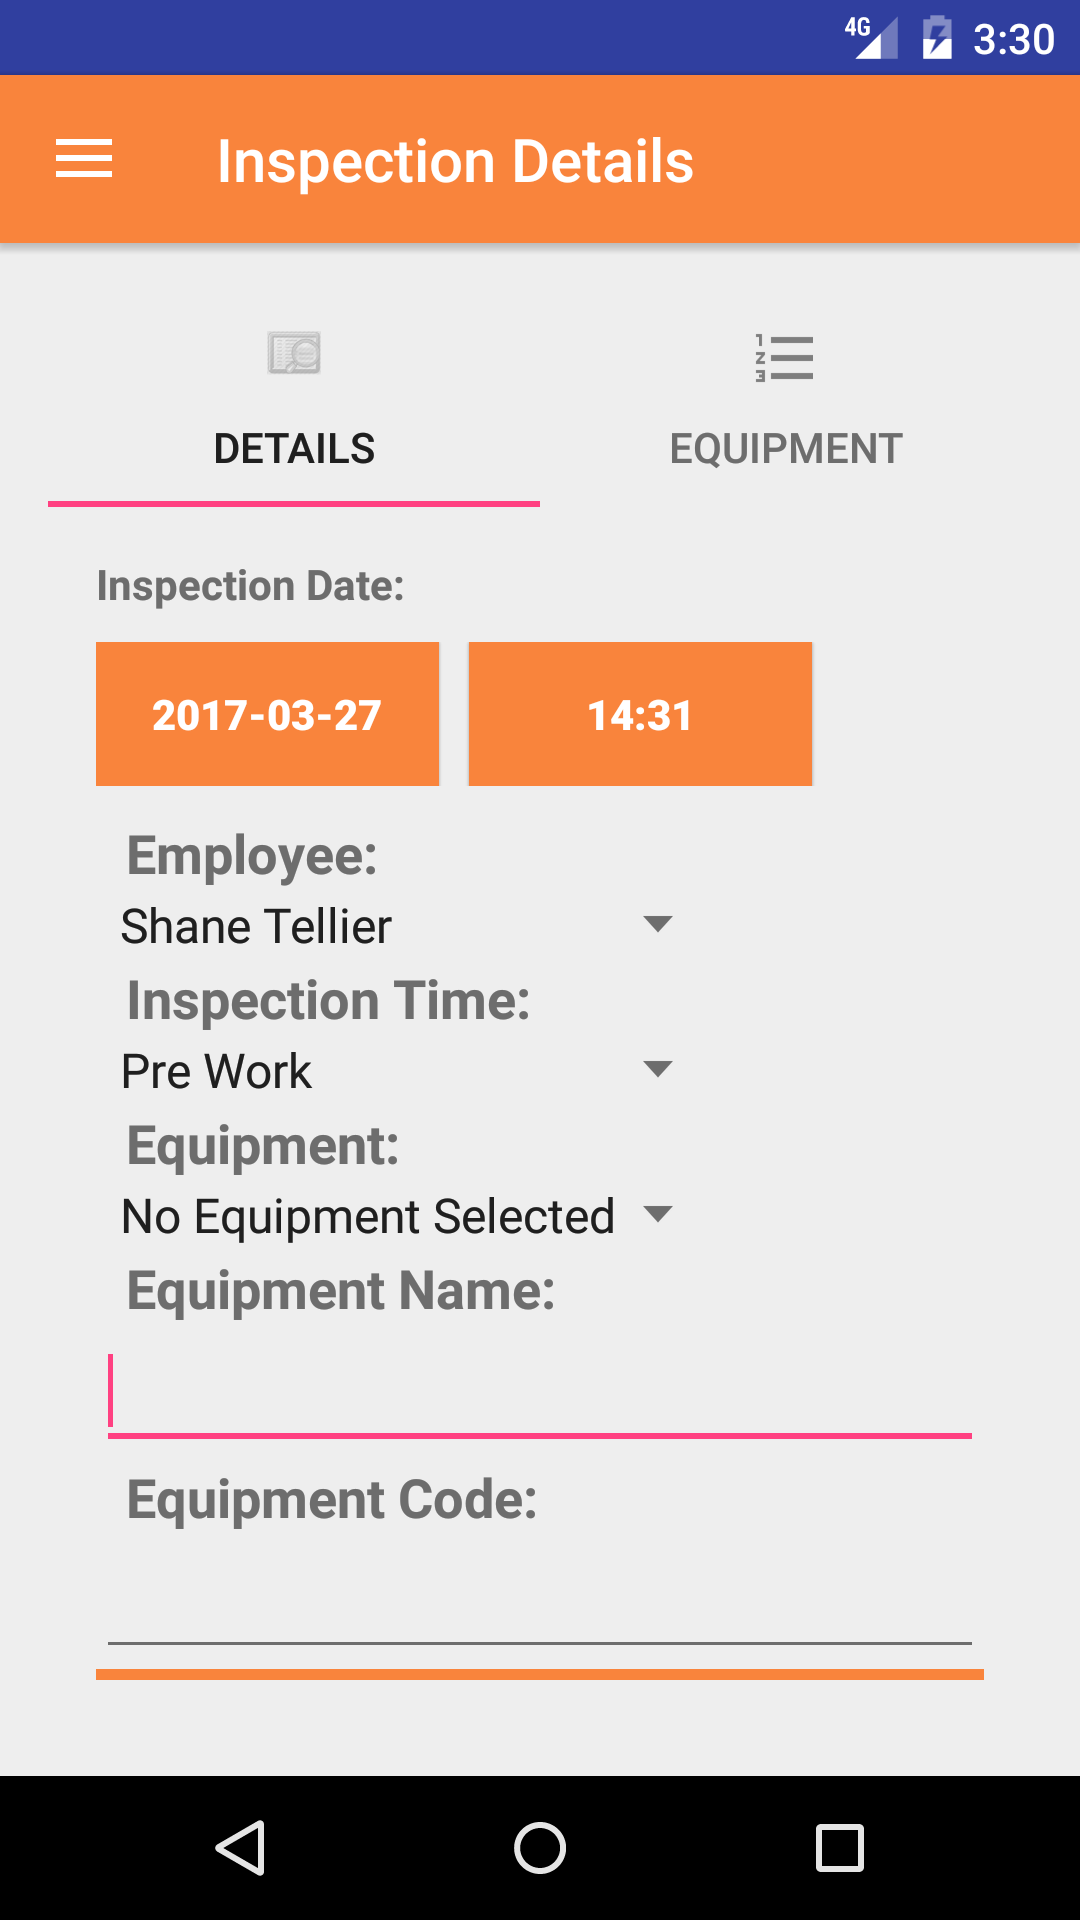
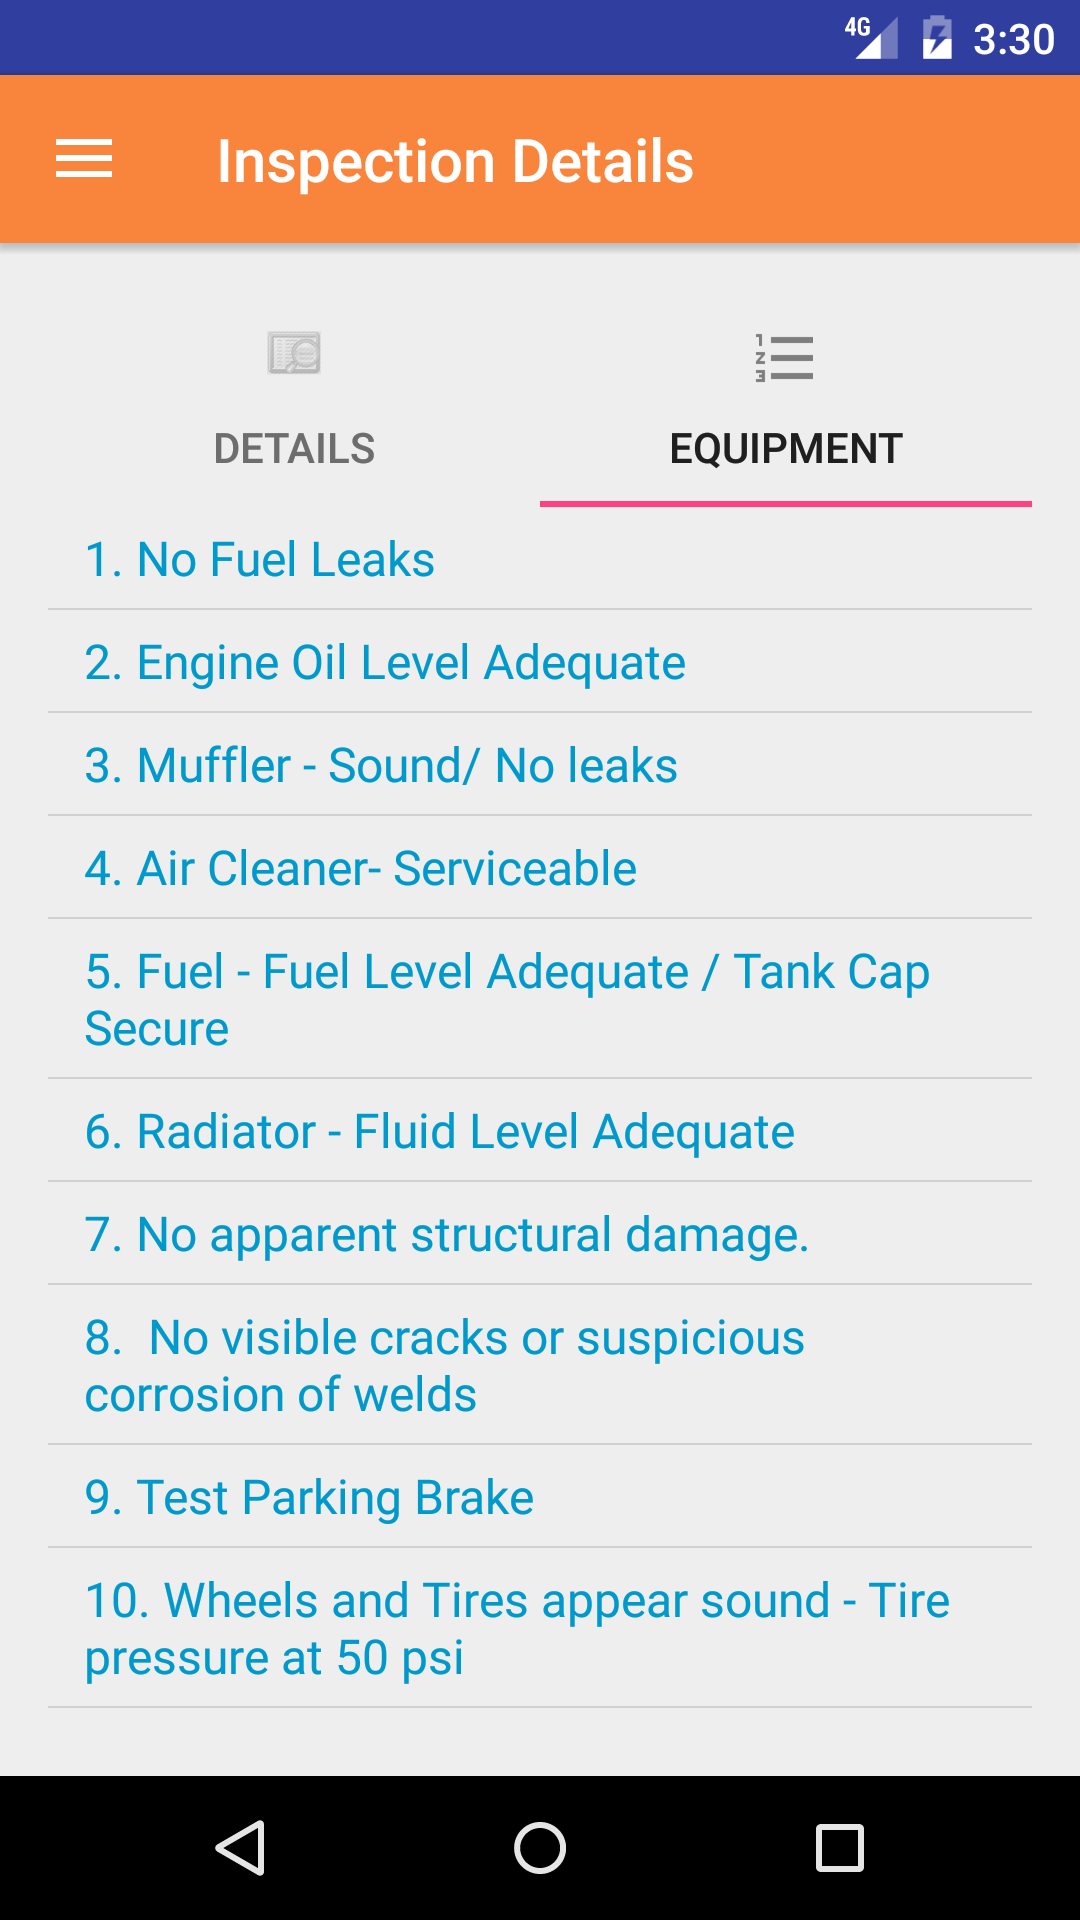
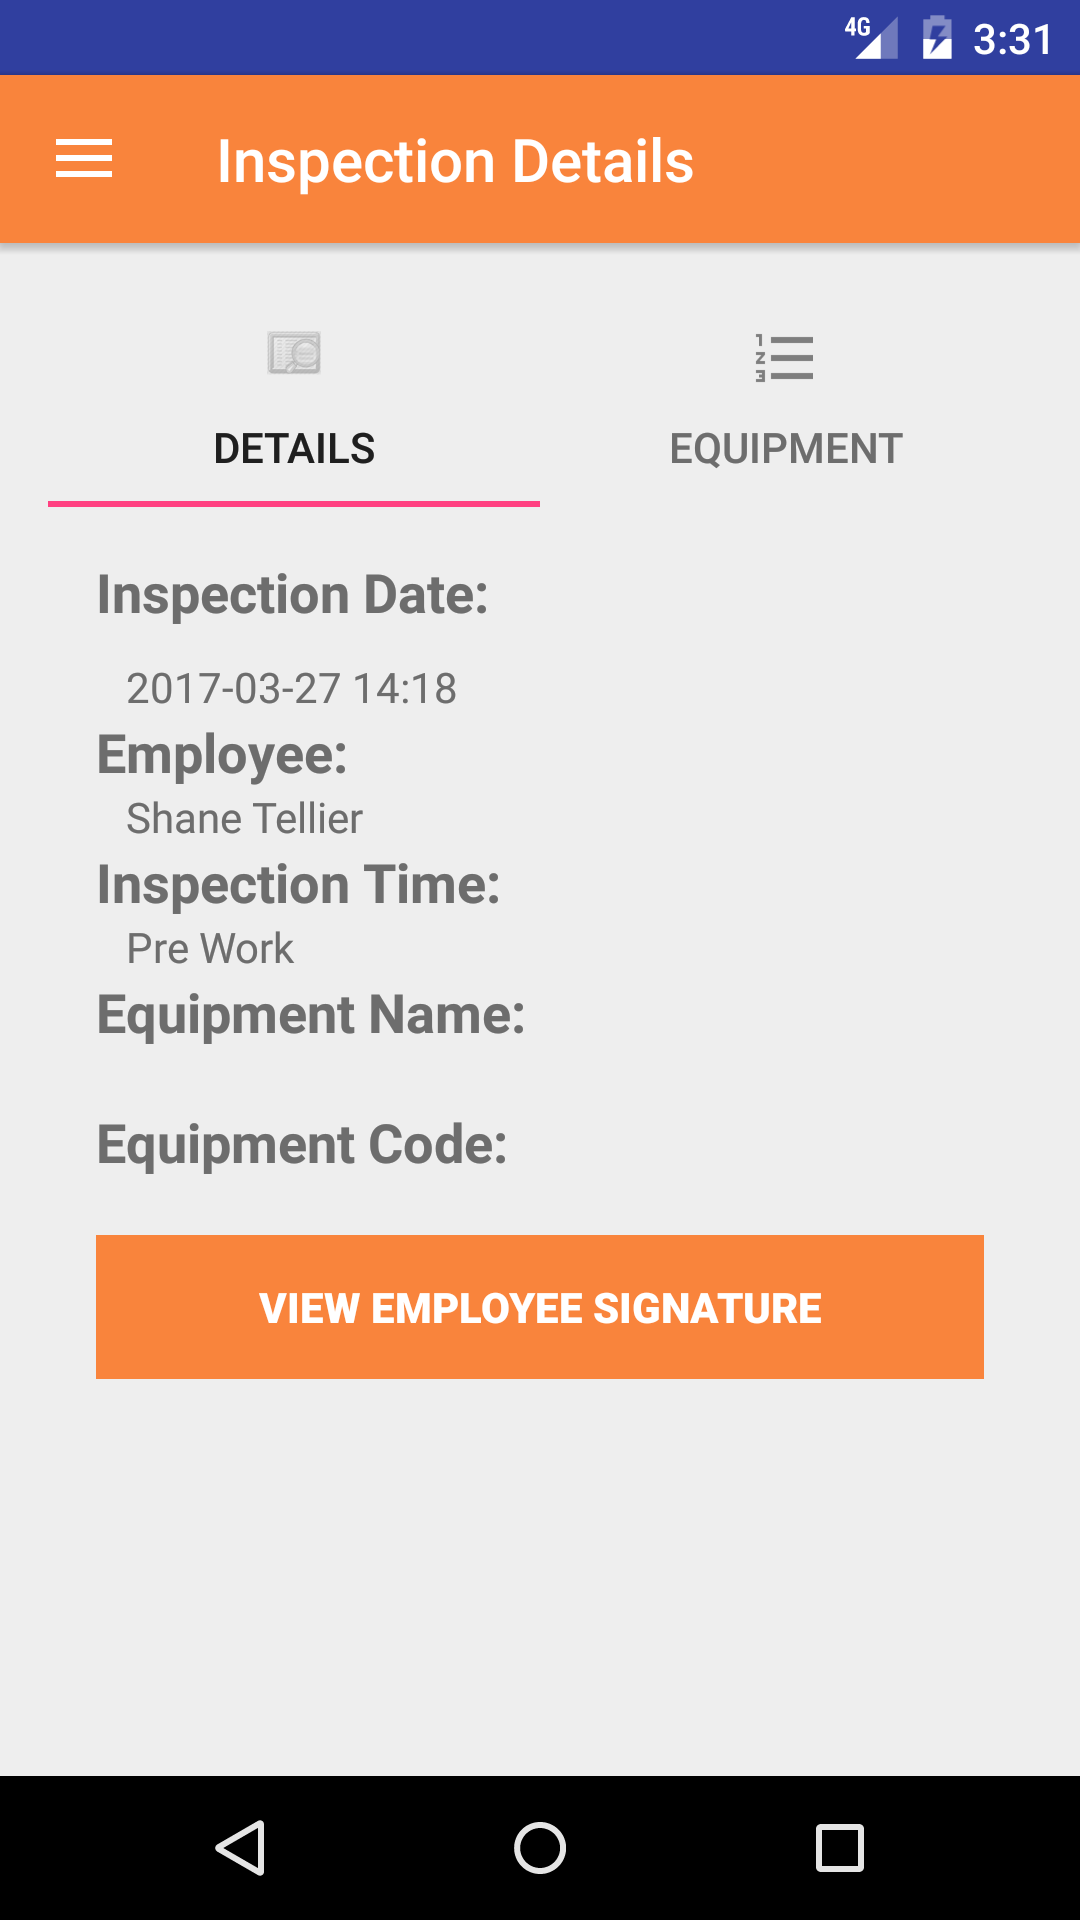
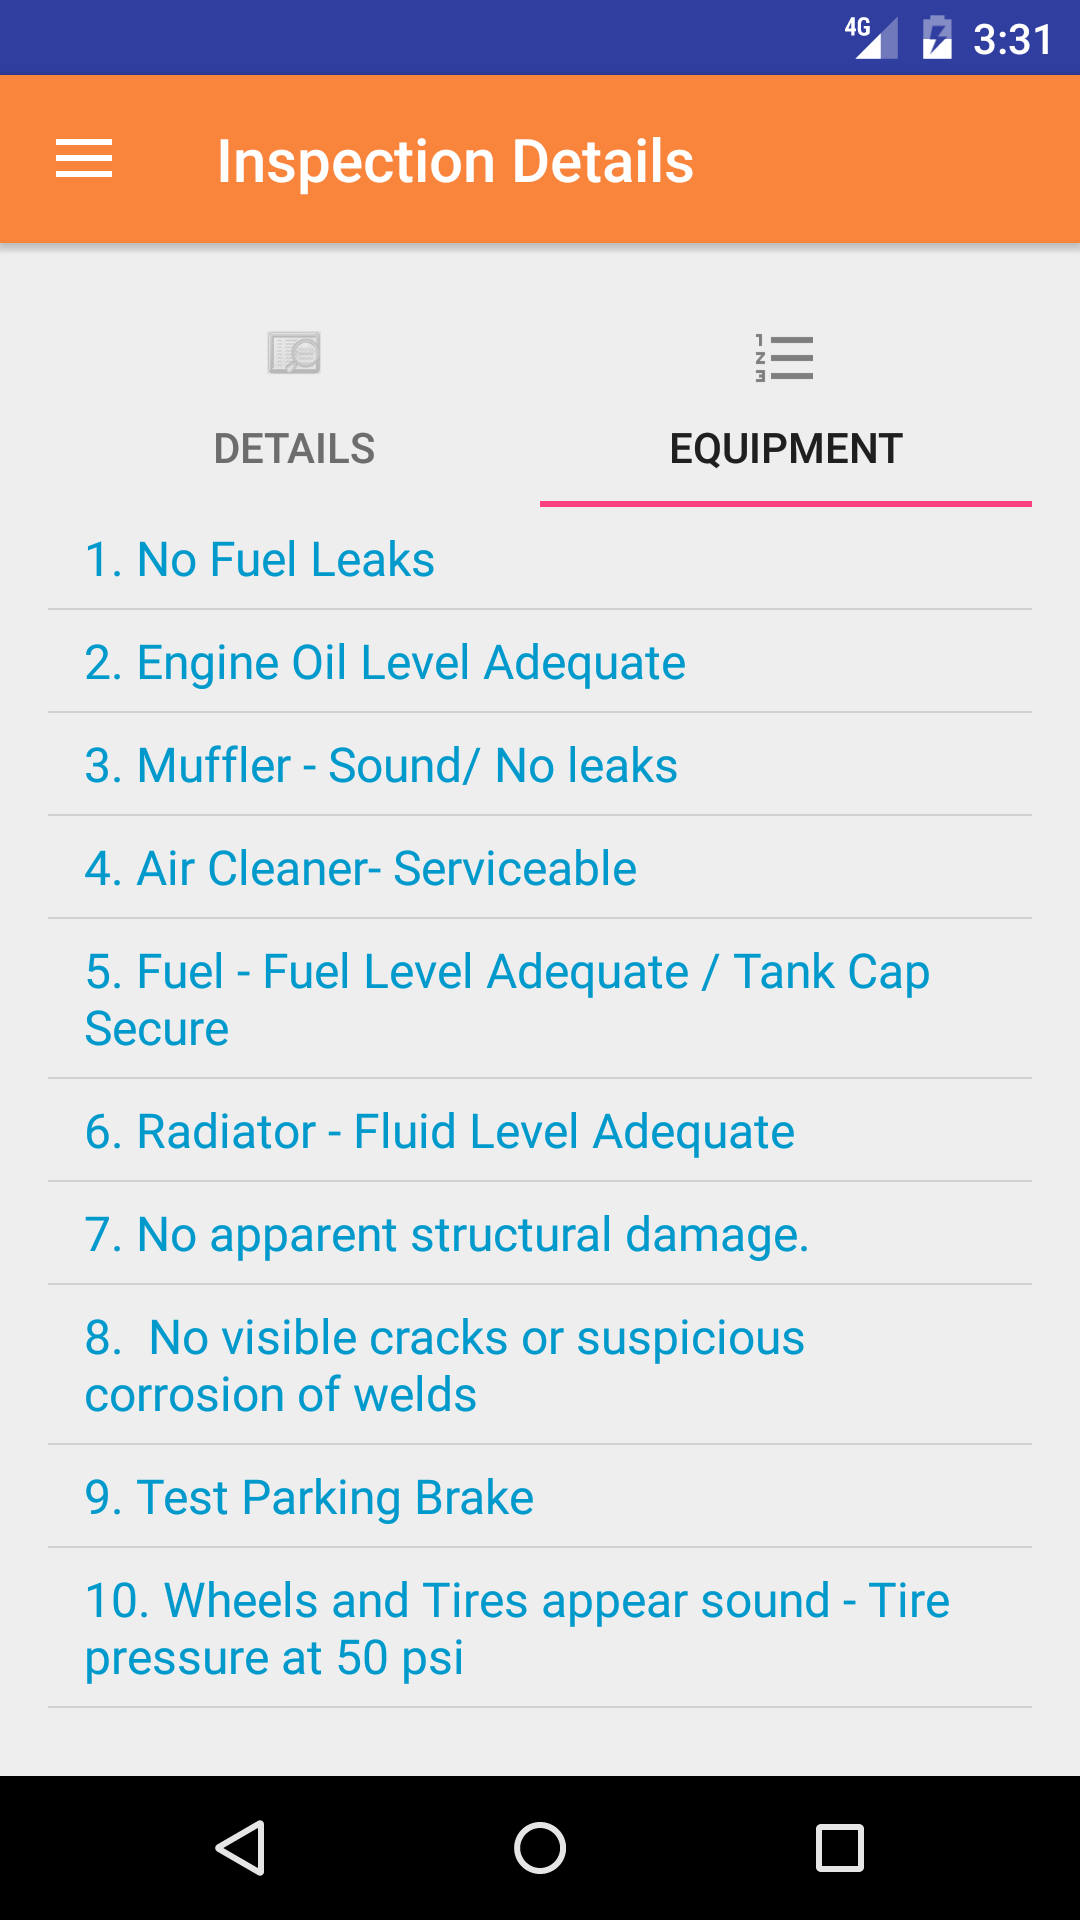
The equipment inspections section allows a user to create and record a equipment inspection. Equipment Inspections can be created from a company equipment inspection.

Safetynet allows a your companies staff to setup a specific equipment inspection for equipment your company use, equipment inspections can be created from default equipment inspections.

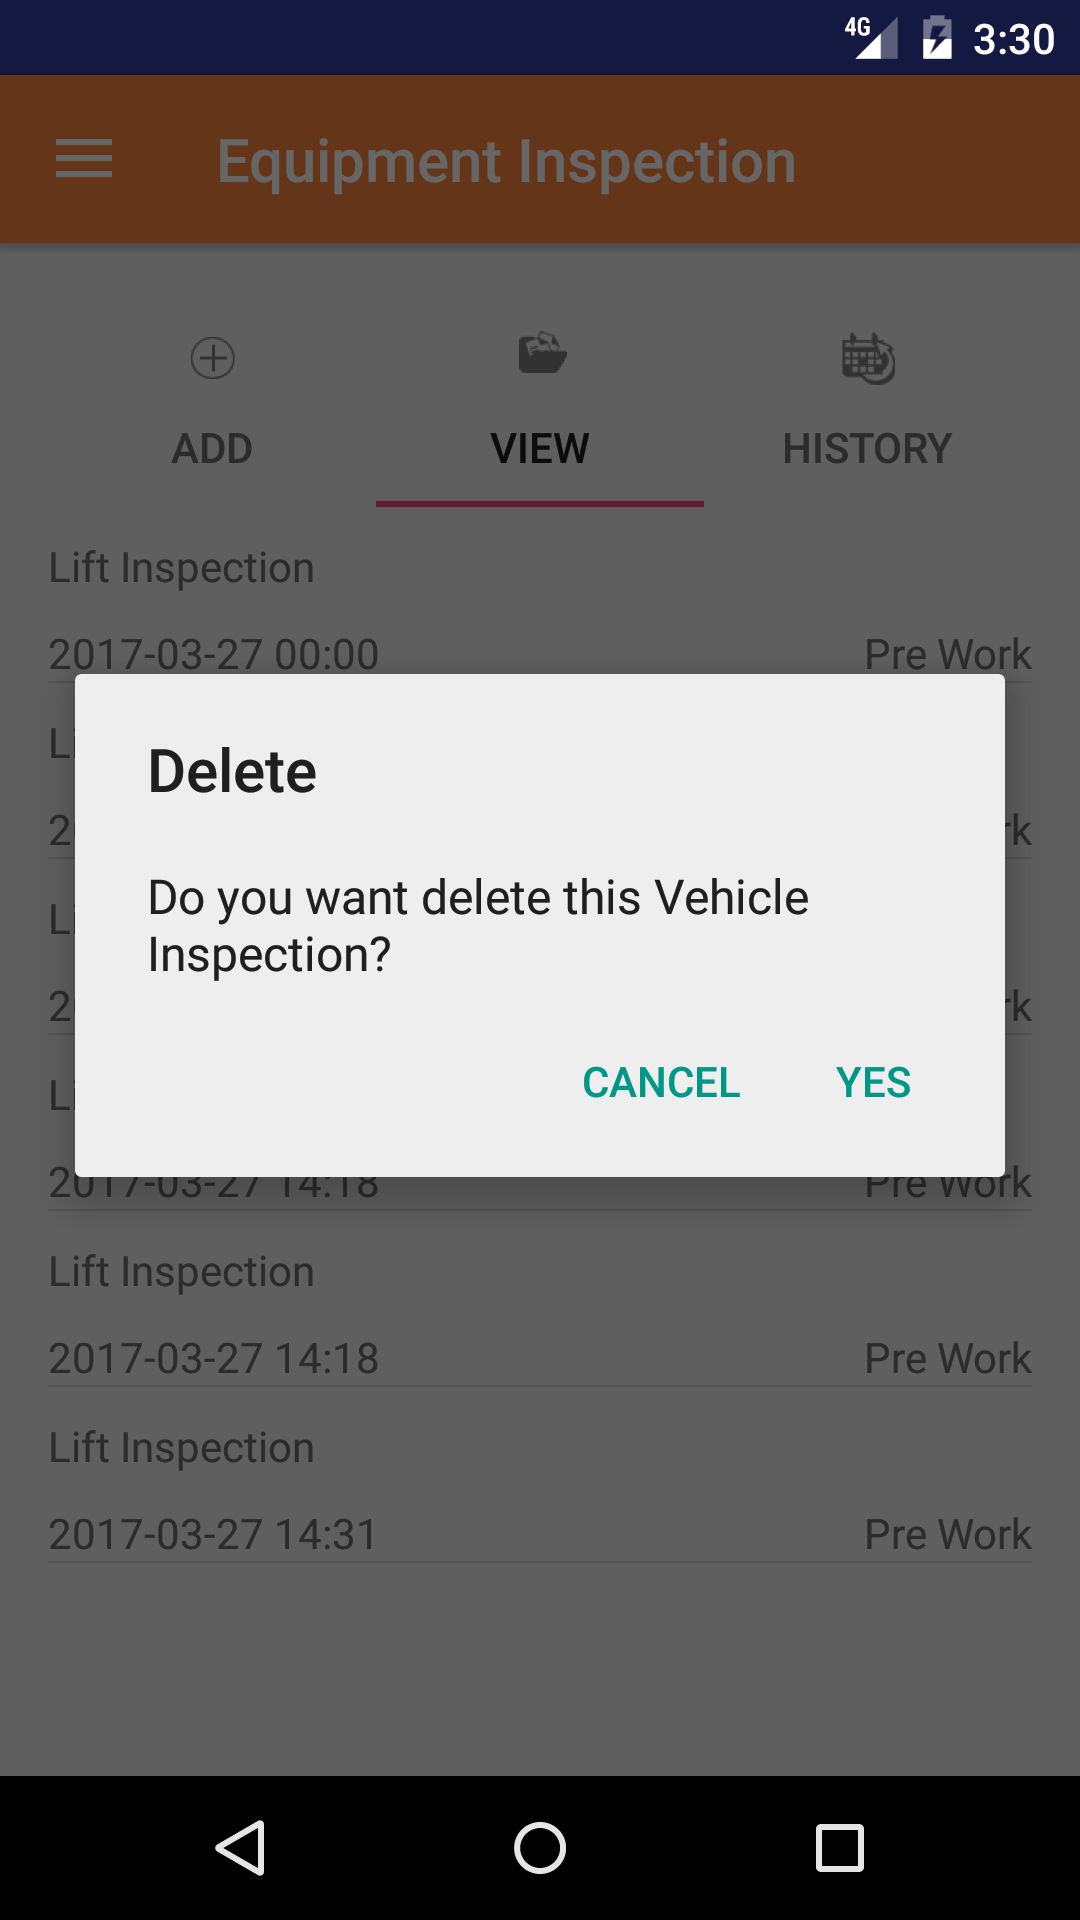
Once a equipment inspection is submitted:

  1. An email can be sent to the person in charge of the equipment inspections. (For more information about email alerts check the email alerts section of the manual)
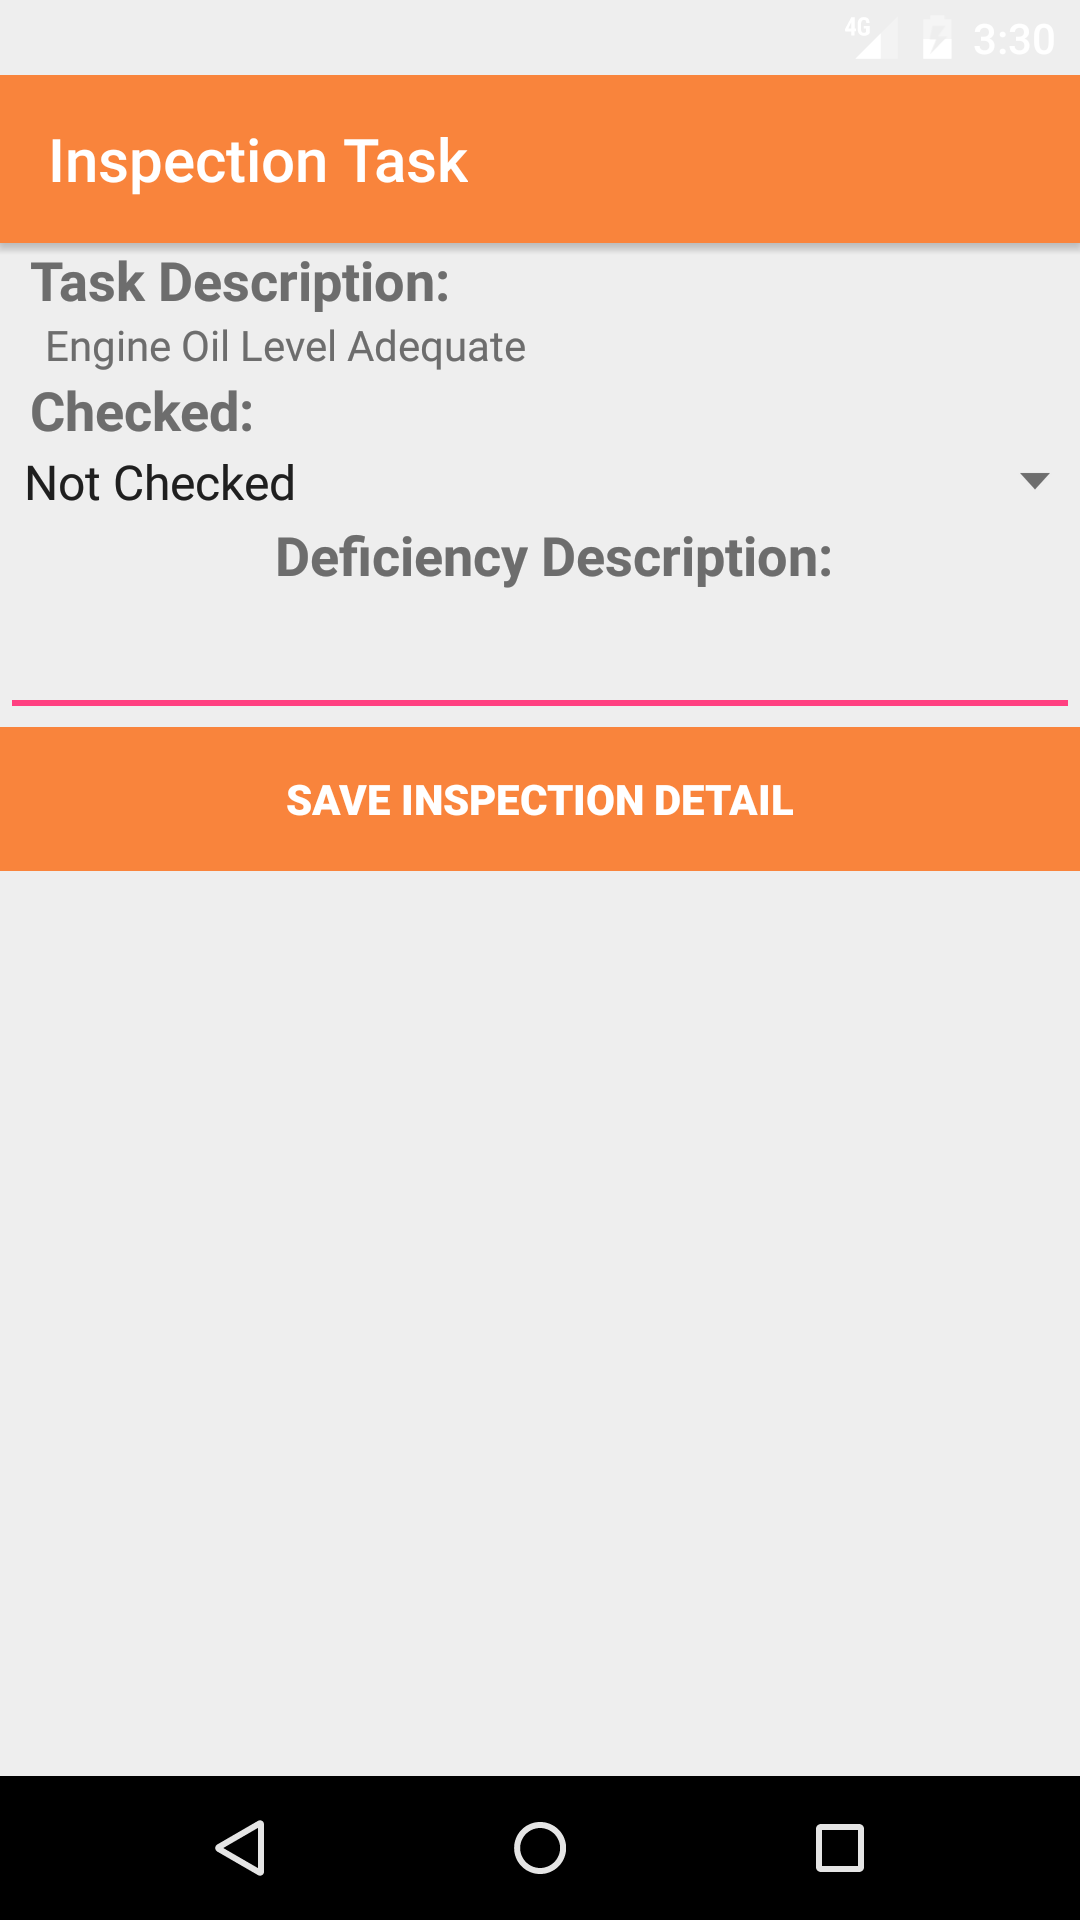
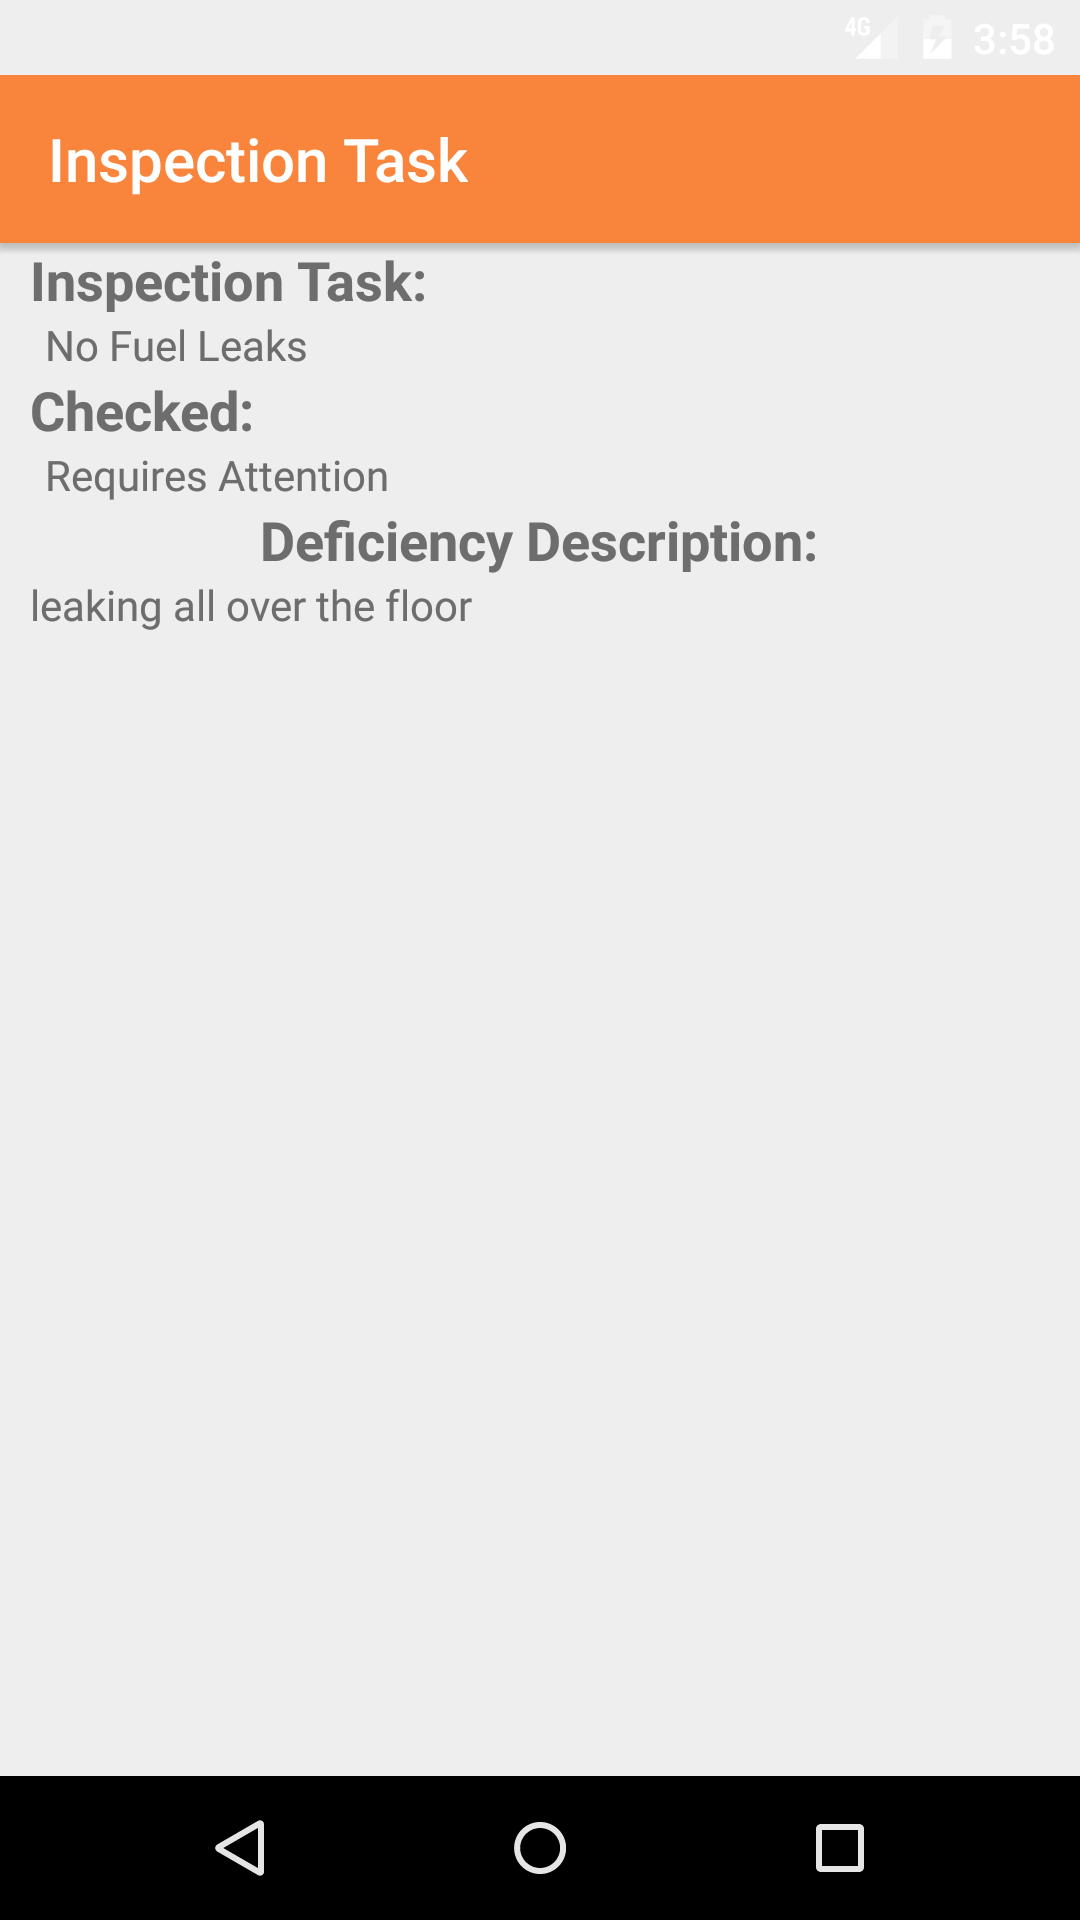
  2. Tasks that are marked as requiring attention are added to a maintenance report, once the inspection is submitted.
  3. Safety Net Statistics are updated for number of equipment inspections completed for companies, and employees.

Maintenance Report Creation

Maintenance Reports are created for tasks that require attention, once a equipment inspection 
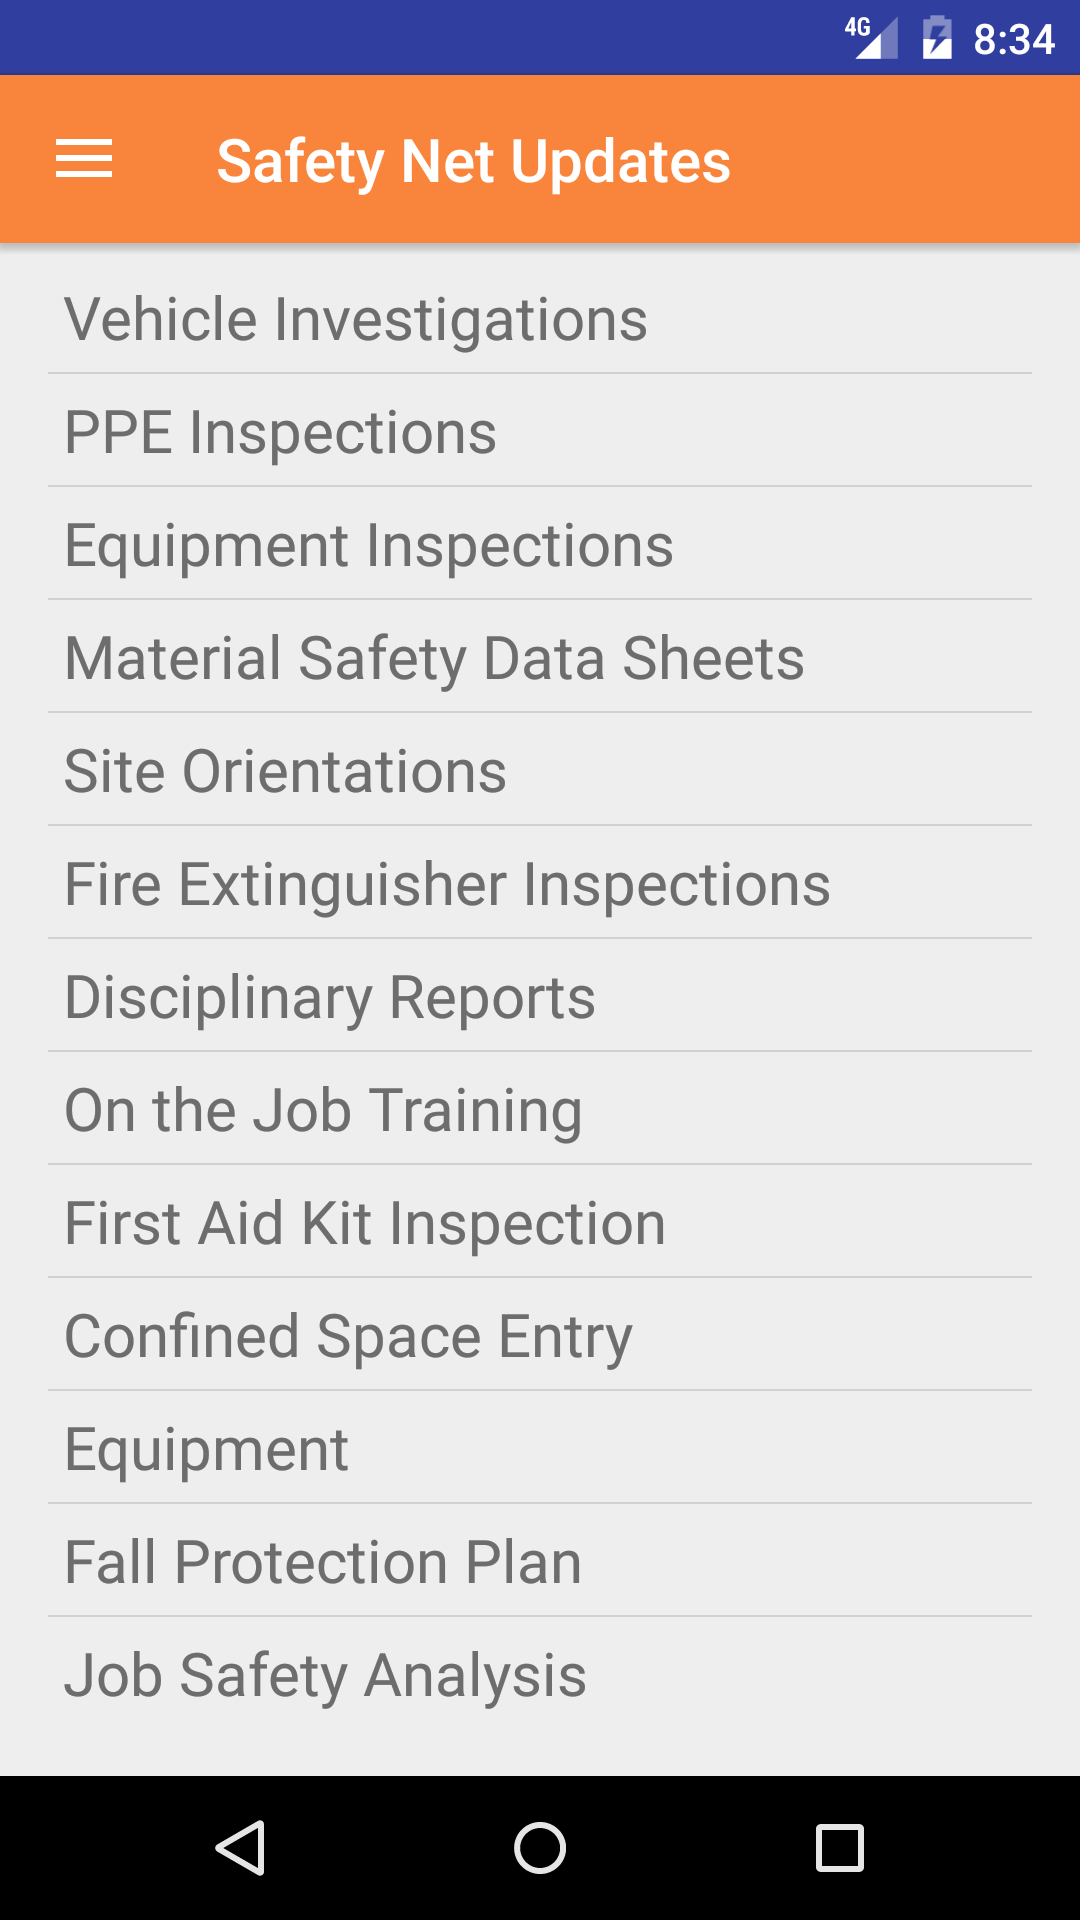
is submitted to SafetyNet. The following reports also create maintenance reports when submitted:

  1. Vehicle Inspections
  2. Personal Protective Equipment Inspections
  3. Equipment Inspections
  4. First Aid Kit Inspections
  5. Fire Extinguisher Inspections

For more information about Maintenance Reports in this manual click here to view the maintenance section.

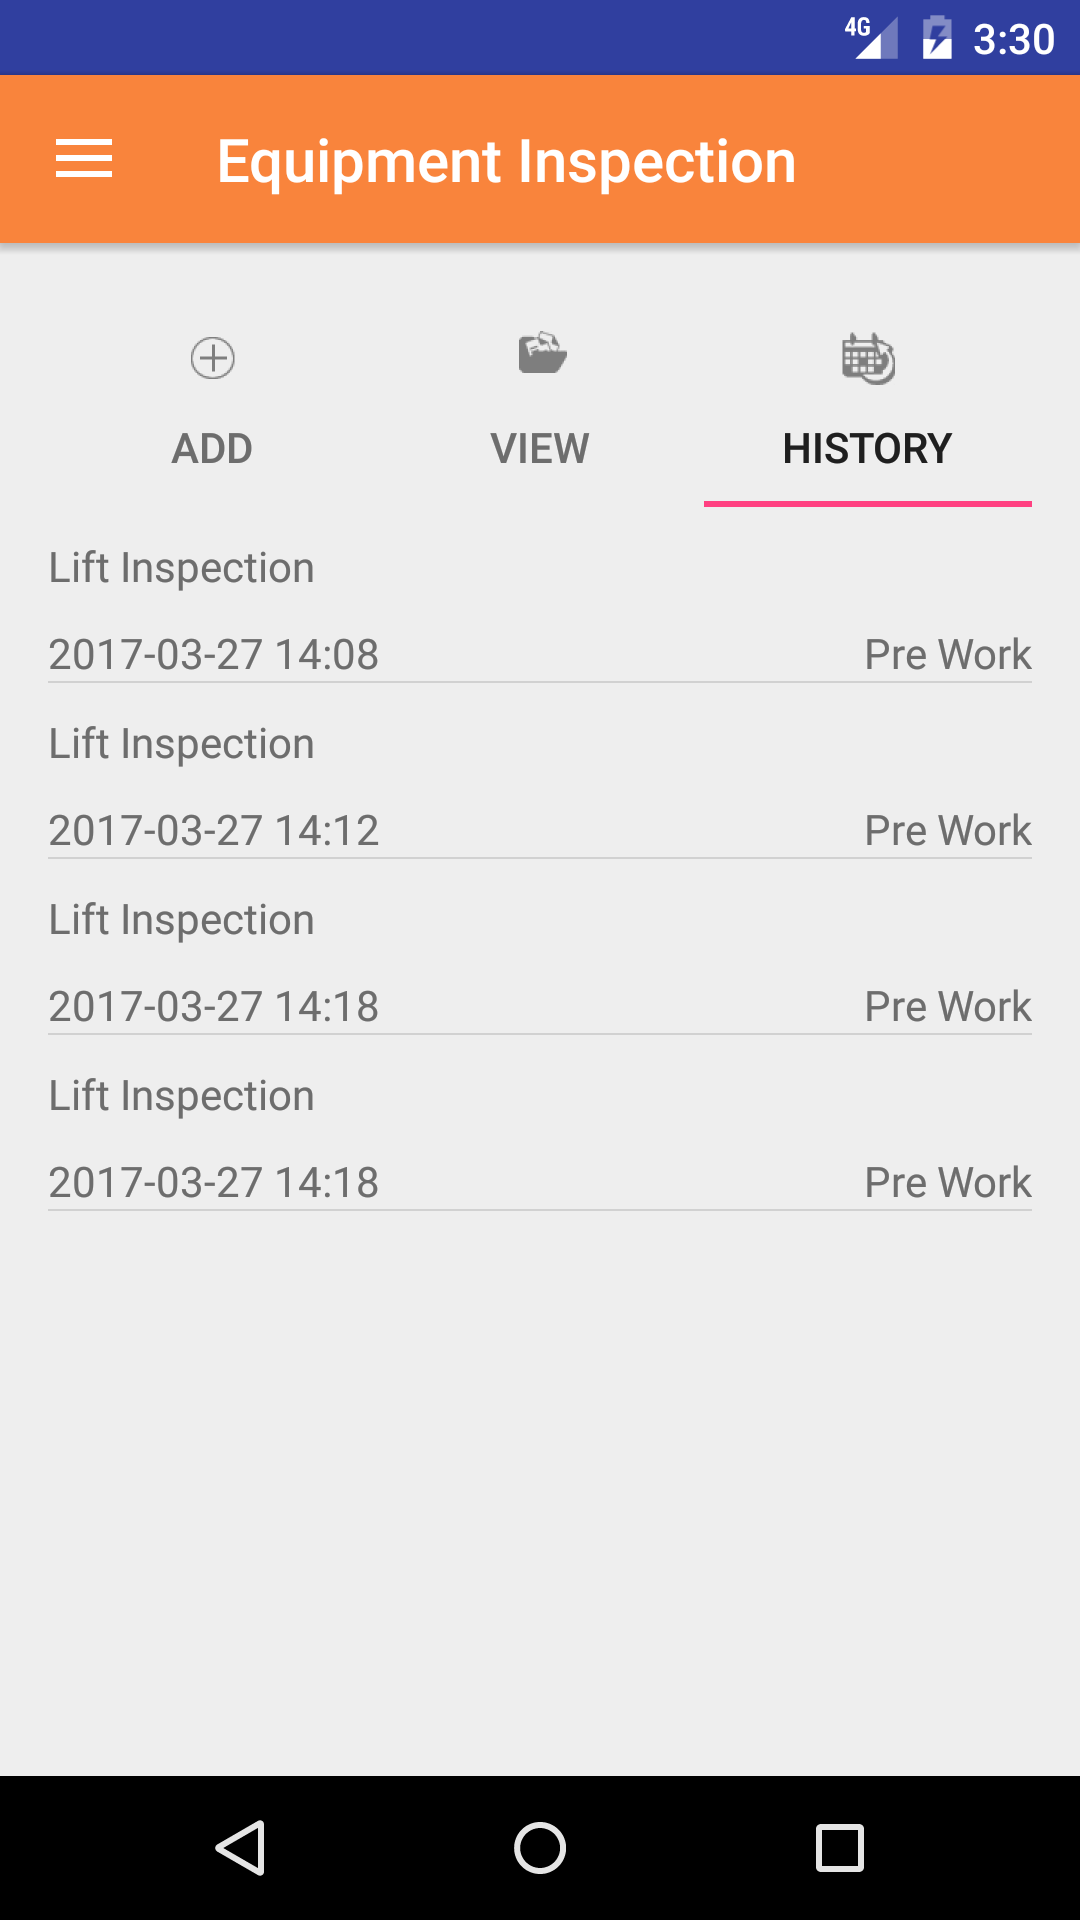
Configuring how often Equipment Inspections are to Occur

How often equipment inspections must occur is a function of your companies policy regarding equipment inspections. To configure Safety Net for how often equipment inspections should occur can be configured in the company safety settings.

Management, Office Staff and Safety Officers can edit how often equipment inspections should occur in the Company section when they edit the Company Safety settings. For more information about configuring your company safety settings in this manual click here to view the company section.

Creating Company Equipment Inspection

The Company Equipment Inspections section allows companies to develop the equipment inspections documents for equipment the company uses on a regular basis, without having to carry out a equipment inspection. For more information about managing company equipment inspections in this manual click here to view the Company Equipment Inspection section.

The equipment inspection section is only available to users that have the equipment inspection section turned on for their users group. To change users access to equipment inspections, management and office staff can change access in Application Section to view the information about the Application Section Click Here

Table of Contents

#Section Name#Section Name#Section Name
1Add Equipment Inspection From Company Equipment Inspection 2Look Up Open Equipment Inspection 3Edit Equipment Inspection
4Add Employee Signature 5Look Up Equipment Inspection Detail 6Edit Equipment Inspection Detail
7Submit Equipment Inspection 8Delete Equipment Inspection 9View Closed Equipment Inspection
10Update Equipment Inspections

1.Add Equipment Inspection From Company Equipment Inspection

Steps
  1. From the Main Menu screen, tap the On Inspection button.
  2. Then tap on the Equipment Inspection button.
  3. This opens the Add Equipment Inspection From Company Equipment Inspection entry screen.
  4. Date: The date field allow field staff to choose the date the equipment inspection occurs.
    1. Tap the Date button to open the Choose Date screen.
    2. Scroll the calender screen and select the date from the calender.
  5. Time: The time field allow field staff to choose the time the equipment inspection occurs.
    1. Tap the Time button to open the Choose Time screen.
    2. Scroll the clock screen and select the time from the clock.
  6. Tap the Company Equipment Inspection field to open the Choose Company Equipment Inspection screen.
  7. Company Equipment Inspection are listed in descending order equipment inspection names.

    Note: Company Equipment Inspections by nature will be updated and added to the list all the time, so it may be necessary to update the list click here.

    1. Scroll the list of equipment inspections until the desired equipment inspection is displayed on the screen.
    2. Tap the desired equipment inspection to select it.
  8. Tap the Employee field to open the Choose Employee screen.
  9. Employee are listed in descending order employee names.

    1. Scroll the list of employees until the desired employee is displayed on the screen.
    2. Tap the desired employee to select it.
  10. Tap the Inspection Time field to open the Choose Inspection Time screen.
  11. Inspection Time are listed in descending order inspection names.

    1. Scroll the list of inspection times until the desired inspection time is displayed on the screen.
    2. Tap the desired inspection time to select it.
  12. Tap the Add Equipment Inspection button to add the Equipment Inspection.
    • A pop-up message that reads Equipment Inspection Added indicates that the Equipment Inspection is ready to have details to be entered and equipment details to be inspected.
Step 1
Step 2
Step 3
Step 4
Step 5-9

3.Look Up Open Equipment Inspection

Once in the Equipment Inspection section

Steps
  1. Tap the second tab on the menu, the Equipment Inspection view.
  2. Scroll the list of Equipment Inspections until the desired Equipment Inspection is displayed on the screen. Listing the equipment inspection date and inspection time in black text, the equipment inspection name in black text.
  3. Tap on the Equipment Inspection you would like to view. This loads the equipment inspection edit screen.
Steps 1-3

4.Edit Equipment Inspection

Once on the Equipment Inspection you would like to Edit, on the details tab.

Steps
  1. Date: The date field allow field staff to choose the date the equipment inspection occurs.
    1. Tap the Date button to open the Choose Date screen.
    2. Scroll the calender screen and select the date from the calender.
  2. Time: The time field allow field staff to choose the time the equipment inspection occurs.
    1. Tap the Time button to open the Choose Time screen.
    2. Scroll the clock screen and select the time from the clock.
  3. Tap the Employee field to open the Choose Employee screen.
  4. Employee are listed in descending order employee names.

    1. Scroll the list of employees until the desired employee is displayed on the screen.
    2. Tap the desired employee to select it.
  5. Tap the Inspection Time field to open the Choose Inspection Time screen.
  6. Inspection Time are listed in descending order inspection names.

    1. Scroll the list of inspection times until the desired inspection time is displayed on the screen.
    2. Tap the desired inspection time to select it.
  7. Tap the Equipment field to open the Choose Equipment screen.
  8. Equipment are listed in descending order equipment name.

    1. Scroll the list of equipment until the desired equipment is displayed on the screen.
    2. Tap the desired equipment to select it.
  9. Equipment Name: The equipment name field allows field staff to enter the equipment name of equipment being inspected. The Character limit of the field is 250.
  10. Equipment Code: The equipment code field allows field staff to enter the equipment code of the equipment. The Character limit of the field is 250.
  11. Tap Edit Equipment Inspection button to save any changes to the Equipment Inspection Details.
    • A pop-up message that reads Equipment Inspection Details have been Saved indicates that the equipment inspection details have been saved.
Step 1
Step 2
Steps 3-8

5.Add Employee Signature

The employee who conducts the Equipment Inspection must provide an electronic signature to indicate that they took part in the equipment inspection.

Once on the Equipment Inspection you would like to Edit

Steps
  1. Tap the first tab, the details tab.
  2. Tap the employee signature button.
  3. Tap the Create new button to open the Signature Edit screen.
  4. Sign in the white space beneath the Save New Drawing Here label.
  5. Tap Save in the top right corner of the screen to update the Signature field.
Step 1
Step 2
Step 3

6.Edit Equipment Inspection Detail

Once on the Equipment Inspection you would like to view

Steps
  1. Tap on the second tab, the Equipment Inspection Details icon at the bottom of the screen to open the Equipment Inspection Details screen. The screen loads opens with a list of equipment inspection details, with the inspection task in blue text and the deficiency description in red text.
  2. Scroll the list of equipment inspection details until the desired equipment inspection detail is displayed on the screen.
  3. Tap the desired equipment inspection detail to load the edit equipment inspection detail screen.
  4. Fields
  5. Checked: Select from the select box to change the status of the inspection task.
    • Not Checked: means task has not been checked.
    • Satisfactory: means inspection tasks has been found to be satisfactory.
    • Requires Attention: means inspection tasks has been found to be requires attention. Any task marked as Req. requires a description of the issue to be written in the deficiency or comments field.
  6. Deficiency / Additional Comments: The deficiency and additional comments field allows field staff to enter a description of the issues found for the equipment inspection detail. The Character limit of the field is 250.
  7. Tap the Save Inspection Detail button, to save the a equipment inspection detail.
Steps 1-3
Steps 4-6

7.Submit Equipment Inspection

Once on the Equipment Inspection you would like to Submit, all the equipment inspection details have been checked and inspected and the inspection has been signed off on.

Steps
  1. Tap the Submit Equipment Inspection button.
Step 1

8.Delete Equipment Inspection

Once in the Equipment Inspection section

Steps
  1. Tap the second tab, the Equipment Inspections view.
  2. Scroll the list of Equipment Inspections until the desired Equipment Inspection is displayed on the screen. Listing the equipment inspection date and inspection time in black text, the equipment inspection name in black text.
  3. Long Tap the equipment inspection to bring up the delete screen for the equipment inspection.
  4. Tap the Delete button. The equipment inspection will be deleted.
Steps 1-4

12.View Closed Equipment Inspection

After Equipment Inspections have been closed out, they will be available to look at through the History view on the iPhone Application.

Once on the Equipment Inspection section

Steps
  1. Tap the third tab on the menu, the History tab of the main menu view.
  2. Scroll the list of Equipment Inspections until the desired Equipment Inspection is displayed on the screen. Listing the equipment inspection date and inspection time in black text, the equipment inspection name in black text.
  3. Tap on the Equipment Inspection you would like to view. This loads the first tab, the equipment inspection information, which loads with the equipment inspection date, equipment information, and the employee whom conducted the equipment inspection at the top.
  4. Tap the second tab, the Equipment Inspection Details lists the equipment inspection details on the equipment inspection.
  5. Tap the Equipment Inspection Details list detail to view the equipment inspection details.
Steps 1-2
Step 3
Steps 4
Steps 5

13.Update Equipment Inspections

As other field staff and employee"s perform equipment inspections the library of company equipment inspections for field staff to use will grow. Also as field staff perform equipment inspections with other staff there will be a need for field staff to update their IPhone application.

Steps
  1. From the Menu screen, tap the Updates button.
  2. Scroll the list of sections until you find the Equipment Inspection button.
  3. Tap on the Equipment Inspection button.
Step 1
Steps 2-3